UNITED OFFICE ULG 300 A1 Bedienungsanleitung
Vorschau ausblenden
Andere Handbücher für ULG 300 A1:
- Bedienungsanleitung (61 Seiten) ,
- Bedienungsanleitung (31 Seiten) ,
- Bedienungsanleitung (49 Seiten)

Verwandte Anleitungen für UNITED OFFICE ULG 300 A1


Inhaltszusammenfassung für UNITED OFFICE ULG 300 A1
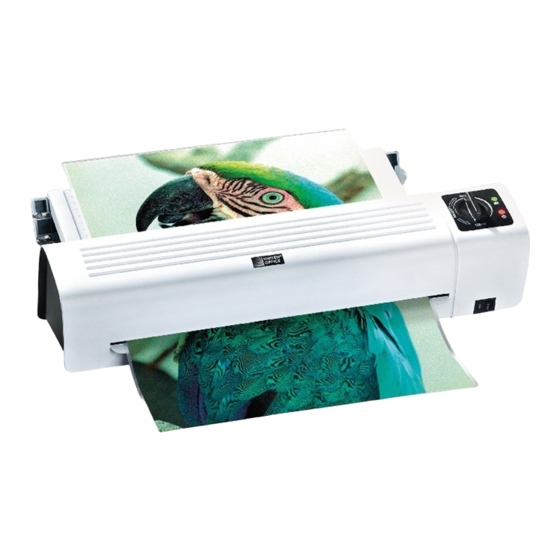
- Seite 1 LAMINIERGERÄT A3 ULG 300 A1 LAMINIERGERÄT A3 PLASTIFIEUSE A3 Bedienungsanleitung Mode d’emploi PLASTIFICATORE A3 A3 LAMINATOR Istruzioni per l’uso Operating instructions IAN 273398...
- Seite 2 Klappen Sie vor dem Lesen die Seite mit den Abbildungen aus und machen Sie sich anschließend mit allen Funktionen des Gerätes vertraut. Avant de lire le mode d‘emploi, ouvrez la page contenant les illustrations et familiarisez-vous ensuite avec toutes les fonctions de l‘appareil. Prima di leggere aprire la pagina con le immagini e prendere confi...
-
Seite 4: Inhaltsverzeichnis
Inhaltsverzeichnis Seite Einleitung Verwendungszweck Lieferumfang Gerätebeschreibung Technische Daten Sicherheitshinweise Geeignete Folientaschen Schaltstufen Heißlaminieren vorbereiten Kaltlaminieren vorbereiten Laminiervorgang Anti Blockier-Funktion (ABS) Schneidfunktion Reinigen und Pflegen Aufbewahren Entsorgen Garantie und Service Importeur Lesen Sie die Bedienungsanleitung vor der ersten Verwendung aufmerksam durch und heben Sie diese für den späteren Gebrauch auf. -
Seite 5: Einleitung
Laminiergerät A3 Gerätebeschreibung Folienführungsschiene (hinten) Einleitung Schneideschiene Schneidekopf Herzlichen Glückwunsch zum Kauf Ihres neuen Folienformat-Arretierung Gerätes. Schlitz für manuelle Folienzufuhr Sie haben sich damit für ein hochwertiges Produkt Indikationsleuchte „Betriebsbereit“ entschieden. Die Bedienungsanleitung ist Bestand- EIN-/AUS-Indikationsleuchte teil dieses Produkts. Sie enthält wichtige Hinweise Wahlschalter für Heiß- und Kaltlaminieren für Sicherheit, Gebrauch und Entsorgung. -
Seite 6: Sicherheitshinweise
I Laminieren Sie grundsätzlich keine wertvollen, Überhitzungsschutz Dieses Gerät ist mit einem Überhitzungsschutz aus- einzigartigen Dokumente. Obwohl das Laminier- gestattet. Wenn der Motor aufgrund von Überlastung gerät allen gängigen Sicherheitsnormen/-stan- zu heiß wird, schaltet sich das Gerät automatisch dards entspricht, können Fehlfunktionen – wie aus. -
Seite 7: Geeignete Folientaschen
Geeignete Folientaschen I Achten Sie darauf, dass die Anschlussleitung während des Betriebs niemals nass oder feucht wird. • Sie können zum Heißlaminieren Folientaschen mit I Trennen Sie das Gerät sofort nach Gebrauch einer Breite von bis zu 320 mm und einer Stärke vom Stromnetz. -
Seite 8: Heißlaminieren Vorbereiten
Heißlaminieren vorbereiten Achten Sie darauf, dass alle Ränder des Dokuments mindestens zwei Millimeter ³ Stecken Sie die Folienführungsschiene in die Abstand zum Rand der Folientasche haben dafür vorgesehenen Löcher auf der Rückseite müssen, wie in Abb. 1 beschrieben. Beach- des Laminiergerätes. ten Sie, dass Sie lediglich eine Folie zum ³... -
Seite 9: Kaltlaminieren Vorbereiten
Kaltlaminieren vorbereiten Achten Sie darauf, dass alle Ränder des Dokuments mindestens zwei Millimeter Wenn Sie zuvor heißlaminiert haben: Abstand zum Rand der Folientasche Lassen Sie das Laminiergerät nach dem haben müssen, wie in Abb. 1 beschrieben. Heißlaminieren erst komplett abkühlen, Beachten Sie, dass Sie lediglich eine Folie bevor Sie mit dem Kaltlaminieren beginnen. -
Seite 10: Anti Blockier-Funktion (Abs)
³ Schneidfunktion Die fertig laminierte Folientasche wird aus dem Folien-Schlitz des Laminiergerätes ausgege- ben. Wenn Sie die Schneidfunktion an der Folienfüh- Nur nach dem Heißlaminieren: rungsschiene benutzen wollen, nehmen Sie die ³ Nehmen Sie diese sofort aus dem Gerät, da Folienführungsschiene sich heiße Folientaschen noch leicht verformen ³... -
Seite 11: Reinigen Und Pflegen
³ Reinigen und Pflegen Lassen Sie das Blatt los, sobald Sie merken, dass es automatisch eingezogen wird. Lebensgefahr durch elektrischen Schlag: • Öffnen Sie niemals das Gehäuse des • Die Verunreinigungen auf den Rollen im Inneren Geräts. Es befinden sich keinerlei Bedien- des Laminiergerätes setzen sich nun auf dem elemente darin. -
Seite 12: Garantie Und Service
Garantie und Service Service Deutschland Tel.: 0800 5435 111 Sie erhalten auf dieses Gerät 3 Jahre Garantie ab (Kostenfrei aus dem dt. Festnetz/Mobilfunknetz) Kaufdatum. Das Gerät wurde sorgfältig produziert E-Mail: kompernass@lidl.de IAN 273398 und vor Anlieferung gewissenhaft geprüft. Bitte bewahren Sie den Kassenbon als Nachweis Service Österreich für den Kauf auf. - Seite 13 - 10 -...
- Seite 14 Sommaire Page Introduction Finalité de l'appareil Accessoires fournis Description de l'appareil Caractéristiques techniques Consignes de sécurité Pochettes films à utiliser Commandes de niveaux Préparation de la plastification à chaud Préparer la plastification à froid Procédure de plastification Fonction anti-blocage (ABS) Fonction de coupe Nettoyage et entretien Rangement...
-
Seite 15: Introduction
Plastifieuse A3 Description de l'appareil Glissière de guidage de film (arrière) Introduction Glissière de coupe Tête de coupe Toutes nos félicitations pour l'achat de votre nouvel Arrêt du format du film appareil. Fente d'introduction manuelle du film Vous avez choisi un produit de grande qualité. Témoin indicateur "En service"... -
Seite 16: Consignes De Sécurité
I Ne pas plastifier en règle générale des documents Protection anti-surchauffe Cet appareil est doté d’une protection anti-surchauffe. à caractère unique ou de grande valeur. Bien Si le moteur surchauffe en raison d'une surcharge, que la plastifieuse réponde à tous les standards et l’appareil s’éteint automatiquement. -
Seite 17: Pochettes Films À Utiliser
Pochettes films à utiliser I Veillez à ce que le cordon d'alimentation ne soit jamais humide ou mouillé pendant le fonc- tionnement. • L'appareil admet pour la plastification à chaud des I Après utilisation, débranchez immédiatement pochettes d'une largeur allant jusqu'à 320 mm l'appareil du réseau de courant. -
Seite 18: Préparation De La Plastification À Chaud
Préparation de la plastification Veiller à ce que toutes les bordures du à chaud document aient au moins deux millimètres d'écart par rapport au bord de la pochette ³ Introduisez la glissière de guidage de film à film, comme indiqué sur la fig. 1. Veillez dans les orifices prévus à... -
Seite 19: Préparer La Plastification À Froid
Préparer la plastification à froid Veiller à ce que toutes les bordures du document aient au moins deux millimètres Si vous avez auparavant réalisé une plasti- d'écart par rapport au bord de la pochette fication à chaud : à film, comme indiqué sur la fig. 1. laisser d'abord la plastifieuse se refroidir Veillez à... -
Seite 20: Fonction Anti-Blocage (Abs)
³ Fonction de coupe Le sachet de film plastifié sort de la fente du film de la plastifieuse. Uniquement après la plastification à chaud : Si vous souhaitez utiliser la fonction de coupe au ³ Retirez-le immédiatement de l'appareil car les niveau de la glissière de guidage de film , retirez sachets de film chauds peuvent se déformer... -
Seite 21: Nettoyage Et Entretien
³ Nettoyage et entretien Relâchez la feuille dès que vous sentez qu'elle est entraînée automatiquement. Danger de mort par électrocution : • Ne jamais ouvrir le boîtier de l'appareil. • Les saletés présentes sur les rouleaux à l'intérieur La machine ne contient aucun élément de de la plastifieuse se fixent sur la feuille de papier. -
Seite 22: Garantie Et Service Après-Vente
Garantie et service après-vente Service France Tel.: 0800 919270 Cet appareil bénéficie de 3 ans de garantie à E-Mail: kompernass@lidl.fr IAN 273398 compter de la date d'achat. L'appareil a été fabriqué avec soin et consciencieusement contrôlé avant sa Service Suisse distribution. - Seite 23 - 20 -...
- Seite 24 Indice Pagina Introduzione Destinazione d'uso Volume della fornitura Descrizione dell'apparecchio Dati tecnici Avvertenze di sicurezza Tasche di plastica idonee Impostazioni Preparazione della laminazione a caldo Preparazione della laminazione a freddo Procedimento di laminazione Funzione antiblocco (ABS) Funzione di taglio Pulizia e manutenzione Conservazione Smaltimento Garanzia e assistenza...
-
Seite 25: Introduzione
Plastificatore A3 Descrizione dell'apparecchio Guida per la pellicola (posteriormente) Introduzione Guida di taglio Testina di taglio Congratulazioni per l'acquisto del nuovo Blocco per il formato della pellicola apparecchio. Intaglio per l'inserimento manuale della pellicola Lei ha scelto un prodotto di alta qualità. Il manuale Spia di indicazione "Pronto per l'uso"... -
Seite 26: Avvertenze Di Sicurezza
I Non laminare documenti di valore e originali. Protezione dal surriscaldamento Questo apparecchio è dotato di un dispositivo di Sebbene la laminatrice sia conforme a tutte le protezione dal surriscaldamento. Se il motore si norme e agli standard di sicurezza correnti, non surriscalda a causa del sovraccarico, l'apparecchio è... -
Seite 27: Tasche Di Plastica Idonee
Tasche di plastica idonee I Impedire che il cavo di collegamento alla rete elettrica si bagni o inumidisca durante l'uso. I Staccare immediatamente l'apparecchio dalla • Per la laminazione a caldo si possono usare presa subito dopo l'uso. L'apparecchio è com- tasche di plastica larghe fino a 320 mm e con pletamente scollegato solo ad avvenuto distacco spessore massimo di 125 micron. -
Seite 28: Preparazione Della Laminazione A Caldo
Preparazione della Tenere presente che tutti i margini del laminazione a caldo documento devono avere almeno due millimetri di distanza dal margine della ³ Inserire la guida per la pellicola nei fori tasca di plastica, come mostrato nell'ill. 1. previsti sul retro dell'apparecchio di laminazione. Fare attenzione a utilizzare solo un foglio ³... -
Seite 29: Preparazione Della Laminazione A Freddo
Preparazione della Tenere presente che tutti i margini del laminazione a freddo documento devono avere almeno due millimetri di distanza dal margine della Se si è eseguita prima la laminazione a tasca di plastica, come mostrato nell'ill. 1. caldo, fare raffreddare completamente la Fare attenzione a utilizzare solo un foglio laminatrice dopo la laminazione a caldo, per volta per la laminazione. -
Seite 30: Funzione Antiblocco (Abs)
³ Funzione di taglio La tasca di pellicola laminata verrà emessa dall'intaglio pellicola della laminatrice. Se si vuole utilizzare la funzione di taglio con la Solo dopo la laminazione a caldo: guida della pellicola , rimuovere la guida per ³ prelevare i prodotti laminati immediatamente guida della pellicola dall'apparecchio, poiché... -
Seite 31: Pulizia E Manutenzione
³ Pulizia e manutenzione Rilasciare il foglio non appena si nota che esso si inserisce automaticamente. Pericolo di morte a causa di scossa elettrica: • Non aprire mai l'alloggiamento dell'appa- • Lo sporco presente sui rotoli all'interno dell'appa- recchio. In esso non è presente alcun recchio di laminazione si deposita sul foglio di elemento di comando. -
Seite 32: Garanzia E Assistenza
Garanzia e assistenza Importatore Questo apparecchio è garantito per tre anni a KOMPERNASS HANDELS GMBH partire dalla data di acquisto. L'apparecchio BURGSTRASSE 21 è stato prodotto con cura e debitamente collaudato 44867 BOCHUM prima della consegna. GERMANY Conservare lo scontrino come prova d'acquisto. www.kompernass.com In caso di interventi in garanzia, contattare telefoni- camente il proprio centro di assistenza. - Seite 33 - 30 -...
- Seite 34 Content Page Introduction Intended use Items supplied Appliance description Technical Data Safety instructions Suitable laminating pouches Operating levels Preparing for hot lamination Preparing for cold lamination Lamination process Anti-Blocking Switch (ABS) Trimming function Cleaning and care Storage Disposal Warranty and Service Importer Read the operating instructions carefully before using the device for the first time and preserve this booklet for later reference.
-
Seite 35: Introduction
A3 Laminator Appliance description Foil guide rails (rear) Introduction Cutting rail Cutting head Congratulations on the purchase of your new Foil format restraint appliance. Slot for manual foil feed You have clearly decided in favour of a quality pro- Indicator lamp "Ready" duct. -
Seite 36: Safety Instructions
I Never laminate valuable or unique documents. Overheating Protection This appliance is fitted with overheating protection. Although the laminator satisfies all predominant Should the motor become too hot due to excessive safety norms and standards, errors can never be loading, the appliance switches itself off automati- completely discounted - as with all electrical cally. -
Seite 37: Suitable Laminating Pouches
Suitable laminating pouches I Ensure that the power cable never becomes wet during operation. I Unplug the appliance immediately after use. • For hot lamination you can use pouches with a The appliance is free of electricity only when you width of up to 320 mm and a maximum thickness remove the plug from the mains power socket. -
Seite 38: Preparing For Hot Lamination
Preparing for hot lamination Make certain that all corners of the docu- ment have at least two millimetres of ³ Insert the foil guide rails in the designated space to the edge of the laminating pouch, holes on the rear of the laminator. as shown in Fig. -
Seite 39: Preparing For Cold Lamination
Preparing for cold lamination Make certain that all corners of the docu- ment have at least two millimetres of space If you have previously performed hot to the edge of the laminating pouch, as lamination: shown in Fig. 1. After hot laminating, allow the laminator Make certain that you use only one pouch to cool down completely before beginning for laminating. -
Seite 40: Anti-Blocking Switch (Abs)
³ Trimming function The finished laminated pocket is now ejected from the foil slot of the laminator. Should you wish to use the trimming function on the Only after hot lamination: ³ foil guide rails , dismantle the foil guide rails Remove them immediately from the appliance, as hot foil pockets can still be easily deformed. -
Seite 41: Cleaning And Care
³ Cleaning and care Release the sheet as soon as you notice it being pulled in automatically. Potentially fatal electrical shock: • Never open the appliance housing. There • The contaminants on the rollers inside the lami- are no user-serviceable elements inside. nator now firmly attach themselves to the sheet •... -
Seite 42: Warranty And Service
Warranty and Service The warranty for this appliance is for 3 years from the date of purchase. The appliance has been manufactured with care and meticulously examined before delivery. Please retain your receipt as proof of purchase. In the event of a warranty claim, please make contact by telephone with our Service Department. - Seite 43 KOMPERNASS HANDELS GMBH BURGSTRASSE 21 44867 BOCHUM DEUTSCHLAND / GERMANY www.kompernass.com Stand der Informationen · Version des informations Versione delle informazioni · Last Information Update: 11 / 2015 · Ident.-No.: ULG300A1-102015-1 IAN 273398...