Herunterladen Inhalt Inhalt Diese Seite drucken
Inhaltsverzeichnis

Werbung

Verfügbare Sprachen
  • DE

Verfügbare Sprachen

  • DEUTSCH, seite 166
使用説明書
INSTRUCTION MANUAL
MODE D'EMPLOI
MANUAL DE INSTRUCCIONES
GEBRAUCHSANLEITUNG
MANUALE DI ISTRUZIONI

Werbung

Inhaltsverzeichnis

Fehlerbehebung

loading

Inhaltszusammenfassung für Canon VC-C50i

  • Seite 1 使用説明書 INSTRUCTION MANUAL MODE D’EMPLOI MANUAL DE INSTRUCCIONES GEBRAUCHSANLEITUNG MANUALE DI ISTRUZIONI...
  • Seite 2 はじめに このたびは、キヤノンコミュニケーションカメラ VC-C50i/VC-C50iR(以下、本機)をお買 い上げいただき、誠にありがとうございます。 本機を正しく安全にお使いいただくために、必ずこの使用説明書をお読みください。また、 「a 安全にお使いいただくために」を最初によくお読みになった上、記載事項を必ずお守りくださ い。 主な特長 ■ 26 倍光学ズーム、12 倍電子ズームによる高倍率撮影 ■ 1 ルクスの低照度下で可視光撮影が可能 ■ 内蔵赤外光照明により 0 ルクス撮影可能(ナイトモード) ■ 高速/高精度カメラヘッド駆動 ■ ノイズリダクションによるクリアーな映像 著作権について お客様が撮影した映像や画像は、個人で利用するほかは著作権法上、権利者に無断で使用 することはできませんのでご注意ください。 ご注意 1. 本書のすべての著作権はキヤノン株式会社にあります。本書の内容の一部、または全部 を無断で転載することは禁止されています。 2. 本書の内容について、将来予告無しに変更することがあります。 3. 本書の内容については万全を期して作成しましたが、お気づきの点がございましたらご 連絡くださるようお願い申しあげます。 4. 運用した結果の影響につきましては、3. 項に関わらず責任を負いかねますのでご了承く ださい。...
  • Seite 3: Inhaltsverzeichnis

    もくじ a 安全にお使いいただくために ............4 本書で使用しているマークについて ............4 日常のお手入れ ..................... 7 ご使用の前に ..................8 本機および付属品を確認してください ..........8 各部の名称 ....................8 設置する ....................9 接続する ....................10 電源の ON/OFF ..................14 LED の表示と本機の状態について ............. リモコンで操作する ................ 15 各部の名称 ..................... 15 リモコンに電池を入れる ..............16 リモコンの届く範囲...
  • Seite 4: A 安全にお使いいただくために

    a 安全にお使いいただくために 本機をお使いいただくにあたり、必ず守っていただかなければならない注意事項について説明し けが 死亡事故 物的損害 ます。守られない場合、 や 、 が発生することがありますので、よく お読みになった上、必ずお守りください。 本書で使用しているマークについて 本書では特にお読みいただきたい説明に、次のマークを使用しています。 マーク 意     味 この表示を無視して取扱いを誤った場合に、死亡または重傷を負う可 警告 能性が想定される内容を示しています。安全にお使いいただくため に、必ずこの注意事項をお守りください。 この表示を無視して取扱いを誤った場合に、傷害または物的損害が発 注意 生する可能性が想定される内容を示しています。安全にお使いいただ くために、必ずこの注意事項をお守りください。 これらの表示を無視して取扱いを誤った場合に、火災の発生や感電、 破裂の可能性が想定される内容を示しています。 火災注意 感電注意 破裂注意 これらの表示は火気を近づけることや分解すること、またその他の行 為の禁止を示しています。 禁止 火気禁止 分解禁止 この表示は必ずプラグをコンセントから抜かなければならないことを 示しています。 プラグをコンセ ントから抜く 操作上必ず守っていただきたい重要事項や禁止事項が書かれていま す。機械の故障や損傷を防ぐために、必ずお読みください。 操作の参考となることや補足説明が書かれています。お読みになるこ とをおすすめします。...
  • Seite 5 a 安全にお使いいただくために a 設置上の注意 次のような場所には設置しないでください。 警告 火災や感電の原因になります。 ● 高温のところ ● 火気の近く 火災注意 感電注意 ● 湿気やほこりの多いところ ● 直射日光の当たるところ   禁止  火気禁止 ● 潮風の当たるところ ● 引火性溶剤の近く (アルコールやシンナーなど) 設置は確実に行ってください。 警告 天井への設置は、本体と取付け金具を含む重量に充分 耐えられる強度があることをお確かめください。充分 な強度がないと、落下して大けがの原因となります。 また、1 年に 1 度は、必ず取付け部(およびオプショ ンのワイドコンバータ使用時はワイドコンバータ取付 け部)がゆるんでいないか点検してください。 (ワイドコンバータ WL-37 は VC-C50iR に取付けて 使用することはできません。...
  • Seite 6 a 安全にお使いいただくために a 電源に関する注意 警告 ご使用の際は次のことをお守りください。 守られない場合、火災や感電の原因になります。 AC100V ● 必ず付属の専用 AC アダプタを使用してください。 また、付属の AC アダプタは、本製品以外には使用 火災注意 感電注意 しないでください。 ● 電源コードに重いものを載せる、引っ張る、無理に   禁止  曲げる、傷つける、加工するなどしないでください。 ● AC アダプタを布や布団でおおったり、つつんだり しないでください。 ● 濡れた手で操作しないでください。 ● プラグは奥まで確実に差し込んでください。 プラグをコンセントから抜くときは、プラグを持って 注意 抜いてください。 守られない場合、コードが傷つくなどして火災や感電の原因と なることがあります。 火災注意 感電注意 a 電池の取扱いに関する注意[リモコン使用時] 電池を取扱う際は次のことをお守りください。...
  • Seite 7: 日常のお手入れ

    a 安全にお使いいただくために a 持ち運ぶときの注意 持ち運ぶときは、次の点に注意してください。 注意 ● 電源プラグをコンセントから抜いてください。 ● 接続コードやケーブルなどを外してください。 コードやケーブルが傷つき、火災や感電の原因にな 火災注意 感電注意 ることがあります。 ● カメラヘッド部を持たないでください。   禁止  プラグをコンセ カメラヘッド部をパン方向、チルト方向に手でまわ ントから抜く すと故障の原因になります。 a お手入れに関する注意 お手入れの際は次のことをお守りください。 警告 守られない場合、火災や感電の原因になります。 ● 電源プラグをコンセントから抜いてください。 ● アルコールやシンナー、ベンジンなどの引火性溶剤 火災注意 感電注意 は使用しないでください。   禁止  プラグをコンセ ントから抜く 日常のお手入れ 外装のお手入れ 1.
  • Seite 8: ご使用の前に

    VC-C50iR 本体 マルチコネクタ用 BNC-RCA 変換 プラグ コネクタ AC ケーブル AC アダプタ PA-V16 (ケーブル長:1m) (ケーブル長:1.5m) ● 単三乾電池(2 本) ■ オプション商品 ● VC-C50i/VC-C50iR 使用説明書 ● ワイドコンバータ WL-37 ● インターフェースアダプタ (→ P.10) VC-EX3 使用説明書 VC-C50iR では使用できません。 ● 保証書 各部の名称 VC-C50i VC-C50iR (正面) リモコン受光部...
  • Seite 9: 設置する

    ご使用の前に 設置する VC-C50i の設置 VC-C50iR の設置 平らで安定したところに置いて ネジ 2ヶ(付属されていません)で ご使用ください。 しっかり固定してください。 取付け板 VC-C50iR ネジ ネジ (取付け寸法) • ネジ穴間 :114mm • ネジ穴径 :直径 6mm • 取付け板厚 :1mm 設置は確実に行ってください 警告 ● 天井に設置する場合は、お買い上げの販売店にご相談ください。 ● 天井への設置は、本体と取付け金具を含む重量に充分耐えられる強度 があることをお確かめください。充分な強度がないと、落下して大け がの原因となります。 ● 1 年に 1 度は、必ず取付け部(およびオプションのワイドコンバータ 使用時はワイドコンバータ取付け部)がゆるんでいないか点検してく...
  • Seite 10: 接続する

    さい。ズームのテレ側では、解像感が落ちたりオートフォーカスが合わない ことがあります。 ● ワイドコンバータ取付け時の本体の設置角度は、水平に対して± 15°です。 ● ナイトモード時はワイドコンバータの使用はできません。 (→ P.29) 接続する (本体背面) DC IN 13V VIDEO OUT ・ パソコン AC ケーブル ・ 他の VC-C50i/ VC-C50iR ・ ネットワーク カメラサーバー ・ センサー マルチコネクタ用プラグ ・ アラーム ・ モニタ AC アダプタ BNC コネクタ VIDEO 入力端子へ...
  • Seite 11 ご使用の前に マルチコネクタで接続する マルチコネクタ用プラグにリード線(AWG No.28 ∼ 18)を取り付ける 1. リード線取り付け穴に隣接しているスロットへ、マ イナスドライバーを奥まで差し込む ■ リード線取り付け穴の内部が開きます。 2. マイナスドライバーを差し込んだまま、リード線取 り付け穴にリード線を差し込む リード線 3. リード線が穴から抜けないように押さえながら、マ イナスドライバーを引き抜く ■ リード線が取り付け穴に固定されます。 同様の手順で、必要なリード線をすべて接続します。 マルチコネクタで接続する場合は、お買い上げの販売店にご相談ください。 マルチコネクタを本機に取りつける B 1 0 1. マルチコネクタ用プラグのレバーを上げる A 1 0 2. マルチコネクタ用プラグをマルチコネクタに差し込 B 1 0 む A 1 0 3.
  • Seite 12 ご使用の前に マルチコネクタのピン配列 Y GND Y OUT C GND C OUT RTS OUT CTS OUT TX OUT RX OUT RTS IN CTS IN TX IN RX IN Light_ON/OFF- Light_ON/OFF+ Alarm_- Alarm_+ Sensor_- Sensor_+ 項目 ピン NO ピン名称 入出力 信号方向 備考 S 映像出力 S ビデオの輝度出力...
  • Seite 13 ご使用の前に 項目 ピン NO ピン名称 入出力 信号方向 備考 外部照明スイッチ FET 外部照明の制御 Light_ON/OFF- 出力 電流吸い込み SW 50V/200mA 信号 (MAX) 外部照明スイッチ FET Light_ON/OFF+ 出力 電流はきだし SW 50V/200mA (MAX) アラーム制御 FET SW アラーム制御信 Alarm_- 出力 電流吸い込み 50V/200mA(MAX) 号 アラーム制御 FET SW Alarm_+ 出力 電流はきだし...
  • Seite 14: 電源の On/Off

    ご使用の前に 電源の ON/OFF 本機には電源スイッチがありません。AC アダプタの電源プラグを差し込むことで電源 ON と なります。電源を ON にすると、本機の LED が緑色に点灯します。また、モニタの電源が ON になっていれば映像が映ります。 AC100V 本機 50/60Hz モニタ AC アダプタ AC ケーブル ● 電源を OFF から ON にした後で、最初にパソコンまたはリモコンを操作する と、カメラヘッド位置の初期化が行われます(数秒で終わります) 。なお初期 化中は、本機の LED が緑色で点滅(1 秒間隔)します。 ● 初期化動作中は絶対にカメラヘッドに触らないでください。正しく初期化さ れなかったり、故障の原因になります。 ● 電源を OFF にした後、再度 ON にする場合は、5 秒以上の間隔をあけてくだ さい。間隔が短いと動作不良の原因となります。また、電源プラグを抜き差...
  • Seite 15: リモコンで操作する

    リモコンで操作する リモコンのボタン操作中は、本機の LED は緑色で点滅(0.1 秒間隔)します。 各部の名称 カメラ ON/OFF ボタン(→ P.22) カメラを ON/OFF します。 ZOOM ボタン(→ P.18) BRIGHT ボタン(→ P.20) モニタ画面上の被写体を大きくしたり、 モニタの映像の明るさを調節 BRIGHT ZOOM 小さくしたりします。 します。 • T :被写体を大きくします(ズーム • +:明るくします。 イン) 。 • −:暗くします。 • W:被写体を小さくします(ズーム アウト) 。 SET/OK ボタン (→...
  • Seite 16: リモコンに電池を入れる

    リモコンで操作する リモコンに電池を入れる 単 3 乾電池 2 本が必要です。 1. 電池カバーを取りはずす 2. 電池を入れる ■ +と−の向きに注意して入れてください。 3. 電池カバーを取付ける リモコンの届く範囲 図に示す範囲内で、リモコンをカメラのリモコン受光部に向けて操作してください。ただし、 電池の残量や障害物などによって、リモコンの届く範囲は変わります。 (VC-C50iR も同様で す。 ) 90° 30° 90° 30°...
  • Seite 17: カメラヘッドの向きを変える(パン / チルト / ホーム

    ON SCREEN MENU 上下に動かすとき(チルト) 8、5 ボタンを押す ■ ボタンを押し続けると速度が次のように変化します。 低速→中速→高速 正面に戻すとき(ホーム) h ボタンを押す ■ 高速でカメラヘッドを正面に戻します。 カメラヘッドの向きを手で変えないでください。 カメラヘッドの向きを誤って手で変えたり、ものなどが当たっ たりしてカメラヘッドが直接動いてしまった場合は、必ず h ボタンを押してください。カメラが記憶しているパン / チルト 位置と、実際のパン / チルト位置のずれがなくなり、正常に動 作するようになります。 カメラヘッドの動作範囲 カメラヘッドの水平位置からの動作範囲を示します。VC-C50i の上方向の初期設定は 30°ですが、90°まで設定することができます(→ P.27) 。 30° 100° 100° 10° 170° 30° 170° VC-C50i VC-C50iR 90°...
  • Seite 18: ズームイン / ズームアウト(テレ / ワイド

    リモコンで操作する ズームイン / ズームアウト (テレ / ワイド) モニタの画面上の被写体を大きく(ズームイン)したり、小さく(ズームアウト)したりしま す。 ズームインするとき(テレ) t 側を押す BRIGHT ZOOM ■ ボタンを押し続けるとズーム速度が次のように変化します。      低速        高速 HOME SET/OK CANCEL ∞ ズームアウトするとき(ワイド) ON SCREEN MENU w 側を押す ■ ボタンを押し続けるとズーム速度が次のように変化します。      低速        高速 ピントの合う範囲 ズームの位置によっては、ピントが合わない場合があります。 カメラが近づける距離の変化 ピントの合う範囲 1.6m 距離 ズームの位置...
  • Seite 19 リモコンで操作する ピントを調節する (フォーカス) 被写体にピントを合わせます。ピントを自動で合わせるオートフォーカスと、手動で合わせる マニュアルフォーカスがあります。 (初期設定はオートフォーカスです。 ) オートフォーカスにするとき a ボタンを押す BRIGHT ZOOM ■ ピントは自動的に合います。 HOME SET/OK CANCEL ∞ ON SCREEN MENU オートフォーカスではピントの合いにくい被写体 次のような被写体は、オートフォーカスではピントが合いにくいことがあります。そのよう なときは、マニュアルフォーカス(→ P.20)でピントを合わせてください。 白い壁など明暗の差が 斜めになっているもの 強い光が反射している ないもの もの 横じまのあるもの 炎や煙などの実体のな ガラス越しのもの いもの...
  • Seite 20 リモコンで操作する ピントを固定にするとき n ボタンを押す BRIGHT ZOOM ■ オートフォーカスを解除し、ピントが固定になります。 近くにピントを合わせるとき HOME r ボタンを押す SET/OK CANCEL ■ マニュアルフォーカスになり、近くにピントを合わせること ができます。 ∞ ■ ボタンを押し続けると、ピントの合う位置が近くに移動し続 けます。 ON SCREEN MENU 遠くにピントを合わせるとき e ボタンを押す ■ マニュアルフォーカスになり、遠くにピントを合わせること ができます。 ■ ボタンを押し続けると、ピントの合う位置が遠くに移動し続 けます。 ■ ズームの位置によってはピントが合わない場合があります (→ P.18) 。 明るさを調節する (ブライト) 映像を明るくしたり、暗くしたりします。電源を...
  • Seite 21 リモコンで操作する カメラの状態を記憶させる (プリセット) カメラヘッドの向き、ズームの位置および明るさの状態を登録します。最大 9 件(1 ∼ 9)ま で登録でき、電源を OFF またはカメラを OFF にしても登録内容は消えません。 状態を登録するとき 1. カメラヘッドの向き、ズームの位置および明るさを決め BRIGHT ZOOM る ■ フォーカスの情報は登録されません。 HOME 2. s ボタンを押す SET/OK CANCEL ■ 本機の LED が緑色で点滅(0.5 秒間隔)します。 ■ 操作を中止するときは c ボタンを押してください。 ∞ 3. 1 ∼ 9 ボタンを押す ON SCREEN MENU ■...
  • Seite 22: カメラを On/Off する

    リモコンで操作する カメラを ON/OFF する カメラの ON/OFF は p(カメラ ON/OFF)ボタンで行います。カメラを OFF にしてもプリ セット、日付、時刻、ID 番号はクリアされません。 カメラを OFF にするとき カメラ ON の状態で p ボタンを押す BRIGHT ZOOM ■ 映像が消え、本機の LED が赤色で点灯します(カメラ OFF) 。p ボタンおよび i ボタン以外のリモコン操作は受 付けません。 HOME SET/OK CANCEL カメラを ON にするとき ∞ カメラ...
  • Seite 23: いろいろな設定

    いろいろな設定 設定画面を表示して、時計や文字の設定および表示、カメラの動作などを設定することができ ます。 設定操作に使用するボタン 設定は、以下に示すリモコンのボタンを使って行います。 58 ボタン :カーソルを上下に移動します。 BRIGHT ZOOM 6 ボタン :カーソルを右に移動します。または画面を次の 階層に進めます。 4 ボタン :カーソルを左に移動します。 HOME SET/OK CANCEL c ボタン :項目を設定しないでひとつ前の階層に戻しま す。 ∞ s ボタン :項目を設定して次の階層に進めます。 ON SCREEN MENU m ボタン :設定画面を表示したり、消したりします。設定 画面を表示中、本機の LED は緑色で点滅(0.5 秒間隔)します。 o ボタン :時計や文字などを表示したり、消したりします...
  • Seite 24: 時計を合わせる

    いろいろな設定 時計を合わせる 日付、 時刻を設定します。 好みに応じて TIME STYLE および DATE STYLE を決めてください。 MA I N D I PLAY MENU D TE& I ME MENU TT I NGS SET MENU DATE D I SPLAY SET DATE 0 ’ T I ME D I SPLA D I SP MENU DATE&T I ME...
  • Seite 25: 文字の設定

    いろいろな設定 文字の設定 設定できる文字は、英文字(A ∼ Z) 、数字(0 ∼ 9) 、および記号(< > - / . : (スペース)) です。文字候補領域以外の場所ならどこにでも設定することができます。設定は w と e を繰 り返して 1 文字ずつ行います。複数行にわたる場合は 1 行ごとに q から t を繰り返します。 文字を削除したいときはカーソルを l(バックスペース)に置き、s ボタンを押して 1 文 字ずつ消します。 文字候補 設定したい位置 24 桁 MA I N MENU D I PLAY MENU SET MENU...
  • Seite 26: カメラヘッドの動作スピードおよびパン動作の設定

    いろいろな設定 カメラヘッドの動作スピードおよびパン動作の設定 カメラヘッドのパン / チルトの動作スピード、および DIRECTION MIRROR(カメラヘッド のパン方向の動作)を設定します。 MA I N MENU RA MENU RA MENU SET MENU SPEED AUTO SPEED SPEE AUTO D I SP MENU MO A RANGE DEFAULT SETT I N CA E MENU D I RECT I O M I RROR NEXT SET BACK CANCEL...
  • Seite 27: カメラヘッドの動作範囲の設定

    UP L I M I T SET DOWN L I M I T SET DOWN L I M I T SET NEXT SET BACK CANCEL CANCEL CANCEL 映像を見ながら制限した い位置まで移動する カメラヘッドの動作範囲は以下に示す範囲で設定できます。 VC-C50i : 左右方向 ± 100°上方向 90°下方向 30° VC-C50iR : 左右方向 ± 170°上方向 10°下方向 90°...
  • Seite 28: Ae、フリッカ防止の設定

    いろいろな設定 AE、フリッカ防止の設定 AE(明るさの調節) 、およびフリッカ(画面のちらつき)防止を設定します。 MA I N MENU RA MENU TT NG SET MENU SPEED AUTO E REFERENCE FAULT SPEE AUTO D I SP MENU MO A RANGE DEFAULT FL I CKERLE SS AE CA E MENU SETT I N D I RECT I O M I RROR N I GHT...
  • Seite 29: ナイトモードの設定

    いろいろな設定 ナイトモードの設定 ナイトモードにすると、赤外光撮影により、暗闇でも白黒映像として被写体を確認できます。 ナイトモードに切り替えるとき、ナイトモード用の内蔵赤外光照明(赤外線 LED)が自動点 灯します。なお照明は、30 分後に自動消灯します。 MENU RA MENU SPEED AUTO SPEE AUTO MO A RANGE DEFAULT SETT I N D I RECT I O M I RROR NEXT SET BACK CANCEL NEXT SET BACK CANCE ● ナイトモードでは、オートフォーカスでピントが合いにくくなったり、ピントが合って いないように見える場合があります。そのようなときは、マニュアルフォーカスでピン トを合わせてください。...
  • Seite 30: Rs-232C の設定

    いろいろな設定 RS-232C の設定 本機をパソコンやその他の装置で制御するための設定です。DATA 8 BIT と NON PARITY は設定値を確認するためのもので、固定です。 MA I N MENU SET MENU RS - 232C TT I NGS RS - 232C TT I NGS SET MENU RS - 232C ETT I NGS . . BAUD BAUD D I SP MENU REMO...
  • Seite 31: 複数のカメラを個別に操作する

    複数のカメラを個別に操作する カメラ(VC-C50i または VC-C50iR)が複数台隣接して設置してある場合、リモコンで操作 をすると、受信したカメラはすべて一斉に同じ動作をします。このような場合、各カメラにあ らかじめ ID 番号を設定しておくと、リモコンから ID 番号を指定することで個別にカメラを操 作することができます。 ID 番号を設定する 各カメラ(VC-C50i または VC-C50iR)それぞれに ID 番号(1 ∼ 9)を設定します。ID 番 号を設定しないときは[0]にします。隣接するカメラすべてに ID 番号を設定してください。ま た、同じ ID 番号を複数のカメラに設定すると、それらは同一の動作をします。 1. ID 番号を設定するカメラだけ電源を ON にする。隣接す るその他のカメラの電源は OFF にする 電源の ON/OFF は、そのカメラに接続されている AC アダ...
  • Seite 32: 個別に操作したいカメラを選択する

    複数のカメラを個別に操作する 個別に操作したいカメラを選択する <例> 下図のような 4 台のカメラ(ID1 ∼ ID3)のうち、ID2(2 台)のカメラだけ個別に 操作できるようにします。通常の使用時は、カメラの LED は緑色で点灯しています。 緑色で点灯 緑色で点灯 緑色で点灯 緑色で点灯 ● 操作は、隣接するすべてのカメラの LED を確認しながら行ってください。リ モコンの信号がすべてのカメラに届いているかどうか確認できます。 ● ID 番号が設定されていないカメラ(ID:0)は、ステップ 2 で ON になります。 ● カメラが OFF のときでも、i ボタンを押すとすべてのカメラの LED はオレ ンジ色に点滅して個別操作が開始できます。ただし、ステップ 2 で番号ボタ ンを押したとき、ID 番号が一致しないカメラは OFF になります。 1.i ボタンを押す...
  • Seite 33: 個別操作を解除する

    複数のカメラを個別に操作する 個別操作を解除する <例> 前ページで選択した ID2 のカメラの個別操作を解除します。各カメラの LED は下図 のようになっています。 オレンジ色で点灯 緑色で点灯 緑色で点灯 オレンジ色で点灯 操作は、隣接するすべてのカメラの LED を確認しながら行ってください。リモ コンの信号がすべてのカメラに届いているかどうか確認できます。 1.i ボタンを押す 隣接するすべてのカメラの LED がオレンジ色の点滅(0.5 BRIGHT ZOOM 秒間隔)に変わります。 HOME SET/OK CANCEL オレンジ色で点滅 オレンジ色で点滅 オレンジ色で点滅 オレンジ色で点滅 ∞ 操作を中止したいときは c ボタンまたは i ボタンを押し てください。ID2 のカメラの LED は緑色の点灯に、その他 ON SCREEN MENU のカメラの...
  • Seite 34: 故障かなと思ったら

    故障かなと思ったら もう一度以下のことを確認してから販売店にご連絡ください。 リモコン操作ができない 確認 1. LED が消灯していませんか? 対処 電源プラグをコンセントに正しく奥まで差し込んでください。→ P.14 確認 2. LED が赤色で点灯していませんか? カメラが OFF になっています。リモコンの p ボタンを押してカメラを 対処 ON にしてください。→ P.22 確認 3. LED がオレンジ色で点灯をしていませんか? 対処 ID 設定機能による動作制限を受けています。ID を正しく設定し直すか、個 別操作を解除してください。→ P.31 ∼ 33 確認 4. リモコンを操作したときに、LED が緑色で点滅していますか? 対処 ・...
  • Seite 35 故障かなと思ったら プリセットで登録した位置にカメラヘッドが向かない 確認 1. カメラヘッドが動作範囲まで動きますか? 何らかの原因でカメラヘッドが直接動いてしまいました。リモコンの h 対処 ボタンを押してください。→ P.17 確認 2. プリセット登録後にパン / チルトの動作範囲を変更していませんか? 対処 プリセットを登録し直してください。→ P.21 ピントが合わない 確認 1. マニュアルフォーカスになっていませんか? マニュアルでピントを調節するか、リモコンの a ボタンを押してオート 対処 フォーカスにしてください。→ P.19 ∼ 20 確認 2. レンズが汚れていませんか? 対処 レンズの清掃をしてください。→ P.7 確認 3. プリセットの実行をしましたか? 対処 マニュアルフォーカスの時にプリセットの実行をすると、実行後ピントが...
  • Seite 36: 工場出荷時の初期設定

    工場出荷時の初期設定 工場出荷時および RESTORE DEFAULT を[YES]にしたとき(→ P.30) 、各項目は以下に 示す設定になります。 (本機の初期設定) 項  目 初期設定 項  目 初期設定 フォーカス ※ 1 AUTO プリセット なし ブライト ※ 1 標準の明るさ 時計および文字 非表示 (設定画面の初期設定) 項  目 初期設定 BAUD RATE 9600 STOP BIT DATA 8 BIT Read only SET MENU NON PARITY Read only REMOTE CONTROLLER ID...
  • Seite 37: 主な仕様

    最大約 12.5W(専用 AC アダプタ含む) 使用環境 温度:0℃∼ 40℃ 湿度:20% ∼ 85%RH(結露なきこと) 設置角度 水平に対して± 20°(オプションのワイドコンバータ使用時は± 15°) 本体サイズ VC-C50i:100mm(W)× 117mm(D)× 96mm(H) (突起物は含まず) VC-C50iR:100mm(W)× 117mm(D)× 97.6mm(H) (突起物は含まず) 本体質量 VC-C50i:約 420g / VC-C50iR:約 490g リモコン 型式 WL-V5 方式 赤外線パルス方式 電源 DC3V(単 3 乾電池× 2) サイズ 50mm(W)× 175mm(D)× 24.5mm(H) (突起物は含まず) 質量...
  • Seite 38 お問い合せ先 製品に関するお問い合せは、お客様相談センターをご利用ください。 キヤノンお客様相談センター TV 会議システム・ビジュアルコミュニケーション 050-555-90074 [受付時間] < 平日 > 9:00 ∼ 12:00 / 13:00 ∼ 17:00 (土・日・祝日及び年末年始弊社休業日は休ませていただきます) ※ 上記番号をご利用いただけない方は 043-211-9622 をご利用ください。 ※ IP 電話をご利用の場合、プロバイダーのサービスによってつながらない場 合があります。 ※ 受付時間は予告なく変更する場合があります。 あらかじめご了承ください。 補修用性能部品について 保守サービスのために必要な保守用性能部品の最低保有期間は、 製品の製造打 ち切り後 7 年間です。 (補修用性能部品とは、その製品の機能を維持するために必要な部品です)...
  • Seite 39 INSTRUCTION MANUAL...
  • Seite 40 Product. Features of the VC-C50i/VC-C50iR Communication Camera ■ Genuine Canon 26× optical zoom and 12× digital zoom for high- magnification imaging ■ Capable of shooting at low light levels down to 1 lux ■...
  • Seite 41: Exclusion Of Liability

    Exclusion of Liability If the Product is connected to a recording device (for example a VCR), Canon Inc. accepts no responsibility whatsoever for any financial losses that may be incurred as a result of the loss of recorded information or images, regardless of the internal or external cause of the loss.
  • Seite 42: Safe Use Of Equipment

    When replacing the fuse only a correctly rated approved type should be used and be sure to re-fit the fuse cover. The AC adapter can be connected to the VC-C50i/VC-C50iR from a standard AC power outlet. Please check your instruction manual to make sure that your VC-C50i/VC-C50iR is compatible with this adapter.
  • Seite 43 50 and following of Italian legislative decree 22/97. For more information regarding return and recycling of WEEE products, please visit www.canon-europe.com/environment. (EEA: Norway, Iceland and Liechtenstein)
  • Seite 44 If such changes or modifications should be made, you could be required to stop operation of the equipment. Canon U.S.A. Inc. One Canon Plaza, Lake Success, NY 11042, U.S.A. Tel No. (516) 328-5600 IC NOTICE This Class B digital apparatus complies with Canadian ICES-003.
  • Seite 45: Important Safety Instructions

    Safe Use of Equipment a IMPORTANT SAFETY INSTRUCTIONS In these safety instructions, the word serious injury to a child or adult, and “equipment” refers to the Canon serious damage to the equipment. An communication camera VC-C50i/VC-C50iR equipment and cart combination should and all its accessories.
  • Seite 46 Canon or that have the same 16. Object and Liquid Entry - Never push characteristics as the original part.
  • Seite 47 OFF the equipment, correctly positioned when you load unplug it from the main power supply the batteries. and contact your nearest Canon - If any soiling or leakage of the supplier. Do not continue to use the internal battery fluid occurs,...
  • Seite 48: Maintenance

    a Safe Use of Equipment Maintenance Cleaning the Equipment 1. Unplug the AC adapter from the wall outlet. 2. Carefully wipe the equipment with a soft cloth that has been moistened with water or a mild detergent. WARNING Do not use flammable solvents such as alcohol, benzene or thinners. The use of such substances can cause a fire or electric shock.
  • Seite 49 CONTENTS a Safe Use of Equipment ..................4 a Important Warnings ................... 4 a Important Operational Instructions ............5 a IMPORTANT SAFETY INSTRUCTIONS ............. 7 Maintenance ....................10 Icons Used in This Instruction Manual ............. 10 Before You Use the Product ..................12 Checking the Camera and Its Accessories ..........
  • Seite 50: Before You Use The Product

    Before You Use the Product Checking the Camera and Its Accessories Before you install the Product, check that all the items shown below are included in your product package. If any of these items is missing, contact your Canon dealer. Wireless Interface adapter...
  • Seite 51: Installing The Product

    WARNING Install the camera securely. ● When installing the camera on the ceiling, contact your Canon dealer. ● When installing the camera on the ceiling, check that the ceiling is strong enough to bear the weight of the camera including the installation bracket. Installation in a weak location could result in the camera falling and causing serious injury.
  • Seite 52: Connecting The Components

    ● The wide-angle converter cannot be used in night mode. (→ P.33) Connecting the Components (Rear of camera) DC IN 13V VIDEO OUT AC cable • PC • Another VC-C50i/ VC-C50iR • Network camera server • Sensor Multiconnector plug • Alarm • Monitor...
  • Seite 53 Before You Use the Product Connecting to the Multiconnector Use the procedure below to plug leads (AWG No.28-18) into the multiconnector plug. 1. Insert a flat-bladed screwdriver all the way into the slot next to the lead fastening hole. ■ The inside of the lead fastening hole opens. 2.
  • Seite 54 Before You Use the Product Multiconnector Pin Layout Y GND Y OUT C GND C OUT RTS OUT CTS OUT TX OUT RX OUT RTS IN CTS IN TX IN RX IN Light_ON/OFF- Light_ON/OFF+ Alarm_- Alarm_+ Sensor_- Sensor_+ Input/ Item Pin No.
  • Seite 55 Before You Use the Product Input/ Item Pin No. Pin name Signal direction Notes Output External lighting External lighting switch Light_ON/OFF- Output Current input control signal 50V/200mA (max.) External lighting switch Light_ON/OFF+ Output Current output 50V/200mA (max.) Alarm control Alarm control 50V/ Alarm_- Output Current input...
  • Seite 56: Turning The Power On And Off

    Before You Use the Product Turning the Power ON and OFF The VC-C50i/VC-C50iR camera does not have a power switch. You can switch the camera on by plugging the AC adapter into a wall outlet. When power to the camera is switched on, the LED on the camera turns green.
  • Seite 57: Controlling The Camera From The Wireless Controller

    Controlling the Camera from the Wireless Controller While the wireless controller buttons are being used, the LED on the camera blinks green (at 0.1-second intervals). Nomenclature Camera ON/OFF button (→ P.26) Switches the camera on and off. ZOOM button (→ P.22) BRIGHT button (→...
  • Seite 58: Loading The Batteries Into The Wireless Controller

    Controlling the Camera from the Wireless Controller Loading the Batteries into the Wireless Controller The wireless controller requires two AA-type batteries. 1. Remove the battery cover. 2. Insert the batteries. ■ Taking care that the poles (+ and –) are correctly positioned.
  • Seite 59: Changing The Camera Head Angle (Pan/Tilt/Home Position)

    Range of Camera Head Movement The figures below show the range of camera head movement from a horizontal position. The default range of upward movement for the VC-C50i is 30°, but the range can be set to 90° (→ P.31).
  • Seite 60: Zooming In/Out (Tele/Wide)

    Controlling the Camera from the Wireless Controller Zooming In/Out (TELE/WIDE) The zoom function increases (zoom in) and decreases (zoom out) the size of the subject on the monitor screen. To zoom in (TELE): Press the t side of the button. BRIGHT ZOOM ■...
  • Seite 61: Focusing (Focus)

    Focusing (FOCUS) This section describes how to focus on the subject. The VC-C50i/VC-C50iR has an auto-focus mode, in which the camera automatically focuses on the subject, and a manual focus mode, in which the operator can adjust the focus by hand. (The default setting is auto-focus.) To use autofocus mode Press the a button.
  • Seite 62: Adjusting The Brightness (Bright)

    Controlling the Camera from the Wireless Controller To fix the focus Press the n button. BRIGHT ZOOM ■ This switches auto-focus off and fixes the focus. To focus on nearby subjects Press the r button. HOME SET/OK CANCEL ■ This enables switching the camera to manual focus mode while moving the focal point closer to the camera.
  • Seite 63: Storing A Preset Camera Position (Preset)

    To restore a preset position Press a button from 1 to 9. ■ The VC-C50i/VC-C50iR returns to the stored camera head angle, zoom position and brightness level. ● During preset operations, the camera pans and tilts at the speeds set for pan/ tilt operation in the setting menu.
  • Seite 64: Switching The Camera On And Off

    Controlling the Camera from the Wireless Controller Switching the Camera ON and OFF The camera is switched on and off by using the p (camera ON/OFF) button on the wireless controller. Even if you switch the camera OFF, the stored preset positions, the date, the time and the ID number are not cleared.
  • Seite 65: Camera Settings

    Camera Settings Set and display the clock and text, and specify camera operation settings. Buttons Used to Specify the Settings The wireless controller buttons shown below are used for the setting. 58 buttons : Move the cursor up and down. 6 button BRIGHT ZOOM...
  • Seite 66: Setting The Clock

    Camera Settings Setting the Clock Use the procedure below to set the date and time. You can also select your preferred TIME STYLE and DATE STYLE settings. MA I N MENU D I PLAY MENU D TE& I ME TT I NGS SET MENU DATE D I SPLAY...
  • Seite 67: Entering Characters

    Camera Settings Entering Characters The characters that can be specified are uppercase letters (A to Z), numbers (0 to 9) and some symbols (<, >, -, /,., : and spaces). Text can be entered anywhere on the screen outside the character area. Repeat steps w and e in the procedure below for each character entered.
  • Seite 68: Setting The Camera Head Movement Speed And Pan Operation

    Camera Settings Setting the Camera Head Movement Speed and Pan Operation Use the procedure below to set the speed at which the camera head pans and tilts and to select the DIRECTION MIRROR setting (direction of camera head panning). MA I N MENU RA MENU RA MENU...
  • Seite 69: Setting The Range Of Camera Head Movement

    Watch the monitor image to move to the desired limit. The limits for the range of camera head movement are as follows: ±100° left and right, 90° upward and 30° downward VC-C50i: MEMO VC-C50iR: ±170° left and right, 10° upward and 90° downward...
  • Seite 70: Setting The Ae

    Camera Settings Setting the AE Use the procedure below to specify the AE (brightness adjustment) setting. FLICKERLESS AE is unnecessary to set. MA I N MENU RA MENU TT NG SET MENU SPEED AUTO E REFERENCE FAULT SPEE AUTO D I SP MENU MO A RANGE...
  • Seite 71: Night Mode Settings

    Camera Settings Night Mode Settings Selecting night mode allows you to check the subject in the dark using black and white images provided by infrared photography. When you switch to night mode, the built-in infrared lighting (infrared LED) for night mode automatically switches on. This lighting automatically switches off after 30 minutes.
  • Seite 72: Rs-232C Settings

    Camera Settings RS-232C Settings These settings are used for controlling the VC-C50i/VC-C50iR from a PC or other device. The DATA 8 BIT and NON PARITY settings are fixed, and the menu is used to check them only. DATA 8 BIT and NON PARITY are to be read only.
  • Seite 73: Id Mode

    This is referred to as ID mode operation. Setting the ID Number Use the procedure below to assign an ID number (1 to 9) to each camera (VC-C50i/ VC-C50iR). If you do not want to assign an ID number to a camera, select [0] for that camera.
  • Seite 74: Selecting The Camera To Be Controlled

    ID Mode Selecting the Camera to be Controlled <Example> As shown in the figure below, of 4 cameras (ID1 to ID3) only the cameras with ID number 2 (2 cameras) are selected for ID mode operation. In normal operation, the camera LEDs turn green. Green Green Green...
  • Seite 75: Cancelling Id Mode

    ID Mode Cancelling ID Mode <Example> In this example, the selection made in the previous section of the cameras with ID number 2 is cancelled. The camera LEDs are as shown below. Orange Green Green Orange Check the LEDs on all the adjacent connected cameras to ensure that all the cameras are receiving the signals from the wireless controller.
  • Seite 76: Troubleshooting

    Troubleshooting Check the following before contacting your Canon supplier. The wireless controller does not work. Check 1: The LED is not lit. Response: Check that the plug is inserted into the main power outlet correctly and pushed in all the way. → P.18 Check 2: The LED is red.
  • Seite 77 Troubleshooting The camera will not move to a preset position. Check 1: The camera head will not move to the limit of its range of movement. Response: Something has directly moved the camera head. Press the h button on the wireless controller. → P.21 Check 2: The range of pan/tilt movement has been changed since the preset position was stored.
  • Seite 78: Factory Default Settings

    Factory Default Settings When the Product is shipped from the factory or when RESTORE DEFAULT has been set to [YES] (→ P.34), the settings are set to the default values shown below. (Camera Default Settings) Item Default Item Default Focus Auto Preset None...
  • Seite 79: Specifications

    ±20° from horizontal (±15° with optional wide-angle converter installed) Installation Angle VC-C50i: 100 × 117 × 96 mm (3.9 × 4.6 × 3.8 in.) (W × D × H) Dimensions (excluding attachments) VC-C50iR: 100 × 117 × 97.6 mm (3.9 × 4.6 × 3.8 in.) (W × D × H)
  • Seite 80 Specifications Item Details Wireless Model WL-V5 Controller System Infrared pulse system Power Supply 3 V DC (2 AA-type batteries) 50 × 175 × 24.5 mm (1.97 × 6.89 × 0.96 in.) (W × D × H) (excluding Dimensions attachments) Weight Approx.
  • Seite 81 MODE D’EMPLOI...
  • Seite 82 Introduction Nous vous remercions d’avoir choisi la Caméra de Communication Canon VC-C50i/ VC-C50iR. Veuillez lire attentivement ce mode d’emploi pour assurer le bon fonctionnement de cet appareil. Consultez tout d’abord la section “a Utilisation en toute sécurité de l’appareil” et veillez à observer ces instructions lorsque vous utilisez la caméra.
  • Seite 83 Si la caméra est connectée à un appareil enregistreur (un magnétoscope, par exemple) pour enregistrer des images et le son, Canon Inc. ne peut en aucun cas être responsable de tout préjudice pouvant être causé par la perte des images enregistrées, que la cause soit interne ou externe.
  • Seite 84: Avertissements Importants

    Numéro de série L’adaptateur secteur peut être raccordé au VC-C50i/VC-C50iR à partir d’une prise secteur normale. S’assurer dans le mode d’emploi que le VC-C50i/ VC-C50iR est compatible avec cet adaptaeur. – La prise murale doit être située à proximité de I’appareil et être facilement accessible.
  • Seite 85 équipements à recycler, contactez votre mairie, le service de collecte des déchets, le plan DEEE approuvé ou le service d'enlèvement des ordures ménagères. Pour plus d'informations sur le dépôt et le recyclage des produits DEEE, consultez le site www.canon-europe.com/environment. (EEE : Norvège, Islande et Liechtenstein)
  • Seite 86: Instructions De Sécurité Importantes

    INSTRUCTIONS DE SÉCURITÉ IMPORTANTES Dans ces instructions, le mot “équipement” fait un enfant ou un adulte référence à la caméra de communication en entraînant des CANON VC-C50i/VC-C50iR et tous ses bessures graves et de sérieux dommages accessoires. matériels. 1. Lisez ces instructions - Avant d’utiliser cet L’équipement sur un...
  • Seite 87 15. Surcharge - Ne surchargez pas les prises préconisées par Canon ou des pièces qui murales et les rallonges sinon un incendie sont dotées des mêmes caractéristiques pourrait se déclarer ou vous pourriez vous que celles d’origine.
  • Seite 88 Canon le plus proche. Ne continuez pas à utiliser la caméra car vous pourriez provoquer un incendie ou vous électrocuter.
  • Seite 89: Nettoyage De L'appareil

    a Utilisation en toute sécurité de l’appareil Entretien Nettoyage de l’appareil 1. Débranchez l’adaptateur secteur de la prise murale. 2. Essuyez soigneusement l’appareil avec un chiffon doux imbibé d’eau ou d’un produit de nettoyage à faible concentration. AVERTISSEMENT: Ne pas utiliser de dissolvants, tels que l’alcool, le benzène ou des diluants. L’emploi de ces produits risque de provoquer un incendie ou une décharge électrique.
  • Seite 90 Table des matières a Utilisation en toute sécurité de l’appareil ............4 a Avertissements importants ............... 4 a Instructions d’utilisation importantes ............5 a INSTRUCTIONS DE SÉCURITÉ IMPORTANTES ........6 Entretien ......................9 Icônes utilisées dans ce mode d’emploi ............9 Avant d’utiliser la caméra ..................
  • Seite 91: Avant D'utiliser La Caméra

    Avant d’installer la caméra, vérifiez si tous les éléments indiqués ci-dessous sont contenus dans l’emballage de l’appareil. Si l’un d’entre eux est manquant, contactez votre revendeur Canon. Adaptateur Télécommande d’interface VC-EX3 Caméra VC-C50i Caméra VC-C50iR sans fil WL-V5 Connecteur Fiche BNC-RCA...
  • Seite 92: Installation De La Caméra

    AVERTISSEMENT: Installez solidement la caméra. ● Contactez votre revendeur Canon pour installer la caméra au plafond. ● Si vous installez la caméra au plafond, vérifiez s’il est suffisamment résistant pour supporter le poids de la caméra, avec son support d’installation. L’installation dans un endroit peu résistant peut entraîner la chute de la caméra et provoquer des blessures graves.
  • Seite 93: Connexion Des Composants

    ● Le convertisseur grand angle ne peut pas être utilisé en mode nocturne. (→ P.32) Connexion des composants (Arrière de la caméra) VIDEO OUT DC IN 13V Câble secteur • Ordinateur • Autre VC-C50i/ VC-C50iR • Serveur de caméra en réseau • Capteur Fiche multiconnecteur •...
  • Seite 94 Avant d’utiliser la caméra Branchement au multiconnecteur Procédez de la manière suivante pour brancher les conducteurs (AWG N° 28-18) dans la fiche multiconnecteur. 1. Introduisez à fond un tournevis à lame plate dans la fente à côté de l’orifice de serrage du conducteur.
  • Seite 95 Avant d’utiliser la caméra Configuration des broches du multiconnecteur Y GND Y OUT C GND C OUT RTS OUT CTS OUT TX OUT RX OUT RTS IN CTS IN TX IN RX IN Light_ON/OFF- Light_ON/OFF+ Alarm_- Alarm_+ Sensor_- Sensor_+ N° de Entrée/ Rubrique Désignation broche...
  • Seite 96 Avant d’utiliser la caméra N° de Entrée/ Rubrique Désignation broche Direction du signal Remarques broche Sortie Signal de Interrupteur de l’éclairage Light_ON/OFF- Sortie Entrée de courant commande de externe 50V/200mA l’éclairage (max.) externe Interrupteur de l’éclairage Light_ON/OFF+ Sortie Sortie de courant externe 50V/200mA (max.) Commande d’alarme...
  • Seite 97: Mise Sous Et Hors Tension

    Avant d’utiliser la caméra Mise sous et hors tension Les caméras VC-C50i/VC-C50iR n’ont pas d’interrupteur d’alimentation. Vous pouvez mettre la caméra sous tension en branchant l’adaptateur secteur dans une prise murale. Lorsque la caméra est mise sous tension, la DEL sur la caméra passe au vert. Si le moniteur est allumé, une image apparaît à l’écran.
  • Seite 98: Commande De La Caméra Avec La Télécommande Sans Fil

    Commande de la caméra avec la télécommande sans fil Lorsque les touches de la télécommande sans fil sont utilisées, la DEL de la caméra clignote en vert (à des intervalles de 0,1 seconde). Nomenclature Touche ON/OFF (→ P.25) Pour mettre la caméra en marche et á l’arrêt.
  • Seite 99: Mise En Place Des Piles Dans La Télécommande Sans Fil

    Commande de la caméra avec la télécommande sans fil Mise en place des piles dans la télécommande sans fil La télécommande sans fil fonctionne avec deux piles de type AA. 1. Enlevez le couvercle du logement des piles. 2. Mettez les piles en place. ■...
  • Seite 100: Modification De L'angle De La Tête De La Caméra (Panorama/Inclinaison/Position De Départ)

    Les illustrations ci-dessous présentent la plage du mouvement de la tête de la caméra à partir de la position horizontale. La plage par défaut du mouvement vertical pour la VC-C50i est de 30°, mais cette plage peut être réglée jusqu’à 90° (→ P.30).
  • Seite 101: Zoom Avant/Arrière (Tele/Wide)

    Commande de la caméra avec la télécommande sans fil Zoom avant/arrière (TELE/WIDE) Le zoom permet d’augmenter (zoom avant) ou de réduire (zoom arrière) la taille du sujet sur l’écran du moniteur. Pour faire un zoom avant (TELE): Appuyez sur le côté t de la touche. BRIGHT ZOOM ■...
  • Seite 102: Mise Au Point (Focus)

    Mise au point (FOCUS) Cette section décrit comment faire la mise au point sur le sujet. Les caméras VC-C50i/ VC-C50iR sont dotées d’un mode de mise au point automatique dans lequel la caméra fait automatiquement la mise au point, et d’un mode manuel dans lequel l’opérateur peut la régler manuellement.
  • Seite 103: Réglage De La Luminosité (Bright)

    Commande de la caméra avec la télécommande sans fil Pour fixer la mise au point Appuyez sur la touche n. BRIGHT ZOOM ■ Ceci désactive la mise au point automatique et fixe la mise au point. Pour la mise au point de sujets à proximité HOME SET/OK CANCEL...
  • Seite 104: Sauvegarde D'une Position Préréglée De La Caméra (Preset)

    Pour remettre à la position initiale Appuyez sur une touche numérotée de 1 à 9. ■ Les réglages en mémoire dans les caméras VC-C50i/ VC-C50iR pour l’angle de la tête, la position du zoom et le niveau de luminosité sont rétablis.
  • Seite 105: Marche Et Arrêt De La Caméra

    Commande de la caméra avec la télécommande sans fil Marche et arrêt de la caméra La caméra est mise en marche ou à l’arrêt à l’aide de la touche p (caméra ON/OFF) de la télécommande sans fil. Les positions de préréglage mémorisées, la date, l’heure et le numéro d’identification ne sont pas annulés lorsque la caméra est mise à...
  • Seite 106: Réglages De La Caméra

    Réglages de la caméra Pour régler et afficher l’horloge et le texte et spécifier les réglages de fonctionnement de la caméra. Touches utilisées pour spécifier les réglages Les touches de la télécommande sans fil indiquées ci-dessous sont utilisées pour le réglage. 58 Touches : Déplacent le curseur de haut en bas.
  • Seite 107: Réglage De L'horloge

    Réglages de la caméra Réglage de l’horloge Utilisez la procédure suivante pour régler la date et l’heure. Vous pouvez également sélectionner vos réglages préférés pour TIME STYLE et DATE STYLE. MA I N MENU D I PLAY MENU D TE& I ME TT I NGS SET MENU DATE...
  • Seite 108: Saisie De Caractères

    Réglages de la caméra Saisie de caractères Les caractères pouvant être spécifiés sont les lettres majuscules (A à Z), les chiffres (0 à 9) et certains symboles (<, >, -, /,., : et les espaces). Le texte peut être saisi n’importe où sur l’écran en dehors de la zone des caractères.
  • Seite 109: Réglage De La Vitesse Du Mouvement De La Tête De La Caméra Et Du Mouvement Panorama

    Réglages de la caméra Réglage de la vitesse du mouvement de la tête de la caméra et du mouvement panorama Utilisez la procédure ci-dessous pour régler la vitesse à laquelle la tête de la caméra se déplace à l’horizontale et à la verticale et pour sélectionner le réglage DIRECTION MIRROR (direction du mouvement panorama de la caméra).
  • Seite 110: Réglage De La Portée Du Mouvement De La Tête De La Caméra

    Les limites pour la portée du mouvement de la tête de la caméra sont les suivantes: ±100° à gauche et à droite, 90° vers le haut et 30° vers le bas VC-C50i: MÉMO VC-C50iR: ±170° à gauche et à droite, 10° vers le haut et 90° vers le bas...
  • Seite 111: Réglage De L'exposition Automatique Ae

    Réglages de la caméra Réglage de l’exposition automatique AE Utilisez la procédure ci-dessous pour spécifier le réglage AE (réglage de luminosité). Il est inutile de régler FLICKERLESS AE. MA I N MENU RA MENU TT NG SET MENU SPEED AUTO E REFERENCE FAULT SPEE...
  • Seite 112: Réglage Du Mode Nocturne

    Réglages de la caméra Réglage du mode nocturne La sélection du mode nocturne vous permet de vérifier le sujet dans l’obscurité à l’aide d’images en noir et blanc, fournies par photographie infrarouge. Lorsque vous passez au mode nocturne, l’éclairage infrarouge intégré (DEL infrarouge) du mode nocturne se met automatiquement en marche.
  • Seite 113: Réglages Rs-232C

    Réglages de la caméra Réglages RS-232C Ces réglages sont utilisés pour contrôler les caméras VC-C50i/VC-C50iR à partir d’un ordinateur ou d’un autre périphérique. Les réglages DATA 8 BIT et NON PARITY sont fixes et le menu est utilisé uniquement pour les vérifier. DATA 8 BIT et NON PARITY sont destinés uniquement à...
  • Seite 114: Mode Id

    Utilisez la procédure ci-dessous pour attribuer un numéro ID (1 à 9) à chaque caméra (VC-C50i/VC-C50iR). Si vous ne souhaitez pas attribuer un numéro d’identification à une caméra, sélectionnez [0] pour cette caméra. En attribuant le même numéro d’identification à...
  • Seite 115: Sélection De La Caméra À Contrôler

    Mode ID Sélection de la caméra à contrôler <Exemple> Comme indiqué sur l’illustration ci-dessous, parmi les 4 caméras (ID1 à ID3) seules les caméras ayant le numéro 2 (2 caméras) sont sélectionnées pour le fonctionnement en mode ID. En temps normal, les DEL des caméras passent au vert. Vert Vert Vert...
  • Seite 116: Annulation Du Mode Id

    Mode ID Annulation du mode ID <Exemple> Dans cet exemple, la sélection effectuée dans la section précédente pour les caméras avec le numéro ID2 est annulée. Les DEL des caméras sont indiquées ci-dessous. Orange Vert Vert Orange Vérifiez les DEL sur toutes les caméras branchées adjacentes pour vous assurer que toutes les caméras reçoivent les signaux de la télécommande sans NOTE fil.
  • Seite 117: Dépannage

    Dépannage Procédez aux contrôles suivants avant de contacter votre revendeur Canon. La télécommande sans fil ne fonctionne pas. Contrôle 1: The DEL is not lit. Réponse: Vérifiez si la fiche est bien branchée et bien enfoncée dans la prise secteur. → P.17 Contrôle 2: La DEL est rouge.
  • Seite 118 Dépannage La caméra ne se déplace pas sur une position préréglée. Contrôle 1: La tête de la caméra ne se déplace pas jusqu’à la limite de la portée de son mouvement. Réponse: La tête de la caméra a été déplacée accidentellement. Appuyez sur la touche h de la télécommande sans fil.
  • Seite 119: Réglages Par Défaut D'usine

    Réglages par défaut d’usine Les réglages sont remis aux valeurs par défaut indiquées ci-dessous lorsque le produit est expédié de l’usine ou lorsque RESTORE DEFAULT a été réglé sur [YES] (→ P.33). (Réglages par défaut de la caméra) Fonction Réglage par défaut Fonction Réglage par défaut Mise au point...
  • Seite 120: Spécifications

    ±20° à partir de l’horizontale (±15° avec le convertisseur grand angle en Angle d’installation option installé) VC-C50i: 100 × 117 × 96 mm (L × P × H) (sans accessoires) Dimensions VC-C50iR: 100 × 117 × 97,6 mm (L × P × H) (sans accessoires)
  • Seite 121 Spécifications Caractéristiques Détails Télécommande Modèle WL-V5 sans fil Système Système à impulsions infrarouges Alimentation 3 V CC (2 piles de type AA) 50 × 175 × 24,5 mm (1,97 × 6,89 × 0,96 pouces) (L × P × H) (sans Dimensions accessoires) Poids...
  • Seite 123 MANUAL DE INSTRUCCIONES...
  • Seite 124 Características de la cámara para comunicación VC-C50i/VC-C50iR ■ Zoom óptico 26× y zoom digital 12× legítimos de Canon para imágenes con gran ampliación ■ Capaz de realizar tomas a bajos niveles de iluminación, del orden de 1 ■...
  • Seite 125: Exclusión De Responsabilidad

    Información sobre derechos de autor Las imágenes fijas o de vídeo grabadas con su VC-C50i/VC-C50iR no se pueden utilizar de forma que puedan infringir las leyes de los derechos de autor, o sin el consentimiento de su propietario, a menos que sea exclusivamente para uso personal.
  • Seite 126: Advertencias Importantes

    N° de teléfono del concesionario N° de modelo VC-C50i o VC-C50iR N° de serie El adaptador AC puede conectarse a la VC-C50i/VC-C50iR desde un tomacorriente AC. Se ruega consultar su manual de instrucciones para asegurarse de que su VC-C50i/VC-C50iR es compatible con este adaptador.
  • Seite 127: Instrucciones Importantes De Uso

    WEEE autorizado o con el servicio de recogida de basuras para hogares. Si desea más información acerca de la devolución y reciclado de productos WEEE, visite la web www.canon-europe.com/environment. (EEA: Noruega, Islandia y Liechtenstein)
  • Seite 128: Instrucciones De Seguridad Importantes

    8. Ubicación y palabra “equipo” se refiere a la cámara desplazamiento - No para comunicación VC-C50i/VC-C50iR ponga este equipo Canon y todos sus accesorios. sobre un carro, estante, trípode, 1. Lea las instrucciones - Deben leerse soporte o mesa todas las instrucciones de seguridad y inestables.
  • Seite 129 a Uso seguro del equipo equipo, asegúrese de que la antena alimentación o de luz eléctrica, ni sea conectada a tierra para proveer donde puedan caer sobre dichos cierta protección contra las circuitos o líneas. Cuando se instale un sobretensiones y las cargas estáticas sistema de antena exterior, debe acumuladas.
  • Seite 130 - No someta el equipo a impactos asegúrese de que el técnico utilice fuertes. piezas especificadas por Canon o que disponen de las mismas características 24. Por favor observe lo siguiente cuando que las originales. El uso de piezas de se manipulan las pilas.
  • Seite 131: Limpieza Del Equipo

    a Uso seguro del equipo Mantenimiento Limpieza del equipo 1. Desenchufe el adaptador AC del tomacorriente de la pared. 2. Limpie cuidadosamente el equipo con un paño suave humedecido con agua o un detergente neutro. ADVERTENCIA No utilice solventes inflamables como alcohol, bencina o diluyente. El uso de tales sustancias pueden producir incendio o descargas eléctricas.
  • Seite 132 ÍNDICE a Uso seguro del equipo ..................4 aAdvertencias importantes ................4 a Instrucciones importantes de uso ............5 a INSTRUCCIONES DE SEGURIDAD IMPORTANTES ........ 6 Mantenimiento ....................9 Iconos utilizados en este manual de instrucciones .......... 9 Antes de usar el producto ..................11 Comprobación de la cámara y sus accesorios ..........
  • Seite 133: Antes De Usar El Producto

    Comprobación de la cámara y sus accesorios Antes de instalar el producto, compruebe que todos los elementos indicados abajo se encuentran incluidos en el paquete del producto. Si hay algún elemento faltante, póngase en contacto con su concesionario Canon. Controlador sin Adaptador de Cámara VC-C50i...
  • Seite 134: Instalación Del Producto

    ADVERTENCIA Instale firmemente la cámara. ● Para instalar la cámara en el techo, póngase en contacto con su concesionario Canon. ● Si instala la cámara en el techo, compruebe que sea lo suficientemente resistente para soportar el peso de la cámara, incluyendo el soporte de instalación. La instalación en un lugar débil puede provocar la caída de la cámara y causar lesiones de gravedad.
  • Seite 135: Conexión De Los Componentes

    ● El convertidor gran angular no se puede utilizar en el modo nocturno. (→ p.32) Conexión de los componentes (Parte posterior de la cámara) DC IN 13V VIDEO OUT Cable AC • PC • Otra VC-C50i/ VC-C50iR • Servidor para cámaras de • Sensor Enchufe multiconector • Alarma •...
  • Seite 136 Antes de usar el producto Conexión al multiconector Utilice el siguiente procedimiento para conectar los conductores (AWG N°28-18) en el enchufe multiconector. 1. Inserte a fondo un destornillador de punta plana en la ranura existente junto al orificio de fijación del conductor. ■...
  • Seite 137 Antes de usar el producto Disposición de las patillas del multiconector Y GND Y OUT C GND C OUT RTS OUT CTS OUT TX OUT RX OUT RTS IN CTS IN TX IN RX IN Light_ON/OFF- Light_ON/OFF+ Alarm_- Alarm_+ Sensor_- Sensor_+ N°...
  • Seite 138 Antes de usar el producto N° de Entrada/ Elemento Nombre de la patilla Dirección de la señal Notas patilla salida Señal de control Interruptor de iluminación de iluminación Light_ON/OFF- Salida Entrada de corriente externa 50V/200mA externa (máx.) Interruptor de iluminación Light_ON/OFF+ Salida Salida de corriente...
  • Seite 139: Conexión Y Desconexión De La Alimentación

    Antes de usar el producto Conexión y desconexión de la alimentación La cámara VC-C50i/VC-C50iR no dispone de interruptor de alimentación. La cámara se enciende al conectar el adaptador AC en un tomacorriente de pared. Al encenderse la cámara, el LED de la cámara se ilumina en verde. Si el monitor está encendido, aparece una imagen en la pantalla.
  • Seite 140: Controlando La Cámara Con El Controlador Sin Hilos

    Controlando la cámara con el controlador sin hilos El LED de la cámara parpadea en verde (a intervalos de 0,1 segundo) mientras se están usando los botones del controlador sin hilos. Nomenclatura Botón ON/OFF de la cámara (→ p.25) Enciende y apaga la cámara. Botón ZOOM (→...
  • Seite 141: Instalación De Las Pilas En El Controlador Sin Hilos

    Controlando la cámara con el controlador sin hilos Instalación de las pilas en el controlador sin hilos El controlador sin hilos requiere dos pilas tipo AA. 1. Retire la tapa del compartimiento de las pilas. 2. Inserte las pilas. ■ Asegúrese de que las polaridades (+ y –) queden correctamente posicionadas.
  • Seite 142: Cambio Del Ángulo Del Cabezal De La Cámara (Giro/Inclinación/Posición Inicial)

    En las siguientes figuras se muestra el rango de movimiento del cabezal de la cámara con respecto a la posición horizontal. El rango predeterminado para el movimiento hacia arriba de la VC-C50i es de 30°, pero puede ajustarse a 90° (→ p.30). 30°...
  • Seite 143: Zoom De Acercamiento/Alejamiento (Tele/Wide)

    Controlando la cámara con el controlador sin hilos Zoom de acercamiento/alejamiento (TELE/WIDE) La función zoom permite aumentar (zoom de acercamiento) y disminuir (zoom de alejamiento) el tamaño del sujeto en la pantalla del monitor. Para el zoom de acercamiento (TELE): Oprima el lado t del botón.
  • Seite 144: Enfoque (Focus)

    Enfoque (FOCUS) Esta sección describe cómo enfocar el sujeto. La VC-C50i/VC-C50iR dispone del modo de enfoque automático, para que la cámara enfoque automáticamente en el sujeto, y de un modo de enfoque manual, en que el usuario puede ajustar el enfoque con la mano. (El ajuste predeterminado es enfoque automático.)
  • Seite 145: Ajuste De La Luminosidad (Bright)

    Controlando la cámara con el controlador sin hilos Para fijar el enfoque Oprima el botón n. BRIGHT ZOOM ■ Se desactiva el enfoque automático y se fija el enfoque. Para enfocar sujetos cercanos Oprima el botón r. HOME SET/OK CANCEL ■...
  • Seite 146: Almacenamiento De Una Posición De Preajuste De La Cámara (Preset)

    Para restablecer una posición de preajuste Oprima un botón del 1 al 9. ■ La VC-C50i/VC-C50iR restablece los ajustes de ángulo del cabezal de la cámara, posición del zoom y nivel de luminosidad. ● Durante las operaciones de preajuste, los movimientos para giro e inclinación de la cámara se realizan a las velocidades definidas para la...
  • Seite 147: Encendido Y Apagado De La Cámara

    Controlando la cámara con el controlador sin hilos Encendido y apagado de la cámara La cámara se enciende y apaga con el botón p (cámara encendida/apagada) del controlador sin hilos. Aunque apague la cámara, las posiciones de preajuste almacenadas, la fecha, la hora y el número de identificación no se borrarán.
  • Seite 148: Ajustes De La Cámara

    Ajustes de la cámara Permiten configurar y visualizar el reloj y el texto, y especificar los ajustes de funcionamiento de la cámara. Botones utilizados para especificar los ajustes Los botones del controlador sin hilos mostrados abajo se utilizan para los ajustes. Botones 58 : Mueve el cursor hacia arriba y abajo.
  • Seite 149: Ajuste Del Reloj

    Ajustes de la cámara Ajuste del reloj Utilice el procedimiento de abajo para ajustar la fecha y la hora. También podrá definir sus ajustes preferidos de TIME STYLE y DATE STYLE. MA I N MENU D I PLAY MENU D TE& I ME TT I NGS SET MENU DATE...
  • Seite 150: Introducción De Caracteres

    Ajustes de la cámara Introducción de caracteres Los caracteres que se pueden especificar son letras mayúsculas (A a Z), números (0 a 9) y algunos símbolos (<, >, -, /,., : y espacios). El texto puede insertarse en cualquier lugar de la pantalla fuera del área de caracteres.
  • Seite 151: Ajuste De La Velocidad Del Movimiento Del Cabezal De La Cámara Y De La Operación De Giro

    Ajustes de la cámara Ajuste de la velocidad del movimiento del cabezal de la cámara y de la operación de giro Utilice el procedimiento de abajo para ajustar la velocidad en que la cámara efectúa los movimientos de giro e inclinación y para seleccionar el ajuste DIRECTION MIRROR (dirección del giro del cabezal de la cámara).
  • Seite 152: Ajuste Del Rango De Movimiento Del Cabezal De La Cámara

    Los límites para el rango de movimiento del cabezal de la cámara son como se indica abajo: ±100° a izquierda y derecha, 90° hacia arriba y 30° hacia abajo VC-C50i: MEMO VC-C50iR: ±170° a izquierda y derecha, 10° hacia arriba y 90° hacia abajo...
  • Seite 153: Ajuste De La Exposición Automática Ae

    Ajustes de la cámara Ajuste de la exposición automática AE Utilice el siguiente procedimiento para especificar el ajuste de AE (ajuste de luminosidad). No es necesario ajustar FLICKERLESS AE. MA I N MENU RA MENU TT NG SET MENU SPEED AUTO E REFERENCE FAULT...
  • Seite 154: Ajustes Del Modo Nocturno

    Ajustes de la cámara Ajustes del modo nocturno La selección del modo nocturno le permite comprobar el sujeto en la oscuridad, utilizando imágenes en blanco y negro proporcionadas por la fotografía infrarroja. Al cambiar al modo nocturno, se activa automáticamente la luz infrarroja incorporada (LED infrarrojo) para el modo nocturno.
  • Seite 155: Ajustes Rs-232C

    Ajustes de la cámara Ajustes RS-232C Estos ajustes se utilizan para controlar la VC-C50i/VC-C50iR desde un PC u otro dispositivo. Los ajustes DATA 8 BIT y NON PARITY se encuentran fijos, y el menú se utiliza sólo para su verificación. DATA 8 BIT y NON PARITY son sólo para lectura.
  • Seite 156: Modo Id

    ID. Ajuste del número ID Utilice el siguiente procedimiento para asignar un número ID (1 a 9) a cada cámara (VC-C50i/VC-C50iR). Si no desea asignar un número ID a la cámara, seleccione [0] para esa cámara. La asignación del mismo número ID a múltiples cámaras le permitirá...
  • Seite 157: Selección De La Cámara A Controlar

    Modo ID Selección de la cámara a controlar <Ejemplo> Tal como se observa en la figura de abajo, de las 4 cámaras (ID1 a ID3), sólo están seleccionadas las cámaras con el número ID 2 (2 cámaras). En operación normal, los LEDs de las cámaras se ilumina en verde. Verde Verde Verde...
  • Seite 158: Cancelación Del Modo Id

    Modo ID Cancelación del modo ID <Ejemplo> En este ejemplo, la selección realizada en la sección precedente de las cámaras con el número ID 2 se cancela. Los LEDs de las cámaras son como se indica abajo. Naranja Verde Verde Naranja Compruebe los LEDs de todas las cámaras conectadas adyacentes para asegurarse de que todas las cámaras están recibiendo las señales del...
  • Seite 159: Problemas Y Solución De Problemas

    Problemas y solución de problemas Compruebe lo siguiente antes de ponerse en contacto con su concesionario Canon. El controlador sin hilos no funciona. Comprobación 1: El LED no está iluminado. Solución: Compruebe que la clavija esté insertada en el tomacorriente, correctamente y hasta el fondo.
  • Seite 160 Problemas y solución de problemas La cámara no se mueve a una posición de preajuste. Comprobación 1: El cabezal de la cámara no se mueve hasta el límite de su rango de movimiento. Solución: Algo ha movido directamente el cabezal de la cámara. Oprima el botón h del controlador sin hilos.
  • Seite 161: Ajustes Predeterminados De Fábrica

    Ajustes predeterminados de fábrica Cuando el producto se expide de fábrica o cuando se ajusta RESTORE DEFAULT a [YES] (→ p.33), los ajustes se encuentran en los valores predeterminados indicados abajo. (Ajustes predeterminados de la cámara) Ajuste Ajuste Elemento Elemento predeterminado predeterminado Enfoque...
  • Seite 162: Especificaciones

    ±20° de la horizontal (±15° con el convertidor gran angular opcional Ángulo de instalación instalado) VC-C50i: 100 × 117 × 96 mm (An × Pr × Al) (sin accesorios) Dimensiones VC-C50iR: 100 × 117 × 97,6 mm (An × Pr × Al) (sin accesorios) Peso VC-C50i: Aprox.
  • Seite 163 Especificaciones Elemento Detalles Controlador Modelo WL-V5 sin hilos Sistema Sistema de pulso infrarrojo Fuente de 3 V CC (2 pilas tipo AA) alimentación 50 × 175 × 24,5 mm (1,97 × 6,89 × 0,96 pulg.) (An × Pr × Al) (sin Dimensiones accesorios) Peso...
  • Seite 165 GEBRAUCHSANLEITUNG...
  • Seite 166: Einführung

    Einführung Wir danken Ihnen für Ihr Vertrauen in die Canon Überwachungskamera VC-C50i/ VC-C50iR. Bitte lesen Sie die Gebrauchsanleitung gut durch, um einen korrekten, sicheren Betrieb des Geräts zu gewährleisten. Lesen Sie vor dem ersten Einsatz vor allem die Hinweise unter “a Wichtige Sicherheitshinweise”, und befolgen Sie alle Anweisungen.
  • Seite 167 Batterien der betreffenden Art verkauft werden. Die Batterien werden unentgeltlich für den Verbraucher zurückgenommen. Informationen zum Urheberrecht Lauf- und Standbilder, die mit der VC-C50i/VC-C50iR aufgezeichnet wurden, dürfen nicht in einer das Urheberrecht verletzenden Weise verwendet werden bzw. nicht ohne die Genehmigung des Urheberrechtsinhabers, ausgenommen für rein persönliche Zwecke.
  • Seite 168: Wichtige Sicherheitshinweise

    Erläuterungen zu lesen. MEMO a Wichtige Warnhinweise Das Netzteil des VC-C50i/VC-C50iR kann an eine gewöhnliche Netzsteckdose angeschlossen werden. Schlagen Sie in der Bedienungsanleitung nach, um sicherzustellen, daß lhr VC-C50i/VC-C50iR für diesen Adapter geeignet ist. – Die Steckdose sollte sich in der Nähe des Geräts befinden und leicht zugänglich sein.
  • Seite 169: Wichtige Hinweise Zur Sicherheit

    Wichtige Sicherheitshinweise a WICHTIGE HINWEISE ZUR SICHERHEIT Bei den folgenden Sicherheitshinweisen Tische. Das Gerät könnte herunterfallen bezeichnet der Ausdruck “Gerät” die Canon und jemanden verletzen oder aber Überwachungskamera VC-C50i/VC-C50iR und beschädigt werden. Eine Kombination von Gerät und Transportwagen ist mit Vorsicht deren Zubehör.
  • Seite 170 a Wichtige Sicherheitshinweise Stoßspannungen und statische Aufladung 15. Überlastung - Wandsteckdosen und zu schützen. Abschnitt 810 der Nationalen Verlängerungskabel dürfen nicht Vorschriften über elektrische überlastet werden; es besteht die Gefahr Ausrüstungen (National Electric Code) eines Brands oder Elektroschocks. weist Informationen über die 16.
  • Seite 171 Sie sich vergewissern, daß Batterien folgende Anweisungen. das Kundendienstpersonal nur solche Nichtbeachten kann dazu führen, daß die Ersatzteile verwendet hat, die von Canon Batterien explodieren oder starke Wärme, vorgegeben sind, oder die gleiche Funken oder korrodierende Flüssigkeit Eigenschaften wie die Originalteile abgeben.
  • Seite 172: Wartung

    a Wichtige Sicherheitshinweise Wartung Reinigung des Geräts 1. Ziehen Sie das Netzadapterkabel von der Wandsteckdose ab. 2. Wischen Sie das Gerät sorgfältig mit einem trockenen, weichen Tuch ab, das mit etwas Wasser oder mildem Reinigungsmittel befeuchtet ist. WARNUNG Verwenden Sie keine brennbaren Lösungsmittel, wie z.B. Alkohol, Benzin oder Farbverdünner.
  • Seite 173 INHALT a Wichtige Sicherheitshinweise ................4 In dieser Anleitung verwendete Symbole ............4 a Wichtige Warnhinweise ................4 a WICHTIGE HINWEISE ZUR SICHERHEIT ..........5 Wartung ......................8 Vor der Inbetriebnahme des Geräts ................ 10 Überprüfen der Kamera und ihres Zubehörs ..........10 Bezeichnungen ....................
  • Seite 174: Vor Der Inbetriebnahme Des Geräts

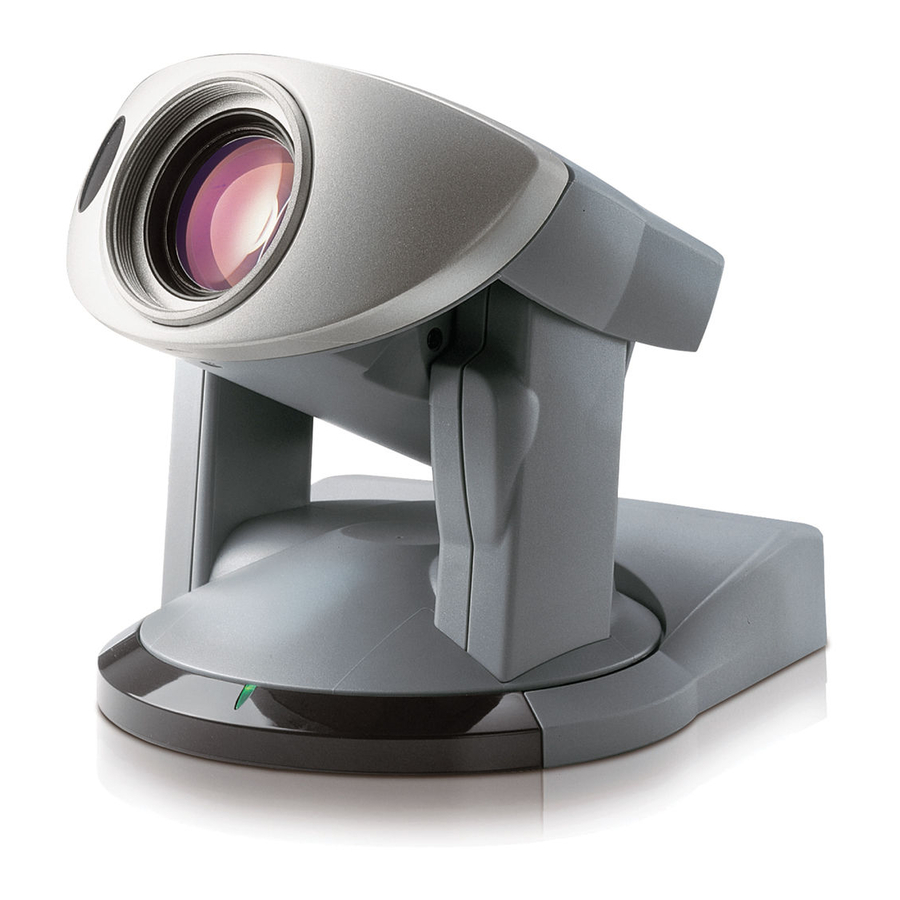
    Vor der Inbetriebnahme des Geräts Überprüfen der Kamera und ihres Zubehörs Vergewissern Sie sich vor dem Installieren, daß in der Verpackung alle folgende Gegenstände enthalten sind. Falls etwas fehlen sollte, wenden Sie sich bitte an Ihren Canon- Händler. oder VC-C50i Kamera...
  • Seite 175: Installieren Des Geräts

    • Stärke der Montageplatte: 1 mm WARNUNG Installieren Sie die Kamera auf sichere Weise. ● Für eine Deckenmontage der Kamera sollten Sie sich an Ihren Canon-Händler wenden. ● Vergewissern Sie sich vor der Deckenmontage, daß die Decke stark genug ist, um Kamera und Halterung zu tragen.
  • Seite 176: Einsatz Des Weitwinkelkonverters

    ● Der Weitwinkelkonverter kann im Nachtmodus nicht verwendet werden. (→ S.31) Anschließen der Komponenten (Rückseite der Kamera) DC IN 13V VIDEO OUT Netzkabel • PC • Andere VC-C50i/ VC-C50iR • Netzwerkkameraserver • Sensor Mehrfachsteckverbinder-Stecker • Alarm • Monitor BNC-Stecker Zur VIDEO-IN-Buchse...
  • Seite 177 Vor der Inbetriebnahme des Geräts Verdrahten des Mehrfachsteckverbinder-Steckers Verdrahten Sie Kabeladern (AWG Nr. 28-18) folgendermaßen am Mehrfachsteckverbinder-Stecker. 1. Führen Sie einen Minusschraubendreher bis zum Anschlag in den Schlitz neben dem Klemmenloch ein. ■ Die Klemme im Loch öffnet sich dabei. 2.
  • Seite 178: Mehrfachsteckverbinder Pinbelegung

    Vor der Inbetriebnahme des Geräts Mehrfachsteckverbinder Pinbelegung Y GND Y OUT C GND C OUT RTS OUT CTS OUT TX OUT RX OUT RTS IN CTS IN TX IN RX IN Light_ON/OFF- Light_ON/OFF+ Alarm_- Alarm_+ Sensor_- Sensor_+ Eingang/ Gegenstand Pin-Nr. Pin-Name Signalrichtung Anmerkungen...
  • Seite 179: Ein-/Ausgänge Für Externe Geräte

    Vor der Inbetriebnahme des Geräts Eingang/ Gegenstand Pin-Nr. Pin-Name Signalrichtung Anmerkungen Ausgang Schalter für externe Steuersignal für Light_ON/OFF- Ausgang Stromeingang Beleuchtung, externe 50V/200mA (max.) Beleuchtung Schalter für externe Beleuchtung, Light_ON/OFF+ Ausgang Stromausgang 50V/200mA (max.) Alarm- Alarmsteuerung, Ausgang Alarm_- Stromeingang Steuersignal 50V/200mA (max.) Alarmsteuerung, Ausgang...
  • Seite 180: Ein- Und Ausschalten Des Geräts

    Vor der Inbetriebnahme des Geräts Ein- und Ausschalten des Geräts Die VC-C50i/VC-C50iR Kamera weist keinen Hauptschalter auf. Schalten Sie die Kamera ein, indem Sie sie über den Netzadapter an der Wandsteckdose anschließen. Wenn die Stromversorgung zur Kamera eingeschaltet wird, leuchtet die LED-Lampe der Kamera grün auf.
  • Seite 181: Ansteuern Der Kamera Mit Der Fernbedienung

    Ansteuern der Kamera mit der Fernbedienung Während Verwendung der Fernbedienungstasten blinkt die LED-Lampe der Kamera grün (in 0,1 s Intervallen). Bezeichnungen Kamera EIN/AUS-Taste (→ S.24) Schaltet die Kamera ein und aus. ZOOM-Taste (→ S.20) BRIGHT-Taste (→ S.22) Zum Vergrößern oder Verkleinern eines Zum Einstellen der Helligkeit des BRIGHT ZOOM...
  • Seite 182: Einlegen Der Batterien In Die Fernbedienung

    Ansteuern der Kamera mit der Fernbedienung Einlegen der Batterien in die Fernbedienung Die Fernbedienung wird mit zwei Mignonzellen zu betreiben. 1. Nehmen Sie den Batteriefachdeckel ab. 2. Legen Sie die Batterien ein. ■ Achten Sie darauf, daß die Pole (+ und –) korrekt ausgerichtet sind.
  • Seite 183: Bewegen Der Kamera (Schwenken/Neigen/Ausgangsposition)

    Abweichung von der gespeicherten Position wird dann korrigiert und die Bewegung wieder normalgestellt. Bewegungsbereich des Kamerakopfs Folgende Werte zeigen die Kamerakopfbewegung aus der Horizontalen. Die Voreinstellung für Bewegung nach oben ist bei der VC-C50i 30°, der Bereich kann aber bis zu 90° betragen (→ S.29). 30° 100°...
  • Seite 184: Heranzoomen/Wegzoomen (Tele/Weit)

    Ansteuern der Kamera mit der Fernbedienung Heranzoomen/Wegzoomen (TELE/WEIT) Die Zoomfunktion vergrößert (Heranzoomen) und verkleinert (Wegzoomen) das Objekt des Bildschirms. Heranzoomen (TELE): Drücken Sie auf die t Seite der Taste. BRIGHT ZOOM ■ Bei gedrückter Taste erhöht sich die Zoomgeschwindigkeit wie folgend. Langsam Schnell HOME...
  • Seite 185: Scharfeinstellung (Fokus)

    Ansteuern der Kamera mit der Fernbedienung Scharfeinstellung (FOKUS) Dieser Abschnitt erläutert das Fokussieren. Die VC-C50i/VC-C50iR hat einen Autofokusmodus, womit die Kamera automatisch auf ein Objekt fokussiert, und einen manuellen Fokusmodus, wo die Bedienungsperson manuell scharf einstellt. (Die Standardeinstellung ist Autofokus.) Zum Aktivieren des Autofokusmodus Betätigen Sie die a Taste.
  • Seite 186: Einstellen Der Helligkeit (Bright)

    Ansteuern der Kamera mit der Fernbedienung Festhalten des Fokuspunkts Betätigen Sie die n Taste. BRIGHT ZOOM ■ Damit wird der Autofokus abgeschaltet und der Fokuspunkt festgehalten. Fokussieren auf naheliegende Objekte HOME Betätigen Sie die r Taste. SET/OK CANCEL ■ Die Kamera wird damit auf manuellen Fokusmodus umgeschaltet, während Sie den Fokuspunkt näher an die ∞...
  • Seite 187: Speichern Einer Voreingestellten Kameraposition (Preset)

    ■ Jegliche früheren Voreinstellungen werden überschrieben. Aufrufen einer Voreinstellposition Drücken Sie auf eine Taste 1 bis 9. ■ Die VC-C50i/VC-C50iR stellt sich gemäß der Speicherwerte von Kamerakopfwinkel, Zoomposition und Helligkeit ein. ● Während des Betriebs entsprechend der Voreinstellungen wird die Kamera gemäß...
  • Seite 188: Ein- Und Ausschalten Der Kamera

    Ansteuern der Kamera mit der Fernbedienung Ein- und Ausschalten der Kamera Die Kamera wird mit der p Taste (Kamera EIN/AUS) der Fernbedienung ein- und ausgeschaltet. Auch nach Ausschalten der Kamera bleiben die gespeicherten Voreinstellpositionen, Datum, Uhrzeit und Kennummer erhalten. Ausschalten der Kamera Betätigen Sie bei eingeschalteter Kamera die p Taste.
  • Seite 189: Kameraeinstellungen

    Kameraeinstellungen Zur Einstellung und Anzeige von Zeit und Text sowie zur Voreinstellung der Kamera. Tasten für Vorgabe der Einstellungen Die folgenden Fernbedienungstasten dienen der Einstellung. 58 Tasten : Bewegt den Cursor nach oben und unten. 6 Taste BRIGHT ZOOM : Bewegt den Cursor nach rechts. Außerdem zum Vorrücken auf die nächste Ebene.
  • Seite 190: Einstellen Der Zeit

    Kameraeinstellungen Einstellen der Zeit Gehen Sie zum Einstellen von Datum und Uhrzeit wie folgend vor. Auch Einstellungen für TIME STYLE und DATE STYLE sind verfügbar. MA I N MENU D I PLAY MENU D TE& I ME TT I NGS SET MENU DATE D I SPLAY...
  • Seite 191: Eingabe Von Zeichen

    Kameraeinstellungen Eingabe von Zeichen Eingebbar sind Großbuchstaben (A bis Z), Ziffern (0 bis 9) und einige Symbole (<, >, -, /,., : und Leerstelle). Text kann außerhalb des Zeichenbereichs überall auf den Bildschirm gesetzt werden. Wiederholen Sie Schritte w und e der folgenden Prozedur für jedes eingegebene Zeichen.
  • Seite 192: Einstellen Der Geschwindigkeit Und Schwenkbewegung Des Kamerakopfs

    Kameraeinstellungen Einstellen der Geschwindigkeit und Schwenkbewegung des Kamerakopfs Gehen Sie zum Einstellen der Geschwindigkeit der Schwenk- und Neigebewegung des Kamerakopfs sowie zur Wahl der Einstellung DIRECTION MIRROR (Richtung des Kamerakopfschwenks) wie folgend vor. MA I N MENU RA MENU RA MENU SET MENU SPEED AUTO...
  • Seite 193: Einstellen Des Bewegungsbereichs Des Kamerakopfs

    Zur Grenzposition unter Beobachtung des Monitorbilds fahren. Die Grenzwerte für den Bewegungsbereich des Kamerakopfs sind wie folgend: ±100° links und rechts, 90° nach oben, 30° nach unten VC-C50i: MEMO VC-C50iR: ±170° links und rechts, 10° nach oben, 90° nach unten...
  • Seite 194: Einstellen Der Helligkeit (Ae)

    Kameraeinstellungen Einstellen der Helligkeit (AE) Legen Sie die AE (Helligkeit) wie folgend fest. Bei FLICKERLESS AE brauchen Sie keine Einstellung vorzunehmen. MA I N MENU RA MENU TT NG SET MENU SPEED AUTO E REFERENCE FAULT SPEE AUTO D I SP MENU MO A RANGE...
  • Seite 195: Nachtmodus-Einstellungen

    Kameraeinstellungen Nachtmodus-Einstellungen Im Nachtmodus können Sie Motive in dunkler Umgebung anhand von Schwarzweißbildern erfassen, die durch Infrarotfotografie abgebildet werden. Beim Aktivieren des Nachtmodus wird das eingebaute Infrarotlicht (Infrarot-LED) automatisch eingeschaltet. Das Licht wird 30 Minuten später automatisch wieder ausgeschaltet. MENU RA MENU SPEED AUTO...
  • Seite 196: Einstellungen Der Rs-232C-Schnittstelle

    Kameraeinstellungen Einstellungen der RS-232C-Schnittstelle Hiermit läßt sich die VC-C50i/VC-C50iR von einem PC oder anderen Gerät her ansteuern. Die Einstellungen DATA 8 BIT und NON PARITY liegen fest, das Menü dient also nur zur Kontrolle. DATA 8 BIT und NON PARITY sind Read-Only.
  • Seite 197: Id-Modus

    Fernbedienung aktiviert. Hiermit erzielen Sie den sogenannten ID-Modus-Betrieb. Vorgabe der Kennummer Weisen Sie wie folgend jeder Kamera (VC-C50i/VC-C50iR) eine Kennummer (1 bis 9) zu. Falls Sie einer Kamera keine Kennummer zuweisen wollen, wählen Sie für die betreffende Kamera [0]. Durch Zuweisen einer einzigen Kennummer für mehrere Kameras können Sie diese Kamera gleichzeitig ansteuern.
  • Seite 198: Wahl Der Anzusteuernden Kamera

    ID-Modus Wahl der anzusteuernden Kamera <Beispiel> Wie folgend gezeigt, werden von den 4 Kameras (ID1 bis ID3) nur die Kameras mit der Kennummer 2 (2 Kameras) für ID-Modus-Betrieb gewählt. Bei normalem Betrieb leuchten die Kamera-LED-Lampen grün. Grün Grün Grün Grün ●...
  • Seite 199: Aufheben Des Id-Modus

    ID-Modus Aufheben des ID-Modus <Beispiel> In diesem Beispiel heben wir die Wahl der Kameras mit Kennummer 2, die im vorigen Abschnitt beschrieben wurde, wieder auf. Die Kamera-LED-Lampen sind zuerst wie folgend. Orange Grün Grün Orange Überprüfen Sie die LED-Lampen aller daneben angeschlossenen Kameras, um sicherzustellen, daß...
  • Seite 200: Fehlersuche

    Fehlersuche Kontrollieren Sie folgendes, bevor Sie sich an Ihren Canon-Händler wenden. Die Fernbedienung funktioniert nicht. Prüfung 1: Die LED-Lampe leuchtet nicht. Abhilfe: Vergewissern Sie sich, daß der Stecker an die Wandsteckdose angeschlossen und ganz eingesteckt ist. → S.16 Prüfung 2: Die LED-Lampe ist rot.
  • Seite 201 Fehlersuche Die Kamera geht nicht in die Voreinstellposition. Prüfung 1: Der Kamerakopf bewegt sich nicht bis zur eingestellten Grenzposition. Der Kamerakopf wurde etwas verdreht. Drücken Sie die h Taste der Abhilfe: Fernbedienung. → S.19 Prüfung 2: Der Bewegungsbereich für Schwenken/Neigen wurde nach dem Abspeichern der Voreinstellposition verändert.
  • Seite 202: Werksvoreinstellungen

    Werksvoreinstellungen Wenn das Gerät vom Werk versandt wird, oder wenn RESTORE DEFAULT auf [YES] (→ S.32) gesetzt wurde, sind die folgenden Werksvoreinstellungen aktiv. (Kameragrundeinstellungen) Gegenstand Grundstellung Gegenstand Grundstellung Fokus Auto Voreinstellung Keine Helligkeit Normal Zeit und Text Nicht angezeigt (Grundwerte des Einstellbildschirms) Gegenstand Einstellung BAUD RATE...
  • Seite 203: Technische Daten

    ±20° aus der Horizontalen (±15° bei Einsatz des optionalen Montagewinkel Weitwinkelkonverters) VC-C50i: 100 × 117 × 96 mm (B × T × H) (ausgen. Zusätze) Abmessungen VC-C50iR: 100 × 117 × 97,6 mm (B × T × H) (ausgen. Zusätze) Gewicht VC-C50i: ca.
  • Seite 204 Technische Daten Gegenstand Daten Fernbedienung Modell WL-V5 System Infrarotimpuls Stromversorgung DC 3 V (2 Mignonzellen) Abmessungen 50 × 175 × 24,5 mm (B × T × H) (ausgen. Zusätze) Gewicht ca. 79 g (ausgen. Batterien) Modell PA-V16 Netzadapter (Option) Eingang AC 100-240 V, 50/60 Hz, 50-65 VA Ausgang DC 13 V, 1,8 A (max)
  • Seite 205 MANUALE DI ISTRUZIONI...
  • Seite 206: Caratteristiche Della Telecamera Per Comunicazioni Vc-C50I/Vc-C50Ir

    Caratteristiche della telecamera per comunicazioni VC-C50i/VC-C50iR ■ Zoom ottico 26× e zoom digitale 12× autentici Canon per la ripresa a grande ingrandimento ■ Possibilità di scatto anche a livelli di solo 1 lux ■...
  • Seite 207: Esclusione Di Responsabilità

    Il contenuto di questo manuale può essere soggetto a modifiche senza preavviso. CANON e il marchio CANON sono marchi registrati di Canon Inc. Altri nomi di prodotti e aziende citati in questo manuale sono marchi o marchi registrati delle rispettive aziende.
  • Seite 208: Avvertimenti Importanti

    Avvertimenti importanti L’adattatore a corrente alternata può venire collegato alla VC-C50i/VC-C50iR e ad una presa di corrente alternata di rete. Controllare sul manuale di istruzioni che la VC-C50i/ VC-C50iR utilizzata sia compatibile con questo adattatore. – La presa di corrente deve trovarsi nelle vicinanze dell’apparecchio e deve essere facilmente accessibile.
  • Seite 209: Istruzioni Di Sicurezza Importanti

    In queste istruzioni di sicurezza, la parola all’apparecchio stesso. Una combinazione “apparecchio” si riferisce alla telecamera per di apparecchio e carrello deve essere comunicazioni VC-C50i/VC-C50iR Canon e a spostata con cautela. Arresti bruschi, forza eccessiva e superfici irregolari tutti i suoi accessori.
  • Seite 210 Canon o con le stesse caratteristiche del pezzo originale. 14. Sovraccarico - Non sovraccaricare prese Sostituzioni non autorizzate possono di corrente e cavi di prolunga perché...
  • Seite 211 21. Quando si verifica una delle seguenti condizioni, spegnere immediatamente l’apparecchio, scollegarlo dalla fonte di alimentazione principale e contattare il più vicino rivenditore Canon. Non continuare ad usare l’apparecchio perché questo può causare incendi o scosse elettriche. - L’apparecchio emette fumo, calore, suoni anomali o odori strani.
  • Seite 212: Pulizia Dell'apparecchio

    a Uso sicuro dell’apparecchio Manutenzione Pulizia dell’apparecchio 1. Scollegare l’adattatore CA dalla presa di corrente. 2. Pulire bene l’apparecchio con un panno morbido inumidito con acqua o detergente leggero. AVVERTIMENTO Non usare solventi infiammabili come alcool, benzina o diluenti. L’uso di tali sostanze può causare incendi o scosse elettriche. 3.
  • Seite 213 INDICE a Uso sicuro dell’apparecchio ................. 4 Icon usate in questo manuale di istruzioni ............4 a Avvertimenti importanti ................4 a ISTRUZIONI DI SICUREZZA IMPORTANTI ..........5 Manutenzion ....................8 Prima di usare il prodotto ..................10 Controllo della telecamera e dei suoi accessori ........10 Nomenclatura ....................
  • Seite 214: Prima Di Usare Il Prodotto

    Controllo della telecamera e dei suoi accessori Prima di installare il prodotto, controllare che tutti gli elementi sotto indicati siano inclusi nella confezione del prodotto. Se dovesse mancare qualcosa, contattare il proprio rivenditore Canon. Telecamera VC-C50i Telecamera VC-C50iR Telecomando WL-V5 Adattatore di...
  • Seite 215: Installazione Del Prodotto

    AVVERTIMENTO Installare saldamente la telecamera. ● Quando si installa la telecamera a soffitto, contattare il proprio rivenditore Canon. ● Quando si installa la videocamera a soffitto, controllare che il soffitto sia abbastanza robusto da reggere il peso della telecamera inclusa la staffa di installazione. L’installazione in luoghi deboli può...
  • Seite 216: Collegamento Dei Componenti

    ● Il convertitore grandangolare non può venire usato nella modalità notte (→ p.31). Collegamento dei componenti (Retro della telecamera) DC IN 13V VIDEO OUT Cavo CA • Personal computer • Un’altra VC-C50i/ VC-C50iR • Server di rete per telecamera Connettore multiplo • Sensore • Allarme • Monitor Adattatore...
  • Seite 217 Prima di usare il prodotto Collegamento via connettore multiplo Per collegare cavi (AWG N° 28-18) al connettore multiplo, usare la procedura seguente. 1. Inserire un cacciavite a fondo nella fessura accanto al foro di fissaggio del cavo. ■ L’interno del foro di fissaggio del cavo di apre. 2.
  • Seite 218 Prima di usare il prodotto Disposizione piedini del connettore multiplo Y GND Y OUT C GND C OUT RTS OUT CTS OUT TX OUT RX OUT RTS IN CTS IN TX IN RX IN Light_ON/OFF- Light_ON/OFF+ Alarm_- Alarm_+ Sensor_- Sensor_+ N°...
  • Seite 219 Prima di usare il prodotto N° Ingresso/ Voce Nome piedino Direzione del segnale Note piedino uscita Segnale di Interruttore di Light_ON/OFF- Uscita Ingresso attuale controllo illuminazione esterna da illuminazione 50 V/200 mA (max.) esterna Interruttore di Light_ON/OFF+ Uscita Uscita attuale illuminazione esterna da 50 V/200 mA (max.) Segnale di...
  • Seite 220: Accensione E Spegnimento

    Prima di usare il prodotto Accensione e spegnimento La telecamera VC-C50i/VC-C50iR non dispone di un interruttore di alimentazione. Si può accendere la telecamera collegando l’adattatore CA ad una presa di corrente. Quando la telecamera è accesa, il LED della telecamera si illumina in verde. Se il monitor è acceso, un’immagine appare sullo schermo.
  • Seite 221: Controllo Della Telecamera Con Il Telecomando

    Controllo della telecamera con il telecomando Mentre si usano i tasti del telecomando, il LED della telecamera lampeggia in verde (a intervalli di 0,1 secondi). Nomenclatura Tasto ON/OFF telecamera (→ p.24) Accende e spegne la telecamera. Tasto ZOOM (→ p.20) Tasto BRIGHT (→...
  • Seite 222: Inserimento Delle Pile Nel Telecomando

    Controllo della telecamera con il telecomando Inserimento delle pile nel telecomando Il telecomando necessita di due pile tipo AA. 1. Rimuovere il coperchio del comparto pile. 2. Inserire le pile. ■ Fare attenzione a che i poli (+ e –) siano orientati correttamente.
  • Seite 223: Cambiamento Dell'angolazione Della Testata Telecamera (Movimento Orizzontale/Movimento Verticale/Posizione Base)

    Raggio di movimento della testata telecamera Le cifre sotto indicano il raggio di movimento della testata telecamera da una posizione orizzontale. Il raggio default di movimento verso l’alto per la VC-C50i è di 30°, ma può essere impostato a 90° (→ p.29).
  • Seite 224: Zoomata In Avvicinamento/Allontanamento (Tele/Wide)

    Controllo della telecamera con il telecomando Zoomata in avvicinamento/allontanamento (TELE/WIDE) La funzione zoom aumenta (zoomata in avvicinamento) o diminuisce (zoomata in allontanamento) le dimensioni del soggetto sullo schermo del monitor. Per zoomare in avvicinamento (TELE): Premere il lato t del tasto. BRIGHT ZOOM ■...
  • Seite 225: Messa A Fuoco (Focus)

    Messa a fuoco (FOCUS) Questa sezione descrive come mettere a fuoco il soggetto. La VC-C50i/VC-C50iR dispone di un modo di messa a fuoco automatica, in cui la telecamera mette a fuoco automaticamente il soggetto e di un modo di messa a fuoco manuale, in cui l’operatore può regolare manualmente la messa a fuoco.
  • Seite 226: Regolazione Della Luminosità (Bright)

    Controllo della telecamera con il telecomando Per fissare la messa a fuoco Premere il tasto n. BRIGHT ZOOM ■ Questo disattiva la messa a fuoco automatica e blocca la messa a fuoco. Per mettere a fuoco soggetti vicini HOME SET/OK CANCEL Premere il tasto r.
  • Seite 227: Memorizzazione Di Una Posizione Telecamera Preselezionata (Preset)

    ■ Eventuali informazioni di preselezione precedenti sono sovrascritte. Per richiamare una posizione preselezionata Premere un tasto da 1 a 9. ■ La VC-C50i/VC-C50iR ritorna alla angolazione testata telecamera, posizione zoom e livello di luminosità preselezionati. ● Durante le operazioni preselezionate, la telecamera si muove orizzontalmente e verticalmente alle velocità...
  • Seite 228: Accensione E Spegnimento Della Telecamera

    Controllo della telecamera con il telecomando Accensione e spegnimento della telecamera La telecamera viene accesa e spenta con il tasto p (ON/OFF telecamera) del telecomando. Anche se si spegne la telecamera, le posizioni preselezionate memorizzate, la data, l’ora e il numero ID non sono azzerati.
  • Seite 229: Impostazioni Telecamera

    Impostazioni telecamera Impostare e visualizzare orologio e testo e specificare le impostazioni di funzionamento della telecamera. Tasti usati per specificare le impostazioni I tasti del telecomando sotto indicati sono usati per l’impostazione. Tasti 58 : Spostano il cursore in alto e in basso. Tasto 6 BRIGHT ZOOM...
  • Seite 230: Impostazione Dell'orologio

    Impostazioni telecamera Impostazione dell’orologio Usare il seguente procedimento per impostare la data e l’ora. Si possono anche selezionare le impostazioni preferite per TIME STYLE e DATE STYLE. MA I N MENU D I PLAY MENU D TE& I ME TT I NGS SET MENU DATE D I SPLAY...
  • Seite 231: Inserimento Di Caratteri

    Impostazioni telecamera Inserimento di caratteri I caratteri che possono essere specificati sono lettere maiuscole (da A a Z), numeri (da 0 a 9) e alcuni simboli (<, >, -, /,., : e spazi). Il testo può essere inserito in qualsiasi punto dello schermo al di fuori dell’area caratteri.
  • Seite 232: Impostazione Della Velocità Di Movimento Della Testata Telecamera E Del Movimento Orizzontale

    Impostazioni telecamera Impostazione della velocità di movimento della testata telecamera e del movimento orizzontale Usare il seguente procedimento per impostare la velocità di movimento orizzontale e verticale della testata telecamera e per selezionare la direzione dell’impostazione DIRECTION MIRROR (direzione di movimento orizzontale della testata telecamera). MA I N MENU RA MENU...
  • Seite 233: Impostazione Del Raggio Di Movimento Della Testata Telecamera

    I limiti per il raggio di movimento della testata telecamera sono come segue: ±100° a sinistra e destra, 90° in alto e 30° in basso VC-C50i: MEMO ±170° a sinistra e destra, 10° in alto e 90° in basso...
  • Seite 234: Impostazione Dell'ae

    Impostazioni telecamera Impostazione dell’AE Usare il seguente procedimento per specificare l’impostazione AE (regolazione luminosità). Non è necessario impostare FLICKERLESS AE. MA I N MENU RA MENU TT NG SET MENU SPEED AUTO E REFERENCE FAULT SPEE AUTO D I SP MENU MO A RANGE...
  • Seite 235: Impostazioni Della Modalità Notte

    Impostazioni telecamera Impostazioni della modalità notte L’attivazione della modalità notte permette di controllare un soggetto al buio usando le immagini in bianco e nero permesse dalla fotografia ad infrarossi. Quando si attiva la modalità notte, l’illuminazione ad infrarossi incorporata (LED ad infrarossi) per la modalità notte si accende automaticamente.
  • Seite 236: Impostazioni Rs-232C

    Impostazioni telecamera Impostazioni RS-232C Queste impostazioni sono usate per controllare la VC-C50i/VC-C50iR da un computer o altro dispositivo. Le impostazioni DATA 8 BIT e NON PARITY sono fisse e il menu è usato solo per controllarle. DATA 8 BIT e NON PARITY sono solo per la lettura.
  • Seite 237: Modo Id

    Modo ID Quando più VC-C50i/VC-C50iR sono collegate e installate, tutte le telecamere nel raggio operativo del telecomando eseguono simultaneamente le operazioni specificate. In questa situazione, le telecamere possono essere controllate individualmente assegnando numeri ID diversi a ciascuna telecamera e quindi specificando il numero ID desiderato con il telecomando.
  • Seite 238: Selezione Della Telecamera Da Controllare

    Modo ID Selezione della telecamera da controllare <Esempio> Come mostrato nella figura sotto, di 4 telecamere (da ID1 a ID3) solo le telecamere con il numero ID 2 (2 telecamere) sono selezionate per il funzionamento nel modo ID. Nel funzionamento normale, i LED delle telecamere si illuminano in verde.
  • Seite 239: Disattivazione Del Modo Id

    Modo ID Disattivazione del modo ID <Esempio> In questo esempio, la selezione compiuta nella sezione precedente delle telecamere con il numero ID 2 viene annullata. I LED delle telecamere appaiono come mostrato sotto. Arancione Verde Verde Arancione Controllare i LED di tutte le telecamere collegate adiacenti per verificare che tutte le telecamere ricevano i segnali del telecomando.
  • Seite 240: Soluzione Di Problemi

    Soluzione di problemi Controllare quanto segue prima di contattare il proprio rivenditore Canon. Il telecomando non funziona. Controllo 1: Il LED non è illuminato. Rimedio: Controllare che la spina sia inserita correttamente e a fondo nella presa di corrente. → p.16 Controllo 2: Il LED è...
  • Seite 241 Soluzione di problemi La telecamera non si sposta ad una posizione preselezionata. Controllo 1: La testata telecamera non si sposta fino al limite del suo raggio di movimento. Rimedio: Qualcosa ha spostato direttamente la testata telecamera. Premere il tasto h del telecomando. → p.19 Controllo 2: Il raggio di movimento orizzontale/verticale è...
  • Seite 242: Impostazioni Default Di Fabbrica

    Impostazioni default di fabbrica Quando il prodotto esce dalla fabbrica o quando RESTORE DEFAULT è stato impostato su [YES] (→ p.32), le impostazioni sono regolate sui valori di default sotto indicati. (Impostazioni default della telecamera) Voce Default Voce Default Messa a fuoco Automatica Preselezione Nessuna...
  • Seite 243: Dati Tecnici

    ±20° dall’orizzontale (±15° con il convertitore grandangolare opzionale Angolazione di installazione installato) VC-C50i: 100 × 117 × 96 mm (L × P × H) (esclusi attacchi) Dimensioni VC-C50iR: 100 × 117 × 97,6 mm (L × P × H) (esclusi attacchi)
  • Seite 244 Dati tecnici Voce Dettagli Telecomando Modello WL-V5 Sistema Sistema a impulsi infrarossi Alimentazione 3 V CC (2 pile tipo AA) 50 × 175 × 24,5 mm (L × P × H) (esclusi attacchi) Dimensioni Peso Circa 79 g (escluse le pile) Modello PA-V16 Adattatore...
  • Seite 246 8801 Trans Canada Hwy. ST. Laurent Québec H4S 1Z6 CANON CANADA INC. CALGARY OFFICE 2828, 16th Street, N.E. Calgary, Alberta T2E 7K7, Canada For all inquiries concerning this product, call toll free in Canada 1-800-OK-CANON EUROPE, AFRICA & MIDDLE EAST CANON EUROPA N.V.

Diese Anleitung auch für:

Vc-c50ir

Inhaltsverzeichnis