RICOO RW-R06 Montageanleitung
Universelle wandhalterung
Universal wall bracket
Universelle Wandhalterung
RW-R06
S0674
°
±
Rotation
Drehung
Scope of the delivery
Plastic bag (big) / Plastikbeutel (groß)
Lieferumfang
A
S10 x 50MM
6 pcs/Stk.
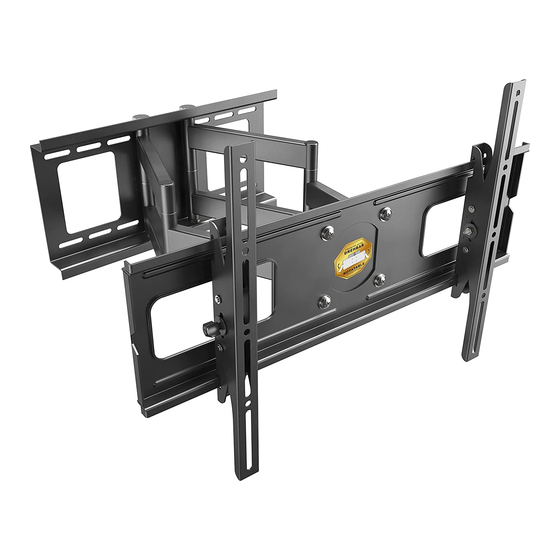
Wall mount (pre-assembled)
Wandhalterung (vormontiert)
H
M4 x 16MM
4 pcs/Stk.
Please note: some plastik bag compartments may be empty
!
Bitte beachten: manche Plastikbeutel-Fächer können leer sein.
Please note: The numbering on the plastic bag may di er!
!
Bitte beachten: die Durchnummerierung auf dem Plastikbeutel kann abweichen!
Please note: Metal washers from the compartment "F" are not required for assembly.
!
Bitte beachten: Metallscheiben aus dem Fach „F" sind für die Montage nicht erforderlich.
Rails (pre-assembled, 2 pcs.)
Plastic bag (small) / Plastikbeutel (klein)
Schienen (vormontiert, 2 Stk.)
!
Please measure distance between mounting holes!
STEP 1
Bitte den Lochabstand vor der Montage nachmessen!
SCHRITT 1
Mounting holes
Befestigungslöcher
Vertical /
Senkrecht
Horizontal / Waagerecht
TV / monitor back
TV / Monitor Rückseite
120
°
Swivel
Schwenkung
15
°
±
Tilt
Neigung
B
C
D
E
F
Plain washers
Metal washer
Toothed washer
Zahnscheibe
M8 x 50MM
Unterlegscheiben
Plastic cylinder
Metallscheibe
6 pcs/Stk.
8 pcs/Stk.
Plastikzylinder
6 pcs/Stk.
I
J
K
L
M
M5 x 30MM
M5 x 16MM
M6 x 30MM
M6 x 16MM
M8 x 30MM
4 pcs/Stk.
4 pcs/Stk.
4 pcs/Stk.
4 pcs/Stk.
4 pcs/Stk.
Beachten Sie:
O
Q
R
P
Einige Elemente
können bereits ab
Plastic washer
Werk an den Schienen
M6 x 14MM
Plastikscheibe
vormontiert sein.
4 pcs/Stk.
4 pcs/Stk.
2 pcs/Stk.
2 pcs/Stk.
Please check BEFORE installation distance between
mounting holes on your TV / monitor!
!
Bitte überprüfen Sie VOR der Montage
den Lochabstand zwischen den Befestigungslöchern
an Ihrem TV / Monitor!
This wall mount supports the following distance between holes:
Diese Wandhalterung unterstützt folgende Lochabstände:
Horizontal / Waagerecht:
min. 50 mm - max. 690 mm
min. 50 mm - max. 400 mm
Vertical / Senkrecht:
STEP 2
SCHRITT 2
Place bubble level
central on the top
of the wall plate
Bringen Sie
die Wasserwaage
zentral oben auf
der Wandplatte an.
STEP 3 A
G
SCHRITT 3 A
M4 x 30MM
16 pcs/Stk.
4 pcs/Stk.
1
N
M8 x 16MM
4 pcs/Stk.
Drilling
Bohrung
50 mm
S
10 mm
Bubble Level
Wasserwaage
1 pcs/Stk.
STEP 3 B
SCHRITT 3 B
1
Stud finder
Balkenfinder
Drilling
Bohrung
50 mm
Affixing the bubble level
Anbringung der Wasserwaage
Wall plate
Wandplatte
Solid concrete mounting
Befestigung an der Massivbetonwand
Wood stud mounting
Befestigung an der Holzbalkenwand
5 mm
S
Concrete Wall
Betonwand
A
E
B
E
B

Verwandte Anleitungen für RICOO RW-R06


Inhaltszusammenfassung für RICOO RW-R06
- Seite 1 Universal wall bracket Affixing the bubble level STEP 2 Universelle Wandhalterung Anbringung der Wasserwaage SCHRITT 2 RW-R06 ° S0674 Swivel Schwenkung Place bubble level central on the top of the wall plate Bringen Sie die Wasserwaage zentral oben auf der Wandplatte an.
- Seite 2 STEP 6 B Attaching rails to screen Alignment of front panel STEP 4 Anbringung der Schienen an den Bildschirm Ausrichtung der Frontplatte Wall plate SCHRITT 6 B SCHRITT Wandplatte Wall mount: front view Wandhalterung: Frontansicht For TVs with a flat back -------------------------------------------------------------------------------- ...