Werbung
Verfügbare Sprachen
Verfügbare Sprachen
Quicklinks
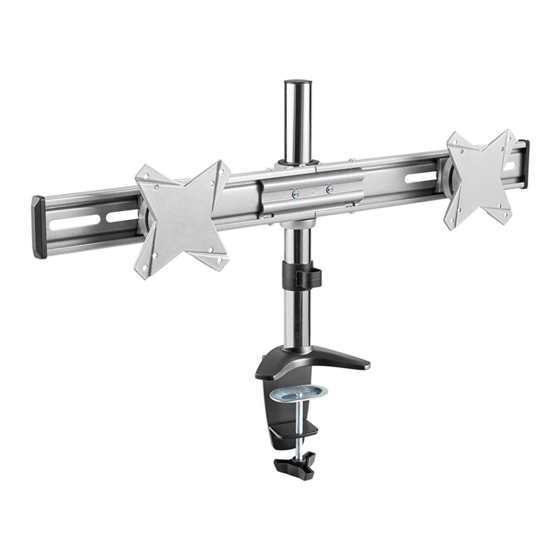
TV / Monitor Tischhalterung
v.15.9
TS3611
75x75
(17,6lbs) x2
100x100
1
MONTAGEANLEITUNG
ACHTUNG: NIEMALS DAS MAXIMAL
ZULÄSSIGE BELASTUNGSGEWICHT
ÜBERSCHREITEN. MISSACHTUNG
KANN ZU SACHSCHÄDEN ODER
SCHWEREN VERLETZUNGEN FÜHREN!
8kg x2
MAX
Deutsch
English
Werbung

Verwandte Anleitungen für RICOO TS3611


Inhaltszusammenfassung für RICOO TS3611
- Seite 1 TV / Monitor Tischhalterung MONTAGEANLEITUNG ACHTUNG: NIEMALS DAS MAXIMAL ZULÄSSIGE BELASTUNGSGEWICHT ÜBERSCHREITEN. MISSACHTUNG KANN ZU SACHSCHÄDEN ODER SCHWEREN VERLETZUNGEN FÜHREN! v.15.9 8kg x2 75x75 TS3611 (17,6lbs) x2 100x100 Deutsch English...
- Seite 2 ACHTUNG: Lesen Sie die gesamte Bedienungsanleitung durch, bevor Sie mit der Montage beginnen. WARNUNG • Beginnen Sie nicht mit der Montage, bis Sie alle Anweisungen und Warnungen, welche in dieser Montageanleitung vorhanden sind, durchgelesen und verstanden haben. Wenn Sie Fragen zu den Anweisungen oder Warnungen haben, kontaktieren Sie bitte Ihren Händler.
-
Seite 3: Lieferumfang
Lieferumfang WICHTIG: Stellen Sie vor der Montage sicher, dass alle Teile welche hier aufgeführt sind, bei der Lieferung dabei sind. Sollten Teile fehlen oder defekt sein, kontaktieren Sie Ihren Händler. A (x1) B (x1) D (2x) F (x1) E (x1) D (x1) Paket M x2 M4x14 (x4) - Seite 4 Den Lochabstand vor der Montage nachmessen Bitte überprüfen Sie VOR der Montage den Lochabstand zwischen den Befestigungs- löchern an Ihrem TV / Monitor! Befestigungslöcher Vertikal / Senkrecht Horizontal / Waagerecht Bildschirm Rückseite Diese Wandhalterung unterstützt folgende Lochabstände: 75mm , 100mm Horizontal / Waagerecht 75mm , 100mm Vertikal / Senkrecht...
- Seite 5 Schritt 3 Schritt 4 * Das Aufkleben des Gummipads ist in der Regel nur bei den Tischen mit Glas-Tischplatten notwendig und dient dem Schutz der Glasoberfläche der Tischplatte. festziehen festziehen Höhe einstellen lösen Fixierring festziehen aufkleben* Deutsch English...
- Seite 6 Schritt 5 5a. Montage an die Tischkante Beachten : min. Tischdicke = 10mm max. Tischdicke = 90mm festziehen Tischklemme an der Tischkante ausrichten und mit dem Drehknopf fixieren. 5b. Montage im Tischloch Demontieren Sie die Tischklemme wie abgebildet. Montageschraube Gummipad Montieren Sie die Grundplatte an der Tischklemme mit den Schrauben (diese wurden zuvor entfernt).
- Seite 7 Beachten: min. Lochdurchmesser = 10mm max. Lochdurchmesser = 70mm Fixierschraube durch das Tischloch durchführen und in die Grundplatte einschrauben. Fixierschraube fest anziehen. Schritt 6 festziehen Deutsch English...
- Seite 8 Schritt 7 Oberseite des TVs · Wählen Sie die zu Ihrem Monitor passenden Schrauben. · Montieren Sie die Frontplatte am Monitor. · Fixieren Sie die Frontplatte mit Hilfe von den dazugehörigen Schrauben. Ziehen Sie alle Schrauben nach. ACHTUNG: Nicht überziehen! Deutsch English...
- Seite 9 Schritt 8 festziehen Deutsch English...
- Seite 10 Schritt 9 Schritt 10 Je nach Gewicht des Displays kann es notwendig sein Anpassungen an der Kugelgelenk- Vorrichtung durchzuführen. Deutsch English...
- Seite 11 Fertig Die Tischhalterung kann um +/-15° geschwenkt, um +/-15° geneigt oder um 360° gedreht werden. Wartung • Prüfen Sie in regelmäßigen Abständen (mindestens alle drei Monate), ob alle Schrauben an dem Produkt fest angezogen sind. • Bei Fragen kontaktieren Sie Ihren Händler. Deutsch English...
- Seite 12 Monitor Desk Mount INSTALLATION MANUAL CAUTION: DO NOT EXCEED RATED LISTED WEIGHT. SERIOUS INJURY OR PROPERTY DAMAGE MAY OCCUR! v.15.9 8kg x2 75x75 TS3611 (17,6lbs) x2 100x100 English Deutsch...
- Seite 13 NOTE: Read the entire instruction manual before you start installation and assembly. WARNING • Do not begin the installation until you have read and understood all the instructions and warnings contained in this installation sheet. If you have any questions regarding any of the instructions or warnings, please contact your local distributor.
- Seite 14 Component Checklist IMPORTANT: Ensure that you have received all parts according to the component checklist prior to installation. If any parts are missing or faulty, telephone your local distributor for a replacement. A (x1) B (x1) C (2x) F (x1) E (x1) D (x1) Package M x2...
- Seite 15 Measure distance between mounting holes Please check BEFORE installation distance between mounting holes on your TV / monitor! Mounting holes Vertical / Perpendicularly Horizontally Display back This wall mount supports the following distance between holes: Horizontally 75mm , 100mm 75mm , 100mm Vertical / Perpendicularly Step 1 Step 2...
- Seite 16 Step 3 Step 4 * The adhesive bonding of the rubber pad is normally necessary only if it is a glass-topped table. It serves to protect the glass surface of the tabletop. tighten tighten Adjust height loosen Fixation ring tighten stick on* English Deutsch...
- Seite 17 Step 5 5a. Edge Installation Note: min. desktop thickness = 10mm max. desktop thickness = 90mm tighten Turn the knob to make clamp fit to desk edge, then secure it tightly. 5b. Hole Installation Disassemble the desk clamp and select the right parts for using hole installation. Attach screw Rubberpad Re-install the base plate with three retained screws, then tighten securely.
- Seite 18 Note: min. hole diameter =10mm max. hole diameter =70mm Insert the adjust screw into base plate through the hole. Then using the adjust screw to fix and tighten it securely. Step 6 tighten English Deutsch...
- Seite 19 Step 7 Top of the display Screw the VESA plate onto the display. Tighten all screws but do not over tighten. English Deutsch...
- Seite 20 Step 8 loosen, adjust position, then tighten English Deutsch...
- Seite 21 Step 9 Step 10 Slightly loosen or tighten the screws as required due to different weights of the displays. English Deutsch...
- Seite 22 Done Adjust to the desired position or tilt. Maintenance • Check that the bracket is secure and safe to use at regular intervals(at least every three months). • Please contact your distributor if you have any questions. English Deutsch...