Herunterladen Inhalt Inhalt Diese Seite drucken
V-ZUG DEHMR 5 Betriebsanleitung
Vorschau ausblenden Andere Handbücher für DEHMR 5:

Werbung

Verfügbare Sprachen

Verfügbare Sprachen

V-ZUG AG
Dunstabzug
Hotte d'aspiration
Cappa aspirante
Range hood
DEHMR 5/7/8
Betriebsanleitung
Mode d'emploi
Istruzioni per l'uso
Operating instructions

Werbung

Inhaltsverzeichnis
loading

Inhaltszusammenfassung für V-ZUG DEHMR 5

  • Seite 1 V-ZUG AG Dunstabzug Hotte d’aspiration Cappa aspirante Range hood DEHMR 5/7/8 Betriebsanleitung Mode d’emploi Istruzioni per l’uso Operating instructions...
  • Seite 2: Inhaltsverzeichnis

    INHALTSVERZEICHNIS EMPFEHLUNGEN UND HINWEISE ............................. 3 CHARAKTERISTIKEN ................................4 MONTAGE ..................................... 5 BEDIENUNG ..................................7 WARTUNG ..................................... 8 SOMMAIRE CONSEILS ET SUGGESTIONS ............................10 CARACTERISTIQUES ................................. 11 INSTALLATION ..................................12 UTILISATION ..................................14 ENTRETIEN ..................................15 INDICE CONSIGLI E SUGGERIMENTI ............................17 CARATTERISTICHE ................................
  • Seite 3: Empfehlungen Und Hinweise

    EMPFEHLUNGEN UND HINWEISE Diese Gebrauchsanleitung gilt für mehrere Geräte-Ausführungen. Es ist möglich, dass einzelne Ausstat- tungsmerkmale beschrieben sind, die nicht auf Ihr Gerät zutreffen. 2° MONTAGE • Der Hersteller haftet nicht für Schäden, die auf eine fehlerhafte oder unsachgemäße Montage zurückzuführen sind.
  • Seite 4: Charakteristiken

    CHARAKTERISTIKEN Platzbedarf Komponenten Bez. Menge Produktkomponenten Haubenkörper komplett mit: Bedienelemente, Beleuch- tung, Filter, Absaugeinheit Luftstromrichtungsgitter Reduzierflansch ø 150-120 mm Flansch mit Rückstauklappe ø 150 mm Bez. Menge Produktkomponenten Schrauben (8 für 52cm Dunstabzugshaube) Schrauben 2,9 x 9,5 Menge Unterlagen Betriebsanleitung...
  • Seite 5: Montage

    MONTAGE Montage des Haubenkörpers BEVOR DIE HAUBE AM HÄNGESCHRANK MONTIERT WIRD, WIE FOLGT VORGEHEN: • Das Absaugpaneel herausziehen. • Das Paneel vom Haubenkörper lösen, in dem der spezielle Hebel des Befestigungszapfens verschoben wird. • Die Fettfilter entfernen. • Die elektrische Steckverbindung der Bedienelemente abhängen, indem die Verbinder gelöst werden.
  • Seite 6: Anschlüsse

    Anschlüsse ANSCHLUSS IN ABLUFTVERSION Bei Abluftbetrieb kann die Haube vom Installateur ø 150 ø 120 wahlweise mittels Rohr oder Schlauch (ø150 oder 120mm) an die Außenrohrleitung angeschlossen wer- den. • Den Flansch mit Rückstauklappe 10 anbringen. • Das Rohr mit geeigneten Rohrschellen fixieren. Das hierzu erforderliche Material wird nicht mitgeliefert.
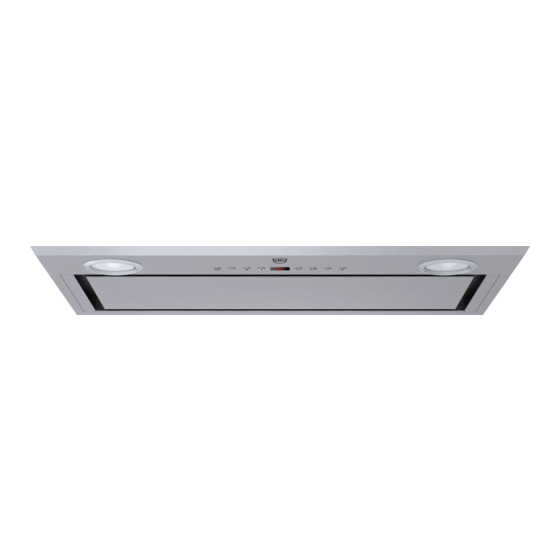
  • Seite 7: Bedienung

    BEDIENUNG Schalttafel Taste Funktion Display Schaltet den Absaugmotor bei der ersten Geschwindig- Zeigt die eingestellte Geschwindigkeit an keitsstufe ein und bei allen Betriebsgeschwindigkeiten aus. Vermindert die Betriebsgeschwindigkeit. Zeigt die eingestellte Geschwindigkeit an Erhöht die Betriebsgeschwindigkeit. Zeigt die eingestellte Geschwindigkeit an Macht einmal pro Sekunde abwechselnd HI und die Rest- Aktiviert von jeder Geschwindigkeit aus, auch bei abge- stelltem Motor, die Intensivgeschwindigkeit, die auf 10...
  • Seite 8: Wartung

    WARTUNG FERNBEDIENUNG (OPTION) Dieses Gerät kann mit einer Fernbedienung gesteuert werden, welche mit alkalischen Zink-Kohle-Batterien 1,5 V des Standardtyps LR03-AAA versorgt wird (nicht mitgeliefert). • Die Fernbedienung nicht in die Nähe von Hitzequellen legen. • Batterien müssen vorschriftsmäßig entsorgt werden. Öffnen des Paneels •...
  • Seite 9 Aktivkohle-Geruchsfilter (Filterversion) Die Aktivkohle-Geruchsfilter sind spülmaschinengeeignet und müssen gewaschen werden, sobald am Display die Led S1 blinkt, oder mindestens alle 4 Monate, oder auch öfter, je nach Intensität des Gebrauchs. Nach max. 5 Wäschen müssen die Filter erneuert werden. Die Alarmmeldung, wenn zuvor aktiviert, erfolgt nur, wenn der Absaugmotor zugeschaltet ist.
  • Seite 10: Conseils Et Suggestions

    CONSEILS ET SUGGESTIONS La présente notice d'emploi vaut pour plusieurs versions de l'appareil. Elle peut contenir des descriptions d'accessoires ne figurant pas dans votre appareil. 2° INSTALLATION • Le fabricant décline toute responsabilité en cas de dommage dû à une installation non correcte ou non con- forme aux règles de l’art.
  • Seite 11: Caracteristiques

    CARACTERISTIQUES Encombrement Composants Réf. Q.té Composants de Produit Corps Hotte équipé de: Commandes, Lumière, Groupe Ventilateur, Filtres Grille en Direction Sortie Air Buse de Réduction ø 150-120 mm Buse avec clapet ø 150 mm Réf. Q.té Composants pour l ’installation Vis (8 pour Hotte de 52 cm) Vis 2,9 x 9,5 Q.té...
  • Seite 12: Installation

    INSTALLATION Montage du corps de hotte AVANT DE MONTER LA HOTTE DANS L’ARMOIRE MURALE SUIVRE LA MARCHE CI-DESSOUS : • Ouvrir le panneau en le tirant. • Décrocher le panneau du corps de la hotte, en faisant cou- lisser le levier du goujon de fixation spécialement prévu. •...
  • Seite 13 Branchements SORTIE AIR VERSION ASPIRANTE En cas d’installation en version aspirante, brancher la ø 150 ø 120 hotte à la tuyauterie de sortie via un tube rigide ou flexible de ø 150 ou 120 mm, au choix de l’installateur. • Insérer la buse avec clapet 10. •...
  • Seite 14: Utilisation

    UTILISATION Tableau de commande Touche Fonction Affichage Branche le moteur d’aspiration à la première vitesse Affiche la vitesse réglée et le débranche à toutes les vitesses. Diminue la vitesse d’exercice. Affiche la vitesse réglée Augmente la vitesse d’exercice. Affiche la vitesse réglée Active la vitesse Intensive à...
  • Seite 15: Entretien

    ENTRETIEN TELECOMMANDE (FOURNIE SUR DEMANDE) Il est possible de commander cet appareil au moyen d’une télécom- mande, alimentée avec des piles alcalines zinc-charbon 1,5 V du type standard LR03-AAA (non compris). • Ne pas ranger la télécommande à proximité de sources de chaleur. •...
  • Seite 16 Filtres anti-odeur à charbon actif (version filtrante) Également lavable au lave-vaisselle, le nettoyer lorsque la Led S1 clignote ou au moins tous les 4 mois ou plus fréquemment en cas d’utilisation particulièrement intense, en garantissant le fonctionnement jusqu’à un maximum de 5 lavages avant son remplacement. Le signal d’alarme, si préalablement activé, a lieu seulement lorsque le moteur d’aspiration est en marche.
  • Seite 17: Consigli E Suggerimenti

    CONSIGLI E SUGGERIMENTI Questo libretto di istruzioni per l'uso è previsto per più versioni dell' apparecchio. É possibile che siano descritti singoli particolari della dotazione, che non riguardano il Vostro apparecchio. 2° INSTALLAZIONE • Il produttore declina qualsiasi responsabilità per danni dovuti ad installazione non corretta o non conforme alle regole dell’arte.
  • Seite 18: Caratteristiche

    CARATTERISTICHE Ingombro Componenti Rif. Q.tà Componenti di Prodotto Corpo Cappa completo di: Comandi, Luce, Filtri, Grup- po Aspiratore. Griglia Direzionata Flangia di riduzione ø 150-120 mm Flangia con Valvola ø 150 mm Rif. Q.tà Componenti di Installazione Viti (8 per la cappa da 52 cm) Viti 2,9 x 9,5 Q.tà...
  • Seite 19: Installazione

    INSTALLAZIONE Montaggio Corpo Cappa PRIMA DI MONTARE LA CAPPA AL PENSILE AGIRE COME SEGUE: • Aprire il pannello aspirante tirandolo. • Sganciare il pannello dal corpo cappa facendo scorrere l’apposita leva del perno di fissaggio. • Togliere i filtri Antigrasso. •...
  • Seite 20 Connessioni USCITA ARIA VERSIONE ASPIRANTE Per installazione in Versione Aspirante collegare la ø 150 ø 120 Cappa alla tubazione di uscita per mezzo di un tubo rigido o flessibile di ø150 o 120 mm, la cui scelta è la- sciata all'installatore. •...
  • Seite 21: Uso

    Quadro comandi Tasto Funzione Display Accende il motore di aspirazione alla prima velocità Visualizza la velocità impostata e lo spegne a tutte le velocità.. Decrementa la velocità di esercizio. Visualizza la velocità impostata Incrementa la velocità di esercizio. Visualizza la velocità impostata Attiva la velocità...
  • Seite 22: Manutenzione

    MANUTENZIONE TELECOMANDO (OPZIONALE) Questo apparecchio può essere comandato per mezzo di un tele- comando, alimentato con pile alcaline zinco-carbone da 1,5 V del tipo standard LR03-AAA (non incluse). • Non riporre il telecomando in prossimità di fonti di calore. • Non disperdere le pile nell’ambiente, depositarle negli appositi contenitori.
  • Seite 23 Filtri antiodore al Carbone attivo (Versione Filtrante) Lavabile anche in lavastoviglie va pulito quando lampeggia il Led S1 o almeno ogni 4 mesi o più frequentemente, per un uso particolarmente intenso, garantendo il funzionamento fino ad un massimo di 5 lavaggi prima della sostituzione. La segnalazione di Allarme, se preventiva- mente attivata, si verifica solo quando è...
  • Seite 24: Recommendations And Suggestions

    RECOMMENDATIONS AND SUGGESTIONS The Instructions for Use apply to several versions of this appliance. Accordingly, you may find de- scriptions of individual features that do not apply to your specific appliance. 2° INSTALLATION • The manufacturer will not be held liable for any damages resulting from incorrect or improper instal- lation.
  • Seite 25: Characteristics

    CHARACTERISTICS Dimensions Components Ref. Q.ty Product Components Hood Body, complete with :Controls, Light, Blower, Filters Directioned grid Reducer Flange ø 150-120 mm Damper ø 150 mm Ref. Q.ty Installation Components Screws (8 for 52 cm Hood) Screws 2,9 x 9,5 Q.ty Documentation Instruction Manual 2 25...
  • Seite 26: Installation

    INSTALLATION Fitting the Hood canopy BEFORE FITTING THE HOOD TO THE WALL UNIT, PROCEED AS FOLLOWS: • Open the suction panel by turning the specific knob. • Disconnect the panel from the hood canopy by sliding the fixing pin lever. •...
  • Seite 27 Connections DUCTED VERSION AIR EXHAUST SYSTEM When installing the ducted version, connect the hood to ø 150 ø 120 the chimney using either a flexible or rigid pipe ø 150 or 120mm, the choice of which is left to the installer. •...
  • Seite 28: Use

    Control panel Button Function Display Turns the suction motor on at speed one and off at Displays the set speed any speed. Decreases the working speed. Displays the set speed Increases the working speed. Displays the set speed Activate intensive speed from any other speed, Displays HI and the time remaining once very second.
  • Seite 29: Maintenance

    MAINTENANCE REMOTE CONTROL (OPTIONAL) The appliance can be controlled using a remote control powered by a 1.5 V carbon-zinc alkaline batteries of the standard LR03- AAA type (not included). • Do not place the remote control near to heat sources. •...
  • Seite 30: Lighting Unit

    Activated Charcoal Filter (Recirculation Version) Can be washed in the dishwasher. It must be washed when Led S1 flashes or at least once eve- ry 4 months, or more frequently if use is particularly intense. Guaranteed to operate after washing for up to a maximum of 5 times before requiring replacement. The Alarm signal, if it has been activated, only appears when the Suction motor is turned on.
  • Seite 32 V-ZUG AG Industriestrasse 66, CH-6301 Zug Tel. +41 (0)58 767 67 67, Fax +41 (0)58 767 61 61 info@vzug.com, www.vzug.com Service-Center: Tel. 0800 850 850 J61023.910-0 991.0356.222_01 - 141029...

Diese Anleitung auch für:

Dehmr 7Dehmr 8

Inhaltsverzeichnis