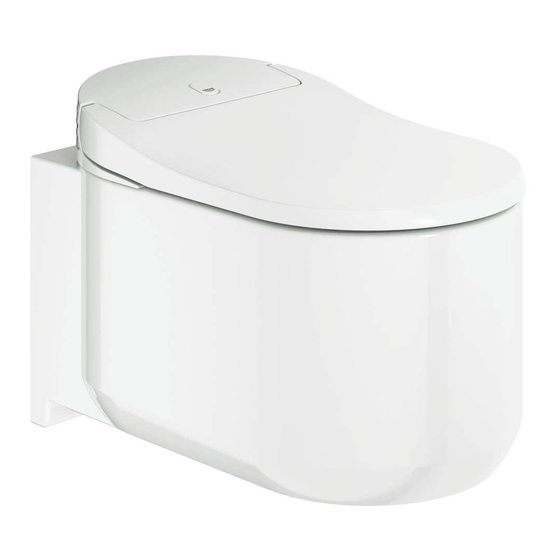
Grohe 39354SH0 Installationsanleitung
Vorschau ausblenden
Andere Handbücher für 39354SH0:
- Bedienungsanleitung (1858 Seiten) ,
- Kurzanleitung (227 Seiten) ,
- Installationsanleitung (126 Seiten)

Verwandte Anleitungen für Grohe 39354SH0


Inhaltszusammenfassung für Grohe 39354SH0
- Seite 1 Sensia ARENA ® GROHE GERMANY 99.0537.031/ÄM 235404/03.16 www.grohe.com 39354SH0 18801SH0 INSTALLATIONSANLEITUNG ..2 INSTALLATION MANUAL ..6 MANUEL D’INSTALLATION ..10 445 - 485 210 - 250 ±0.00 48 - 88...
- Seite 2 Dieses Handbuch besteht aus zwei Teilen. Der erste enthält Sicherheitshinweise und Beschreibungen zur Installation der Toilette, der zweite enthält Abbildungen zu den Installationsmethoden. Verwenden Sie dieses Handbuch als Referenz für jedes Teil. Lassen Sie außerdem die Schritte aus, wenn Sie das Modell 18801SH0 installieren.
-
Seite 3: Sicherheitshinweise
Schütten Sie kein Wasser oder Reinigungsmittel in oder auf den WC-Sitz, die Fernbedienung oder die Netzsteckdose. Sicherheitshinweise Dies kann zu einem elektrischen Schlag oder Brand führen. Lesen Sie die Hinweise vor der Produktmontage sorgfältig Verwenden Sie nur eine Stromquelle mit durch, um eine sichere Montage und Verwendung des 220 V–240 V Wechselspannung. - Seite 4 Schutzabdeckung unter der durch Frostschäden verursachen. Betätigungsplatte des Produkts ein Aufkleber mit Angaben zu den Abmessungen. • Bei GROHE Spülkästen mit automatischer Spülvorrichtung Stromanschluss kann der Wasseranschluss ohne Schlitze sichtbar mit Kupferrohren auf den Fliesen geführt werden. Das bedeutet, •...
- Seite 5 Hinweis Schlauch und Clip für Wasserzufuhr (nur Standardmodell • Stellen Sie sicher, dass die Adern in die passenden 39354SH0) Öffnungen geführt werden. Hahnventil (nur Standardmodell 39354SH0) Befestigen Sie die Teile der Netzsteckdosen aneinander. Fernbedienung Schrauben, Montageanker und AA-Batterien (für Hinweis Fernbedienung) •...
- Seite 6 Prüfen Sie, ob die Keramikschüssel horizontal richtig Unterseite der Schüssel. ausgerichtet ist. Öffnen Sie das Wasserabsperrventil. Hinweis Passen Sie beim GROHE Spülkasten die Menge des • Passen Sie die Ausrichtung der Schüssel Spülwassers an. Anschließend wird die Betätigungsplatte gegebenenfalls an, indem Sie die Sechskantschrauben wieder befestigt.
- Seite 15 Rapid SL (4.5 L) 46 944 42 333 19 mm 2.5 mm No. 0 19 mm...
- Seite 17 00:00:10...
- Seite 18 100 mm...
- Seite 20 39354SH0 39354SH0 18801SH0 18801SH0...
- Seite 22 GROHE Rapid SL 81 mm 75 mm >18 mm 119 mm 108 mm >18 mm...
- Seite 23 100mm 100 mm 6 mm Max. 5 mm 33 mm 6 mm 600-900 mm 800-1200 mm...
- Seite 24 DRYER...
- Seite 25 PCW-1335 (16040)