Herunterladen Inhalt Inhalt Diese Seite drucken

Werbung

Verfügbare Sprachen
  • DE

Verfügbare Sprachen

  • DEUTSCH, seite 8
Airfix D
ENG | Installation and operating instructions –––––––––––––––––––4
DEU | Montage- und Bedienungsanleitung ––––––––––––––––––––6
NLD
| Montage- en gebruikshandleiding ––––––––––––––––––––––8
FRA
| Installation et mode d'emploi –––––––––––––––––––––––– 10
ITA
| Istruzioni d'installazione e d'impo––––––––––––––––––––– 12
POL
| Instrukcja montażu i obsługi ––––––––––––––––––––––––– 14
RUS | Инструкции по установке и эксплуатации ––––––––––– 16

Werbung

Inhaltsverzeichnis
loading

Inhaltszusammenfassung für flamco Airfix D

  • Seite 1 Airfix D ENG | Installation and operating instructions –––––––––––––––––––4 DEU | Montage- und Bedienungsanleitung ––––––––––––––––––––6 | Montage- en gebruikshandleiding ––––––––––––––––––––––8 | Installation et mode d’emploi –––––––––––––––––––––––– 10 | Istruzioni d’installazione e d’impo––––––––––––––––––––– 12 | Instrukcja montażu i obsługi ––––––––––––––––––––––––– 14...
  • Seite 2 H-2058 Budaörs, Pf. 73 Flamco B.V. +31 33 299 75 00 support@fl amco.nl Postbus 502 3750 GM Bunschoten Flamco Sp. z o. o. +48 616 5659 55 info@fl amco.pl ul. Akacjowa 4 62-002 Suchy Las Flamco Sverige +46 500 42 89 95 vvs@fl amco.se...
  • Seite 4 Airfi x D ENG | Installation and operating instructions –––––––––––––––––––4 DEU | Montage- und Bedienungsanleitung ––––––––––––––––––––6 | Montage- en gebruikshandleiding ––––––––––––––––––––––8 | Installation et mode d’emploi –––––––––––––––––––––––– 10 | Istruzioni d’installazione e d’impo––––––––––––––––––––– 12 | Instrukcja montażu i obsługi ––––––––––––––––––––––––– 14 RUS | Инструкции...
  • Seite 5 70 °C 40 kg...
  • Seite 6: Installation

    Airfix D vessels can also be used in pressurization systems. Safety requirements Install and operate Airfix D vessels only if the vessel is free from visible damage. In order to keep within the operating parameters, appropriate safety accessories must be fitted.
  • Seite 7: Maintenance

    See under first use. 4. De-installation 1. Shut off the water supply (K) or AirfixControl (D) and drain the Airfix D. 2. Remove the cap (L) and the plug (M). 3. Remove pressure (P) from the Airfix D at the gas top-up valve (S).
  • Seite 8: Montage

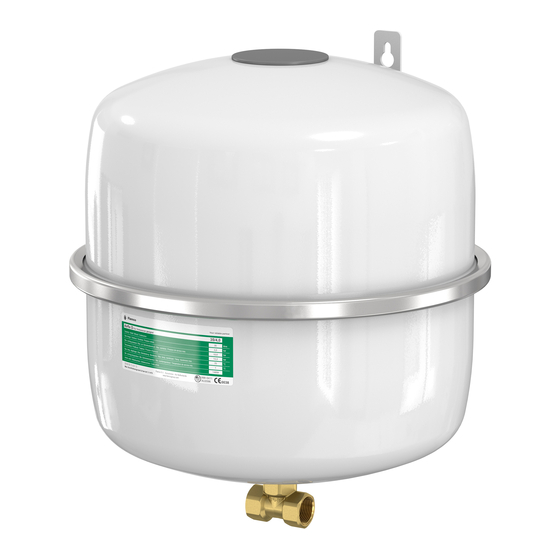
    Das Airfix D muß von einem anerkannten Fachinstallateur eingebaut werden. Dabei sind die vor Ort geltenden Vorschriften stets zu beachten. Airfix D von 8 – 25 Litern sind am Wasserstutzen (F) hängend zu montieren. Für die Wandbefestigung ist eine Aufhängezarge MB 3 (G) als Zubehör lieferbar.
  • Seite 9: Wartung

    5. Die Abdichtungen auf Dichtheit überprüfen. 3. Wartung Bewahren Sie diese Anleitung in der Nähe des Ausdehnungsgefäßes auf. Flamco gewährt nur dann 5 Jahre Garantie, wenn eine jährliche Wartung des Airfix Ausdehnungsgefäßes, von einem anerkannten Installateur, durchgeführt wurde. Die Wartung ist vom durchführenden Installateur auf den entsprechenden Seiten am Ende dieser Anleitung zu dokumentieren.
  • Seite 10 Inbedrijfstelling 1. Watertoevoer (K) afsluiten en de boiler drukloos maken. 2. Voordruk van de Airfix D 0,2 bar lager instellen dan de toevoerdruk bij de Airfix D (zie voor de fabrieksmatig ingestelde voordruk het vatetiket): • Afdekkap (L) en dopje (M) verwijderen.
  • Seite 11 Watertoevoer naar de Airfix D openen: Zie inbedrijfstelling. 4. Demontage 1. Watertoevoer (K) of AirfixControl (D) sluiten en de Airfix D aan waterzijde aftappen. 2. Afdekkap (L) en dopje (M) verwijderen. 3. Airfix D via ventiel (S) drukloos (P) maken.
  • Seite 12 L’Airfix D doit être monté par un installateur professionnel agréé. Respectez les prescriptions locales. Les vases Airfix D de 8 - 25 litres doivent être installés suspendus, le raccord eau (F) étant orienté vers le haut. Pour une fixation (H) murale, les consoles MB 2/ MB 3 (G) (livrées séparément) peuvent être utilisées.
  • Seite 13 Examen de l’état extérieur du vase (recherche d’éventuels dégâts et traces de corrosion). Vérif er la pression de gonflage et au besoin la corriger à la valeur requise de la manière suivante: Fermer l’alimentation d’eau (K) ou l’AirfixControl (D) et vidanger le vase Airfix D côté eau. Régler la pression de gonflage: Voir la mise en service.
  • Seite 14 (F); per il fi ssaggio a muro è disponibile come accessorio la staffa da parete MB 2/ MB 3 (G). Il vaso Airfix D da 35 litri deve essere montato in sospensione. Si consiglia l’impiego del gruppo d’intercettazione AirfixControl (D) (disponibile come accessorio).
  • Seite 15: Manutenzione

    1. Chiudere l’alimentazione dell’acqua (K) o AirfixControl (D) e scaricare l’acqua in pressione da Airfix D. 2. Rimuovere la calotta (L) ed il tappo (M). 3. Depressurizzare (P) Airfix D scaricando il gas dalla valvola di riempimento (S). 4. Svitare Airfix D (A) dal raccordo. Attenzione: Un Airfix D pieno d’acqua è...
  • Seite 16: Informacje Ogólne

    Naczynia wzbiorcze Airfix D są urządzeniami ciśnieniowymi spełniającymi wymagania dyrektywy 97/23/WE. Odpowiedni certyfikat dostępny jest u producenta. W skład kompletu wchodzą: naczynie Airfix D (A), trójnik przyłączeniowy Airfix TD (B) oraz instrukcja montażu i obsługi (C), a także opcjonalnie armatura odcinająca i spustowa AirfixControl (D). Dane na temat producenta, roku produkcji, numeru produkcyjnego oraz dane techniczne podane są...
  • Seite 17 Otwieranie doprowadzania wody do urządzenia Airfix D: Patrz uruchomienie. 4. Demontaż 1. Zamknąć dopływ wody (K) lub ArfixControl (D) i opróżnić Airfix D po stronie wodnej. 2. Usunąć pokrywę (L) i zatyczkę (M). 3. Zredukować całkowicie ciśnienie (P) urządzenia Airfix D na zaworze (S).
  • Seite 18: Общие Положения

    емкостью 8 - 25 л должен быть подвешен и подсоединен к патрубку подачи воды (F). Для настенного монтажа может быть поставлен настенный кронштейн MB 2/ MB 3 (G). Airfix D емкостью 35 л подвешивается на навесном монтажном элементе (H), патрубок подачи воды...
  • Seite 19: Техническое Обслуживание

    проводится следующим образом: Проверьте бак снаружи на наличие повреждений и коррозии. Проверьте предварительное давление газа и, при необходимости, доведите его до необходимого значения следующим образом: Перекройте подачу воды (K) или AirfixControl (D) и слейте воду из Airfix D. Отрегулируйте предварительное давление: См. “Запуск”. Откройте трубопровод подачи воды в Airfix D: См.
  • Seite 20 ENG Installation and maintenance Airfix D: Litres 1st Service Productionnumber: Date: Pre-charge pressure of the vessel: Installer: Cold-water fill pressure / Name: PRV pressure: Stamp: Capacity of water heater: Litres Initial installation Date: Installer: Name: Stamp: 2nd Service 3th Service...
  • Seite 21: Deu Installation Und Wartung

    DEU Installation und wartung Airfix D: Liter 1. Wartung Herstellnummer: Datum: Eingestellter Vordruck des Gefäßes: Installationsfirma: Kaltwasserzulaufdruck / Name: Druckminderer Einstelldruck: Stempel: Inhalt Warmwasserbereiter: Liter Erstinstallation Datum: Installationsfirma: Name: Stempel: 2. Wartung 3. Wartung Datum: Datum: Installationsfirma: Installationsfirma: Name: Name:...
  • Seite 22 NLD Installatie en onderhoud Airfix D: Liter 1. Onderhoudsbeurt Productienummer: Datum: Ingestelde voordruk van het vat: Installatiebedrijf: Koudwatertoevoerdruk / Naam: Drukregelaar-insteldruk: Stempel: Inhoud warmwatertoestel: Liter Eerste installatie Datum: Installatiebedrijf: Naam: Stempel: 2. Onderhoudsbeurt 3. Onderhoudsbeurt Datum: Datum: Installatiebedrijf: Installatiebedrijf: Naam:...
  • Seite 23 FRA Installation et entretien Airfix D: Litre(s) 1. Entretien Numéro de fabrication : Date: Pression de gonflage du vase : Installateur : Pression d’entrée eau froide / Nom: tarage réducteur : Cachet: Capacité du chauffe-eau : Litre(s)) Première installation Date:...
  • Seite 24 The data listed are solely applicable to Flamco products. Anwendung von Flamco Produkten. Für eine unsachgemäße Nutzung, Flamco B.V. shall accept no liability whatsoever for incorrect use, applica- Anwendung oder Interpretation der technischen Daten übernimmt tion or interpretation of the technical information.

Inhaltsverzeichnis