Inhaltsverzeichnis
Werbung
Verfügbare Sprachen
Verfügbare Sprachen
Quicklinks
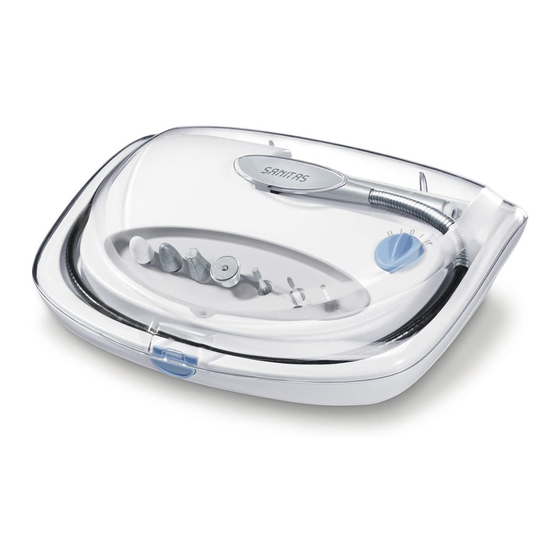
SMA 70
D Gebrauchsanleitung
Maniküre-/Pediküre-Set
G Instruction for Use
Manicure/Pedicure set
F Mode d'emploi
Ensemble manicure/pédicure
E Instrucciones para el uso
Juego de manicura-pedicura
r Инструкция по
применению
Набор для маникюра и
педикюра
Service-Adresse:
Hans Dinslage GmbH
Riedlinger Straße 28
88524 Uttenweiler
GERMANY
Tel.-Nr.: +49 (0)7374-915766
Fax-Nr.: +49 (0)7374-920723
E-Mail: service@sanitas-online.de
Werbung
Inhaltsverzeichnis

Verwandte Anleitungen für Sanitas SMA 70


Inhaltszusammenfassung für Sanitas SMA 70
- Seite 1 D Gebrauchsanleitung Maniküre-/Pediküre-Set G Instruction for Use Manicure/Pedicure set SMA 70 F Mode d'emploi Ensemble manicure/pédicure E Instrucciones para el uso Juego de manicura-pedicura r Инструкция по применению Набор для маникюра и педикюра Service-Adresse: Hans Dinslage GmbH Riedlinger Straße 28...
-
Seite 2: Wichtige Hinweise
DeutScH Dieses Maniküre- und Pediküretischgerät mit flexibler Spiralwelle ist mit hochwertigen Aufsätzen ausgestattet. In der Grundausführung sind 7 Aufsätze aus langlebiger Saphirbeschichtung, beziehungsweise aus Polierfilz beigefügt. Zusammen mit der 2-stufigen Geschwindigkeitsregelung und dem Rechts-/Linkslauf wird eine professionelle Fuß- und Nagelpflege möglich, wie es sonst nur beim Fachmann möglich ist. 1. -
Seite 3: Teilebeschreibung
• Personen mit Bewegungseinschränkung sollten sich bei Behandlungen der Füße von einer zweiten Person helfen lassen. • Sorgen Sie für eine gute Beleuchtung des Arbeitsbereiches. • Vermeiden Sie eine unbeabsichtigte Inbetriebnahme. Stellen Sie sicher, dass sich der Schalter in der AUS- Position „0“... - Seite 4 auf der Geräteunterseite: 14 Saugfuß 15 Netzkabel (in Kabelaufwicklung) 16 Aufbewahrung für Netzstecker 3. Lieferumfang Überprüfen Sie unmittelbar nach dem Auspacken immer den Lieferumfang auf Vollständigkeit sowie den einwandfreien Zustand des Gerätes. 1 x Tischgerät 1 x Filzkegel 1 x Saphirkegel 1 x Saphir-Hornhautschleifer 1 x Saphirscheibe 1 x Zylinderfräser...
- Seite 5 • Führen Sie das Gerät unter leichtem Druck in kreisenden Bewegungen langsam über die zu bearbeitenden Partien. • Entfernen Sie nicht die gesamte Hornhaut, um den natürlichen Schutz der Haut beizubehalten. • Stellen Sie sicher, dass sich die Achse immer frei drehen kann. Die Achse darf nicht dauerhaft blockiert sein, da ansonsten das Gerät zu heiß...
-
Seite 6: Technische Daten
Zylinderfräser Abschleifen verholzter Fußnageloberflächen sowie grobes Glätten derselbigen. Hierzu legen Sie bitte den Zylinderfräser waagerecht zur Nageloberfläche an und tragen in langsamen kreisenden Bewegungen die gewünschte Nagelschicht ab. Flammenfräser Zum Lösen eingewachsener Nägel. Führen Sie hierzu den Flammenfräservorsichtig an die zu behandelnde Stelle hin und tragen die nötigen Nagelteile ab. Saphirfräser Dieser Zubehöraufsatz dient dem vorsichtigen Entfernen von Hühneraugen. -
Seite 7: Garantie
9. Garantie Wir leisten 2 Jahre Garantie ab Kaufdatum für Material- und Fabrikationsfehler des Produktes. Die Garantie gilt nicht: – Im Falle von Schäden, die auf unsachgemäßer Bedienung beruhen. – Für Verschleißteile. – Für Mängel, die dem Kunden bereits bei Kauf bekannt waren. –... - Seite 8 enGLISH This table-top manicure and pedicure device with a flexible spiral shaft comes with high-quality attachments. The basic model has seven attachments with a long-life sapphire coating and with polishing felt. The device with the two-speed control and clockwise and anticlockwise rotation can provide professional toenail and fingernail care that would otherwise only be available in a professional nail salon.
-
Seite 9: Description Of Parts
• Persons with restricted movement should be assisted by a second person when working on their feet. • Make sure the work area is well lit. • Make sure that the device is not started accidentally. Make sure that the switch is in the OFF position "0" before plugging in the power plug. -
Seite 10: Scope Of Supply
on the bottom of the device: 14 Suction cup 15 Power cord (in cord winder) 16 Compartment for power plug 3. Scope of supply Check that the device and accessories are complete immediately after unpacking and make sure that the device is undamaged. - Seite 11 • Move the device slowly in a circular movement with light pressure over the areas that you are treating. • Do not remove the entire callus, leave some to retain the natural protection of the skin. • Make sure that the axle can always rotate freely. The axle must not be blocked for any length of time, otherwise the device will heat up and may be damaged.
-
Seite 12: Technical Data
cylindrical milling cutter Removing hardened toenail surfaces and coarse smoothing. Place the cylindrical mil- ling cutter horizontally on the nail surface and remove the nail layer with slow rotary movements. Flame milling cutter For removing ingrown nails. Insert the flame milling cutter carefully to the point of interest and remove the appropriate parts of the nail. -
Seite 13: Remarques Importantes
FRAnçAIS Cet ensemble de manucure / pédicure avec tuyau hélicoïdal souple est fourni avec plusieurs embouts. Le modèle de base comprend 7 embouts avec saphir longue durée ou disque de polissage. Avec ses deux niveaux de vitesse et la possibilité de régler la rotation vers la gauche ou la droite, cet appareil permet de réaliser une manucure et une pédicure véritablement professionnelles. -
Seite 14: Description Des Pièces
• Les personnes présentant des problèmes de mobilité devraient demander l'aide d'une autre personne pour utiliser l'appareil sur les ongles des pieds. • Veillez à ce que l'éclairage de la zone de travail soit suffisant. • Evitez tout démarrage involontaire de l'appareil. Vérifiez que l'interrupteur est en position 0 avant de brancher la prise électrique dans la fiche. Si l'appareil est déjà allumé au moment où vous le branchez, un incident peut se produire. • Si vous avez les cheveux longs, veuillez les attacher. Les cheveux peuvent se prendre dans les pièces mobiles. • Retirez la prise électrique de la fiche avant de changer les accessoires ou de ranger l'appareil. De cette manière, l'appareil ne pourra pas démarrer accidentellement. -
Seite 15: Eléments Fournis
sous l'appareil : 14 Socle 15 C âble d'alimentation (avec enrouleur de câble) 16 Logement pour prise électrique 3. eléments fournis Au moment du déballage, vérifiez qu'aucun élément ne manque et que l'appareil est en bon état. 1 x système de table 1 x cône en feutre 1 x cône saphir 1 x ponceuse saphir pour la corne 1 x disque saphir... - Seite 16 • F aites passer l'appareil en cercles lents et en exerçant une légère pression sur les pieds ou les mains du patient. • Ne retirez pas toute la corne, afin que la peau conserve son dispositif de protection naturel. • Veillez à ce que le système rotatif tourne correctement. Le système rotatif ne doit pas rester bloqué trop longtemps, sous peine d'échauffement de l'appareil et de dommages.
-
Seite 17: Caractéristiques Techniques
Fraise cylindrique Polissage des surfaces durcies des ongles des pieds et de la corne. Pour cela, placez la fraise cylindrique horizontalement sur la surface de l'ongle et éliminez la partie souhaitée de l'ongle en réalisant des mouvements circulaires assez lents. Fraise flamme Pour raccourcir les ongles. -
Seite 18: Instrucciones Importantes
eSPAñoL El presente aparato de sobremesa de manicura-pedicura con eje espiral flexible está provisto de aditamentos de primera calidad. En la versión básica se incluyen 7 adaptadores con un duradero revestimiento de zafiro, respectivamente de fieltro de pulir. Junto con la regulación de velocidad de 2 escalones y con la marcha a la derecha/izquierda el aparato permite un cuidado profesional de los pies y uñas. -
Seite 19: Descripción De Las Piezas
• Las personas con limitación de movimientos deben ser ayudadas por una segunda persona para el trata- miento de los pies. • Procure que el lugar de trabajo esté bien iluminado. • Evite que el aparato sea puesto en marcha por error. Asegúrese que el interruptor esté en la posición apagado "0"... -
Seite 20: Volumen De Suministro
en el lado inferior del aparato: 14 Ventosa 15 Cable de alimentación (en enrollamiento de cable) 16 Compartimento para guardar el enchufe 3. Volumen de suministro Inmediatamente después de desembalar el aparato controle siempre si el volumen de suministro está com- pleto y si el aparato está... - Seite 21 • Conduzca el aparato ejerciendo una leve presión y con lentos movimientos circulares sobre las zonas a tratar. • No elimine completamente las callosidades, a fin de conservar la protección natural de la piel. • Asegúrese que el eje siempre pueda girar libremente. El eje no debe bloquearse durante largo tiempo, ya que de lo contrario se calentará...
-
Seite 22: Eliminación De Desechos
Fresa cilíndrica Amolado de las superficies lignificadas de las uñas de los pies y un alisamiento grueso de ellas. Posicione la fresa cilíndrica paralelamente a la superficie de la uña y lleve a cabo lentos movimientos circulares para eliminar la capa deseada de la uña. Fresa de llama Para aflojar las uñas encarnadas. -
Seite 23: Важные Указания
РусскИй Данный аппарат для маникюра и педикюра с гибким спиральным валом оснащен высококачественными насадками. В базовый комплект поставки входят 7 насадок с долговечным сапфировым покрытием или, соответственно, из фетра для полировки. Благодаря 2-ступенчатому регулированию скорости и реверсу электромотора обеспечивается профессиональный уход за ногтями рук и ног, который обычно возможен только... - Seite 24 • Данный прибор не предназначен для использования лицами (в т. ч. детьми) с ограниченными физическими, сенсорными или умственными способностями или с недостатком опыта и/или знаний, за исключением случаев, когда они находятся под постоянным присмотром ответственных за них лиц или получили от них указания, как пользоваться прибором. • Лицам с ограничением подвижности при выполнении маникюра следует прибегнуть к помощи второго человека. • Обеспечивайте хорошее освещение рабочей зоны. • Не допускайте случайного включения. Прежде, чем вставить вилку в розетку, убедитесь в том, что выключатель...
-
Seite 25: Описание Узлов
2. Описание узлов 1 Корпус прибора 2 С апфировый диск 3 Ручка с осью 4 Гибкий спиральный вал 5 Затвор 6 Рабочий индикатор 7 Поворотный переключатель 8 Сапфировый бор 9 Факелообразный бор 10 Цилиндрический бор 11 С апфировая шлифовальная насадка для удаления ороговевшей кожи 12 С... - Seite 26 установки насадки • В ыберите требуемую насадку и установите ее спереди в ручку прибора. Насадки должны быть прочно вставлены до упора. • П режде, чем вставить вилку в розетку, убедитесь в том, что поворотный переключатель находится в положении «0». • В ставьте вилку в розетку. Прибор готов к работе (рабочий индикатор загорается). снятие насадки • Установите поворотный переключатель в положение «0». • Вытащите вилку сетевого кабеля из розетки. • Рассоедините насадку и ручку, удерживая их прямо. 5. Применение Важно! При использовании контролируйте результаты. Это особо касается диабетиков, т. к. их руки и ноги менее чувствительны. Примечание: перед...
- Seite 27 Войлочный конус Сглаживание и полирование края ногтя после опиливания, а также чистка поверхности ногтя. Всегда полируйте ноготь круговыми движениями и не оставляйте конус долго в одной точке, т. к. трение может привести к сильному выделению тепла. сапфировый конус Удаление сухой и ороговевшей кожи или крупных мозолей с подошв ног и пяток и обработка ногтей. сапфировая шлифовальная насадка для удаления ороговевшей кожи Быстрое удаление толстого слоя ороговевшей кожи или крупных мозолей с подошв ног...
-
Seite 28: Технические Данные
• При необходимости, очистите насадки тряпкой или щеткой, смоченной дезинфицирующим средством или 90%ым спиртом (из аптеки). Затем тщательно просушите насадки. • Для очистки не применяйте химические или абразивные средства. • Следите за тем, чтобы вода не попала внутрь прибора. Если это случилось, используйте прибор повторно только после того, как он полностью высох. 7. утилизация Утилизируйте прибор согласно требованиям Положения об утилизации электрического и электронного оборудования 2002/96/EC – WEEE („Waste Electrical and Electronic Equipment“). По всем вопросам по утилизации обращайтесь в соответствующую коммунальную службу. 8.