Yamaha DD-14 Bedienungsanleitung

Verwandte Anleitungen für Yamaha DD-14


Inhaltszusammenfassung für Yamaha DD-14
- Seite 1 r\l/^nrAI DCD^I lOOI/^KI I^lvi inr/VL wN^l^^iVi Owner's Manual Bedienungsanleitung Mode d'emploi Manual de Instrucciones...
- Seite 2 • Super Session Piayer The Super Session Player function will respond to the notes you play with unpredictable sounds and phrases. You'll have lots of fun dueling with the DD-14 in ad-lib jam sessions! • Nine scraper instruments The DD-14 also features a scraper which can play any of nine different PCM sounds, from an auto harp to a multi drum, to a guiro, or guitar.
-
Seite 3: Inhaltsverzeichnis
> MIDI Implementation You can hook the DD-14 up to other digital instruments, such as synthesizers or drum machines, using the MIDI terminals on the instrument's rear panel. Inhalt Contents 1. Controls and Connectors............. 5 1. Benutzeroberfläche und Anschlüsse......2. The Demonstration Songs...........9 2. -
Seite 4: Pflege Ihres Dd
4. Do not subject the instrument to strong physical shocks, and avoid placing any heavy objects on top of it. 5. Use a soft cloth, dry or slightly damp, to clean the DD-14. Never use chemicals such as benzine or thinner. -
Seite 5: Stromversorgung Des Dd
Using an optional Power Adaptor: Betrieb mit einem optionalen Netzadapter Plug the DC output cable from an Yamaha PA-3, PA-4, or PA-40 Power Adaptor into the DC IN jack on the DD-14 rear panel, then plug the adaptor into a convenient AC power outlet. -
Seite 6: Controls And Connectors
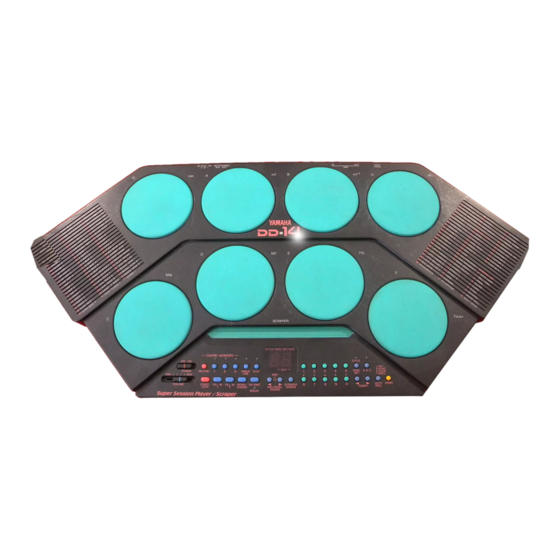
1. Benutzeroberßche und Anschlüsse 1. Controls and Connectors Control Panel Bedienelemente CD STYLE LIST Chord symbols @ PERCUSSION SET LIST ® SCRAPER LIST Percussion pads Scraper ® Display ® POWER switch (g) VOLUME control ® CHORD MEMORY RECORD button ® CHORD MEMORY PLAY buttons ®... -
Seite 7: Rear Panel
FOOT PEDAL jack on the rear panel. The percussion sticks have been designed specifically for use with the DD-14, and should not be used to play acoustic drums or to strike any surface other than the percussion pads (D. Also, please do not strike the percussion pads with... -
Seite 8: The Demonstration Songs
If you wish, you can play along with the demo songs by tapping on the DD-14 percussion pads (5). 4. You can stop the demonstration at any time by pressing... - Seite 9 “dA" will appear in the display to indicate that the DD-14 is going to play all two of the demo songs. You don't have to listen to all two of the songs if you don't want to, however. To select only one song, try tapping on one of the percussion pads ©...
-
Seite 10: Manual Percussion
3. Manuelle Perkussion 3. Manual Percussion You can start playing the DD-14 as soon as you turn the POWER switch (8) ON and raise the VOLUME control ® to an appropriate level. Play the percussion pads with the supplied percussion sticks or your hands. The scraper © is played by running the tip of a percussion stick or a finger back and forth across its length. - Seite 11 PAD/PEDAL ‘-BEAT-i ASSIGN Your DD-14 was set to play with this sensitivity level when it left the Yamaha factory. Please note that the sensitivity of the pedal and the scraper ® will not be affected by this setting. The DD-14 will remember your sensitivity setting even when the power is turned off.
-
Seite 12: The Super Session Player
3.1 The Super Session Player 3.1 Der Super Session Player Each time you turn on the power to the DD-14, the indicator above the SUPER SESSION PLAYER button ® will light. Tiiis means that the Super Session Player function has been activated. -
Seite 13: Percussion Set Selection
3.2 Percussion Set Selection 3.2 Anwahl eines Percussion Sets The DD-14 has thirty different percussion sets that you can select to match your musical requirements. Each set assigns different instruments {or melody percussion notes) to the DD- 14*s percussion pads (5) and foot pedal. The pad and pedal assignments for each percussion set are listed below. -
Seite 14: Custom Percussion Sets
3.3 Custom Percussion Sets 3.3 Selbst programmierte Percussion Sets The DD-14 allows you to assign any of its 75 instrument sounds to any of the percussion pads d). In addition, you can assign any of the non-melody percussion instruments (00 through 64) to the foot pedal. - Seite 15 INSTRUMENT INSTRUMENT ìmtmmm Nummer iOang Nummer Klang Klang Nummer Bass Drum 1 Conga Lo Lion Bass Drum 2 Conga Hi Jungle Car Horn Bass Drum 3 Conga Mute Buzzer Bass Drum 4 Timbale Lo Dropping Coin Snare 1 Timbale Hi Water Snare 2 Claves...
- Seite 16 2. Select one of the percussion pads © to which you will assign the new instrument. Tap the pad once. Press one of the PAD/PEDAL ASSIGN buttons The number of the instrument which is currently assigned to the pad you've selected will appear in the display (?) while you're pressing the button.
- Seite 17 (Be sure to enter two digits.) Release the PAD/PEDAL ASSIGN button immediately after you hear the instrument you want. The DD-14 will now play the newly assigned instrument whenever you play the pad in question.
-
Seite 18: The Auto Roll Function
Since the length and speed of each of these effects varies automatically to match the tempo, all you have to do is hit the first note with the right timing and the DD-14 will do rest. Even... -
Seite 19: The Scraper
The "flam" setting produces turns every note you play into a flam (a double note). When you select the "roll" setting, the DD-14 will produce a roll synchronized with the tempo each time you hit one of the pads ® or the foot pedal. - Seite 20 HARP) automatically selected whenever you turn the POWER switch ® Press the SCRAPER ASSIGN button repeatedly to select the desired setting. The DD-14 will cycle through the nine possibilities, returning to "_0" after it reaches "_8". STYLE/PERC, SET/SCR. STYLE/PERC. SET/SCR.
-
Seite 21: Auto Accompaniment
START/STOP button a second time. 4.1 The Auto Bass Chord Function 4.1 Baß/Akkordautomatik Each time you turn the DD-14's POWER switch ® on, the indicator above AUTO BASS CHORD button @ will light. This means that the Auto Bass Chord function has been activated. -
Seite 22: Accompaniment Style Selection
You can turn the function on and off as desired by simply pressing this button. 4.2 Accompaniment Style Selection 4.2 Wahl eines Begleitstils You can use the method below to select a different style using the method below at any time, even while the Auto Accompaniment is playing. -
Seite 23: The Tempo Setting
Automatic Percussion Set Selection Whenever you select an accompaniment style while the MINUS ONE function {described on page 45) is turned on, the DD-14 will automatically select the percussion set most appropriate to that style. 4.3 The Tempo Setting 4.3 Tempoeinstellung... -
Seite 24: Setting The Tempo With Tap Start
Tap any of the percussion pads with a steady beat, using the tempo you want to play at. The DD-14 will count off "One, two, three, four!" (or a variation, depending on the time signature of the style you've selected), then start the Auto Accompaniment playing at the tempo you've set. - Seite 25 Beginnen mit einer Einleitung (INTRO) starting with an Intro You can start any of the accompaniment styles with an intro pattern by pressing the INTRO/ENDING button ® instead of the START/STOP button INTRO/ ENDING Hinzufügen von Zwischentakten (Fill-ins) Adding Fill-ins To add a short fill-in pattern (rhythm variation) while the Auto Accompaniment is playing, press one of the two FILL IN buttons...
-
Seite 26: Minus One Accompaniment
If you press the INTRO/ENDING button a second time while the ending pattern is playing, the DD-14 will add a htardando, slowing the tempo gradually until the pattern ends. -
Seite 27: The Chord Memory
The DD-14 lets you record three songs, corresponding to the three CHORD MEMORY PLAY ® buttons on the control panel. Each song can consist of up to 32 measures of chord change data, together with intro, fill-in, and ending pattern specifications. - Seite 28 CHORD MEMORY PLAY button you selected to stop recording. — CHORD MEMORY — • or O O <X oder ■( START/ oder INTRO/ ENDING STOP The DD-14 will sound a buzzer and stop recording if you exceed the song capacity of 32 measures.
- Seite 29 Recording Chords in Realtime The DD-14 will automatically activate the Auto Bass Chord function whenever it enters record ready mode. Strike the percussion pads © to play chords as you record, referring to the chord symbols ® next to the pads to determine which ones are appropriate.
-
Seite 30: Step Recording
5.2 Step Recording In addition to the realtime recording method described in the previous section, the DD-14 also allows you to use a step recording method. This method is rather more complex than realtime recording, but it allows you to specify chord changes with greater ease and accuracy. - Seite 31 -| START/ oder INTRO/ STOP ENDING The DD-14 will stop recording automatically if you exceed the song capacity of 32 measures. Akkorde im Schrittmodus aufnehmen Recording Chords in Step Mode When step recording, chord roots and types are specified by tapping on the percussion pads ®—or by tapping a pad...
- Seite 32 When specifying the root of chord, for example, you can hold down the "4" or "9" number button instead of pressing the foot pedal to raise the root a semitone. Also, you can lower the root a semitone by holding down the "5" or "0" number button when you play a pad.
-
Seite 33: Playback
To play back a recorded song, press the CHORD MEMORY PLAY button ® corresponding to the desired song. If the song does not include an ending pattern, the DD-14 will play the song repeatedly until you stop It. Play along on the percussion pads (D if you like. You can... -
Seite 34: Midi
The DD-14 automatically transmits MIDI note and velocity information from its MIDI OUT terminal whenever you play one of the percussion pads, or the foot pedal. This information can be used to tell a receiving keyboard or tone... - Seite 35 Man KUMaEM INST RUMEMT Moicnnammtr Insir mtnt 1 -16 Basa brum3 Bnare Drum E E.Tom 2 Ooflod Ht>Hat 2 ài Opan HFFIal 2 8«« D(0m 4 Snare 3 &nare 4 Bass Drum 1 Bass Drum 2 Rim Shai Snare 1 Fland Claps Snare 2 Tom Lo...
- Seite 36 From dem DD-14 DD-14 When you connect the DD-14 MIDI OUT terminal to the MID! IN terminal of a MIDI keyboard or tone generator, the keyboard or tone generator will respond to the notes played on the DD-14- Referring to the instrument and note list...
- Seite 37 The DD-14 can be set to transmit notes on any of the sixteen channels. In addition, the ten melody percussion instruments are each assigned their own transmit channels. Generally...
- Seite 38 If you will be using the DD-14's Auto Accompaniment function in combination with a MIDI sequencer, you will want to synchronize the DD-14 to the sequencer so that they are both running on the same timing pulse. You can do this by pressing the RECORD @ switch while holding down both of the PAD/PEDAL ASSIGN buttons When you do so, the message "on"...
- Seite 39 YAMAHA [ Digital Percussion ] Date : 12/18 199£ Model DD-14 MIDI Implementation Chart Version : 1.0 Transmitted Recognized Remarks Function ---------------- -- ---------------------------- i------------------------- -“-H-------------------------------- 1 Basic Default 1 1 -11 j 1 - 1 6 Channel Changed 1 -16...
-
Seite 40: Troubleshooting
The custom pad and pedal assignments have The DD-14 has not been played for about a Redo the pad and pedal assignments. disappeared. week. -
Seite 41: Specifications
Technische Daten Specifications Max. Simultaneous Notes Polyphonie: Instrument Voices Instrumentensti mmen 75 percussion (incl. 10 pitched) + 9 scraper Percussion Sets Percussion Sets: 25 preset {incl. 10 pitched) + 5 user memory Auto Rhythm/Auto Bass Chord Styles Zahl der Stile der Rhythmus- und Baß/Akkordautomatik: Chord Memory Capacity 3 songs Kapazität des Akkordspeichers:... - Seite 42 Main Amplifier (3 W (RMS), 8 ohms) x 2 Speaker (10 cm, 8 ohms) x 2 Rated Voltage DC 10-12 V Power Source Six "C" size, SUM-2, or R-14 batteries (or equivalent), or AC Power Adaptor (PA-3, PA-4, or PA-40) Memory Approx.
- Seite 43 NORTH AMERICA Gedung Yamaha Music Center, Jalan Jend. Gatot Viale Italia 88, 20020 LainatejMilano), Italy Tel: 02-935-771 Subrolo Kav. 4, Jakarta 12930, Indonesia 135 Milner Avenue, Scarborough, Ontario, MIS 3R1, Tel: 21-520-2577 Canada Tel; 416-298-1311 Jotge Juan 30, 28001, Madrid, Spain...
- Seite 44 This applies only to products distrbuted by Yamaha Canada Music Ltd. contact the local retailer authorized to distribute this type of product. If you Dies bezieht sich nur auf die von der Yamaha Canada Muric Ltd. vertriebenen Produkte. can not locate the appropriate retailer, please contact Yamaha Corporation of Cecl ne s'applique qu'aux produits dlstribuds par Yamaha Canada Music Ltd.
- Seite 45 YAMAHA © 1993 Yamaha Corporation VQ07660 JDAER2AP5.3AP Printed in Japan...