
Verwandte Anleitungen für Fein ASM 14-2


Inhaltszusammenfassung für Fein ASM 14-2
- Seite 1 ASM 14-2; 14-2 PC Repair instructions All rights reserved by FEIN, especially in case of patent applications. C-SC_CSSM VERSION 1.0 2015-04-08 1/30 FEIN retains all rights of disposal, such as copying and circulation.
-
Seite 2: Inhaltsverzeichnis
5. Lubricants and auxiliary materials required 6. Disassembly 7. Assembly 8. Troubleshooting 9. Wiring diagram All rights reserved by FEIN, especially in case of patent applications. C-SC_CSSM VERSION 1.0 2015-04-08 2/30 FEIN retains all rights of disposal, such as copying and circulation. -
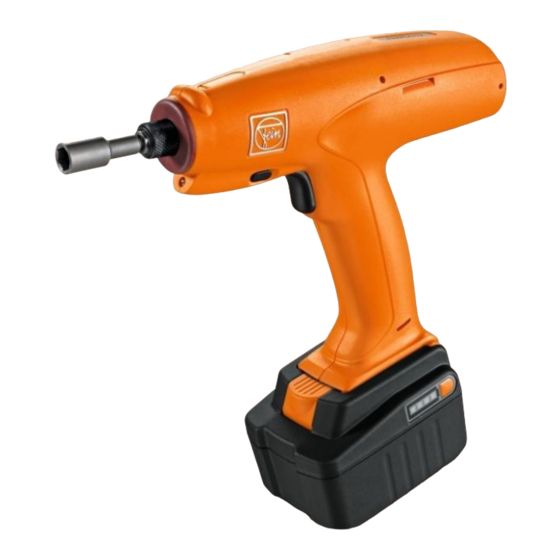
Seite 3: Models Described
Order no. 7 112 60 … ASM 14-2 7 112 61 … ASM 14-2 PC All rights reserved by FEIN, especially in case of patent applications. C-SC_CSSM VERSION 1.0 2015-04-08 3/30 FEIN retains all rights of disposal, such as copying and circulation. -
Seite 4: Technical Data
Up-to-date test data for all models can be found on the FEIN Extranet (Customer Service → Repair Guides). Lubricants The lubricants and container sizes available from FEIN can be found on the FEIN Extranet (Customer Service → Repair aids). Lists of spare parts Lists of spare parts and exploded views are available online at www.fein.com... - Seite 5 The German Equipment and Product Safety Act [ProdSG] applies for correct use. Outside Germany, the regulations applicable in the relevant country must be observed. All rights reserved by FEIN, especially in case of patent applications. C-SC_CSSM VERSION 1.0...
-
Seite 6: Tools Required
- Feeler gauge - Side-cutting pliers - Soldering station - Long-nosed pliers NOTE Only special tools with an ordering code can be ordered from FEIN. All rights reserved by FEIN, especially in case of patent applications. C-SC_CSSM VERSION 1.0 2015-04-08 6/30 FEIN retains all rights of disposal, such as copying and circulation. - Seite 7 Auxiliary substances Loctite 270 0 90 006 0010 9 50 ml Secure screws All rights reserved by FEIN, especially in case of patent applications. C-SC_CSSM VERSION 1.0 2015-04-08 7/30 FEIN retains all rights of disposal, such as copying and circulation.
-
Seite 8: Disassembly
- Circlip pliers 3. Spread open the motor housing (3) and remove the housing cover. - Torx 10 screwdriver 4. Remove pressure piece (4). All rights reserved by FEIN, especially in case of patent applications. C-SC_CSSM VERSION 1.0 2015-04-08 8/30... -
Seite 9: Assembly
1. Remove the slide switch with pressure spring (1) and the pushbutton with pressure spring (2). 2. Carefully pull out the foil conductor (3) and carefully remove from the motor housing. All rights reserved by FEIN, especially in case of patent applications. C-SC_CSSM VERSION 1.0... - Seite 10 4. Remove the motor with the electronics (4) from the motor housing. 5. Pull the bush (5) off the planetary gear. 6. Pull off the plug (6). All rights reserved by FEIN, especially in case of patent applications. C-SC_CSSM VERSION 1.0...
- Seite 11 1. With a soldering rod, remove the connection cable from the motor connections (1). 2. With side-cutting pliers, remove the cable tie (2). - Soldering rod - Side-cutting pliers All rights reserved by FEIN, especially in case of patent applications. C-SC_CSSM VERSION 1.0 2015-04-08 11/30 FEIN retains all rights of disposal, such as copying and circulation.
- Seite 12 There is a risk that parts may fall out of the planetary gear when it is pulled out. The photo shows the construction of the planetary gear. All rights reserved by FEIN, especially in case of patent applications. C-SC_CSSM VERSION 1.0...
- Seite 13 N.B.: Check the information on page 12. - Socket head wrench: WAF 2.5mm 2. Unscrew the screws (3) and remove the motor flange (4). All rights reserved by FEIN, especially in case of patent applications. C-SC_CSSM VERSION 1.0 2015-04-08 13/30 FEIN retains all rights of disposal, such as copying and circulation.
- Seite 14 2. Remove parts (2) of the tool locking device. - Circlip pliers: Circlip, ring, pressure spring, sleeve, ball > D=4 mm. opener / stepped 3-10mm - Slotted screwdriver All rights reserved by FEIN, especially in case of patent applications. C-SC_CSSM VERSION 1.0 2015-04-08 14/30...
- Seite 15 - Bar magnet The adjusting ring has a left-handed thread. 5. Remove the ring (7). 6. Remove the three balls from the ring (8). All rights reserved by FEIN, especially in case of patent applications. C-SC_CSSM VERSION 1.0 2015-04-08 15/30 FEIN retains all rights of disposal, such as copying and circulation.
- Seite 16 1. Remove the nine balls from the clutch ring (1) and tool holder. - Bar magnet NOTE The balls are easier to take out if the clutch ring is degreased before disassembly. All rights reserved by FEIN, especially in case of patent applications. C-SC_CSSM VERSION 1.0 2015-04-08 16/30 FEIN retains all rights of disposal, such as copying and circulation.
- Seite 17 - Grease (0 40 12 301 00 0) 4. Insert the nine balls D=4mm through the hole (4). - Forceps 5. Insert nine balls D=5mm (5) into the lower clutch ring. All rights reserved by FEIN, especially in case of patent applications. C-SC_CSSM VERSION 1.0 2015-04-08 17/30 FEIN retains all rights of disposal, such as copying and circulation.
- Seite 18 2. Remove excess grease (4). - Torque wrench 3. Screw in the adjusting ring by approx. 10 mm. The adjusting ring has a left-handed thread. All rights reserved by FEIN, especially in case of patent applications. C-SC_CSSM VERSION 1.0 2015-04-08 18/30 FEIN retains all rights of disposal, such as copying and circulation.
- Seite 19 Basic setting = 0.8 mm opener / stepped 3-10mm 3. Fit the grooved ball bearing (3) onto the tool holder. 4. Fit the discs (4) and the circlip (5). All rights reserved by FEIN, especially in case of patent applications. C-SC_CSSM VERSION 1.0 2015-04-08 19/30 FEIN retains all rights of disposal, such as copying and circulation.
- Seite 20 3. Insert the spring (4) in the sleeve. 4. Place the ring (5) on the sleeve and press down. 5. Fit the snap ring (6). All rights reserved by FEIN, especially in case of patent applications. C-SC_CSSM VERSION 1.0 2015-04-08 20/30 FEIN retains all rights of disposal, such as copying and circulation.
- Seite 21 2. Screw on the motor flange (2). Tighten the cylinder head screw to 1 Nm ±0.1 Nm and secure with Loctite. All rights reserved by FEIN, especially in case of patent applications. C-SC_CSSM VERSION 1.0 2015-04-08 21/30 FEIN retains all rights of disposal, such as copying and circulation.
- Seite 22 This step in the operation is not absolutely necessary, but it does make the rest of the assembly process easier. 3. Connect the plug (4) from the motor to the electronics. All rights reserved by FEIN, especially in case of patent applications. C-SC_CSSM VERSION 1.0...
- Seite 23 2. Grease the bush (2) [grease 0 40 12 301 00 0] and place it in position on the planetary gear. Check the installation position. The curve of the bush should face the switch. All rights reserved by FEIN, especially in case of patent applications. C-SC_CSSM VERSION 1.0...
- Seite 24 2. Insert the clutch (2). 3. Fit the cover (3). 4. Fit the housing insert (4). 5. Hook the two springs (5) in place. All rights reserved by FEIN, especially in case of patent applications. C-SC_CSSM VERSION 1.0 2015-04-08 24/30...
- Seite 25 2. Connect the foil conductor to the electronics (2). 3. Insert the LED indicator (3) into the cut-out provided. 4. Insert the switch trigger (4). 5. Lay the LED (5) in place. All rights reserved by FEIN, especially in case of patent applications. C-SC_CSSM VERSION 1.0 2015-04-08 25/30 FEIN retains all rights of disposal, such as copying and circulation.
- Seite 26 ±0.3 The installation dimension can be corrected by moving the discs in front of and behind the grooved ball bearing on the tool holder. All rights reserved by FEIN, especially in case of patent applications. C-SC_CSSM VERSION 1.0 2015-04-08 26/30 FEIN retains all rights of disposal, such as copying and circulation.
- Seite 27 2. Insert the pressure piece (3). 3. Fit the housing cover on the machine. When placing the housing cover in position, make sure the electronics film is not damaged. All rights reserved by FEIN, especially in case of patent applications. C-SC_CSSM VERSION 1.0...
- Seite 28 Tighten the screws to 1.2 Nm -0.1 Nm - Torx 10 screwdriver 2. Press the coded sleeve (1) down into position by hand. All rights reserved by FEIN, especially in case of patent applications. C-SC_CSSM VERSION 1.0 2015-04-08 28/30...
-
Seite 29: Troubleshooting
ASM 14-2; 14-2 PC 8. Troubleshooting See separate file on Extranet or retail partner portal. All rights reserved by FEIN, especially in case of patent applications. C-SC_CSSM VERSION 1.0 2015-04-08 29/30 FEIN retains all rights of disposal, such as copying and circulation. -
Seite 30: Connection Diagram
ASM 14-2; 14-2 PC Connection diagram All rights reserved by FEIN, especially in case of patent applications. C-SC_CSSM VERSION 1.0 2015-04-08 30/30 FEIN retains all rights of disposal, such as copying and circulation.