Herunterladen Inhalt Inhalt Diese Seite drucken
Inhaltsverzeichnis

Werbung

Verfügbare Sprachen

Verfügbare Sprachen

EHS3920
................................................ .............................................
EN HOB
FR TABLE DE CUISSON
DE KOCHFELD
USER MANUAL
NOTICE D'UTILISATION
BENUTZERINFORMATION
2
12
23

Werbung

Inhaltsverzeichnis
loading

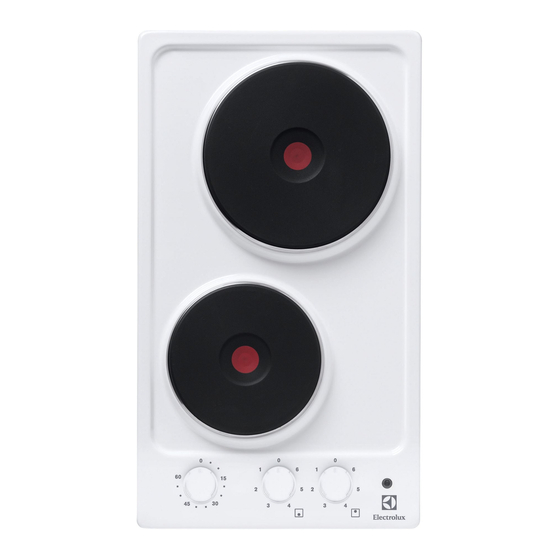
Inhaltszusammenfassung für Electrolux EHS3920

  • Seite 1 ..................... EHS3920 EN HOB USER MANUAL FR TABLE DE CUISSON NOTICE D'UTILISATION DE KOCHFELD BENUTZERINFORMATION...
  • Seite 2: Inhaltsverzeichnis

    9. TECHNICAL INFORMATION ..........11 WE’RE THINKING OF YOU Thank you for purchasing an Electrolux appliance. You’ve chosen a product that brings with it decades of professional experience and innovation. Ingenious and stylish, it has been designed with you in mind.
  • Seite 3: Safety Information

    ENGLISH 1. SAFETY INFORMATION Before the installation and use of the appliance, carefully read the supplied instructions. The manufacturer is not responsible if an incorrect installation and use causes in- juries and damages. Always keep the instructions with the appliance for future reference. 1.1 Children and vulnerable people safety WARNING! Risk of suffocation, injury or permanent disability.
  • Seite 4: Safety Instructions

    • Never try to extinguish a fire with water, but switch off the appliance and then cover flame e.g. with a lid or a fire blanket. • Do not store items on the cooking surfaces. • Do not use a steam cleaner to clean the appliance.
  • Seite 5 ENGLISH contact opening width of minimum 3 WARNING! Risk of damage to the appliance. • Use only correct isolation devices: line • Do not keep hot cookware on the con- protecting cut-outs, fuses (screw type trol panel. fuses removed from the holder), earth •...
  • Seite 6: Product Description

    3. PRODUCT DESCRIPTION 3.1 Cooking surface layout 180 mm Cooking zone 1500 W Cooking zone 1500 W Power indicator 145 mm Control knobs Minute minder 3.2 Electric cooking zones Symbol Function control knobs minimum heat Symbol Function maximum heat off position 4.
  • Seite 7: Helpful Hints And Tips

    ENGLISH have an effect on the performance of the 4.3 Rapid hot plate appliance. A red dot in the middle of the plate shows The rapid hot plate can smoke and make a rapid hot plate. A rapid hot plate heats an odour when you use it for the first time.
  • Seite 8: Troubleshooting

    The stainless steel can become tarnished Clean the appliance with a damp if it is too much heated. Refer to this you cloth and some detergent. must not cook with potstones, earthen- Heat the hotplate to a low tempera- ware pans or cast iron plates.
  • Seite 9: Installation

    ENGLISH MOD. MOD. MOD. TYPE PROD.NO. 230V-50Hz PROD.NO. PROD.NO. 0049 SER.NO. IP20 SER.NO SER.NO 03 IT DATA DATA MADE IN ITALY MODEL MODEL Stick it on Guarantee Card and send Stick it on instruction booklet this part Stick it on Guarantee Card and keep this part 8.
  • Seite 10: Replacement Of The Connection Cable

    10 www.electrolux.com • There is a risk of fire when the appli- ance is in connection with an extension cable, an adapter or a multiple connec- tion. Make sure that the ground con- nection agrees with the standards and regulations.
  • Seite 11: Kitchen Unit With Oven

    ENGLISH stalled separately for safety reasons and Kitchen unit with oven to let easy remove oven from the unit. The hob recess dimensions must obey the indication and the kitchen unit must 50 cm 120 cm be equipped with vents to let a continu- ous supply of air.
  • Seite 12: Service Après-Vente

    9. CARACTERISTIQUES TECHNIQUES ........22 NOUS PENSONS À VOUS Merci d'avoir choisi ce produit Electrolux. Avec ce produit, vous bénéficiez de dizaines d'années d'expérience professionnelle et d'innovation. Ingénieux et élégant, il a été conçu sur mesure pour vous.
  • Seite 13: Consignes De Sécurité

    FRANÇAIS 1. CONSIGNES DE SÉCURITÉ Avant d'installer et d'utiliser cet appareil, lisez soigneuse- ment les instructions fournies. Le fabricant ne peut être tenu pour responsable des dommages et blessures liés à une mauvaise installation ou utilisation. Conservez tou- jours cette notice avec votre appareil pour vous y référer ultérieurement.
  • Seite 14: Instructions De Sécurité

    14 www.electrolux.com • Ne faites pas fonctionner l'appareil avec un minuteur externe ou un système de commande à distance. • Il peut être dangereux de laisser chauffer de la graisse ou de l'huile sans surveillance sur une table de cuisson car cela pourrait provoquer un incendie.
  • Seite 15 FRANÇAIS • Ne laissez pas le câble d'alimentation • Ne posez pas de couverts ou de cou- s'emmêler. vercles sur les zones de cuisson. Elles sont chaudes. • Assurez-vous que le câble d'alimenta- tion ou la fiche (si présente) n'entrent •...
  • Seite 16: Mise Au Rebut

    16 www.electrolux.com 2.3 Entretien et nettoyage 2.4 Mise au rebut AVERTISSEMENT AVERTISSEMENT Risque de dommage de l'appareil. Risque de blessure ou d'asphyxie. • Nettoyez régulièrement l'appareil afin • Contactez votre service municipal pour de maintenir le revêtement en bon état.
  • Seite 17: Avant La Première Utilisation

    FRANÇAIS glez sur la position maximum et laissez 4.1 Programmateur de la l'appareil fonctionner pendant 10 minutes. minuterie Ceci afin de d'éliminer les résidus dans l'appareil. Ensuite, faites fonctionner l'ap- Utiliser le minuteur pour régler le dé- pareil sur la position minimum pendant compte pour une table de cuisson.
  • Seite 18: Exemples De Cuisson

    18 www.electrolux.com AVERTISSEMENT Niveau Utilisation : Assurez-vous que les récipients de ré- ne couvrent pas la zone de com- glage mande. Utilisez des récipients dont le fond Faire mijoter doucement correspond à la dimension du Faire mijoter brûleur. Faire frire / gratiner Zone de Diamètres des...
  • Seite 19: En Cas D'anomalie De Fonctionnement

    FRANÇAIS Nettoyez l'appareil à l'aide d'un chif- Pour les bords en inox de la table fon humide légèrement imbibé de dé- de cuisson, utilisez un produit de tergent. nettoyage pour acier inoxydable. Allumez la plaque à faible température Le bord en inox de la zone de et laissez sécher.
  • Seite 20: Étiquettes Fournies Avec Le Sac D'accessoires

    20 www.electrolux.com 7.1 Étiquettes fournies avec le sac d'accessoires Collez les étiquettes adhésives comme in- diqué ci-dessous : MOD. MOD. MOD. TYPE PROD.NO. 230V-50Hz PROD.NO. PROD.NO. 0049 SER.NO. IP20 SER.NO SER.NO 03 IT DATA DATA MADE IN ITALY MODEL MODEL...
  • Seite 21: Remplacement Du Câble D'alimentation

    FRANÇAIS 8.2 Branchement électrique 8.4 Encastrement • Vérifiez que la tension nominale et le ty- pe d'alimentation figurant sur la plaque signalétique correspondent aux valeurs min. 100 mm d'alimentation locales. 490 mm min. 650 mm • Cet appareil est fourni avec un câble d'alimentation.
  • Seite 22: Caracteristiques Techniques

    22 www.electrolux.com tions et l'élément de cuisine doit être 30 mm équipé d'aérations pour assurer un apport d'air continu. Les branchements électri- ques de la table de cuisson et du four doi- min 20 mm vent être installés séparément pour des (max 150 mm) raisons de sécurité...
  • Seite 23 9. TECHNISCHE DATEN ........... . 33 WIR DENKEN AN SIE Vielen Dank, dass Sie sich für ein Electrolux Gerät entschieden haben. Sie haben ein Produkt gewählt, hinter dem eine jahrzehntelange professionelle Erfahrung und Innovation steht. Bei der Entwicklung dieses großartigen und eleganten Geräts haben wir an Sie gedacht.
  • Seite 24: Sicherheitsinformationen

    24 www.electrolux.com 1. SICHERHEITSINFORMATIONEN Lesen Sie vor der Montage und Verwendung des Geräts sorgfältig die mitgelieferte Anleitung. Der Hersteller haftet nicht für Verletzungen oder Schäden, die durch eine feh- lerhafte Montage entstehen. Bewahren Sie die Anleitung zum Nachschlagen auf. 1.1 Sicherheit von Kindern und schutzbedürftigen...
  • Seite 25: Kochen Mit Fett Oder Öl Auf Einem Unbeaufsichtigten

    DEUTSCH • Kochen mit Fett oder Öl auf einem unbeaufsichtigten Kochfeld ist gefährlich und kann zu einem Brand füh- ren. • Versuchen Sie nicht einen Brand mit Wasser zu lö- schen, sondern schalten Sie das Gerät aus und bede- cken Sie die Flamme mit einem Deckel oder einer Feu- erlöschdecke.
  • Seite 26 26 www.electrolux.com • Achten Sie darauf, dass das Netzkabel • Schalten Sie die Kochzonen nach je- nicht lose hängt oder sich verheddert. dem Gebrauch aus. • Stellen Sie beim elektrischen Anschluss • Benutzen Sie das Gerät nicht als Ar- des Gerätes sicher, dass das Netzkabel beits- oder Abstellfläche.
  • Seite 27: Entsorgung

    DEUTSCH • Reinigen Sie das Gerät regelmäßig, um • Für Informationen zur ordnungsgemä- eine Abnutzung des Oberflächenmateri- ßen Entsorgung des Gerätes wenden als zu verhindern. Sie sich an die zuständige kommunale Behörde vor Ort. • Reinigen Sie das Gerät nicht mit einem Wasser- oder Dampfstrahl.
  • Seite 28: Vor Der Ersten

    28 www.electrolux.com wird und leuchtet solange, bis die Koch- Kochstufe ein und lassen Sie das Gerät zonen ausgeschaltet werden. 10 Minuten eingeschaltet. Auf diese Wei- se werden die Rückstände im Gerät ver- brannt. Lassen Sie dann das Gerät auf 4.1 Einstellen des...
  • Seite 29: Reinigung Und Pflege

    DEUTSCH WARNUNG! Koch- Verwendung: Achten Sie darauf, dass die Töpfe stufe: nicht das Bedienfeld berühren. Sanftes Köcheln Verwenden Sie Töpfe und Pfan- Köcheln nen mit einem Boden, der der Größe der Brenner entspricht. Braten/Bräunen Kochzo- Durchmesser Zum Kochen bringen des Kochge- Zum Kochen bringen/ schirrs Schnell-Braten/Frittieren...
  • Seite 30: Fehlersuche

    30 www.electrolux.com Für Edelstahlkochmulden verwen- Der Edelstahlrahmen der Koch- den Sie bitte ein handelsübliches platte kann sich aufgrund der Hit- Reinigungsmittel für Edelstahl. zebelastung leicht verfärben. 7. FEHLERSUCHE Problem Mögliche Ursache und Abhilfe Das Gerät funktioniert • Sehen Sie im Sicherungskasten nach, ob die Si- nicht.
  • Seite 31: Montage

    DEUTSCH MOD. MOD. MOD. TYPE PROD.NO. 230V-50Hz PROD.NO. PROD.NO. 0049 SER.NO. IP20 SER.NO SER.NO 03 IT DATA DATA MADE IN ITALY MODEL MODEL Kleben Sie ihn auf die Garantiekarte Kleben Sie ihn auf die Gebrauchsan- und verschicken Sie diesen Teil weisung Kleben Sie ihn auf die Garantiekarte und behalten Sie diesen Teil...
  • Seite 32: Netzkabel Ersetzen

    32 www.electrolux.com stromaufnahme ausgelegt ist. Achten Bringen Sie die mit dem Kochfeld geliefer- Sie darauf, den Stecker in eine passen- ten Dichtungen am Rand der Aussparung de Steckdose zu stecken. an. Achten Sie darauf, dass die Enden der Dichtungen ohne Überlappung miteinan- •...
  • Seite 33: Unterbaumöbel Mit Backofen

    DEUTSCH muss sich leicht aus dem Unterbau- Unterbaumöbel mit Backofen schrank entfernen lassen. Die Abmessungen der Kochfeldausspa- rung müssen den Angaben entsprechen, 50 cm 120 cm und die Unterbaumöbel müssen mit Lüf- tungsschlitzen versehen werden, um eine ständige Luftzufuhr zu gewährleisten. Kochfeld und Backofen müssen aus Si- cherheitsgründen über separate elektri- sche Anschlüsse verfügen.
  • Seite 34 34 www.electrolux.com...
  • Seite 35 DEUTSCH...
  • Seite 36 www.electrolux.com/shop...

Diese Anleitung auch für:

Ehs3920-serieEhs3920hoxEhs30020p

Inhaltsverzeichnis