
Verwandte Anleitungen für EuroLite LED TMH-X25 Moving-Head


Inhaltszusammenfassung für EuroLite LED TMH-X25 Moving-Head
- Seite 1 BEDIENUNGSANLEITUNG USER MANUAL LED TMH-X25 Moving-Head Für weiteren Gebrauch aufbewahren! © Copyright Keep this manual for future needs! Nachdruck verboten! Reproduction prohibited!
-
Seite 2: Inhaltsverzeichnis
Inhaltsverzeichnis EINFÜHRUNG ..............................4 SICHERHEITSHINWEISE ..........................4 BESTIMMUNGSGEMÄßE VERWENDUNG ..................... 6 GERÄTEBESCHREIBUNG ..........................7 Features ................................. 7 Geräteübersicht .............................. 8 INSTALLATION ..............................9 Projektormontage ............................9 Anschluss an den DMX-512 Controller / Verbindung Projektor – Projektor ..........11 Anschluss ans Netz ............................12 Anschluss zwischen Geräten ........................ - Seite 3 Diese Bedienungsanleitung gilt für die Artikelnummer 51785991 This user manual is valid for the article number 51785991 Das neueste Update dieser Bedienungsanleitung finden Sie im Internet unter: You can find the latest update of this user manual in the Internet under: www.eurolite.de 3/44 00092193.DOC, Version 1.1...
-
Seite 4: Einführung
- sich die letzte Version der Anleitung im Internet herunter laden EINFÜHRUNG Wir freuen uns, dass Sie sich für einen EUROLITE LED TMH-X25 entschieden haben Wenn Sie nachfolgende Hinweise beachten, sind wir sicher, dass Sie lange Zeit Freude an Ihrem Kauf haben werden. - Seite 5 Das Gerät darf nicht in Betrieb genommen werden, nachdem es von einem kalten in einen warmen Raum gebracht wurde. Das dabei entstehende Kondenswasser kann unter Umständen Ihr Gerät zerstören. Lassen Sie das Gerät solange ausgeschaltet, bis es Zimmertemperatur erreicht hat! Bitte überprüfen Sie vor der ersten Inbetriebnahme, ob kein offensichtlicher Transportschaden vorliegt.
-
Seite 6: Bestimmungsgemäße Verwendung
Kinder und Laien vom Gerät fern halten! Das Gerät darf niemals unbeaufsichtigt betrieben werden! BESTIMMUNGSGEMÄßE VERWENDUNG Bei diesem Gerät handelt es sich um einen kopfbewegten LED-Effektstrahler, mit dem sich dekorative Lichteffekte erzeugen lassen. Dieses Produkt ist für den Anschluss an 100-240 V, 50/60 Hz Wechselspannung zugelassen und wurde ausschließlich zur Verwendung in Innenräumen konzipiert. -
Seite 7: Gerätebeschreibung
Die maximale Umgebungstemperatur T = 45° C darf niemals überschritten werden. Nehmen Sie das Gerät erst in Betrieb, nachdem Sie sich mit seinen Funktionen vertraut gemacht haben. Lassen Sie das Gerät nicht von Personen bedienen, die sich nicht mit dem Gerät auskennen. Wenn Geräte nicht mehr korrekt funktionieren, ist das meist das Ergebnis von unfachmännischer Bedienung! Soll das Gerät transportiert werden, verwenden Sie bitte die Originalverpackung, um Transportschäden zu vermeiden. -
Seite 8: Geräteübersicht
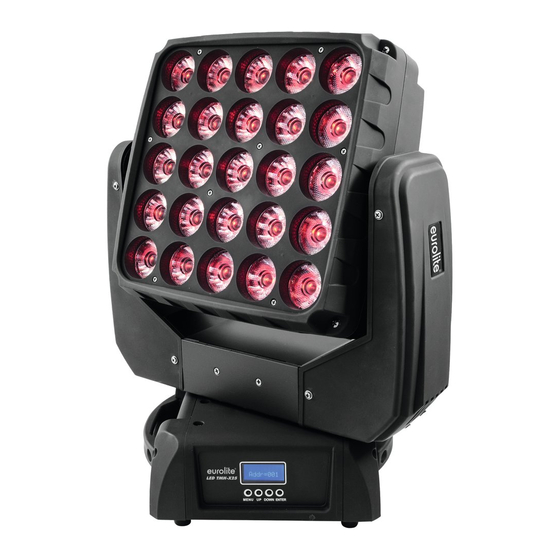
Geräteübersicht (1) LEDs (2) Projektorkopf (3) Projektorarm (4) Display (5) Base (6) Gummifuß (7) Control Board (8) Menu-Taste (9) Up-Taste (10) Down-Taste (11) Enter-Taste (12) Tragegriff (13) 3-poliger DMX-Ausgang (14) 3-poliger DMX-Eingang (15) 5-poliger DMX-Ausgang (16) 5-poliger DMX-Eingang (17) Sicherungshalter (18) Spannungsversorgungsausgang (19) Spannungsversorgungseingang 8/44... -
Seite 9: Installation
INSTALLATION Projektormontage Die Aufhängevorrichtungen des Projektors muss so gebaut und bemessen sein, dass sie 1 Stunde lang ohne dauernde schädliche Deformierung das 10-fache der Nutzlast aushalten kann. Die Installation muss immer mit einer zweiten, unabhängigen Aufhängung, z. B. einem geeigneten Fangnetz, erfolgen. - Seite 10 ACHTUNG! Montieren Sie den Projektor ausschließlich über zwei geeignete Haken. Achten Sie darauf, dass das Gerät sicher befestigt wird. Vergewissern Sie sich, dass die Verankerung stabil ist. Das Gerät kann direkt auf den Boden gestellt werden oder in jeder möglichen Position im Trussing installiert werden, ohne seine funktionellen Eigenschaften zu verändern.
-
Seite 11: Anschluss An Den Dmx-512 Controller / Verbindung Projektor - Projektor
Anschluss an den DMX-512 Controller / Verbindung Projektor – Projektor Achten Sie darauf, dass die Adern der Datenleitung an keiner Stelle miteinander in Kontakt treten. Die Geräte werden ansonsten nicht bzw. nicht korrekt funktionieren. Beachten Sie, dass die Startadresse abhängig vom verwendeten Controller ist. Unbedingt Bedienungsanleitung des verwendeten Controllers beachten. -
Seite 12: Anschluss Ans Netz
Anschluss ans Netz Schließen Sie das Gerät über die beiliegende Netzanschlussleitung ans Netz an. Die Belegung der Anschlussleitungen ist wie folgt: Leitung International Braun Außenleiter Blau Neutralleiter Gelb/Grün Schutzleiter Der Schutzleiter muss unbedingt angeschlossen werden! Wenn das Gerät direkt an das örtliche Stromnetz angeschlossen wird, muss eine Trennvorrichtung mit mindestens 3 mm Kontaktöffnung an jedem Pol in die festverlegte elektrische Installation eingebaut werden. -
Seite 13: Control Board
Control Board Das Control Board bietet mehrere Möglichkeiten: so lassen sich z. B. die DMX-Startadresse eingeben, das vorprogrammierte Programm abspielen oder ein Reset durchführen. Drücken Sie die Menu-Taste um ins Hauptmenü zu gelangen. Über die Up/Down-Tasten können Sie sich im Hauptmenü... -
Seite 14: Function
Function Einstellen der DMX-Startadresse Mit dieser Funktion können Sie die DMX-Startadresse über das Control Board einstellen. • Wählen Sie “Address” durch Drücken der Up/Down-Tasten. • Drücken Sie die Enter-Taste und stellen Sie die DMX-Adresse durch Drücken der Up/Down-Tasten ein. • Drücken Sie die Enter-Taste zur Bestätigung. DMX-Anzeiger Mit dieser Funktion können Sie auslesen, mit welchem Wert der entsprechende Kanal gesendet wird. -
Seite 15: Reset
Temperatureinheit zwischen Grad Celsius und Grad Fahrenheit umschaltbar Mit dieser Funktion lässt sich die Temperaturangabe einstellen. • Wählen Sie “Temp C/F” durch Drücken der Up/Down-Tasten. • Drücken Sie die Up/Down-Taste, um “Celsius” oder “Fahrenheit“ auszuwählen. • Drücken Sie die Enter-Taste zur Bestätigung. Zurücksetzen auf Werkseinstellungen Mit der Funktion „Default“... -
Seite 16: Dmx-Protokoll
Die LEDs des Gerätes sind in folgender Reihenfolge angeordnet (siehe Grafik) und können mit dem folgenden DMX-Protokoll individuell gesteuert werden. DMX-Protokoll Das Gerät verfügt über zwei verschiedene DMX-Kanal-Modi. Über das Control Board können Sie den DMX- Kanal-Modus definieren. Mode/Channel Decimal Hexad. Percentage S/F Eigenschaft Stan- dard... - Seite 17 Farbvoreinstellungen 00 04 Keine Funktion 05 1D 1E 36 12% 21% Grün 37 4F 22% 31% Blau 80 104 50 68 31% 41% Weiß 105 129 69 81 41% 51% Farbvoreinstellung 1 130 154 82 9A 51% 60% Farbvoreinstellung 2 155 174 9B AE 61% 68% Farbvoreinstellung 3 175 179 AF B3 69% 70%...
- Seite 18 126 130 7E 82 49% 51% 131 135 83 87 51% 53% 136 140 88 8C 53% 55% 141 145 8D 91 55% 57% 146 150 92 96 57% 59% 151 155 97 9B 59% 61% 156 160 9C A0 61% 63% 161 165 A1 A5 63% 65% 166 170 A6 AA 65% 67% 171 175 AB AF 67% 69%...
- Seite 19 255 00 FF 100% Grün 0 - 100 % zunehmend Blau 1 255 00 FF 100% Blau 0 - 100 % zunehmend Weiß 1 255 00 FF 100% Weiß 0 - 100 % zunehmend Rot 2 255 00 FF 100% Rot 0 - 100 % zunehmend Grün 2 255 00 FF...
- Seite 20 255 00 FF 100% Blau 0 - 100 % zunehmend Weiß 7 255 00 FF 100% Weiß 0 - 100 % zunehmend Rot 8 255 00 FF 100% Rot 0 - 100 % zunehmend Grün 8 255 00 FF 100% Grün 0 - 100 % zunehmend Blau 8 255 00 FF...
- Seite 21 255 00 FF 100% Weiß 0 - 100 % zunehmend Rot 14 255 00 FF 100% Rot 0 - 100 % zunehmend Grün 14 255 00 FF 100% Grün 0 - 100 % zunehmend Blau 14 255 00 FF 100% Blau 0 - 100 % zunehmend Weiß...
- Seite 22 255 00 FF 100% Rot 0 - 100 % zunehmend Grün 20 255 00 FF 100% Grün 0 - 100 % zunehmend Blau 20 255 00 FF 100% Blau 0 - 100 % zunehmend Weiß 20 255 00 FF 100% Weiß...
-
Seite 23: Reinigung Und Wartung
REINIGUNG UND WARTUNG Der Unternehmer hat dafür zu sorgen, dass sicherheitstechnische und maschinentechnische Einrichtungen mindestens alle vier Jahre durch einen Sachverständigen im Umfang der Abnahmeprüfung geprüft werden. Der Unternehmer hat dafür zu sorgen, dass sicherheitstechnische und maschinentechnische Einrichtungen mindestens einmal jährlich durch einen Sachkundigen geprüft werden. Dabei muss unter anderem auf folgende Punkte besonders geachtet werden: 1) Alle Schrauben, mit denen das Gerät oder Geräteteile montiert sind, müssen fest sitzen und dürfen nicht korrodiert sein. -
Seite 24: Technische Daten
TECHNISCHE DATEN Spannungsversorgung: 100-240 V AC, 50/60 Hz ~ Gesamtanschlusswert: 245 W DMX-Steuerkanäle: 16/116 DMX512-Anschluss: 5-pol. und 3-pol. XLR Blitzrate: 18 Hz Musiksteuerung: über eingebautes Mikrofon Anzahl der LEDs: LED-Typ: 12-W-COB, RGBW Max. Schwenkbewegung (PAN): 540° Max. Kippbewegung (TILT): 270° Abstrahlwinkel: 3°... -
Seite 25: Introduction
- download the latest version of the user manual from the Internet INTRODUCTION Thank you for having chosen a EUROLITE LED TMH-X25. If you follow the instructions given in this manual, we are sure that you will enjoy this device for a long period of time. -
Seite 26: Health Hazard
If the device has been exposed to drastic temperature fluctuation (e.g. after transportation), do not switch it on immediately. The arising condensation water might damage your device. Leave the device switched off until it has reached room temperature. Please make sure that there are no obvious transport damages. Should you notice any damages on the A/C connection cable or on the casing, do not take the device into operation and immediately consult your local dealer. -
Seite 27: Operating Determinations
OPERATING DETERMINATIONS This device is a LED moving-head lighting effect for creating decorative effects. This product is allowed to be operated with an alternating voltage of 100-240 V, 50/60 Hz and was designed for indoor use only. This device is designed for professional use, e.g. on stages, in discotheques, theatres etc. Lighting effects are not designed for permanent operation. -
Seite 28: Description Of The Device
DESCRIPTION OF THE DEVICE Features COB Moving Panel with 5 x 5 Matrix • Equipped with 25 x 12 W COB LEDs in the colors red, green, blue and white • Each LED can be controlled individually • Suitable for pixel mapping applications •... -
Seite 29: Installation
(12) Carrying handle (13) 3-pin DMX output (14) 3-pin DMX input (15) 5-pin DMX output (16) 5-pin DMX input (17) Fuseholder (18) Power output (19) Power input INSTALLATION Rigging The installation of the projector has to be built and constructed in a way that it can hold 10 times the weight for 1 hour without any harming deformation. -
Seite 30: Danger Of Fire
Procedure: The projector should be installed outside areas where persons may walk by or be seated. IMPORTANT! OVERHEAD RIGGING REQUIRES EXTENSIVE EXPERIENCE, including (but not limited to) calculating working load limits, installation material being used, and periodic safety inspection of all installation material and the projector. -
Seite 31: Danger To Life
DANGER TO LIFE! Before taking into operation for the first time, the installation has to be approved by an expert! Screw one clamp via a M10 screw and self-locking nut onto the Omega-holder. Insert the quick-lock fasteners of the first Omega-clamp into the respective holes on the bottom of the device. -
Seite 32: Connection With The Mains
OPERATION After you connected the effect to the mains, the EUROLITE LED TMH-X25 starts running. During the Reset, the motors are trimmed and the device is ready for use afterwards. Stand-alone operation In the Stand-alone mode, the LED TMH-X25 can be used without controller. -
Seite 33: Control Board
Control Board The Control Board offers several features: you can simply set the starting address, run the pre-programmed program or make a reset. The main menu is accessed by pressing the Menu-button (display flashing). Browse through the menu by pressing Up or Down. Press the Enter-button in order to select the desired menu. You can change the selection by pressing Up or Down. -
Seite 34: Function
Function DMX address setting With this function, you can adjust the desired DMX-address via the Control Board. • Select “Address“ by pressing Up or Down. • Press the Enter-button, adjust the DMX address by pressing Up or Down. • Press the Enter-button to confirm. DMX indicator With this function, you can display with which value the respective channel is sent. -
Seite 35: Reset
Select temperature designation With this function you can select the temperature designation. • Select “Temp C/F” by pressing Up or Down. • Press Up or Down to select the desired degree between “Celsius” and “Fahrenheit”. • Press the Enter-button to confirm. Reload Default With this function you can restore the factory settings of the device. -
Seite 36: Dmx-Protocol
The LEDs of the device are arranged in the following order (see graphic) and can be individually controlled with the following DMX-protocol. DMX-protocol The device has two different DMX channel modes. The Control Board allows you to assign the DMX channel mode. - Seite 37 Color presets 00 04 No function 05 1D 1E 36 12% 21% Green 37 4F 22% 31% Blue 80 104 50 68 31% 41% White 105 129 69 81 41% 51% Color preset 1 130 154 82 9A 51% 60% Color preset 2 155 174 9B AE 61% 68% Color preset 3...
- Seite 38 126 130 7E 82 49% 51% 131 135 83 87 51% 53% 136 140 88 8C 53% 55% 141 145 8D 91 55% 57% 146 150 92 96 57% 59% 151 155 97 9B 59% 61% 156 160 9C A0 61% 63% 161 165 A1 A5 63% 65% 166 170 A6 AA 65% 67% 171 175 AB AF 67% 69%...
- Seite 39 255 00 FF 100% Blue 0 - 100 % increasing White 1 255 00 FF 100% White 0 - 100 % increasing Red 2 255 00 FF 100% Red 0 - 100 % increasing Green 2 255 00 FF 100% Green 0 - 100 % increasing Blue 2 255 00 FF...
- Seite 40 White 7 255 00 FF 100% White 0 - 100 % increasing Red 8 255 00 FF 100% Red 0 - 100 % increasing Green 8 255 00 FF 100% Green 0 - 100 % increasing Blue 8 255 00 FF 100% Blue 0 - 100 % increasing White 8...
- Seite 41 Red 14 255 00 FF 100% Red 0 - 100 % increasing Green 14 255 00 FF 100% Green 0 - 100 % increasing Blue 14 255 00 FF 100% Blue 0 - 100 % increasing White 14 255 00 FF 100% White 0 - 100 % increasing Red 15...
- Seite 42 Green 20 255 00 FF 100% Green 0 - 100 % increasing Blue 20 255 00 FF 100% Blue 0 - 100 % increasing White 20 255 00 FF 100% White 0 - 100 % increasing Red 21 255 00 FF 100% Red 0 - 100 % increasing Green 21...
-
Seite 43: Cleaning And Maintenance
CLEANING AND MAINTENANCE The operator has to make sure that safety-relating and machine-technical installations are inspected by an expert after every four years in the course of an acceptance test. The operator has to make sure that safety-relating and machine-technical installations are inspected by a skilled person once a year. -
Seite 44: Technical Specifications
TECHNICAL SPECIFICATIONS Power supply: 100-240 V AC, 50/60 Hz ~ Power consumption: 245 W DMX control channels: 16/116 DMX512 connection: 5-pin and 3-pin XLR Flash-rate: 18 Hz Sound-control: via built-in microphone Number of LEDs: LED type: 12-W-COB, RGBW Maximum PAN-movement: 540°...