bürkert 4040 Bedienungsanleitung
Inhaltsverzeichnis
Verfügbare Sprachen
Verfügbare Sprachen
Kapitel
Inhaltsverzeichnis

Verwandte Anleitungen für bürkert 4040


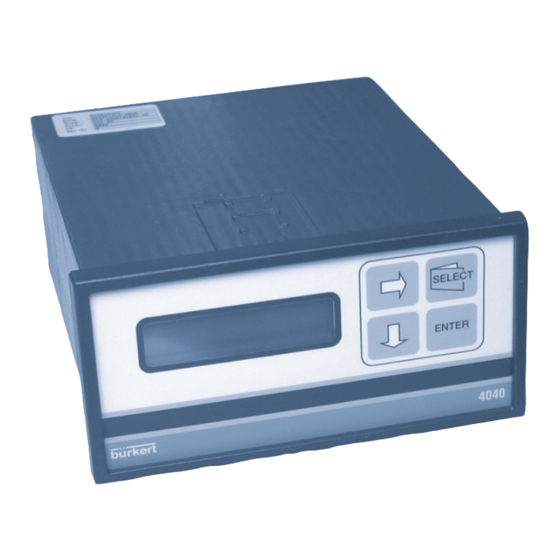
Inhaltszusammenfassung für bürkert 4040
- Seite 1 Operating Instructions Bedienungsanleitung Instructions de service Type 4040 Air Flow Control...
- Seite 29 NHALT Inhaltsverzeichnis Typ 4040 Air Flow Control ALLGEMEINE HINWEISE ............................. 28 Darstellungsmittel .............................28 Allgemeine Sicherheitshinweise ........................28 Lieferumfang ..............................29 Garantiebestimmungen ...........................29 Normenkonformität ............................29 INBETRIEBNAHME ..............................30 Elektrische Installation ............................30 Grundeinstellungen ............................31 BEDIENUNG ................................34 I/O-Struktur für Typ 4040 ..........................34 Anschlussplan Typ 4040 ..........................35 Bedienung Hauptebene ..........................36...
-
Seite 30: Allgemeine Hinweise
Beachten Sie die Anforderungen nach EN 100 015 - 1, um die Möglichkeit ACHTUNG VORSICHT BEI HANDHA- eines Schadens durch schlagartige elektrostatische Entladung zu minimie- BUNG ! ren bzw. zu vermeiden. Achten Sie ebenso darauf, dass Sie elektronische ELEKTROSTATISCH Bauelemente nicht bei anliegender Versorgungsspannung berühren. GEFÄHRDETE BAUELEMENTE / BAUGRUPPEN 28 - 4040... -
Seite 31: Lieferumfang
Geschäftsbedingungen. Voraussetzung für die Garantie ist der bestimmungsgemäße Gebrauch des Gerätes unter Beachtung der spezifizierten Einsatzbedingungen. ACHTUNG! Die Gewährleistung erstreckt sich nur auf die Fehlerfreiheit des gelieferten Typ 4040. Es wird jedoch keine Haftung übernommen für Folgeschäden jeglicher Art, die durch Ausfall oder Fehlfunktion des Gerätes entstehen könnten. -
Seite 32: Inbetriebnahme
Die elektrische Installation der Versorgungsspannung sowie aller Ein- und Ausgänge erfolgt gemäß dem Anschlussplan. Beschaltungsbeispiel 24 V DC Ausgänge 24 V DC Binäreingänge 0 V / 24 V 4-20 mA 4-20 mA 4-20 mA Positioner 24 V DC Sollwert 4-20 mA Sollwert GND 30 - 4040... -
Seite 33: Grundeinstellungen
Das Menü ist codegeschützt, der Default-Code ist „9999“. Konfigurieren der Rezeptur Das Gerät Typ 4040 verwaltet mehrere Rezepturen. Im Menü Konfigurieren kann jeder Rezeptnummer zu- nächst eine Beschreibung des Produkts, des Förderwegs und der Schleuse hinterlegt werden. Das erleichtert die Handhabung, wenn mehrere Rezepturen verwendet werden. Das Konfigurationsmenü ist ebenfalls mit dem Default-Code „9999“... - Seite 34 NBETRIEBNAHME Kennliniekorrektur für den Betrieb mit Steuerung Typ 4040 Der Betrieb mit dem Regler Typ 4040 erfordert ein Stellventil mit linearer Durchflußkennlinie. Da die von Bür- kert gelieferten Regelventile Typ 2712 keine lineare Kennlinie, sondern eine gleichprozentige Kennlinie haben, muß die Linearisierung über den Positioner TopControl Typ 8630 bzw. den SideControl Typ 8635 erfolgen.
- Seite 35 HINWEIS Bitte beachten Sie die Hinweise zum Anlagezustand im Ablaufplan "Leckage Luft Einlesen" Nach Durchführung dieser Inbetriebnahme-Schritte ist das Gerät funktionsbereit. HINWEIS Bitte beachten Sie alle Start-Bedingungen für den Förderbetrieb, die im Ablaufplan „Automatik–Fördern“ zu finden sind. 4040 - 33...
-
Seite 36: Bedienung
EDIENUNG BEDIENUNG I/O-Struktur für Typ 4040 Kurz- physikalischer skalierbarer Strom Auflösung Anschluss zeichen Wert Wert 1. Versorgung: 24 V DC 2. analoge Eingänge: Netzdruck 4-20 mA 0-10 bar 8 Bit Förderdruck 4-20 mA 0-10 bar 8 Bit Ist_Temperatur 4-20 mA 0-160 °C... -
Seite 37: Anschlussplan Typ 4040
EDIENUNG Anschlussplan Typ 4040 Versorgung für Transmitter: + 24 V - Versorgung für Ist_Temperatur T, Binärausgänge: Förderdruck p, + 24 V Netzdruck p1, 24V DC IN Verbinden mit F3 24V DC OUT Versorgung für Positioner, + 24 V Positioner (4-20 mA) GND... -
Seite 38: Bedienung Hauptebene
Alarme nächste Ziffer im Aus- RS 232 RS 232 zum Datenaustausch bestätigt die eingege- wahlfeld oder weiter Enter für Parameter, Alarmaufnahme benen Werte und ist zum nächsten Menüfeld und -quittierung Alarmquittierung * Anzeige auf 2 sec begrenzt 36 - 4040... -
Seite 39: Parametrieren
000 s Ändern = ENTER und -quittierung T2 000 GrdC T2 000 GrdC * Anzeige auf 2 sec Ändern = ENTER begrenzt Ändern Code Neuer Code XXXX Ändern = ENTER Parametrierung Enter = Parametrierung verlassen Ende = Enter 4040 - 37... -
Seite 40: Konfigurieren
000 s austausch für Para- t1 1 000 s Ändern = ENTER meter, Alarmaufnahme und -quittierung t15 000 s t15 000 s Ändern = ENTER * Anzeige auf 2 sec begrenzt Rezept Ende Ende = ENTER 38 - 4040... - Seite 41 Alarme nächste Ziffer im Aus- RS 232 RS 232 zum Datenaustausch bestätigt die eingege- wahlfeld oder weiter Enter für Parameter, Alarmaufnahme benen Werte und ist zum nächsten Menüfeld und -quittierung Alarmquittierung * Anzeige auf 2 sec begrenzt 4040 - 39...
-
Seite 42: Übersetzungstabelle Für Die Anzeigetexte
Errore RTC Aendern = DOWN Change = DOWN Cambiare = DOWN Alarm Alarm Allarme Kein Material ! No material! No materiale! Ueberdruck ! Overpressure! Alta pressione! Ueberkapazitaet! Overcapacity! Alta capacita! pmin erhoehen ! pmin raise! Alzare press.! 40 - 4040... - Seite 43 Datum date Data Uhrzeit time Testen test Tasti Ein-/Ausgaenge IN-/Outputs IN-/Outputs Dig. Eingaenge dig. Inputs Inputs Analogeing. mA anal.Input mA Input Analogico Ausgaenge 1...9 Outputs 1...9 Outputs 1...9 weiter = ENTER continue = ENTER contin. = ENTER 4040 - 41...
-
Seite 44: Ablaufplan: Einlesen Leckagekurve (Schleuse)
Druckvorwahl p in 0.5 bar-Schritten von 0 bis 100% Hub mit einer Rampe von 30 s, j = 0 Stop nach jedem Druckpunkt für 1s p(j) Q(p(j)) speichern und anzeigen Pause 1 s j=j+1 j>jmax ? Grundfunktion 42 - 4040... - Seite 45 B6 ausgeben START: Start *C10 (Start/Stop)=1 ODER *C13 (Schluessel-Schalter)=1 UND SELECT-Taste Sperrluftventil auf Förderventilöffnung in % gemäß Vorgabe 4040 und Förderventil auffahren Zyklisch Netzdruck p1 und Einstellung Positioner (Sollwertvorgabe vE über PIA02 überprüfen, wenn Rampe mit Rampenzeit tvE, Förderung gestartet...
-
Seite 46: Ablaufplan: Automatik - Fördern (1)
ODER PIA01 = HIGH Förderdruck pmax ODER PIA01 p < pmax t < t5 Zeit t5 = 20s PIA01 = LOW (1... 100s) "Pause" t > t5 Zeit t4 = 10s (1... 100s) ALARM 2 Start Schleuse 44 - 4040... -
Seite 47: Ablaufplan: Automatik - Fördern (3)
Puffer voll (1...100 s) t > t6 Stop Schleuse HIGH Puffer voll t < t8 Teit t8 = 10 s (1...100 s) "Pause" Zeit t7 = 10 s t > t8 (1...100 s) ALARM 3 Start Schleuse Programmschleife 4040 - 45... -
Seite 48: Ablaufplan: Stop
EDIENUNG Ablaufplan: Stop aus Programm-Schleife Automatik - Fördern STOP: * C10 (Start/Stop) = 0 Stop ODER * C13 (Schluessel-Schalter) = 1 UND SELECT-Taste Stop Schleuse Sperrluft ZU C11 (Leerblasen) = 0 ? Förderventil ZU Anlage "betriebsbereit" Grundfunktion 46 - 4040... -
Seite 49: Ablaufplan: Alarme
Förderdruck Sollgeschwindigkeit nach Rezept pa: abs. Förderdruck p1a: abs. Netzdruck Sollgeschwindigkeit pmin: während Regelung pmax: v0ist: Istgeschwindigkeit Istgeschwindigkeit Sollwert für Leerblasen Rohrdurchmesser QeffN: Durchfluss Q0: Ist-Druchfluss Rohrdurchmesser Q0N: Ist-Durchfluss FQFG (Norm) T1: Isttemperatur Kompressor Förderventil Schleuse Förderstrecke 4040 - 47... -
Seite 50: Definitionen Und Kurzzeichen Der Verwendeten Grössen
Förderdruck AUTOMATIK -Fördern größter zulässige 0-10,00 STOP ohne Leerblasen Förderdruck bei STOP mit Leerblasen Medienförderung Rohrdurchmesser AUTOMATIK -Fördern für Berechnung von Q 5-355 vor und nach der STOP ohne Leerblasen oder v Schleuse STOP mit Leerblasen 48 - 4040... - Seite 51 0-160 °C STOP ohne Leerblasen manuell eingegebener STOP mit Leerblasen Wert der Temperatur, speziell für die Anzeige tschleuse Betriebs- Betriebsstunden AUTOMATIK Fördern aktuelle Betriebsstun- 0-65535 h stunden Schleuse den (Schleuse EIN), jede Stunde abspei- chern ins EEPROM 4040 - 49...
- Seite 52 Wert vorliegt (Strom kleiner 4mA) Luftmenge Leckage AUTOMATIK -Fördern Offset durch Schleusenle- 0-3000 m3/h (Betrieb) ckage bei verschiedenen Drücken (Förderdruck) QLPN QLPN Luftmenge Leckage AUTOMATIK -Fördern Offset durch Schleusenle- 0-3000 Nm3/h (Norm) ckage bei verschiedenen Drücken (Förderdruck) 50 - 4040...
- Seite 53 Förderventil ZU wird das Förder- ventil zugefahren augenblickliche AUTOMATIK -Fördern gemessener Wert 0-160 °C Absoluttemperatur T2 STOP ohne Leerblasen + 273K STOP mit Leerblasen Normtemperatur, AUTOMATIK -Fördern 273K °C 0-Punkt STOP ohne Leerblasen STOP mit Leerblasen 4040 - 51...
-
Seite 54: Definition Der Anzeige
3. Leerblasen: Wird der Eingang C11=1, so wird der Sollwert vL rampenförmig (Rampenzeit tvL) angefah- ren, unabhängig vom Zustand der Steuerung (außer bei Alarm). 4. Angezeigte Ist-Geschwindigkeit an der 4040 ist v0ist (Ist-Geschwindigkeit am Anfang der Förderstrecke bei Rohrdurchmesser D) 5. -
Seite 55: Störungsbeseitigung
Schleusenpuffer voll anpassen Luftleistung des Kompressors unzureichend Alarm 5: 2kein Netzdruck" Netzdruck und Kompressor prüfen Kompressor defekt HINWEIS Wenn der Förderbetrieb durch einen Alarm gestoppt wurde, muß der Alarm-Reset betätigt werden, damit der Förderbetrieb wieder gestartet werden kann. 4040 - 53... - Seite 56 Fax + 49 (0) 7940 - 10 91 448 E-mail: info@de.buerkert.com International Contact addresses can be found on the internet at: Die Kontaktadressen finden Sie im Internet unter: Les adresses se trouvent sur internet sous : www.burkert.com Bürkert Company Locations...