SOMFY ROLLIXO io Installationsanleitung
Vorschau ausblenden
Andere Handbücher für ROLLIXO io:
- Bedienungsanleitung (52 Seiten) ,
- Installationshandbuch (26 Seiten) ,
- Installationsanleitung (21 Seiten)

Verwandte Anleitungen für SOMFY ROLLIXO io


Inhaltszusammenfassung für SOMFY ROLLIXO io
- Seite 1 STOP Prog ROLLIXO io Manuel d’installation Installationsanleitung Installation manual 5108208D...
-
Seite 3: Inhaltsverzeichnis
L’utilisation de tout accessoire ou de tout composant 10 - Mémorisation d'un émetteur barre palpeuse XSE ___ 14 non préconisé par Somfy est interdite - la sécurité des 11 - Effacement des télécommandes _________________ 14 personnes ne serait pas assurée. -
Seite 4: Mise En Garde - Instructions Importantes De Sécurité
à une défaillance d’un dispositif de sécurité, le pilotage Les câbles enterrés doivent être équipés d’une gaine de doit se faire impérativement en vue de la porte. moteur et les câbles des accessoires. Copyright © 2014 Somfy SAS. All rights reserved. -
Seite 5: Réglementation
Pour les opérations de manipulation, de perçage et de soudure, porter les protections adéquates (lunettes spéciales, gants, casque antibruit, etc.). 1.7 Réglementation Somfy SAS déclare que le produit décrit dans ces Zone 2 instructions lorsqu’il est utilisé conformément à ces instructions, est conforme aux exigences essentielles des Zone 3 Directives Européennes applicables et en particulier à... -
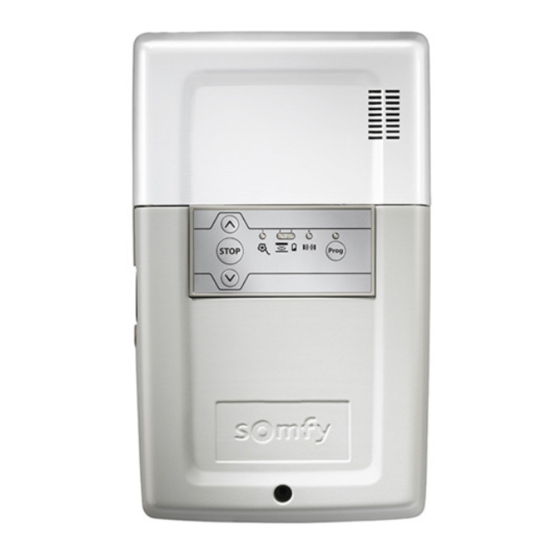
Seite 6: Description Du Récepteur Rollixo
2.3 Description de l’interface de programmation externe ROLLIXO 2.1 Domaine d’application Le récepteur ROLLIXO, associé à un moteur Somfy RDO CSI et à une solution barre palpeuse Somfy, est prévu pour motoriser une porte de garage enroulable Prog STOP à ouverture verticale en usage résidentiel de dimension extérieure :... -
Seite 7: Installation
[2]. Bloquer le câble moteur avec le serre-câble fourni. Le câble du moteur doit impérativement être placé dans la zone d’isolation 230V du récepteur. STOP Prog Zone d’isolation 24V Zone d’isolation 230V Copyright © 2014 Somfy SAS. All rights reserved. -
Seite 8: Installation D'une Barre Palpeuse Radio Optique Ou Résistive Avec Émetteur Xse
Ajuster la position haute avec les touches et . - activer automatiquement la sensibilité maximum du capteur de mouvement - augmenter temps fonctionnement du capteur STOP Prog de 25 à 35 secondes lorsque l’aimant bas est détecté. Copyright © 2014 Somfy SAS. All rights reserved. -
Seite 9: Mémorisation De L'émetteur Xse
Aucun mouvement de la porte n’est possible tant que l’alarme sonne. Lorsque l’alarme sonne, appuyer sur une touche d’une télécommande mémorisée dans le récepteur pour l’arrêter. L’alarme ne peut être arrêtée qu’avec une télécommande mémorisée. Copyright © 2014 Somfy SAS. All rights reserved. -
Seite 10: Raccordement Des Périphériques
- la fermeture automatique est activée. Antenne 433,42 MHz Ne pas raccorder une antenne déportée Si suppression des cellules, il est impératif de faire le pont entre les (incompatible) bornes 18 et 19. Copyright © 2014 Somfy SAS. All rights reserved. - Seite 11 > Barre palpeuse filaire résistive 8k2 - Dipswitch 4 récepteur sur Test 24V dc 24V Cell Sec Cell Position dipswitch 4 récepteur Brown Marron Blue Bleu Black Noir Grey Gris Stop Safety Edge KeySwitch Copyright © 2014 Somfy SAS. All rights reserved.
-
Seite 12: Paramétrage Avancé
Pour activer / désactiver l’alarme, appuyer simultanément sur les touches pendant fermeture provoque du récepteur jusqu’à ce que les 4 voyants clignotent rapidement. STOP réouverture. L’alarme émet un bip si elle est activée. STOP Prog STOP Prog Copyright © 2014 Somfy SAS. All rights reserved. -
Seite 13: Programmation Des Modes De Fonctionnement
> Paramétrage du mode vacances Commentaires Aucune option active X (par Interface de programmation défaut) verrouillée (télécommandes et contact Dipswitch 5 à clé actifs) Mode Télécommandes verrouillées Vacances (interface de programmation et contact à clé actifs) Copyright © 2014 Somfy SAS. All rights reserved. -
Seite 14: Mémorisation Des Télécommandes
[4]. Appuyer brièvement sur la touche choisie pour le pilotage de la motorisation sur la nouvelle télécommande. Le voyant au-dessus de la touche du récepteur clignote, la Prog télécommande est mémorisée dans le récepteur. Prog Télécommande mémorisée Prog Télécommande à mémoriser Copyright © 2014 Somfy SAS. All rights reserved. -
Seite 15: Mémorisation De Télécommandes 3 Touches (Telis Io, Telis Composio Io, Etc.)
[2]. Appuyer sur la touche PROG au dos de la télécommande à mémoriser dans un délai maximum de 10 minutes. Le voyant au-dessus de la touche du récepteur clignote, la Prog télécommande est mémorisée dans le récepteur. Prog Prog Prog Copyright © 2014 Somfy SAS. All rights reserved. -
Seite 16: Mémorisation D'un Émetteur Barre Palpeuse Xse
Keytis io). Appuyer simultanément sur le bouton “PROG” et la TOUCHE à effacer de la télécommande. Prog STOP Pour déverrouiller les touches de programmation, répéter la procédure de verrouillage décrite ci-dessus. Copyright © 2014 Somfy SAS. All rights reserved. -
Seite 17: Diagnostic
Si un émetteur barre rendre lisse et régulier. palpeuse radio est mémorisé dans le récepteur, l’effacer (voir partie 12). Copyright © 2014 Somfy SAS. All rights reserved. -
Seite 18: Emetteur Xse
- Si la LED2 s’allume rouge pendant 8 sec alors l’émetteur XSE est fonctionnel. - Sinon, l’émetteur XSE est défaillant. Si les tests 1 et 2 montrent un émetteur fonctionnel, changer la barre palpeuse. Copyright © 2014 Somfy SAS. All rights reserved. -
Seite 19: Sicherheitshinweise
5.6 Alarm (optional) Anforderungen der Norm EN 60335-2-95 zu erfüllen, muss 6 - Schulung der Benutzer __________________________ 8 dieses Produkt mit einem Somfy-Motor des Typs RDO CSI 7 Anschließen von Peripheriegeräten _________________ 8 und einer Somfy-Sicherheitsleiste kombiniert werden. Die 7.1 Allgemeiner Schaltplan Kombination dieser drei Elemente wird im Folgenden als 7.2 Parametereinstellungen der verschiedenen Anschlussmöglichkeiten 8... -
Seite 20: Warnhinweis - Wichtige Sicherheitshinweise
- durch eine Sicherung oder einen Leistungsselbstschalter Abrollsicherungsvorrichtung installiert werden. 10 A - und durch eine Fehlerstromsicherung (30 mA). Die Trennung vom Stromnetz muss alle Pole erfassen. Die Installation eines Blitzschutzes wird empfohlen (mit Restspannung max. 2 kV). Copyright © 2014 Somfy SAS. All rights reserved. -
Seite 21: Anhang A Der Norm En
Sicherheitsleiste. Unbedingt 1.7 Normen Schließen zwischen bestätigen, dass Somfy SAS erklärt, dass das in diesen Anleitungen Boden und Unterkante Hinderniserkennung beschriebene Produkt bei Anwendung gemäß dieser des Torblatts Anhang A der Norm EN 12 Anweisungen mit den wesentlichen Anforderungen der 453 konform ist anwendbaren Europäischen Richtlinien konform ist,... -
Seite 22: Beschreibung Des Rollixo-Empfängers
Programmierschnittstelle EMPFÄNGERS 2.1 Bestimmungsgemäße Verwendung Der ROLLIXO-Empfänger ist darauf ausgelegt – in Verbindung mit einem Somfy-Motor des Typs RDO CSI und einer Somfy-Sicherheitsleiste – zur Prog STOP motorisierten Öffnung und Schließung von privat genutzten, vertikal öffnenden Garagenrolltoren mit folgenden Außenmaßen eingesetzt zu werden: - Höhe = max. -
Seite 23: Installation
Hinweis: Anschließend muss die Drehrichtung des Antriebs überprüft und gegebenenfalls umgekehrt werden. [2]. Sichern Sie das Antriebskabel mit der mitgelieferten Kabelzugentlastungsklemme. Das Antriebskabel muss unbedingt im 230 V-Isolierbereich des Empfängers eingeführt werden. STOP Prog 24 V-Isolierbereich 230 V-Isolierbereich Copyright © 2014 Somfy SAS. All rights reserved. -
Seite 24: Überprüfung Der Drehrichtung Des Antriebs Und Einstellung Der Endlagen
- Risiken bei der Bodenerfassung minimieren präzises Schließen des Tores zu gewährleisten, STOP Prog - die Betriebszeit des Sensors nach der Erkennung des unteren Abschaltmagneten von 25 auf 35 Sekunden zu erhöhen. Copyright © 2014 Somfy SAS. All rights reserved. -
Seite 25: Abspeicherung Des Xse-Senders
Tor von Hand zu öffnen. Solange der Alarm ertönt, ist keine Torbewegung möglich. Drücken Sie, während der Alarm ertönt, auf eine Taste eines eingelernten Funksenders, um den Alarm auszuschalten. Der Alarm kann nur mit einem eingelernten Funkhandsender ausgeschaltet werden. Copyright © 2014 Somfy SAS. All rights reserved. -
Seite 26: Schulung Der Benutzer
Lichtschranke - die automatische Schließfunktion aktiviert ist. Antenne 433,42 MHz Keine Außenantenne anschließen (nicht Wird die Lichtschranke entfernt, muss die Brücke zwischen den kompatibel) Klemmen 18 und 19 unbedingt wieder eingesetzt werden. Copyright © 2014 Somfy SAS. All rights reserved. -
Seite 27: Drahtgebundene Ohmsche Sicherheitsleiste 8K2 - Dip-Schalter 4, Empfänger Auf On
> Drahtgebundene ohmsche Sicherheitsleiste 8k2 - Dip-Schalter 24V dc 24V Cell Sec Cell Test 4, Empfänger auf ON Position Dip-Schalter 4 Empfänger Brown Braun Blue Blau Schwarz Black Grey Grau Stop Safety Edge KeySwitch Copyright © 2014 Somfy SAS. All rights reserved. -
Seite 28: Erweiterte Einstellungen
Empfängers, bis die 4 Leuchten schnell blinken. STOP während des Schließens die erneute Der Alarm zeigt mit einem kurzen Ton an, wenn er aktiviert ist. Öffnung des Tores. STOP Prog STOP Prog Copyright © 2014 Somfy SAS. All rights reserved. -
Seite 29: Programmierung Der Betriebsmodi
Leuchten 1, 2, 4 und Prog 2 Sekunden lang. Zeitverzögertes Schließen > Einstellungen des Ferienmodus Blockierung durch die Kommentar Lichtschranke Verriegelte Keine Funktion aktiviert (Standard) Programmierschnittstelle (Funkhandsender und Dip-Schalter 5 Schlüsselschalter aktiv) Ferienmodus Verriegelte Funkhandsender (Programmierschnittstelle und Schlüsselschalter aktiv) Copyright © 2014 Somfy SAS. All rights reserved. -
Seite 30: Einlernen Von Funkhandsendern
[4]. Drücken Sie kurz auf die Taste, mit der Sie am neuen Funkhandsender den Torantrieb steuern möchten. Die Kontrollleuchte oberhalb der Taste des Empfängers blinkt, der Eingelernter Prog Funkhandsender Funkhandsender ist im Empfänger eingelernt. Prog Eingelernter Funkhandsender Prog Einzulernender Funkhandsender Copyright © 2014 Somfy SAS. All rights reserved. -
Seite 31: Einlernen Über Das Programmier-Bedienfeld
[2]. Drücken Sie jetzt innerhalb von 10 Minuten auf die Taste PROG auf der Rückseite des einzulernenden Funkhandsenders. Die Kontrollleuchte oberhalb der Taste des Empfängers blinkt, der Prog Funkhandsender ist im Empfänger eingelernt. Prog Prog Prog Copyright © 2014 Somfy SAS. All rights reserved. -
Seite 32: Einlernen Eines Xse-Sicherheitsleistensenders
- durch direktes Löschen am Funkhandsender (nur bei den Funkhandsendern Keytis io). Drücken Sie gleichzeitig auf die Taste „PROG“ und die zu löschende TASTE. STOP Prog Zur Entsperrung der Programmiertasten wiederholen Sie den oben beschriebenen Vorgang. Copyright © 2014 Somfy SAS. All rights reserved. -
Seite 33: Empfänger
Sie gegebenenfalls einen Magneten - Stellen sicher, dass kein an oder ebnen und glätten Sie den Boden. Sicherheitsleisten-Funksender abgespeichert worden ist. Wenn Sicherheitsleisten-Funksender abgespeichert wurde, muss dieser gelöscht werden (siehe Abschnitt 12). Copyright © 2014 Somfy SAS. All rights reserved. -
Seite 34: Xse-Sender
- Anderenfalls ist der XSE-Sender defekt. Wenn die beiden Tests 1 und 2 ergaben, dass der Sender funktioniert, muss die Sicherheitsleiste ausgetauscht werden. > Probleme bei der Aktivierung des Senders aus der geöffneten Copyright © 2014 Somfy SAS. All rights reserved. -
Seite 35: Safety Instructions
5.5 Safety edge standard EN 60335-2-95, this product must be installed 5.6 Alarm (optional) with a Somfy RDO CSI motor and a Somfy safety edge 6 - User training ___________________________________ 8 solution. The assembly is together designated as a "drive". -
Seite 36: Safety Instructions
For overground cables, use a cable grommet that will For manoeuvring, drilling and welding operations, wear withstand the weight of vehicles (ref. 2400484). appropriate protection (special glasses, gloves, ear protection, etc.). 1.6 Safety instructions relating to installation Copyright © 2014 Somfy SAS. All rights reserved. -
Seite 37: Regulations
Rollixo io 1.7 Regulations 1.9 Risk prevention Somfy SAS declares that the product described in these instructions, when used in accordance with the instructions, WARNING complies with the essential requirements of the applicable Risk prevention - roller garage door drive for... -
Seite 38: Description Of The Rollixo Receiver
2.1 Area of application STOP Prog The ROLLIXO receiver, linked to a Somfy RDO CSI motor and a Somfy safety edge solution, is designed to drive a vertically opening roller garage door for residential use with the following external dimensions:... -
Seite 39: Installation
[2]. Lock the motor cable with the cable clamp provided. The motor cable must be placed in the receiver's 230 V insulation area. STOP Prog 24V insulation zone 230V insulation zone Copyright © 2014 Somfy SAS. All rights reserved. -
Seite 40: Checking The Direction Of Rotation Of The Motor And Adjustment Of The Motor End Limits
. - automatically activate magnet maximum level of sensitivity of the movement sensor - increase the sensor operating time by 25 to 35 seconds when STOP Prog the base magnet is detected. Copyright © 2014 Somfy SAS. All rights reserved. -
Seite 41: Programming The Xse Transmitter
Do not press the safety edge during the magnet recognition When the alarm sounds, press a button on a remote control memorised in the procedure. receiver to stop it. The alarm can only be stopped with a memorised remote control. Copyright © 2014 Somfy SAS. All rights reserved. -
Seite 42: User Training
- the automatic control device is being controlled remotely (user unable to see it), - automatic closure is activated. If cells are removed, it is essential to create a bridge between terminals 18 and 19. Copyright © 2014 Somfy SAS. All rights reserved. - Seite 43 > Wired 8k2 resistive safety edge - Dipswitch 8k2 4 receiver set to ON Test 24V dc 24V Cell Sec Cell Dipswitch 4 receiver position Brown Brown Blue Blue Black Black Grey Grey Stop Safety Edge KeySwitch Copyright © 2014 Somfy SAS. All rights reserved.
-
Seite 44: Advanced Parameter Setting
- pressing a button on the remote control To activate/deactivate the alarm, simultaneously press the buttons STOP during closing causes it to reopen. The alarm emits a beep if it has been activated. STOP Prog STOP Prog Copyright © 2014 Somfy SAS. All rights reserved. -
Seite 45: Programming Operating Modes
No option active > Holiday mode parameter setting Comments X (by Programming Interface locked default) (remote controls and keyswitch Dipswitch 5 active) Holiday mode Remote controls locked (programming interface and keyswitch active) Copyright © 2014 Somfy SAS. All rights reserved. -
Seite 46: General Information
Prog [3]. together. [4]. Remote control memorised control. The indicator light above button Prog control is memorised in the receiver. Prog Remote control memorised Prog Remote control to be memorised Copyright © 2014 Somfy SAS. All rights reserved. -
Seite 47: Memorising 3-Button Remote Controls (Telis Io, Telis Composio Io, Etc.)
[2]. Press the PROG button on the back of the remote control to be memorised within a maximum of 10 minutes. The indicator light above button Prog control is memorised in the receiver. Prog Prog Prog Copyright © 2014 Somfy SAS. All rights reserved. -
Seite 48: Memorising An Xse Safety Edge Transmitter
- by clearing directly on the remote control (only on Keytis io remote controls). Press the "PROG" button and the BUTTON to be cleared on the remote control together. Prog STOP To lock the programming buttons, repeat the locking procedure described above. Copyright © 2014 Somfy SAS. All rights reserved. -
Seite 49: Diagnostics
If a radio safety edge transmitter is stored in and install one if necessary or rectify the the receiver, clear it (see section 12). ground to make it smooth and even. Copyright © 2014 Somfy SAS. All rights reserved. -
Seite 50: Xse Transmitter
- If LED2 lights up red for 8 seconds then the XSE transmitter is operating correctly. - If not, the XSE transmitter is faulty. If tests 1 and 2 show that the transmitter is operating correctly, replace the safety edge. Copyright © 2014 Somfy SAS. All rights reserved. - Seite 52 Somfy 50 avenue du Nouveau Monde BP 152 - 74307 Cluses Cedex France www.somfy.com...