Herunterladen Inhalt Inhalt Diese Seite drucken
Inhaltsverzeichnis

Werbung

Verfügbare Sprachen
  • DE

Verfügbare Sprachen

  • DEUTSCH, seite 50
Soon
Garage door opener
Instructions and warnings for the fitter
Istruzioni ed avvertenze per l'installatore
Instructions et recommandations pour l'installateur
Anweisungen und Hinweise für den Installateur
Instrucciones y advertencias para el instalador
Instrukcje i uwagi dla instalatora

Werbung

Inhaltsverzeichnis
loading

Inhaltszusammenfassung für Nice Soon

  • Seite 1 Soon Garage door opener Instructions and warnings for the fitter Istruzioni ed avvertenze per l’installatore Instructions et recommandations pour l’installateur Anweisungen und Hinweise für den Installateur Instrucciones y advertencias para el instalador Instrukcje i uwagi dla instalatora...
  • Seite 2: Inhaltsverzeichnis

    SECTION 1 is a step-by-step guide illustrating the phases re- quired for physical installation of the product and operation start-up. SECTION 2 describes how to personalise operation of Soon, by the programming of specific functions and selection of special operations and settings.
  • Seite 3: Instructions For Automation Installation And Start-Up

    Internet site: www.niceforyou.com caution will prevent deterioration and the risk of leakage of haz- • Use of the Soon product other than as specified in this manual is ardous substances from the battery. strictly prohibited. Improper use constitutes a risk of damage to the •...
  • Seite 4: Installation Feasibility Check

    4.1) Standard installation layout (see fig. 3) Fig. 3 illustrates the complete installation of a Soon gearmotor. The drawing shows the various components and cables required for con- nection, all assembled and positioned according to a standard layout.
  • Seite 5: Install The Mechanical Components

    Mounting the Soon gearmotor (see Fig. 4) the three screws (supplied) in the position shown in the figure, 1. (Fig. 4-a) Insert the Soon outlet shaft in the sectional door drive taking care to position the release mechanism cable outlets cor- shaft, coupling them using the keys provided in the pack.
  • Seite 6: Laying Electric Cables

    All electrical connections must be made with the system discon- nected from the power supply 1. To remove the protection cover and access the SOON elec-tron- ic control unit, remove the screw and pull the cover up-wards to remove (Fig. 5).
  • Seite 7 (see SECTION 2 of the manual) to connect one of the following devices: Flashing light If programmed as “flashing light” the “FLASH” output can be con-nected to a NICE “LUCY B” flashing light with a 12V 21W car type lamp.
  • Seite 8: Connect Bluebus Devices

    BlueBUS can be used, for example, to connect the following: photocells, safety devices, control pushbuttons, indi- cator lamps, etc. The SOON control unit recognises each one of the devices connected by means of a specific self-learning phase and is 5.2.1) Photocells...
  • Seite 9: Connect Electrical Power Supply

    954-1. 5.4) Connect electrical power supply For electrical power supply of SOON, simply insert the plug in a mains socket. If necessary, use a commercially available adapter if the SOON plug does not correspond to the mains socket available. 6) Initial system start-up - checks The following operations will be performed on live electrical circuits and therefore manoeuvres may be hazardous! Therefore take great care and never perform operations alone.
  • Seite 10: Memorising Positions

    7.2) Memorising positions After self-learning the devices, the control unit must recognise the door opening and closing positions. Up to 6 positions can be programmed as follows: Position Meaning Maximum required opening position. When the door reaches this position it stops. Slowdown start position during opening manoeuvre.
  • Seite 11: Perform Final Testing Of System

    Commissioning can only be performed after positive 7. Prepare and provide the owner with the automation maintenan- results of all test phases on Soon and the other devices ce schedule (containing all prescriptions for maintenance of indi- present. Partial or “makeshift” commissioning is strictly vidual devices).
  • Seite 12: Instructions For Personalised Automation Operation

    8,2KΩ resistive type senstivie edge or OSE optic sensor. During normal operation of SOON, when no manoeuvre is in progress, leds L1….L8 are lit or off depending on the status of the associated function, for example L1 is lit if the function “Automatic closure” is enabled.
  • Seite 13: Level 1 Programming

    10.2) Level 1 programming By default level 1 function are all set to OFF, but can be modified at any time as described below. Take care during modification procedures, as there is a maximum time interval of 10 seconds between pressing one key and another; otherwise the system exits the procedure auto- matically memorising the changes made up to that time.
  • Seite 14: Level 2 Programming

    Note: points 3 to 7 can be repeated during the same programming phase to modify other parameters. 11) Maintenance notification SOON enables the user to be notified when a maintenance The maintenance requirement notification is via the flashing light or the check needs to be performed on the automation.
  • Seite 15: Check Of Number Of Manoeuvres Performed

    12) Fault log list SOON enables the display of any faults that have occurred in the last 8 manoeuvres, for example interruption of a manoeuvre due to activa- tion of a photocell or sensitive edge. To check the list of faults, proceed as follows: Press and hold [Set] for approx.
  • Seite 16: Connect Devices To Stop Input

    “BlueBUS Led” (the diagnostics flashes always refer to the last action performed by Soon) For an explanation of the number of flashes and associated cause, refer to the table below: Table 7: diagnostics flash signals n°...
  • Seite 17: What To Do If

    Then detach Soon from the spring support shaft, open identify the cause of the fault and then replace with versions of the the door to the maximum position and re-install Soon in this posi- same current value and specifications.
  • Seite 18 Il presente manuale spiega come installare, programmare e La Prima e la Seconda Parte del manuale sono destinate esclusi- usare l'apri portone sezionale Soon. I vari argomenti sono vamente al Personale Tecnico qualificato che installerà l'automazione. suddivisi in tre parti distinte: Nessuna di queste informazioni può...
  • Seite 19: Operare In Condizioni Di Sicurezza

    • Collegare la Centrale di comando di Soon solo ad una linea di ali- Il presente manuale è strutturato per guidare passo dopo passo il mentazione elettrica dotata di messa a terra di sicurezza.
  • Seite 20: Valutare La Fattibilità Dell'installazione

    4.1) Schema tipico di installazione (vedere fig. 3) La Fig. 3 mostra l'installazione completa di un motoriduttore Soon. Il disegno riporta i vari componenti e i cavi necessari al loro collegamen- to, il tutto assemblato e posizionato secondo uno schema tipico e usuale.
  • Seite 21: Installare I Componenti Meccanici

    Eseguire questa operazione a portone CHIUSO. esempio, lo scavo delle tracce per i tubi dei cavi elettrici o la posa di 2. (Fig. 4-b) Fissare al Soon la staffa tramite vite, dado e rondella in canaline esterne; l'eventuale fissaggio nel calcestruzzo dei suddetti dotazione.
  • Seite 22: Posa Dei Cavi Elettrici

    1. Per rimuovere il coperchio di protezione ed accedere alla cen- trale elettronica di controllo di SOON occorre togliere la vite e sollevare il coperchio tirandolo verso l'alto (Fig. 5). 2. Allentare il pressacavo libero e far passare i cavi per il collega- mento ai morsetti della centrale.
  • Seite 23 è programmabile (vedere la SECONDA PARTE del manuale) per collegare uno fra i seguenti dispositivi: Lampeggiante Se programmata come “lampeggiante” sull'uscita “FLASH” è possibile collegare un lampeggiante NICE “LUCY B” con una lampadina a 12V 21W tipo auto. Durante la manovra lampeggia con periodo 0.5s acceso e 0.5s spento.
  • Seite 24: Collegare I Dispositivi Bluebus

    “7.1 - Memorizzazione dispositivi”. assegnato un indirizzo univoco. A BlueBUS si possono collegare ad esempio: fotocellule, dispositivi di sicurezza, pulsanti di comando, spie di segnalazione ecc. La centrale di controllo di SOON riconosce 5.2.1) Fotocellule Il sistema “BlueBUS” consente, tramite l'indirizzamento con gli appositi ponticelli, il riconoscimento delle fotocellule da parte della centrale e di assegnare la corretta funzione di rilevazione.
  • Seite 25: Collegare L'alimentazione Elettrica

    EN 954-1. 5.4) Collegare l'alimentazione elettrica Per l'alimentazione elettrica a SOON è sufficiente inserire la sua spina in una presa di corrente. Eventualmente utilizzare un adattatore comu- nemente reperibile in commercio se la spina di SOON non corrisponde alla presa disponibile.
  • Seite 26: Memorizzazione Delle Posizioni

    7.2) Memorizzazione delle posizioni Dopo l'apprendimento dei dispositivi è necessario far riconoscere alla centrale le posizioni di apertura e chiusura del portone. È possibile pro- grammare fino a 6 posizioni che sono: Posizione Significato Quota di massima apertura che si desidera. Quando il portone arriva in questa posizione si ferma. Quota di inizio rallentamento durante la manovra di apertura.
  • Seite 27: Effettuare Il Collaudo Finale Dell'impianto

    La messa in servizio può avvenire solo dopo aver esegui- 7. Realizzare e consegnare al proprietario il piano di manutenzione to con esito positivo tutte le fasi di collaudo di Soon e de- dell'automazione (che deve raccogliere tutte le prescrizioni sulla gli altri dispositivi presenti.
  • Seite 28: Istruzioni Per Personalizzare Il Funzionamento Dell'automazione

    8,2KΩ oppure ottico OSE. Durante il funzionamento normale di SOON, quando non è in corso nessuna manovra, i led L1….L8 sono accesi o spenti in base allo sta- to della funzione che rappresentano, ad esempio L1 è acceso se è attiva la “Chiusura automatica”.
  • Seite 29: Programmazioni Primo Livello

    10.2) Programmazioni primo livello Di fabbrica le funzioni del primo livello sono poste tutte “OFF” ma si possono cambiare in qualsiasi momento come descritto di seguito. Fare attenzione nell'eseguire la procedura perché c'è un tempo massimo di 10s tra la pressione di un tasto e l'altro, altrimenti la procedura fini- sce automaticamente memorizzando le modifiche fatte fino a quel momento.
  • Seite 30: Programmazioni Secondo Livello

    Nota: i punti da 3 a 7 possono essere ripetuti durante le stessa fase di programmazione per regolare più parametri. 11) Avviso di manutenzione SOON consente di avvisare l'utente quando eseguire un La segnalazione di richiesta di manutenzione avviene attraverso il lam- controllo di manutenzione dell'automazione.
  • Seite 31: Verifica Del Numero Di Manovre Effettuate

    12) Elenco storico anomalie SOON permette di visualizzare le eventuali anomalie che si sono verificate nelle ultime 8 manovre, ad esempio l'interruzione di una manovra per l'intervento di una fotocellula o di un bordo sensibile. Per verificare l'elenco delle anomalie precedere descritto di seguito.
  • Seite 32: Approfondimenti: Funzioni Particolari

    “Led BlueBUS” (i lampeggi dia- gnostici si riferiscono sempre all'ultima azione compiuta da Soon). Per comprendere la corrispondenza fra numero dei lampeggi e cause, fare riferimento alla seguente tabella: Tabella 7: lampeggi di diagnostica n°...
  • Seite 33: (Guida Alla Risoluzione Dei Problemi)

    L1 smette di lampeggiare velocemente. Quindi disinstalla- - Verificare che Soon sia alimentato con la tensione di rete 230V. re Soon dall'albero portamolle, aprire il portone nella posizione Verificare che i fusibili F1 e F2 (Fig. 15) non siano interrotti; in que- massima e reinstallare Soon da questa posizione.
  • Seite 34 à sa mise en service. La DEUXIÈME PARTIE décrit comment personnaliser le fonc- tionnement de Soon, à travers la programmation de certaines fonctions spécifiques et le choix d'options et de réglages par- ticuliers. De plus, une section est dédiée à la maintenance et...
  • Seite 35: L'automatisme

    ® risques comprenant la liste des exigences essentielles de sécurité • L'emballage du produit Soon doit être mis au rebut dans le plein requises par l'annexe I de la Directive Machines, en indiquant les respect des normes locales en vigueur en matière de recyclage solutions adoptées.
  • Seite 36: Évaluer La Faisabilité De L'installation

    4.1) Schéma typique d'installation (voir Fig. 3) La Fig. 3 illustre l'installation complète d'un opérateur Soon. Le dessin reporte les différents composants et les câbles nécessaires à leur connexion, le tout assemblé et positionné suivant un schéma typique et courant.
  • Seite 37: Installer Les Composants Mécaniques

    Effectuer cette opération avec la porte FERMÉE. exemple, les saignées pour les gaines des câbles électriques ou la 2. (Fig. 4-b) Fixer la patte de fixation sur Soon à l'aide de la vis, de pose de conduits à l'extérieur; l'éventuelle fixation dans le béton des l'écrou et de la rondelle fournie.
  • Seite 38: Pose Des Câbles Électriques

    1. Pour éliminer le couvercle de protection et accéder à la logique électronique de commande de Soon il faut enlever la vis et sou- lever le couvercle en le tirant vers le haut (Fig. 5). 2. Desserrer le presse-étoupe libre et faire passer les câbles pour la connexion aux bornes de la logique.
  • Seite 39 Clignotant Si elle est programmée comme « clignotant » sur la sortie « FLASH » il est possible de connecter un cli- gnotant NICE “LUCY B” avec une ampoule à 12 V 21 W type auto. Durant la manœuvre elle clignote à une fréquence de 0,5 s allumée et 0,5 s éteinte.
  • Seite 40: Connecter Les Dispositifs Bluebus

    La logique de des dispositifs compatibles avec seulement deux conducteurs sur com-mande de SOON reconnaît un par un tous les dispositifs lesquels transitent aussi bien l'alimentation électrique que les connectés à travers une procédure de reconnaissance ad hoc et est signaux de communication.
  • Seite 41: Connecter L'alimentation Électrique

    5.4) Connecter l'alimentation électrique Pour l'alimentation électrique de SOON il suffit de brancher sa fiche électrique dans une prise de courant. Utiliser éventuellement un adap- tateur du type disponible dans le commerce si la fiche de SOON ne correspond pas à la prise disponible.
  • Seite 42: Mémorisation Des Positions

    7.2) Mémorisation des positions Après la reconnaissance des dispositifs il faut faire reconnaître par la logique les positions d'ouverture et de fermeture de la porte. On peut programmer jusqu'à 6 positions qui sont: Position Signification Position d'ouverture maximum désirée. Quand la porte arrive dans cette position, elle s'arrête. Position de début ralentissement durant la manœuvre d'ouverture.
  • Seite 43: Effectuer L'essai Final De L'installation

    La mise en service ne peut être faite que si toutes les 7. Réaliser et remettre au propriétaire le plan de maintenance de phases d'essai de Soon et des autres dispositifs ont été l'automatisme (qui doit regrouper toutes les prescriptions pour la exécutées avec résultat positif.
  • Seite 44: Instructions Pour Personnaliser Le Fonctionnement De L'automatisme

    à l'emploi d'un bord sensible à variation de résistance 8,2KΩ ou de type optique OSE. Durant le fonctionnement normal de SOON, quand aucune manœuvre n'est en cours, les led L1…L8 sont allumées ou éteintes suivant l'état de la fonction à laquelle elles correspondent, par exemple L1 est allumée si la « fermeture automatique » est active.
  • Seite 45: Fonctions Premier Niveau

    10.2) Fonctions premier niveau En usine, les fonctions du premier niveau sont toutes mises sur « OFF » mais on peut les modifier à tout moment en suivant les indications données ci-après. Faire attention dans l'exécution de la procédure car il y a un temps maximum de 10 s entre la pression d'une touche et l'autre, autrement la procédure se termine automatiquement en mémorisant les modifications faites jusqu'à...
  • Seite 46: Programmations Deuxième Niveau

    Note: les points 3 à 7 peuvent être répétés au cours de la même phase de programmation pour régler plusieurs paramètres. 11) Avis de maintenance SOON permet d'aviser l'utilisateur quand il faut procéder nombre de manœuvres. La signalisation de demande de maintenance à...
  • Seite 47: Vérification Du Nombre De Manœuvres Effectuées

    12) Liste historique des anomalies SOON permet d'afficher les éventuelles anomalies qui se sont vérifiées lors des 8 dernières manœuvres, par exemple, l'interruption d'une manœuvre due à l'intervention d'une photocellule ou d'un bord sensible. Pour vérifier la liste des anomalies procéder suivant les indications ci-après.
  • Seite 48: Approfondissements: Fonctions Particulières

    éventuelles anomalies à travers des séquences préétablies de clignotements émis par le clignotant, l'éclairage automatique et la « led BlueBUS » (les clignotements diagnostics se réfèrent toujours à la dernière action accomplie par Soon). Pour comprendre la cor- respondance entre le nombre de clignotements et les causes, se référer au tableau suivant:...
  • Seite 49: Que Faire Si

    BUS” ne clignote pas - Si la led L1 clignote, effectuer une manœuvre de fermeture jusqu'à - Vérifier que Soon est alimenté à la tension de secteur à 230 V. Véri- ce que L1 arrête de clignoter rapidement. Démonter ensuite Soon fier si les fusibles F1 et F2 (Fig.
  • Seite 50 ERSTER TEIL: eine Schrittanleitung, die die notwendige Schritte zur “physischen” Installation des Produktes und für seine Inbetriebnahme schildert. ZWEITER TEIL: er beschreibt, wie Soon durch die Program- mierung einiger Sonderfunktionen und die Wahl von Optionen und besonderer Einstellungen personalisiert werden kann.
  • Seite 51: Anweisungen Für Die Installation Und

    Verfügung. • Am Ende der Installation darf der Automatismus erst benutzt wer- • Der Gebrauch von Soon zu einem anderen Einsatz als im vorlie- den, nachdem die "Inbetriebsetzung" durchgeführt ist, wie in genden Handbuch vorgesehen ist untersagt. Ein unsachgemäßer Abschnitt 8 - ABNAHME UND INBETRIEBSETZUNG DES Gebrauch kann Produktschäden und Personen und Gegenstände...
  • Seite 52: Die Durchführbarkeit Der Installation Bewerten

    4.1) Typisches installationsschema (siehe Abb. 3) Die Abb. 3 zeigt die komplette Installation eines Antriebs Soon. Auf der Zeichnung sind die verschiedenen Bestandteile und die für ihren Anschluss notwendigen Kabel angegeben, das Ganze ist nach einem typischen und üblichen Schema zusammengebaut und angeordnet.
  • Seite 53: Die Mechanischen Bestandteile Installieren

    Nachdem die Vorbereitungsarbeiten zur Installation (wie z.B. Aus- Diesen Vorgang bei GESCHLOSSENEM Tor ausführen graben der Kanäle zum Verlegen der Elektrokabel oder Verlegen 2. (Abb. 4-b) Am Soon, den Bügel mit Schraube, Mutter und Unter- externer Kanäle; eventuelle Befestigung der genannten Kanäle im legscheibe (mitgeliefert) befestigen.
  • Seite 54: Die Elektrischen Kabel Verlegen

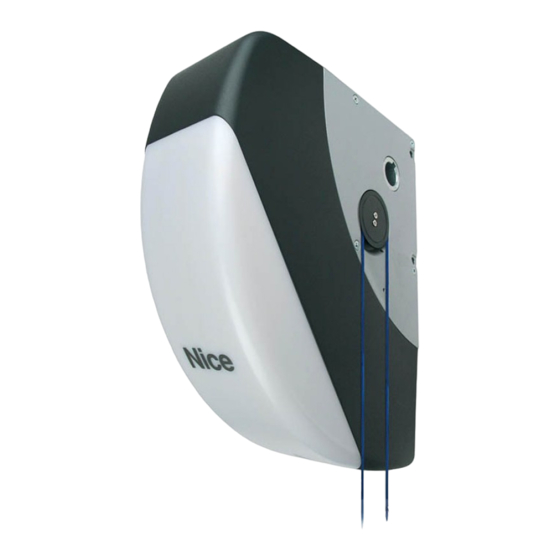
    1. Um den Schutzdeckel zu entfernen und Zugang zur elektroni- schen Steuerung von SOON zu erhalten, muss die Schraube ent- fernt und der Deckel nach oben herausgezogen werden (Abb. 5). 2. Den freien Kabelhalter lösen und die Kabel für den Anschluss an den Klemmen der Steuerung durchführen.
  • Seite 55 Dieser Ausgang kann programmiert werden (siehe den ZWEITEN TEIL des Handbuchs), um eine der folgenden Vorrichtungen daran anzuschließen: Blinkleuchte Falls als “Blinkleuchte” programmiert, kann am Ausgang “FLASH” eine NICE Blinkleuchte “LUCY B” mit 12V 21W Lampe automatischen Typs angeschlossen werden.
  • Seite 56: Die Bluebus-Vorrichtungen Anschließen

    Adresse zugeteilt wird. An BlueBUS kann man zum Beispiel Photo- zellen, Sicherheitsvorrichtungen, Steuertasten, Leuchtmelder usw. anschließen. Die Steuerung von SOON er-kennt nacheinander alle 5.2.1) Photozellen Das System “BlueBUS” ermöglicht durch die Adressierung mit spe- ziellen Überbrückungen die Erkennung der Photozellen seitens der Steuerung und die Zuteilung der korrekten Wahrnehmungsfunktion.
  • Seite 57: Erstes Einschalten Der Anlage - Überprüfungen

    Vorschrift EN 954-1. 5.4) Die bluebus-vorrichtungen anschließen Für die Versorgung von SOON mit Betriebsspannung genügt es, den Stecker von SOON in eine Steckdose zu stecken. Sollte der Stecker von SOON nicht mit der verfügbaren Steckdose übereinstimmen, kann ein handelsüblicher Adapter benutzt werden.
  • Seite 58: Positionen Speichern

    7.2) Positionen speichern Nach der Erlernung der Vorrichtungen muss die Steuerung die Öffnungs- und Schließpositionen des Tors erkennen. Man kann bis zu 6 Posi- tionen programmieren. Sie sind: Position Bedeutung Maß der gewünschten, maximalen Öffnung. Das Tor hält an, wenn es diese Position erreicht. Maß, an dem die Verlangsamung in Öffnung beginnt.
  • Seite 59: Die Endabnahme Der Anlage Ausführen

    Steuerung zweimal schneller blinken und so bestätigen, dass die tungen sind die Verfahren in den jeweiligen Anleitungen Steuerung das Ereignis erkannt hat. auszuführen. Für die Abnahme von SOON muss die fol- 7. Zur Überprüfung der Photozellen und insbesondere um zu prü- gende Sequenz an Vorgängen ausgeführt werden:...
  • Seite 60: Anweisungen Für Die Personalisierung Der Automatisierung

    Ein Endabschnitt des Handbuchs ist dagegen den Problemen und ihrer Lösung sowie der War- tung und Entsorgung des Produktes gewidmet. 9.1) Programmierungstasten An der Steuerung von SOON sind 3 Tasten vorhanden, die sowohl zur Schaltung der Steuerung bei den Tests als auch zu Programmierungen benutzt werden können: OPEN Mit Taste “OPEN”...
  • Seite 61: Programmierungen Des Ersten Niveaus

    10.2) Programmierungen des ersten niveaus Werkseitig sind alle Funktionen des ersten Niveaus auf “OFF” gestellt, was aber jederzeit geändert werden kann, wie hier folgend beschrie- ben. Bei der Durchführung des Verfahrens vorsichtig sein, da die Zeitgrenze 10s zwischen dem Druck auf eine Taste und die andere beträgt. Andernfalls wird das Verfahren automatisch beendet, mit Speicherung der bisher ausgeführten Änderungen.
  • Seite 62: Programmierungen Zweiten Niveaus

    Anmerkung: die Punkte von 3 bis 7 können während derselben Programmierungsphase wiederholt werden, um mehrere Parameter ein- zustellen. 11) Wartungsanzeige SOON warnt den Benutzer, wann eine Wartung der Auto- Die Anzeige “Wartung notwendig” erfolgt durch die Blinkleuchte oder matisierung ausgeführt werden soll. Die Anzahl an Bewe- die Wartungskontrolllampe, je nach Programmierung (siehe Tab.
  • Seite 63: Überprüfung Der Anzahl An Ausgeführten Bewegungen

    12) Liste der alarmhistorik SOON ermöglicht es, eventuelle Störungen bei den 8 letzten Bewegungen zu sehen, wie z.B. die Unterbrechung einer Bewegung infolge der Auslösung einer Photozelle oder Schaltleiste. Um die Liste der Alarmhistorik zu überprüfen, wie hier folgend beschrieben vorgehen.
  • Seite 64: Weitere Auskünfte: Sonderfunktionen

    Störungen durch bereits eingestellte Blinksequenzen der Blinkleuchte, der zusätzlichen Beleuchtung oder der BlueBUS-Led an (das Dia- gnose-Blinken bezieht sich immer auf die von Soon ausgeführte, letzte Handlung). Für den Zusammenhang der Anzahl an Blinkvorgängen mit den Ursachen ist auf die nachfolgende Tabelle Bezug zu nehmen: Tabelle 7: Diagnose-Blinken Anzahl an Blinkv.
  • Seite 65: Was Tun, Wenn

    Dann Soon von der Federtragwelle abmontieren, - Prüfen, ob Soon mit der 230V Netzspannung gespeist ist. Prüfen, das Tor in max. Position öffnen und Soon ab dieser Position wie- ob die Sicherungen F1 und F2 (Abb. 15) unterbrochen sind; in die- der installieren.
  • Seite 66 En este manual se explica cómo instalar, programar y utilizar exclusivamente al Personal Técnico cualificado que instalará la automa- dispositivo para abrir y cerrar puertas seccionales Soon. Los tización. Ninguna de estas informaciones puede ser considerada útil argumentos están subdivididos en tres partes diferentes: para el Usuario final del producto La PRIMERA PARTE es una guía paso a paso que ilustra las...
  • Seite 67: Instrucciones Para Instalar Y Poner En Funcionamiento La Automatización

    • Durante la instalación, todas las operaciones que requieren el (Directiva de Máquinas que reglamenta la realización de una puerta acceso a las piezas internas cubiertas por la tapa de Soon (por ej. o de una cancela automática) y, en especial, las normas EN 12445, los bornes) deben efectuarse con la alimentación eléctrica corta-...
  • Seite 68: Evaluar La Factibilidad De La Instalación

    4.1) Esquema típico de instalación (véase la Fig. 3) La Fig. 3 muestra la instalación completa de un motorreductor Soon. En el dibujo se muestran los componentes y los cables necesarios para la conexión, todo ensamblado y colocado según un esquema típico y usual.
  • Seite 69: Instalación De Los Componentes Mecánicos

    (por ejemplo la realización de las rozas para los tubos de los 2. (Fig. 4-b) Fije el estribo al Soon con el tornillo, la tuerca y la aran- cables eléctricos o la colocación de las canaletas externas, la fijación dela entregados de serie.
  • Seite 70: Tendido De Los Cables Eléctricos

    1. Para desmontar la tapa de protección y acceder a la central electrónica de control del SOON quite el tornillo del costado y levante la tapa tirando de ella hacia arriba (Fig. 5). 2. Afloje el prensaestopas libre y pase los cables para la conexión a los bornes de la central.
  • Seite 71 Luz intermitente Si está programada como “luz intermitente” en la salida “FLASH”, es posible conectar una luz intermitente NICE “LUCY B” con una bombilla de 12V 21W tipo automóvil. Durante la maniobra destella con una frecuencia de 0,5s encendida y 0,5s apagada.
  • Seite 72: Conexión De Los Dispositivos Bluebus

    5.2) Conexión de los dispositivos bluebus BlueBUS es un sistema que permite efectuar las conexiones de los La central de control del SOON reconoce uno a uno todos los dis- dispositivos compatibles con dos conductores solos, por los cuales positivos conectados por medio de una etapa de aprendizaje ade- pasan la alimentación eléctrica y las señales de comunicación.
  • Seite 73: Conexión De La Alimentación Eléctrica

    5.4) Conexión de la alimentación eléctrica Para conectar la alimentación eléctrica al SOON basta con enchufar su clavija en un tomacorriente. De ser necesario, si la clavija del SOON no corresponde al tomacorriente disponible, utilice un adaptador de esos que se encuentran generalmente en el comercio.
  • Seite 74: Memorización De Las Posiciones

    7.2) Memorización de las posiciones Después del aprendizaje de los dispositivos es necesario que la central reconozca las posiciones de apertura y cierre de la puerta. Es posi- ble programar hasta 6 posiciones, a saber: Posición Significado Cota de apertura máxima deseada. La puerta se detiene cuando llega a esta posición. Cota de inicio de la desaceleración durante la apertura.
  • Seite 75: Efectuar El Ensayo Final De La Instalación

    (que debe incluir todas las prescripciones sobre ensayo del Soon y de los demás dispositivos montados. No el mantenimiento de cada dispositivo). está admitida la puesta en servicio parcial o en situacio- 8.
  • Seite 76: Instrucciones Para Personalizar El Funcionamiento De La Automatización

    8,2KΩ u óptica OSE. Durante el funcionamiento normal del SOON, cuando no se está ejecutando ninguna maniobra, los leds L1….L8 están encendidos o apa- gados según el estado de la función que estos representan, por ejemplo L1 está encendido si la función “Cierre automático” está activa.
  • Seite 77: Programaciones De Primer Nivel

    10.2) Programaciones de primer nivel Todas las funciones de primer nivel están configuradas de fábrica en “OFF” pero pueden cambiarse en cualquier momento como descrito a continuación. Tenga cuidado cuando efectúe la operación porque hay un tiempo máximo de 10s entre la presión de un botón y otro; en caso contrario el procedimiento se concluye automáticamente, memorizando las modificaciones hechas hasta ese momento.
  • Seite 78: Programaciones De Segundo Nivel

    Nota: los puntos de 3 a 7 pueden repetirse durante la misma etapa de programación para regular varios parámetros 11) Aviso de mantenimiento El SOON permite avisar al usuario cuándo efectuar un con- tidad de las maniobras. La señal de aviso de mantenimiento es indica- trol de mantenimiento de la automatización.
  • Seite 79: Control Del Número De Maniobras Efectuadas

    12) Listado del historial de los desperfectos El SOON permite visualizar los desperfectos que se hayan producido en las últimas 8 maniobras, por ejemplo la interrupción de una maniobra por la activación de una fotocélula o de una banda sensible. Para comprobar el listado de los desperfectos, proceda como indicado a continuación.
  • Seite 80: Otras Informaciones: Funciones Especiales

    “Led BlueBUS” (los destellos de diag- nósticos se refieren siempre a la última acción realizada por el Soon). Para saber la correspondencia entre el número de destellos y las cau- sas, consulte la siguiente tabla: Tabla 7: destellos de diagnóstico...
  • Seite 81: Qué Hacer Si

    Posteriormente desinstale el Soon - Controle que el Soon esté alimentado con la tensión de red de del eje portamuelles, abra la puerta en la posición máxima y reins- 230V. Controle que los fusibles F1 y F2 (Fig. 15) no estén quema- tale el Soon en esta posición.
  • Seite 82 Personelu Technicznego instalującego. Żadna z programowania i użytkowania siłownika SOON do bram zawartych tam informacji nie jest przeznaczona dla końcowego segmentowych. Poszczególne tematy zostały podzielone na trzy Użytkownika produktu. części: Część Pierwsza to instrukcja, ilustrująca krok po kroku etapy ˝rzeczywistego˝...
  • Seite 83: Zalecenia Dotyczące Instalacji I Uruchomienia Automatyki

    EKSPLOATACYJNE oraz Rozdział 8 - ODBIÓR TECHNICZNY I źródło zagrożenia! ODDANIE DO EKSPLOATACJI. W związku z możliwością wystąpienia • Nie trzymaj elementów siłownika SOON blisko źródeł ciepła i zagrożeń - zarówno podczas montażu, jak i codziennego użytkowania płomieni. Mogłoby to doprowadzić do zniszczenia elementów produktu - montaż...
  • Seite 84: Ocena Możliwości Wykonania Instalacji

    4.1) Typowy schemat instalacji (Rys.3) Na Rys. 3 przedstawiono kompletną instalację siłownika SOON. Rysunek przedstawia typowy schemat wykonania instalacji z zaznaczeniem poszczególnych elementów oraz przewodów potrzebnych do ich montażu.
  • Seite 85: Montaż Elementów Mechanicznych

    SOON. Pamiętaj, aby ściany. zachować wskazaną poniżej kolejność. 4. (Rys. 4-d) Istnieje możliwość montażu siłownika SOON w pozycji poziomej przy wykorzystaniu małej prowadnicy, który znajduje się Montaż siłownika SOON (Rys. 4) na wyposażeniu. Przy użyciu trzech śrub (na wyposażeniu), 1.
  • Seite 86: Ułożenie Przewodów Elektrycznych

    Wszystkie podłączenia elektryczne muszą być wykonywane na odłączonym napięciu. 1. Aby zdjąć pokrywę zabezpieczającą i uzyskać dostęp do centrali sterującej SOON, wykręć śrubę i podnieść pokrywkę odchylając ją do góry (Rys.5). 2. Poluzuj wolną opaskę zaciskową i wsuń w nią przewody do podłączenia do zacisków centrali.
  • Seite 87 Lampa ostrzegawcza Jeśli na wyjściu “FLASH” jest zaprogramowana “lampa ostrzegawcza” istnieje możliwość podłączenia lampy ostrzegawczej NICE “LUCY B” z żarówką o mocy 12V/21W, typu samochodowego. W czasie manewru lampa miga - 0.5 sekundy pali się i 0.5 sekundy jest zgaszona.
  • Seite 88: Podłączenie Urządzeń Bluebus

    Wszystkie podłączone urządzenia są rozpoznawane automatycznie zarówno przechodzi zasilanie elektryczne jak i odbywa się transmisja przez centralę sterującą SOON podczas specjalnej procedury uczenia danych. Wszystkie urządzenia są podłączane równolegle, na tych się. Centrala jest w stanie wykryć z niezwykłą dokładnością wszelkie samych przewodach BlueBUS i bez konieczności zwracania uwagi na...
  • Seite 89: Podłączenie Zasilania

    3 klasę bezpieczeństwa, zgodnie z normą EN 954-1. 5.4) Podłączenie zasilania W celu podłączenia SOON do zasilania elektrycznego wystarczy włożyć wtyczkę do gniazdka. Jeśli wtyczka SOON nie jest kompatybilna z istniejącym gniazdkiem, zastosuj odpowiedni adapter dostępny na rynku. 6) Pierwsze uruchomienie instalacji - testy Opisane poniżej czynności będą...
  • Seite 90: Rozpoznawanie Pozycji

    7.2) Rozpoznawanie pozycji Po rozpoznaniu urządzeń centrala musi zapamiętać pozycje otwarcia i zamknięcia bramy. Można zaprogramować do 6 następujących pozycji: Pozycja Znaczenie Pozycja maksymalnego otwarcia. Po osiągnięciu tej pozycji brama zatrzymuje się. Pozycja początku zwolnienia ruchu podczas manewru otwarcia. Po osiągnięciu tej pozycji silnik zwalnia, przechodząc na prędkość...
  • Seite 91: Końcowy Odbiór Techniczny Instalacji

    (zawierający wytyczne do konserwacji wszystkich wykonaniu, z wynikiem pozytywnym, wszystkich etapów urządzeń wchodzących w skład automatyki). odbioru technicznego Soon i pozostałych urządzeń. Zabrania 8. Przed przekazaniem automatyki do eksploatacji poinformuj się częściowego lub “prowizorycznego” przekazania do właściciela w odpowiedni sposób i na piśmie (na przykład w eksploatacji.
  • Seite 92: Zalecenia Dotyczące Personalizacji Działania Automatyki

    8,2KΩ lub listwy optycznej OSE. W czasie normalnego działania siłownika SOON, kiedy nie odbywa się żaden manewr, diody od L1 do L8 palą się lub są zgaszone w zależności od statusu funkcji, której odpowiadają, np. dioda L1 pali się jeśli jest aktywna funkcja “Zamknięcie automatyczne”.
  • Seite 93: Programowanie Funkcji Pierwszego Poziomu

    10.2) Programowanie funkcji pierwszego poziomu Funkcje pierwszego poziomu są fabrycznie ustawione na “OFF”, ale w każdej chwili można dokonać zmiany. Musisz być bardzo skupiony wykonując tę procedurę ponieważ masz tylko 10 sekund pomiędzy wciśnięciem jednego przycisku i drugiego, po upływie tego czasu procedura kończy się...
  • Seite 94: Programowanie Funkcji Drugiego Poziomu

    Pamiętaj: możesz powtórzyć punkty od 3 do 7 podczas tej samej fazy programowania w celu ustawienia większej ilości parametrów. 11) Przypomnienie o konserwacji Siłownik SOON jest wyposażony w opcję przypominania Przypomnienie o konserwacji jest sygnalizowane przy pomocy lampy użytkownikowi o konieczności przeprowadzenia konserwacji.
  • Seite 95: Kontrola Ilości Przeprowadzonych Manewrów

    Zwolnij przycisk [Set] 12) Historia anomalii SOON pozwala na wizualizację anomalii, które wystąpiły w czasie ostatnich 8 manewrów, np. zatrzymanie manewru ze względu na zadziałanie fotokomórki lub zabezpieczającej listwy krawędziowej. W celu sprawdzenia historii anomalii należy wykonać następujące kroki. Wciśnij i przytrzymaj przez około 3 sekund przycisk [Set].
  • Seite 96: Informacje Dodatkowe: Funkcje Specjalne

    Podczas regularnego działania Centrala stale kontroluje procesy automatyki i może sygnalizować wystąpienie ewentualnych anomalii przy pomocy wcześniej ustalonych sekwencji mignięć wydawanych przez lampę ostrzegawczą, światełko nocne i “Diodę BlueBUS” (mignięcia diagnostyczne odnoszą się zawsze do ostatniej czynności wykonanej przez SOON). Poszczególnym przyczynom wystąpienia anomalii odpowiada różna liczba mignięć, tak jak przedstawiono to w następującej tabeli: Tabela 7: Sygnalizacja diagnostyczna Liczba mignięć...
  • Seite 97: Co Robić Gdy

    L1 przestanie szybko migać. Następnie zdejmij siłownik SOON z - Upewnij się czy do siłownika SOON dochodzi zasilanie z sieci o wału sprężynowego, ustaw bramę w pozycji maksymalnego otwarcia i napięciu 230V. Sprawdź się czy nie zadziałały bezpieczniki F1 i F2.
  • Seite 98 Dichiarazione CE di conformità secondo Direttiva 98/37/CE, Allegato II, parte B (dichiarazione CE di conformità del fabbricante) EC Declaration of Conformity according to Directive 98/37/EC, Annexe II, part B Numero / Number: 245/SOON Revisione / Revision: 0 Il sottoscritto Lauro Buoro in qualità di Amministratore Delegato, dichiara sotto la propria responsabilità che il prodotto: The undersigned Lauro Buoro, managing director, declares under his sole responsibility that the following product: Nome produttore / Manufacturer’s name :...
  • Seite 100 Headquarter Nice worldwide Nice España Madrid Nice Romania Tel. +34.9.16.16.33.00 Cluj Napoca Nice SpA Nice France Fax +34.9.16.16.30.10 Tel/Fax +40.264.45.31.27 Oderzo TV Italia Buchelay info@es.niceforyou.com info@ro.niceforyou.com Tel. +39.0422.85.38.38 Tel. +33.(0)1.30.33.95.95 Fax +39.0422.85.35.85 Fax +33.(0)1.30.33.95.96 Nice España Barcelona Nice Deutschland info@niceforyou.com info@fr.niceforyou.com...

Inhaltsverzeichnis