Inhaltsverzeichnis
Werbung
Verfügbare Sprachen
Verfügbare Sprachen
Quicklinks
BEDIENUNG UND INSTALLATION
OPERATION AND INSTALLATION
UTILISATION ET INSTALLATION
GEBRUIK EN INSTALLATIE
OBSLUHA A INSTALACE
Speicher- und Hydraulikmodul | Cylinder and hydraulic module | Module ballon et
hydraulique | Boiler- en hydraulische module | Modul zásobníku a hydraulický modul
» HSBB 3
» HSBB 3 S
Werbung
Kapitel
Inhaltsverzeichnis
Fehlerbehebung

Verwandte Anleitungen für STIEBEL ELTRON HSBB 3 S


Inhaltszusammenfassung für STIEBEL ELTRON HSBB 3 S
- Seite 1 UTILISATION ET INSTALLATION GEBRUIK EN INSTALLATIE OBSLUHA A INSTALACE Speicher- und Hydraulikmodul | Cylinder and hydraulic module | Module ballon et hydraulique | Boiler- en hydraulische module | Modul zásobníku a hydraulický modul » HSBB 3 » HSBB 3 S...
-
Seite 2: Inhaltsverzeichnis
INHALT Technische Daten ������������������������������������������� 17 BESONDERE HINWEISE 16.1 Maße und Anschlüsse ����������������������������������������� 17 BEDIENUNG 16.2 Elektroschaltpläne ���������������������������������������������� 18 Allgemeine Hinweise ����������������������������������������3 16.3 Angaben zum Energieverbrauch ���������������������������� 22 Mitgeltende Dokumente ���������������������������������������� 3 16.4 Datentabelle ����������������������������������������������������� 22 Sicherheitshinweise ��������������������������������������������� 3 KUNDENDIENST UND GARANTIE Andere Markierungen in dieser Dokumentation ����������... -
Seite 3: Mitgeltende Dokumente ���������������������������������������� 3 16.4 Datentabelle
BESONDERE HINWEISE | BEDIENUNG Allgemeine Hinweise BESONDERE HINWEISE - Verlegen Sie die Ablaufleitung des Sicherheits- ventils mit einem stetigen Gefälle zum Abfluss. - Dimensionieren Sie die Ablaufleitung so, dass bei voll geöffnetem Sicherheitsventil das Wasser un- - Das Gerät kann von Kindern ab 8 Jahren sowie gehindert ablaufen kann. -
Seite 4: Sicherheit
BEDIENUNG Sicherheit Allgemeine Sicherheitshinweise 1.2.3 Signalworte SIGNALWORT Bedeutung WARNUNG Verletzung GEFAHR Hinweise, deren Nichtbeachtung schwere Verletzungen Das Gerät kann von Kindern ab 8 Jahren sowie von Per- oder Tod zur Folge haben. sonen mit verringerten physischen, sensorischen oder WARNUNG Hinweise, deren Nichtbeachtung schwere Verletzungen mentalen Fähigkeiten oder Mangel an Erfahrung und oder Tod zur Folge haben kann. -
Seite 5: Gerätebeschreibung
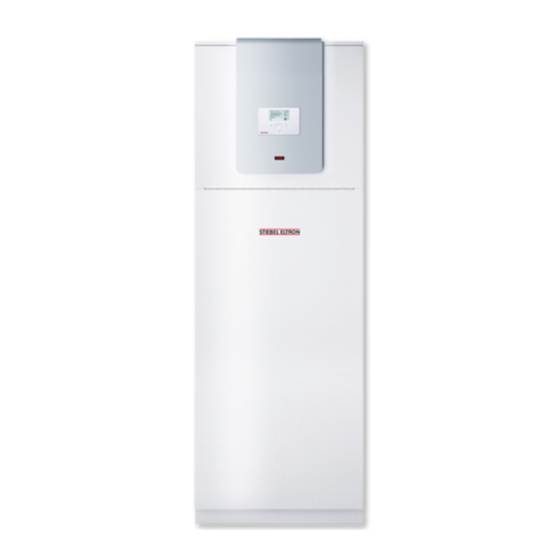
BEDIENUNG Gerätebeschreibung Gerätebeschreibung Einstellungen Das Gerät ist ein Hydraulikmodul mit integriertem Warmwas- serspeicher. Das Gerät ist für die Innenaufstellung vorgesehen. Das Gerät wird hydraulisch und elektrisch mit der Wärmepumpe verbunden. Das Gerät überträgt die von der Wärmepumpe aufgenommene Wärme an das Heizsystem und das Trinkwasser. Das Trinkwas- ser wird dabei über einen Wärmeübertrager auf die gewünschte Temperatur erwärmt. -
Seite 6: Installation
INSTALLATION Sicherheit INSTALLATION 10. Vorbereitungen 10.1 Allgemeines Um Leitungsverluste zu reduzieren, halten Sie den Abstand zwi- Sicherheit schen Gerät und Wärmepumpe gering. Die Installation, Inbetriebnahme sowie Wartung und Reparatur 10.2 Montageort des Gerätes darf nur von einem Fachhandwerker durchgeführt werden. Sachschaden Stellen Sie das Gerät nicht in Feuchträumen auf. -
Seite 7: Mindestabstände
INSTALLATION Montage 10.4 Mindestabstände f Schrauben Sie die vier Schrauben an der Einwegpalette heraus. f Entfernen Sie die Unterlegscheiben. f Nehmen Sie die Gerätefüße aus dem Beipack. f Kippen Sie das Gerät an und schrauben Sie die Gerätefüße in das Gerät hinein. ≥500 ≥100 f Heben Sie das Gerät von der Palette. -
Seite 8: Hydraulischer Anschluss
INSTALLATION Montage 11.3 Hydraulischer Anschluss Versorgungsleitungen Je nach Ausführung der Heizungsanlage (Druckverluste) kann die Sachschaden maximal zulässige Leitungslänge zwischen Gerät und Wärmepum- Führen Sie alle Wasseranschluss- und Installationsarbei- pe variieren. ten nach Vorschrift aus. f Als Richtwert gehen Sie von einer maximalen Leitungslänge von 10 m und einem Leitungsdurchmesser von 22-28 mm aus. -
Seite 9: Anlage Befüllen
INSTALLATION Montage f Berücksichtigen Sie bei der Berechnung der Druckverluste die Vor- und Rücklaufleitungen und den Druckverlust der Wärmepumpe. Die Druckverluste müssen durch die verfüg- bare Druckdifferenz abgedeckt werden. 11.5 Anlage befüllen Wasserbeschaffenheit Vor Befüllen der Anlage muss eine Wasseranalyse des Füllwassers vorliegen. -
Seite 10: Gerät Entlüften
INSTALLATION Montage 11.6 Gerät entlüften Sicherheitsventil heizwasserseitig Multifunktionsgruppe (MFG) f Öffnen Sie zum Entlüften vorübergehend den Schnellentlüfter auf der Multifunktionsgruppe (MFG). 1 Schnellentlüfter 2 Elektronik 1 Ablaufschlauch Sachschaden 2 Befestigung Die Luftausblasöffnung in der Rändelkappe des Schnel- 3 Abfluss lentlüfters darf nicht auf die Elektronik im MFG gerichtet f Dimensionieren Sie die Ablaufleitung so, dass bei voll ge- sein. -
Seite 11: Elektrischer Anschluss
INSTALLATION Elektrischer Anschluss 11.7.1 Zugelassene Werkstoffe Sachschaden Sichern Sie die beiden Stromkreise für das Gerät und die Kaltwasserleitung Steuerung getrennt ab. Als Werkstoffe sind feuerverzinkter Stahl, Edelstahl, Kupfer und Kunststoff zugelassen. Sachschaden Die angegebene Spannung muss mit der Netzspannung Warmwasserleitung übereinstimmen. -
Seite 12: Elektrische Not-/Zusatzheizung
INSTALLATION Elektrischer Anschluss Sie müssen entsprechend der Absicherung folgende Leitungsquer- Elektrischer Anschluss 1-phasig nur HSBB 3 S schnitte installieren: Absicherung Zuordnung Leitungsquerschnitt B 16 A elektrische Not-/Zu- 2,5 mm² bei Verlegung in einer Wand. satzheizung (DHC) 1,5 mm² bei nur zwei belasteten Adern 3-phasig und Verlegung auf einer Wand oder im Elektroinstallationsrohr auf einer Wand. -
Seite 13: Fühlermontage
INSTALLATION Elektrischer Anschluss 12.1 Fühlermontage Kleinspannung, BUS-Leitung und Service 12.1.1 Anlegefühler AVF 6 (im Beipack enthalten) f Schließen Sie in Kombination mit den folgenden Wärmepum- pentypen einen zusätzlichen Rücklauffühler an: - WPL 13 E/cool - WPL 10 I - WPL 10 AC(S) - WPL 15-25 AC(S) (nur in Kombination mit einem Pufferspeicher) - WPL 08-22 (S) Trend (nur in Kombination mit einem... -
Seite 14: Fühler Widerstandswerte
INSTALLATION Elektrischer Anschluss 12.3 Fernbedienung FEK f Schließen Sie den Außentemperaturfühler an der Klemme X2 (T(AUSSEN)) und an dem Masseblock für Kleinspannung X26 des Gerätes an. Anschlussfeld FEK Montage: f Ziehen Sie den Deckel ab. f Befestigen Sie das Unterteil mit beiliegender Schraube. 1 2 3 4 5 6 f Schließen Sie die elektrische Leitung an. -
Seite 15: Inbetriebnahme
INSTALLATION Inbetriebnahme 13. Inbetriebnahme 13.2 Inbetriebnahme des Wärmepumpen-Managers Führen Sie die Inbetriebnahme des Wärmepumpen-Managers und Die Inbetriebnahme des Gerätes, alle Einstellungen in der Inbe- alle Einstellungen entsprechend der Bedienungs- und Installati- triebnahmeebene des Wärmepumpen-Managers und die Einwei- onsanleitung des Wärmepumpen-Managers durch. sung des Benutzers müssen von einem Fachhandwerker durch- geführt werden. -
Seite 16: Wartung
INSTALLATION Wartung 15. Wartung 15.2 Austausch der Signalanode f Trennen Sie bei allen Arbeiten die eingebauten elektrischen Komponenten allpolig vom Stromnetz. f Lüften Sie regelmäßig das Sicherheitsventil, bis der volle Wasserstrahl ausläuft. Erst wenn die Siebe nach längerer Pumpenlaufzeit vollständig sauber sind, ist die Heizungsanlage frei von Schmutz. -
Seite 17: Technische Daten
INSTALLATION Technische Daten 16. Technische Daten 16.1 Maße und Anschlüsse HSBB 3 Durchführung elektr. Leitungen Kaltwasser Zulauf Durchmesser Warmwasser Auslauf Durchmesser Sicherheitsventil Ablauf WP Vorlauf Durchmesser WP Rücklauf Durchmesser Heizung Vorlauf Durchmesser Heizung Rücklauf Durchmesser www.stiebel-eltron.com HSBB 3 |... -
Seite 18: Hsbb 3-Phasig Mit Wpm3 Und Mfg
INSTALLATION Technische Daten 16.2 Elektroschaltpläne HSBB 3 HSBB 3-phasig mit WPM3 und MFG Steuerung DHC (MFG) L1 L2 L3 N (WPM 1 2 3 4 5 6 (Netz T > 1 (L) 2 (N) > p (MFG) 4 3 2 1 3 2 1 3 2 1 6 5 4 3... - Seite 19 INSTALLATION Technische Daten Kleinspannung “+” 1 = H 2 = L 4 = +12V 4 3 2 1 “+” (WPM3) “+” (Netzteil) “+” 1 (L) “+” 2 (N) 6 5 4 3 3 2 1 5 4 3 2 1 3 2 1 1 2 3 4 5 6 X20 Buchsenstecker Pumpen und EVU WPM3...
-
Seite 20: Hsbb 1-Phasig Mit Wpm3 Und Mfg
INSTALLATION Technische Daten HSBB 3 S HSBB 1-phasig mit WPM3 und MFG Steuerung DHC (MFG) 1 2 3 4 5 6 (Net T > 1 (L) 2 (N) > p (MFG) 4 3 2 1 3 2 1 3 2 1 6 5 4 3 3 2 1 “+”... - Seite 21 INSTALLATION Technische Daten Kleinspannung “+” 1 = H 2 = L 4 = +12V 4 3 2 1 “+” (WPM3) “+” (Netzteil) “+” 1 (L) “+” 2 (N) 6 5 4 3 3 2 1 5 4 3 2 1 3 2 1 1 2 3 4 5 6 X20 Buchsenstecker Pumpen und EVU WPM3...
-
Seite 22: Angaben Zum Energieverbrauch
INSTALLATION Technische Daten 16.3 Angaben zum Energieverbrauch Die Produktdaten entsprechen den EU-Verordnungen zur Richtlinie für umweltgerechte Gestaltung energieverbrauchsrelevanter Pro- dukte (ErP). HSBB 3 HSBB 3 S 234264 234265 Hersteller STIEBEL ELTRON STIEBEL ELTRON Energieeffizienzklasse Speichervolumen Warmhalteverluste 16.4 Datentabelle HSBB 3... - Seite 23 INSTALLATION Technische Daten HSBB 3 HSBB 3 S Werte Volumenstrom Heizung nenn. bei A2/W35, B0/W35 und 7 K m³/h Verfügbare externe Druckdifferenz gesamt Wärmeverlust kW/24h 1,78 1,78 Volumenstrom Heizung min. m³/h Max. Betriebsdruck Zulässiger Betriebsüberdruck Heizkreis Zulässiger Betriebsüberdruck Trinkwasser Ausdehnungsgefäß-Volumen www.stiebel-eltron.com...
-
Seite 24: Erreichbarkeit
Feuer, Aufruhr oder ähnliche Ursachen. oder schreiben Sie uns: Über die vorstehend zugesagten Garantieleistungen hinausge- Stiebel Eltron GmbH & Co. KG hend kann der Endkunde nach dieser Garantie keine Ansprüche - Kundendienst - wegen mittelbarer Schäden oder Folgeschäden, die durch das Fürstenberger Straße 77, 37603 Holzminden... -
Seite 25: Entsorgung Von Transport- Und Verkaufsverpackungsmaterial
UMWELT UND RECYCLING Entsorgung von Transport- und Verkaufsverpackungsmaterial Damit Ihr Gerät unbeschädigt bei Ihnen ankommt, haben wir es sorgfältig verpackt. Bitte helfen Sie, die Umwelt zu schützen, und entsorgen Sie das Verpackungsmaterial des Gerätes sach- gerecht. Wir beteiligen uns gemeinsam mit dem Großhandel und dem Fachhandwerk / Fachhandel in Deutschland an einem wirksamen Rücknahme- und Entsorgungskonzept für die um- weltschonende Aufarbeitung der Verpackungen. - Seite 26 CONTENTS Specification ������������������������������������������������ 41 SPECIAL INFORMATION 16.1 Dimensions and connections ��������������������������������� 41 OPERATION 16.2 Wiring diagrams ������������������������������������������������ 42 General information ��������������������������������������� 27 16.3 Details on energy consumption ������������������������������ 46 Relevant documents�������������������������������������������� 27 16.4 Data table �������������������������������������������������������� 46 Safety instructions ���������������������������������������������� 27 GUARANTEE Other symbols in this documentation ����������������������...
-
Seite 27: Special Information
SPECIAL INFORMATION | OPERATION General information SPECIAL INFORMATION - Size the drain pipe so that water can drain off un- impeded when the safety valve is fully opened. - The appliance may be used by children aged 8 OPERATION and older and persons with reduced physical, sensory or mental capabilities or a lack of ex- perience and know-how, provided that they are supervised or they have been instructed on how... -
Seite 28: Other Symbols In This Documentation
OPERATION Safety Other symbols in this documentation General safety instructions WARNING Injury Note The appliance may be used by children aged 8 and older General information is identified by the adjacent symbol. and persons with reduced physical, sensory or mental f Read this information carefully. -
Seite 29: Appliance Description
OPERATION Appliance description Appliance description Settings The appliance is a hydraulic module with an integral DHW cylinder. The appliance is designed for indoor installation. The appliance is connected hydraulically and electrically to the heat pump. The appliance transfers the heat absorbed by the heat pump to the heating system and the domestic hot water. -
Seite 30: Installation
INSTALLATION Safety INSTALLATION - If you are installing the appliance in a boiler room together with other heating equipment, ensure that the operation of other heating equipment will not be impaired. 10.3 Transport Safety Material losses Only a qualified contractor should carry out installation, commis- The appliance is unsuitable for lifting by hoist. -
Seite 31: Installation
INSTALLATION Installation 11. Installation 11.2 Opening the appliance 11.1 Siting f Undo the fixing screws on the top appliance door. f Open the top appliance door. f Undo and remove the fixing screws from the lower appliance 1 Transport tube (on the installation side) door. -
Seite 32: Connection To The Heat Pump
INSTALLATION Installation 11.4 Connection to the heat pump f Provide thermal insulation in accordance with applicable regulations. The appliance and the heat pump are connected to one anoth- Oxygen diffusion er hydraulically via pipes carrying heating water. To reduce the transmission of structure-borne noise on the water side, connect the appliance to the heat pump with pressure hoses (not required Material losses... -
Seite 33: Filling The Heating System
INSTALLATION Installation 11.6 Venting the appliance 11.5.1 Filling the heating system Multi-function assembly (MFG) Material losses Never switch on the power before filling the system. f To vent, temporarily open the quick-action air vent valve in the multi-function assembly (MFG). In the delivered condition, the diverter valve of the MFG is po- sitioned at the centre, enabling the heating and DHW circuits to be filled evenly. -
Seite 34: Dhw Connection
INSTALLATION Installation 11.7 DHW connection Safety valve on the heating water side To connect the DHW, remove the lower front panel (see chapter "Maintenance / Removing the lower front panel"). Material losses Carry out all water connection and installation work in accordance with regulations. -
Seite 35: Power Supply
INSTALLATION Power supply 12. Power supply WARNING Electrocution Carry out all electrical connection and installation work in accordance with national and regional regulations. WARNING Electrocution f Before working on the appliance, isolate it from the power supply at the control panel. WARNING Electrocution Only use a permanent connection to the power supply. - Seite 36 INSTALLATION Power supply 12.7.1 Electric emergency/booster heater Control voltage General Appliance Effect of the electric emergency/booster heater function Mono energet- If the heat pump undershoots the dual mode point, the elec- ic operation tric emergency/booster heater safeguards both the heating operation and the delivery of high DHW temperatures.
-
Seite 37: Sensor Installation
INSTALLATION Power supply 12.1 Sensor installation Low voltage, BUS cable and service 12.1.1 Contact sensor AVF 6 (included in the pack supplied) f Connect an additional return sensor in combination with the following heat pump types: - WPL 13 E/cool - WPL 10 I - WPL 10 AC(S) - WPL 15-25 AC(S) (only in combination with a buffer cylinder) -
Seite 38: Sensor Resistance Values
INSTALLATION Power supply 12.3 FEK remote control f Connect the outside temperature sensor to terminal X2 (T(AUSSEN)) and to the earth block for low voltage X26 of the appliance. FEK terminal strip Installation: f Remove the cover. f Secure the base with the screw supplied. 1 2 3 4 5 6 f Connect the cable. -
Seite 39: Commissioning
INSTALLATION Commissioning 13. Commissioning 13.2 Commissioning the heat pump manager Commission the heat pump manager and make all settings in A qualified contractor must commission the appliance, make all accordance with the operating and installation instructions of the the settings at the commissioning level of the heat pump manager, heat pump manager. -
Seite 40: Maintenance
INSTALLATION Maintenance 15. Maintenance 15.2 Replacing the signal anode f Before any work on the appliance, disconnect all poles of any in-built electric components from the power supply. f Regularly vent the safety valve until a full stream of water flows from it. -
Seite 41: Specification
INSTALLATION Specification 16. Specification 16.1 Dimensions and connections HSBB 3 Entry electrical cables Cold water inlet Diameter DHW outlet Diameter Safety assembly drain Heat pump flow Diameter Heat pump return Diameter Heating flow Diameter Heating return Diameter www.stiebel-eltron.com HSBB 3 |... -
Seite 42: Wiring Diagrams
INSTALLATION Specification 16.2 Wiring diagrams HSBB 3 HSBB 3-phasig mit WPM3 und MFG Steuerung DHC (MFG) L1 L2 L3 N (WPM 1 2 3 4 5 6 (Netzt T > 1 (L) 2 (N) > p (MFG) 4 3 2 1 3 2 1 3 2 1 6 5 4 3... - Seite 43 INSTALLATION Specification Kleinspannung “+” 1 = H 2 = L 4 = +12V 4 3 2 1 “+” (WPM3) “+” (Netzteil) “+” 1 (L) “+” 2 (N) 6 5 4 3 3 2 1 5 4 3 2 1 3 2 1 1 2 3 4 5 6 X20 Plug, pumps and power-OFF WPM3 X63 Not assigned...
-
Seite 44: Hsbb 1-Phasig Mit Wpm3 Und Mfg
INSTALLATION Specification HSBB 3 S HSBB 1-phasig mit WPM3 und MFG Steuerung DHC (MFG) 1 2 3 4 5 6 (Net T > 1 (L) 2 (N) > p (MFG) 4 3 2 1 3 2 1 3 2 1... - Seite 45 INSTALLATION Specification Kleinspannung “+” 1 = H 2 = L 4 = +12V 4 3 2 1 “+” (WPM3) “+” (Netzteil) “+” 1 (L) “+” 2 (N) 6 5 4 3 3 2 1 5 4 3 2 1 3 2 1 1 2 3 4 5 6 X20 Plug, pumps and power-OFF WPM3 X63 Not assigned...
-
Seite 46: Details On Energy Consumption
INSTALLATION Specification 16.3 Details on energy consumption Product data complies with EU regulations relating to the Directive on the eco-design of energy related products (ErP). HSBB 3 HSBB 3 S 234264 234265 Manufacturer STIEBEL ELTRON STIEBEL ELTRON Energy efficiency class... -
Seite 47: Environment And Recycling
INSTALLATION | GUARANTEE | ENVIRONMENT AND RECYCLING HSBB 3 HSBB 3 S Values Nominal heating flow rate at A2/W35, B0/W35 and 7 K m³/h Total available external pressure differential Heat loss kW/24 h 1.78 1.78 Min heating flow rate m³/h Max. operating pressure... - Seite 48 TABLE DES MATIÈRES Données techniques ��������������������������������������� 64 REMARQUES PARTICULIÈRES 16.1 Cotes et raccordements ���������������������������������������� 64 UTILISATION 16.2 Schémas électriques ������������������������������������������� 66 Remarques générales ������������������������������������� 49 16.3 Indications relatives à la consommation énergétique ��� 70 Documentation applicable ������������������������������������ 49 16.4 Tableau de données �������������������������������������������� 70 Consignes de sécurité...
-
Seite 49: Remarques Particulières
REMARQUES PARTICULIÈRES | UTILISATION Remarques générales REMARQUES - L’ouverture de purge de la soupape de sécurité doit être reliée à l’air libre. PARTICULIÈRES - Posez la conduite de sortie de la soupape de sé- curité en prévoyant une pente continue vers la bouche d’évacuation. -
Seite 50: Mentions D'avertissement
UTILISATION Sécurité Consignes de sécurité générales 1.2.3 Mentions d’avertissement MENTION Signification AVERTISSEMENT Blessure D’AVERTISSE- L’appareil peut être utilisé par des enfants dès l’âge de 8 MENT ans ainsi que par des personnes aux facultés physiques, DANGER Caractérise des remarques dont le non-respect entraîne de graves lésions, voire la mort. -
Seite 51: Description De L'appareil
UTILISATION Description de l’appareil Description de l’appareil Réglages L’appareil est une tour hydraulique avec ballon d’eau chaude sa- nitaire intégré. La tour hydraulique est conçue pour un montage intérieur. Elle est à raccorder hydrauliquement et électriquement à la pompe à chaleur. La tour hydraulique transmet au système de chauffage et à... -
Seite 52: Installation
INSTALLATION Sécurité INSTALLATION 10. Travaux préparatoires 10.1 Généralités Pour réduire les pertes dues aux conduites, prévoyez une courte Sécurité distance entre la tour hydraulique et la pompe à chaleur. L’installation, la mise en service, la maintenance et les répara- 10.2 Lieu d’implantation tions de cet équipement ne doivent être effectuées que par un installateur qualifié. -
Seite 53: Distances Minimales
INSTALLATION Montage 10.4 Distances minimales f Dévissez les quatre vis de la palette perdue. f Retirez les rondelles. f Prenez les pieds de l’appareil dans le sachet de fournitures. f Basculez l’appareil et vissez les pieds sur l’appareil. f Soulevez l’appareil de la palette. f Pour mieux positionner l’appareil, utilisez le cas échéant les ≥500 ≥100... -
Seite 54: Raccordement Hydraulique
INSTALLATION Montage 11.3 Raccordement hydraulique Conduites d’alimentation La longueur maximale admissible des conduites entre la tour hy- Dommages matériels draulique et la pompe à chaleur peut varier en fonction de l’exé- Exécutez tous les travaux de raccordement et d’installa- cution de l’installation de chauffage (pertes de charge). tion hydrauliques suivant les prescriptions. -
Seite 55: Raccordement À La Pompe À Chaleur
INSTALLATION Montage 11.4 Raccordement à la pompe à chaleur 11.5.1 Remplissage de l’installation de chauffage La tour hydraulique et la pompe à chaleur sont reliées hydrauli- Dommages matériels quement au moyen de liaisons hydrauliques. Afin de réduire la Ne branchez pas l’installation au réseau électrique avant transmission des bruits de structure provenant de l’eau, il convient le remplissage. -
Seite 56: Remplissage Du Ballon D'eau Chaude Sanitaire
INSTALLATION Montage 11.5.2 Remplissage du ballon d’eau chaude sanitaire Dommages matériels Après la purge, il est impératif de refermer le purgeur automatique. Soupape de sécurité côté eau de chauffage 1 Vanne de vidange (ballon d’eau chaude sanitaire) f Remplissez le ballon d’eau chaude sanitaire par la vanne de vidange. -
Seite 57: Raccordement De L'eau Chaude Sanitaire
INSTALLATION Montage 11.7 Raccordement de l’eau chaude sanitaire Groupe de sécurité côté ECS f Installez un groupe de sécurité sur la conduite d’arrivée Vous devez retirer le panneau avant inférieur (voir le chapitre d’eau froide. Notez qu’en fonction de la pression d’alimenta- « Maintenance / Retrait du panneau avant inférieur »). -
Seite 58: Raccordement Électrique
INSTALLATION Raccordement électrique 12. Raccordement électrique AVERTISSEMENT Électrocution Exécutez tous les travaux de raccordement et d’installa- tion électriques suivant les réglementations nationales et locales. AVERTISSEMENT Électrocution f Mettez l’appareil hors tension avant toute interven- tion au niveau du boîtier électrique. AVERTISSEMENT Électrocution Le raccordement au secteur doit être réalisé... - Seite 59 INSTALLATION Raccordement électrique 12.7.1 Résist. élec. appoint/secours Tension de commande Généralités Fonction de Action de la résistance électrique d’appoint / de l’appareil secours Mode mo- La résistance électrique d’appoint / de secours assure le no-énergie chauffage et la production d’ECS à température élevée lorsque la température passe en dessous du point de biva- lence.
-
Seite 60: Mise En Place Des Sondes
INSTALLATION Raccordement électrique 12.1 Mise en place des sondes Très basse tension, liaison bus et connexion PC 12.1.1 Sonde applique AVF 6 (comprise dans les fournitures) f En combinaison avec les types de pompes à chaleur suivants, branchez une sonde Retour supplémentaire : - WPL 13 E/cool - WPL 10 I - WPL 10 AC(S) -
Seite 61: Commande À Distance Fe 7
INSTALLATION Raccordement électrique f Ne placez pas la sonde de température extérieure au-dessus 12.3 Commande à distance FEK de fenêtres, de portes ou de grilles d’aération. Zone de raccordement FEK f Raccordez la sonde de température extérieure à la borne X2 (T(AUSSEN.)) et au bornier de masse très basse tension X26 de l’appareil. -
Seite 62: Mise En Service
INSTALLATION Mise en service 13. Mise en service 13.2 Mise en service du gestionnaire de pompe à chaleur La mise en service de l’appareil, tous les réglages du niveau mise Effectuez la mise en service du gestionnaire de pompe à chaleur en service de la pompe à... -
Seite 63: Maintenance
INSTALLATION Maintenance 15. Maintenance 15.2 Remplacement de l’anode f Avant toute intervention, coupez l’alimentation des compo- sants électriques intégrés. f Purgez régulièrement la soupape de sécurité jusqu’à ce que l’eau sorte en jet fort. L’installation de chauffage est exempte de salissures seulement si les filtres sont parfaitement propres après une période prolongée de fonctionnement des circulateurs. -
Seite 64: Données Techniques
INSTALLATION Données techniques 16. Données techniques 16.1 Cotes et raccordements HSBB 3 Passage des câbles électriques Arrivée eau froide Diamètre Sortie eau chaude Diamètre Soupape de sécurité sortie Départ PAC Diamètre Retour PAC Diamètre Départ chauffage Diamètre Retour chauffage Diamètre | HSBB 3 www.stiebel-eltron.com... - Seite 65 INSTALLATION Données techniques www.stiebel-eltron.com HSBB 3 |...
-
Seite 66: Schémas Électriques
INSTALLATION Données techniques 16.2 Schémas électriques HSBB 3 HSBB 3-phasig mit WPM3 und MFG Steuerung DHC (MFG) L1 L2 L3 N 1 2 3 4 5 6 (Net T > 1 (L) 2 (N) > p (MFG) 4 3 2 1 3 2 1 3 2 1 6 5 4 3... - Seite 67 INSTALLATION Données techniques Kleinspannung “+” 1 = H 2 = L 4 = +12V 4 3 2 1 “+” (WPM3) “+” (Netzteil) “+” 1 (L) “+” 2 (N) 6 5 4 3 3 2 1 3 2 1 5 4 3 2 1 1 2 3 4 5 6 X20 Connecteur circulateurs et EVU WPM3 X63 non affecté...
-
Seite 68: Hsbb 1-Phasig Mit Wpm3 Und Mfg
INSTALLATION Données techniques HSBB 3 S HSBB 1-phasig mit WPM3 und MFG Steuerung DHC (MFG) 1 2 3 4 5 6 (Net T > 1 (L) 2 (N) > p (MFG) 4 3 2 1 3 2 1 3 2 1... - Seite 69 INSTALLATION Données techniques Kleinspannung “+” 1 = H 2 = L 4 = +12V 4 3 2 1 “+” (WPM3) “+” (Netzteil) “+” 1 (L) “+” 2 (N) 6 5 4 3 3 2 1 5 4 3 2 1 3 2 1 1 2 3 4 5 6 X20 Connecteur circulateurs et EVU WPM3...
-
Seite 70: Indications Relatives À La Consommation Énergétique
Données techniques 16.3 Indications relatives à la consommation énergétique Les caractéristiques produit correspondent aux prescriptions de la directive UE sur l’éco-conception applicable aux produits liés à l’énergie (ErP). HSBB 3 HSBB 3 S 234264 234265 Constructeur STIEBEL ELTRON STIEBEL ELTRON Classe d’efficacité... -
Seite 71: Environnement Et Recyclage
INSTALLATION | GARANTIE | ENVIRONNEMENT ET RECYCLAGE Données techniques HSBB 3 HSBB 3 S Raccordements Raccordement côté chauffage 22 mm 22 mm Raccordement eau froide 22 mm 22 mm Raccordement ECS 22 mm 22 mm Données Débit nominal chauffage à A2/W35, B0/W35 et 7 K m³/h... - Seite 72 INHOUD Technische gegevens��������������������������������������� 88 BIJZONDERE INFO 16.1 Afmetingen en aansluitingen��������������������������������� 88 BEDIENING 16.2 Elektriciteitsschema's ������������������������������������������ 90 Algemene Info ���������������������������������������������� 73 16.3 Gegevens over het energieverbruik ������������������������� 94 Eveneens geldende documenten ���������������������������� 73 16.4 Gegevenstabel ��������������������������������������������������� 94 Veiligheidsaanwijzingen �������������������������������������� 73 GARANTIE Andere aandachtspunten in deze documentatie ���������...
-
Seite 73: Eveneens Geldende Documenten ���������������������������� 73 16.4 Gegevenstabel
BIJZONDERE INFO | BEDIENING Algemene Info BIJZONDERE INFO - Leg de afvoerleiding van het veiligheidsventiel met een traploos verval naar de afvoer. - Dimensioneer de afvoerleiding op een wijze dat het water bij volledig geopende veiligheidsklep - Het toestel kan door kinderen vanaf 8 jaar, als- ongehinderd afgevoerd kan worden. -
Seite 74: Andere Aandachtspunten In Deze Documentatie
BEDIENING Veiligheid Algemene veiligheidsaanwijzingen 1.2.3 Trefwoorden TREFWOORD Betekenis WAARSCHUWING letsel GEVAAR Info die leidt tot zwaar letsel of overlijden als deze niet in Het toestel kan door kinderen vanaf 8 jaar, alsmede acht worden genomen. door personen met verminderde fysieke, sensorische of WAARSCHUWING Info die kan leiden tot zwaar letsel of overlijden als ze niet geestelijke vermogens of met een gebrek aan ervaring in acht worden genomen. -
Seite 75: Toestelbeschrijving
BEDIENING Toestelbeschrijving Toestelbeschrijving Instellingen Het toestel is een hydraulische module met geïntegreerde warm- waterboiler. Het toestel is bestemd voor binnenopstelling. Het toestel wordt hydraulisch en elektrisch verbonden met de warm- tepomp. Het toestel draagt de door de warmtepomp opgenomen warmte over aan het verwarmingssysteem en het drinkwater. -
Seite 76: Installatie
INSTALLATIE Veiligheid INSTALLATIE - Als u het toestel samen met andere verwarmingstoestellen in een stookruimte opstelt, moet verzekerd zijn dat de werking van de andere verwarmingstoestellen niet wordt beïnvloed. 10.3 Transport Veiligheid Materiële schade Installatie, ingebruikname, onderhoud en reparatie van het toestel Het toestel is niet geschikt voor transport met een kraan. -
Seite 77: Montage
INSTALLATIE Montage 11. Montage 11.2 Toestel openen 11.1 Opstelling f Draai de bevestigingsschroeven aan de bovenste toesteldeur los. f Open de bovenste toesteldeur. 1 Transportbuis (installatiezijde) f Draai de bevestigingsschroeven aan de onderste toesteldeur 2 Transporthulp los en verwijder ze. 3 Toestelvoet f Neem de onderste toesteldeur eraf. -
Seite 78: Verbinding Met De Warmtepomp
INSTALLATIE Montage f Let op de juiste aansluiting van de cv-aanvoer en -retour (zie Installatievoorbeeld hoofdstuk "Technische gegevens/maten en aansluitingen"). f Voer de isolatie uit overeenkomstig de geldende voorschriften. Zuurstofdiffusie Materiële schade Voorkom open verwarmingsinstallaties en vloerverwar- mingen met niet-zuurstofdiffusiedichte kunststof leidin- gen. -
Seite 79: Installatie Vullen
INSTALLATIE Montage 11.5 Installatie vullen Gesteldheid van het water Voordat de installatie gevuld wordt, moet een analyse van het vul- water beschikbaar zijn. Deze analyse kan bijvoorbeeld opgevraagd worden bij de bevoegde watermaatschappij. Om schade door kalkvorming te voorkomen, moet het vulwater eventueel behandeld worden door het te ontharden of te ont- zouten. -
Seite 80: Toestel Ontluchten
INSTALLATIE Montage 11.6 Toestel ontluchten Veiligheidsventiel verwarmingswaterzijde Multifunctionele groep (MFG) f Open tijdelijk de snelontluchter op de multifunctionele groep (MFG) om te ontluchten. 1 Snelontluchter 2 Elektronica 1 Afvoerslang Materiële schade 2 Bevestiging De luchtuitblaasopening in de gekartelde kap van de sne- 3 Afloop lontluchter mag niet op de elektronica in de MFG gericht f Dimensioneer de afvoerleiding op een wijze dat het water... -
Seite 81: Elektrische Aansluiting
INSTALLATIE Elektrische aansluiting 12. Elektrische aansluiting 11.7.1 Toegelaten materialen Koudwaterleiding WAARSCHUWING elektrische schok Als materiaal is thermisch verzinkt staal, roestvrij staal, koper of Voer alle werkzaamheden voor elektriciteitsaansluitin- kunststof toegestaan. gen en montage uit conform de nationale en regionale voorschriften. Warmwaterleiding WAARSCHUWING elektrische schok Als materiaal zijn roestvrijstalen, koperen of kunststof buizen... - Seite 82 INSTALLATIE Elektrische aansluiting 12.7.1 Elektr. nood-/bijverwarming Algemeen Toe- Werking van de elektrische nood-/bijverwarming stelfunctie Mono-energe- De elektrische nood-/bijverwarming waarborgt, wanneer het tisch bedrijf bivalentiepunt te laag is, de verwarmingswerking en het be- reiden van hogere warmwatertemperaturen. Noodwerking Indien de warmtepomp bij een storing uitvalt, wordt het ver- warmingsvermogen overgenomen door de elektrische nood-/ bijverwarming.
- Seite 83 INSTALLATIE Elektrische aansluiting Stuurspanning Laagspanning, buskabel en service Stuurspanning (stuuruitgangen) X2 Zwakstroom Afstandsbed. 3 Afstandsbediening Warmwaterlaadpomp en N (X25), PE Afstandsbed. 1 Afstandsbediening Circ. Circulatiepomp N (X25), PE T(MK) Temperatuursensor mengklepcircuit en massa (X26) 2e WEWW 2e warmtegenerator warm water en N (X25), PE T(BUITEN) Buitentemperatuursensor en massa (X26) M(Z)
-
Seite 84: Sensormontage
INSTALLATIE Elektrische aansluiting 12.1 Sensormontage f Sluit de buitentemperatuursensor aan op klem X2 (T(BUI- TEN)) en op het massablok voor zwakstroom X26 van het toestel. 12.1.1 Aanlegsensor AVF 6 (meegeleverd in het toebehoren) f Sluit in combinatie met de volgende warmtepomptypen een Montage: extra retoursensor aan: f Trek het deksel eraf. -
Seite 85: Afstandsbediening Fek
INSTALLATIE Ingebruikname 13. Ingebruikname 12.3 Afstandsbediening FEK De ingebruikname van het toestel, alle instellingen op ingebruik- Aansluitveld FEK nameniveau van de warmtepompmanager en het instrueren van de gebruiker moeten worden uitgevoerd door een installateur. Voer de ingebruikname in overeenstemming met deze handleiding en de bedienings- en installatiehandleidingen van de warmte- 1 2 3 4 5 6 pompmanager en de aangesloten warmtepomp uit. -
Seite 86: Ingebruikname Van De Warmtepompmanager
INSTALLATIE Buitendienststelling 13.2 Ingebruikname van de warmtepompmanager 15. Onderhoud Voer de ingebruikname van de warmtepompmanager en alle in- f Scheid bij alle werken de ingebouwde elektrische compo- stellingen in overeenstemming met de bedienings- en installatie- nenten op alle polen van het elektriciteitsnet. handleiding van de warmtepompmanager uit. -
Seite 87: Vervanging Van De Signaalanode
INSTALLATIE Onderhoud 15.2 Vervanging van de signaalanode 1 Bedrijfsindicator blauw (niet gebruikt) 2 Bedrijfsindicator rood (status signaalanode) f Wanneer de rode signaallamp op het bedieningspaneel is verlicht, dient u de signaalanode te vervangen. 1 Signaalanode 2 Drukschakelaar De drukschakelaar wordt bediend zodra de signaalanode verbruikt is. -
Seite 88: Technische Gegevens
INSTALLATIE Technische gegevens 16. Technische gegevens 16.1 Afmetingen en aansluitingen HSBB 3 Doorvoer elektr.kabels Koudwatertoevoer Diameter Warmwateruitloop Diameter Veiligheidsklep afvoer WP-aanvoer Diameter WP-retour Diameter Verwarming aanvoer Diameter Verwarming retour Diameter | HSBB 3 www.stiebel-eltron.com... - Seite 89 INSTALLATIE Technische gegevens www.stiebel-eltron.com HSBB 3 |...
-
Seite 90: Hsbb 3-Phasig Mit Wpm3 Und Mfg
INSTALLATIE Technische gegevens 16.2 Elektriciteitsschema's HSBB 3 HSBB 3-phasig mit WPM3 und MFG Steuerung DHC (MFG) L1 L2 L3 N 1 2 3 4 5 6 (Net T > 1 (L) 2 (N) > p (MFG) 4 3 2 1 3 2 1 3 2 1 6 5 4 3... - Seite 91 INSTALLATIE Technische gegevens Kleinspannung “+” 1 = H 2 = L 4 = +12V 4 3 2 1 “+” (WPM3) “+” (Netzteil) “+” 1 (L) “+” 2 (N) 6 5 4 3 3 2 1 5 4 3 2 1 3 2 1 1 2 3 4 5 6 X20 Steekstekker pompen en EVU WPM3...
-
Seite 92: Hsbb 1-Phasig Mit Wpm3 Und Mfg
INSTALLATIE Technische gegevens HSBB 3 S HSBB 1-phasig mit WPM3 und MFG Steuerung DHC (MFG) 1 2 3 4 5 6 (Net T > 1 (L) 2 (N) > p (MFG) 4 3 2 1 3 2 1 3 2 1 6 5 4 3 3 2 1 “+”... - Seite 93 INSTALLATIE Technische gegevens Kleinspannung “+” 1 = H 2 = L 4 = +12V 4 3 2 1 “+” (WPM3) “+” (Netzteil) “+” 1 (L) “+” 2 (N) 6 5 4 3 3 2 1 5 4 3 2 1 3 2 1 1 2 3 4 5 6 X20 Steekstekker pompen en EVU WPM3...
-
Seite 94: Gegevens Over Het Energieverbruik
INSTALLATIE Technische gegevens 16.3 Gegevens over het energieverbruik De productgegevens voldoen aan de EU-verordeningen betreffende de richtlijn voor milieuvriendelijke vormgeving van energiegere- lateerde producten (ErP). HSBB 3 HSBB 3 S 234264 234265 Fabrikant STIEBEL ELTRON STIEBEL ELTRON Energieklasse Boilervolume Warmhoudverliezen 16.4 Gegevenstabel... -
Seite 95: Milieu En Recycling
INSTALLATIE | GARANTIE | MILIEU EN RECYCLING HSBB 3 HSBB 3 S Waarden Nom. debiet verwarming bij A2/W35, B0/W35 en 7 K m³/u Beschikbaar extern drukverschil totaal Warmteverlies kW/24 u 1,78 1,78 Min. debiet verwarming m³/u Max. werkdruk Toegelaten bedrijfsoverdruk verwarmingscircuit... - Seite 96 OBSAH Technické údaje ������������������������������������������� 112 ZVLÁŠTNÍ POKYNY 16.1 Rozměry a přípojky��������������������������������������������112 OBSLUHA 16.2 Schémata zapojení ��������������������������������������������114 Obecné pokyny ��������������������������������������������� 97 16.3 Údaje ke spotřebě energie �����������������������������������118 Související dokumentace �������������������������������������� 97 16.4 Tabulka údajů ��������������������������������������������������118 Bezpečnostní pokyny ������������������������������������������ 97 ZÁRUKA Jiné symboly použité v této dokumentaci ������������������ 98 Měrné...
-
Seite 97: Související Dokumentace �������������������������������������� 97 16.4 Tabulka Údajů
ZVLÁŠTNÍ POKYNY | OBSLUHA ZVLÁŠTNÍ POKYNY OBSLUHA - Přístroj smí používat děti od 8 let a osoby se sní- Obecné pokyny ženými fyzickými, senzorickými nebo mentálními schopnostmi nebo s nedostatkem zkušeností a Kapitoly „Zvláštní pokyny“ a „Obsluha“ jsou určeny uživatelům přístroje a instalačním technikům. znalostí... -
Seite 98: Jiné Symboly Použité V Této Dokumentaci
OBSLUHA Bezpečnost Jiné symboly použité v této dokumentaci Všeobecné bezpečnostní pokyny VÝSTRAHA úraz Upozornění Přístroj smí používat děti od 8 let a osoby se sníženými Obecné pokyny jsou označeny symbolem zobrazeným fyzickými, senzorickými nebo mentálními schopnostmi vedle. nebo s nedostatkem zkušeností a znalostí pouze pod do- f Texty upozornění... -
Seite 99: Popis Přístroje
OBSLUHA Popis přístroje Popis přístroje Nastavení Přístroj je hydraulický modul s integrovaným zásobníkem teplé vody. Přístroj je určený k instalaci v interiéru. Přístroj je hydrau- licky a elektricky propojený s tepelným čerpadlem. Přístroj přenáší teplo získané tepelným čerpadlem do topného systému a pitné... -
Seite 100: Instalace
INSTALACE Bezpečnost INSTALACE 10. Příprava 10.1 Obecné informace Aby se snížily ztráty vedením, udržujte nízkou vzdálenost mezi Bezpečnost přístroji a tepelným čerpadlem. Instalaci, uvedení do provozu, údržbu a opravy přístroje smí pro- 10.2 Místo montáže vádět pouze odborník. Věcné škody Všeobecné... -
Seite 101: Minimální Vzdálenosti
INSTALACE Montáž 10.4 Minimální vzdálenosti f Vyšroubujte všechny čtyři šrouby na jednorázové paletě. f Odstraňte podložky. f Vyjměte z balení opěrné nohy. f Naklopte přístroj a našroubujte do něj opěrné nohy. f Vyzvedněte přístroj z palety. f Aby bylo možné přístroj lépe umístit, použijte případně do- ≥500 ≥100 dávané... -
Seite 102: Hydraulické Připojení
INSTALACE Montáž 11.3 Hydraulické připojení Napájecí vedení Podle provedení topného zařízení (tlakové ztráty) se může ma- Věcné škody ximální přípustná délka vedení mezi přístrojem a tepelným čer- Veškeré vodovodní přípojky a instalace provádějte podle padlem lišit. předpisů. f Vycházejte z orientační hodnoty 10 m u maximální délky ve- dení... -
Seite 103: Plnění Zařízení
INSTALACE Montáž 11.5 Plnění zařízení Kvalita vody Před napuštěním zařízení musíte provést analýzu napouštěné vody. Tuto analýzu můžete žádat např. od příslušného dodavatele vody. K zabránění poškození následkem tvorby vodního kamene musíte napouštěnou vodu příp. upravit změkčením nebo demineralizací. Přitom je nezbytně nutné dodržovat mezní hodnoty napouštěné vody uvedené... -
Seite 104: Odvzdušnění Přístroje
INSTALACE Montáž 11.6 Odvzdušnění přístroje Pojistný ventil na straně topné vody Multifunkční skupina (MFG) f Před odvzdušněním otevřete dočasně rychloodvzdušňovací ventil na multifunkční skupině (MFG). 1 Rychloodvzdušňovací zařízení 2 Elektronika 1 Odtoková hadice Věcné škody 2 Upevnění Otvor k vypuštění vzduchu na vroubkovaném víčku rych- 3 Výlevka loodvzdušňovacího zařízení... -
Seite 105: Elektrická Přípojka
INSTALACE Elektrická přípojka 12. Elektrická přípojka 11.7.1 Schválené materiály Rozvod studené vody VÝSTRAHA elektrický proud Jako materiály jsou přípustné žárově pozinkovaná ocel, nerezová Veškeré elektroinstalační práce a připojování elektric- ocel, měď a plasty. kých přípojek provádějte výhradně v souladu s národ- ními a místními předpisy. - Seite 106 5,9 kW střed přístroje tak, aby dosáhly až k připojovací desce. 8,8 kW f Přípojné kabely a kabely čidel připojte podle následujících údajů. Elektrické připojení 1fázové pouze HSBB 3 S V souladu s jištěním je nutné použít následující průřezy vodičů: Jištění Přiřazení Průřez vedení...
- Seite 107 INSTALACE Elektrická přípojka Řídicí napětí Nízké napětí, sběrnicový kabel a servis Řídící napětí (výstupy řízení) X2 Nízké napětí Dálkový ovl. 3 Dálkové ovládání Plnicí čerpadlo teplé vody a N (X25), PE Dálkový ovl. 1 Dálkové ovládání Cirk. Cirkulační čerpadlo N (X25), PE T(MK) Snímač...
-
Seite 108: Montáž Čidla
INSTALACE Elektrická přípojka 12.1 Montáž čidla Montáž: f Odtáhněte kryt. 12.1.1 Příložné čidlo AVF 6 (součást dodávky) f Pomocí přiloženého šroubu upevněte spodní díl. f V kombinaci s následujícími typy tepelných čerpadel připojte f Zapojte elektrické kabely. dodatečný snímač vratné větve: f Nasaďte víko. -
Seite 109: Dálkový Ovladač Fe 7
INSTALACE Uvedení do provozu 13. Uvedení do provozu 12.2 Dálkový ovladač FE 7 Uvedení přístroje do provozu, všechna nastavení regulátoru te- Připojovací pole FE 7 pelného čerpadla během uvádění do provozu a školení uživatele musí provést autorizovaný servis. Uvedení do provozu musí být provedeno v souladu s tímto návo- dem k obsluze a instalaci regulátoru tepelného čerpadla a připo- jeného tepelného čerpadla. -
Seite 110: Uvedení Regulátoru Tepelného Čerpadla Do Provozu
INSTALACE Uvedení mimo provoz 13.2 Uvedení regulátoru tepelného čerpadla do 15. Údržba provozu f Při jakýchkoliv pracích odpojte vestavěné elektrické kompo- nenty na všech pólech od sítě. Uvedení regulátoru tepelného čerpadla do provozu a všechna na- stavení musejí být provedeny v souladu s návodem k obsluze a f Pravidelně... -
Seite 111: Výměna Signální Anody
INSTALACE Údržba 15.2 Výměna signální anody 1 modrá provozní kontrolka (bez funkce) 2 červená provozní kontrolka (stav signální anody) f Pokud svítí červený indikátor na ovládacím panelu, vyměňte signální anodu. 1 Ochranná anoda 2 tlakový spínač Jakmile je signální anoda spotřebována, dojde k aktivaci tlakového spínače. -
Seite 112: Technické Údaje
INSTALACE Technické údaje 16. Technické údaje 16.1 Rozměry a přípojky HSBB 3 Průchodka el. rozvodů Přítok studené vody Průměr Výtok teplé vody Průměr Pojistný ventil odtok Topná strana tepelného čerpadla Průměr Vratná strana tepelného čerpadla Průměr Topení vstup.strana Průměr Topení vratný tok Průměr | HSBB 3 www.stiebel-eltron.com... - Seite 113 INSTALACE Technické údaje www.stiebel-eltron.com HSBB 3 |...
-
Seite 114: Schémata Zapojení
INSTALACE Technické údaje 16.2 Schémata zapojení HSBB 3 HSBB 3-phasig mit WPM3 und MFG Steuerung DHC (MFG) L1 L2 L3 N 1 2 3 4 5 6 (Net T > 1 (L) 2 (N) > p (MFG) 4 3 2 1 3 2 1 3 2 1 6 5 4 3... - Seite 115 INSTALACE Technické údaje Kleinspannung “+” 1 = H 2 = L 4 = +12V 4 3 2 1 “+” (WPM3) “+” (Netzteil) “+” 1 (L) “+” 2 (N) 6 5 4 3 3 2 1 3 2 1 5 4 3 2 1 1 2 3 4 5 6 X20 Konektor čerpadla a EVU WPM3 X63 neobsazeno...
- Seite 116 INSTALACE Technické údaje HSBB 3 S HSBB 1-phasig mit WPM3 und MFG Steuerung DHC (MFG) 1 2 3 4 5 6 (Net T > 1 (L) 2 (N) > p (MFG) 4 3 2 1 3 2 1 3 2 1 6 5 4 3 3 2 1 “+”...
- Seite 117 INSTALACE Technické údaje Kleinspannung “+” 1 = H 2 = L 4 = +12V 4 3 2 1 “+” (WPM3) “+” (Netzteil) “+” 1 (L) “+” 2 (N) 6 5 4 3 3 2 1 5 4 3 2 1 3 2 1 1 2 3 4 5 6 X20 Konektor čerpadla a EVU WPM3...
-
Seite 118: Údaje Ke Spotřebě Energie
INSTALACE Technické údaje 16.3 Údaje ke spotřebě energie Údaje o výrobku odpovídají nařízením EU ke směrnici o ekodesignu výrobků v souvislosti se spotřebou energie (ErP). HSBB 3 HSBB 3 S 234264 234265 Výrobce STIEBEL ELTRON STIEBEL ELTRON Třída energetické účinnosti Objem zásobníku... -
Seite 119: Životní Prostředí A Recyklace
INSTALACE | ZÁRUKA | ŽIVOTNÍ PROSTŘEDÍ A RECYKLACE HSBB 3 HSBB 3 S Hodnoty Jmen. objemový průtok topení při A2/W35, B0/W35 a 7 K m³/h Dostupný externí rozdíl tlaků celkem Tepelné ztráty kW/24h 1,78 1,78 Průtok topení min. m³/h Max. provozní tlak Dovolený... - Seite 120 Deutschland Verkauf Tel. 05531 702-110 | Fax 05531 702-95108 | info-center@stiebel-eltron.de STIEBEL ELTRON GmbH & Co. KG Kundendienst Tel. 05531 702-111 | Fax 05531 702-95890 | kundendienst@stiebel-eltron.de Dr.-Stiebel-Straße 33 | 37603 Holzminden Ersatzteilverkauf Tel. 05531 702-120 | Fax 05531 702-95335 | ersatzteile@stiebel-eltron.de Tel.