clage CEX-U Montageanleitung Für Den Fachhandwerker
Elektronischer durchlauferhitzer
Vorschau ausblenden
Andere Handbücher für CEX-U:
- Montageanleitung für den fachhandwerker (116 Seiten) ,
- Montageanleitung (92 Seiten) ,
- Gebrauchsanleitung (52 Seiten)

Verwandte Anleitungen für clage CEX-U


Inhaltszusammenfassung für clage CEX-U
- Seite 1 Elektronischer Durchlauferhitzer CEX-U Montageanleitung für den Fachhandwerker Electronically controlled instantaneous water heater CEX-U Installing instructions for the professional...
-
Seite 2: Übersichtsdarstellung
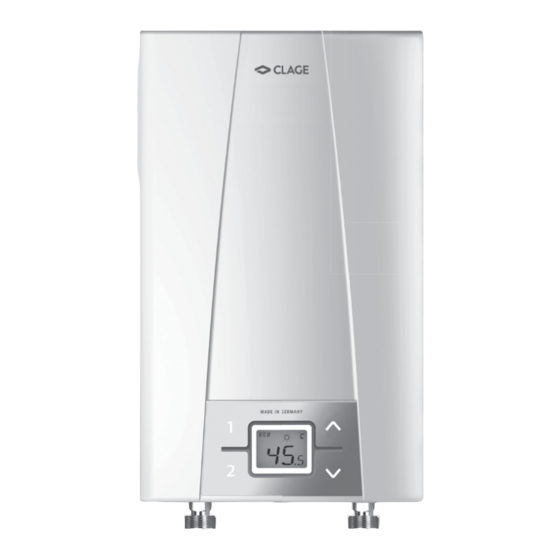
CEX-U ELECTRONIC MPS ® 1. Übersichtsdarstellung 1. Overview Bei Ersatzteilbestellungen stets Gerätetyp When ordering spare parts, please always specify the und Serien nummer angeben! appliance model and serial number. CEX-U Gerätehaube Kalt- und Warmwasser- CEX-U hood anschlussstück 82800 Cold and Hot water... -
Seite 3: Inhaltsverzeichnis
Inhaltsverzeichnis Contents 1. Übersichtsdarstellung ....... 2 1. Overview ........2 2. -
Seite 4: Sicherheitshinweise
CEX-U ELECTRONIC MPS ® 3. Sicherheitshinweise 3. Safety instructions Montage, erste Inbetriebnahme und Installation, initial operation and Wartung dieses Gerätes dürfen nur maintenance of this appliance must durch einen anerkannten Fachhand- only be conducted by an author- werksbetrieb erfolgen, der dabei ised professional, who will then be für die Beachtung der bestehenden... - Seite 5 3. Sicherheitshinweise 3. Safety instructions • Öffnen Sie niemals das Gerät, ohne • Never make technical modifications, vorher die Stromzufuhr zum Gerät dau- either to the appliance itself or the erhaft unterbrochen zu haben. electrical leads and water pipes. • Nehmen Sie am Gerät oder an den •...
-
Seite 6: Technische Daten
CEX-U ELECTRONIC MPS ® 4. Technische Daten 4. Technical specifications CEX-U Model Energieeffizienzklasse Energy efficiency class Nennleistung (Nennstrom) 11 / 13,5 kW (16 / 19,5 A) Rated capacity (Rated current) Gewählte Leistung Chosen capacity 11 kW (16 A) 13,5 kW (19,5 A) (Gewählter Strom) -
Seite 7: Installationsbeispiel
5. Installationsbeispiel 5. Typical installation Installation mit druckloser Armatur Example of an open-outlet installation with special tap G3/8 Tiefe 108 / Depth 108 Elektroanschluss mit Netzleitung (ca. 600, ggf. kürzen) Shorten cable ≥70 if necessary Maßangaben in mm Dimensions in mm Installation mit druckfester Armatur Example of a closed-outlet installation... -
Seite 8: Installation
CEX-U ELECTRONIC MPS ® 6. Installation 6. Installation Zu beachten sind: The following regulations must be observed: • VDE 0100 • Installation must comply with all • EN 806-2 statutory regulations, as well as • Bestimmungen der örtlichen those of the local electricity and Energie- und Wasserversorgungs- water supply companies. -
Seite 9: Gerät Befestigen
6. Installation 6. Installation Gerät befestigen Mounting the appliance 1. Wasserzuleitungen vor der Installation 1. Thoroughly rinse the water supply gründlich durchspülen, um Schmutz pipes before installation to remove aus den Leitungen zu entfernen. soiling from the pipes. 2. Gerät an die Wand halten; dann 2. -
Seite 10: Elektroanschluss
CLAGE’s prepared load shedding box (art. Alternativ kann ein Lastabwurfrelais für no. 82260). Alternatively, a load shedding elektro nische Durchlauferhitzer (CLAGE relay (CLAGE art. no. 82250) can be con- Art.Nr. 82250) an den Außen leiter L nected to phase conductor L . A special angeschlossen werden. -
Seite 11: Elektroanschluss Herstellen
7. Elektroanschluss 7. Electrical connection taneously and wait until the desired mode gleichzeitig die Tasten (0, 1 or 2) is shown on the display, then und warten, bis der gewünschte release the keys. Operating mode 1 must Wert (0, 1 oder 2) im Display erscheint, be selected first, thus to check the correct dann Tasten loslassen. - Seite 12 CEX-U ELECTRONIC MPS ® 7. Elektroanschluss 7. Electrical connection in das Gerät eindringen kann. Die must be used! Schutztülle muss verwendet werden! 4. Strip the cables and plug them in the 3. Montieren Sie die Zugentlastung. Die connecting terminals according to the Zugentlastung muss verwendet werden! wiring diagram.
-
Seite 13: Erstinbetriebnahme
8. Erstinbetriebnahme 8. Initial operation 1. Vor dem elektrischen Anschluss 1. Before making the electrical die Wasserleitungen und das connec tion, fill the mains and the Gerät durch mehrfaches, langsa- appliance with water by carefully mes Öffnen und Schließen des opening and closing the hot water Warmwasserzapfventiles mit tap in order to vent completely. -
Seite 14: Hinweis »Erneute Inbetriebnahme
Zentral- 10. Fill in the guarantee registration card kundendienst oder registrieren Sie Ihr and send it to the CLAGE Central Gerät online auf unserer Homepage Customer Service or use the online www.clage.de. -
Seite 15: Sperr-Level
8. Erstinbetriebnahme 8. Initial operation Sperr-Level Lock level Der Umfang der Bedienung des Gerätes The operating mode of the appliance can kann einge schränkt werden. Die be restricted. The service menu can be Konfiguration erfolgt über das Service- used to configure the appliance. Menü. -
Seite 16: Service-Menü
CEX-U ELECTRONIC MPS ® 9. Service-Menü 9. Service menu Das Service-Menü gibt eine Übersicht The service menu offers an overview of über Systemparameter und dient zur system parameters and is used for diag- Diagnose. nostics. Zum Aktivieren des Menüs drücken Sie... - Seite 17 9. Service-Menü 9. Service menu Fehlernummer von »0« bis »9« und dem the arrow keys the last 10 dazugehörigen Fehler. Der zuletzt auf- error codes are displayed chronologically. getretene Fehler wird immer an Position Thereby the display indicates in turns the »0«...
- Seite 18 Il faut toujours indiquer le type d‘appareil et le numéro de Bij het bestellen van wisselstukken steeds série lors d‘une commande de pièces de rechange ! het type toestel en het serienummer vermelden! Raccord d‘eau froide CEX-U Capot de l’appareil et chaude CEX-U Kap toestel Koud- en warmwater- 82800...
-
Seite 19: Notes
Sommaire Inhoud 1. Vue d’ensemble ........18 1. -
Seite 20: Consignes De Sécurité
CEX-U ELECTRONIC MPS ® 3. Consignes de sécurité 3. Veiligheidsvoorschriften Seul un technicien agréé est autorisé à effectuer le mon- De montage, de eerste ingebruikstelling en het onderhoud tage, la première mise en service et l’entretien de cet van dit toestel mogen alleen door een erkend vakman appareil. -
Seite 21: Caractéristiques Techniques
4. Caractéristiques techniques 4. Technische gegevens Type CEX-U Type N° de référence 26213 Bestelnr. Puissance (courant nominal) 11 / 13,5 kW (16 / 19,5 A) Nominaal vermogen (nominale stroom) Puissance sélectionnée Ingesteld vermogen 11 kW (16 A) 13,5 kW (19,5 A) (courant sélectionné) -
Seite 22: Exemple D'installation
CEX-U ELECTRONIC MPS ® 5. Exemple d’installation 5. Typische installatie Installation avec robinetterie non pressurisée Installatie met drukloze kraan G3/8 Profondeur / Diepte 108 Branchement électrique avec câble secteur (env. 600, à raccourcir si ≥70 nécessaire) Elektrische aanslui- ting met netleiding (ca. -
Seite 23: Installation
6. Installation 6. Installatie Doivent être respectées : Neem het volgende in acht: • VDE 0100 • VDE 0100 • EN 806-2 • EN 806-2 • Dispositions des sociètés de distri- • Bepalingen van de plaatselijke bution d’énergie et d’eau leverancier van water en elektri- citeit •... -
Seite 24: Fixation De L'appareil
CEX-U ELECTRONIC MPS ® 6. Installation 6. Installatie Fixation de l’appareil Toestel bevestigen 1. Rincez soigneusement les conduites 1. Spoel voordat u het toestel installeert d’eau avant utilisation pour en éliminer de watertoevoerleidingen grondig door les impuretés. om vuil uit de leidingen te verwijderen. -
Seite 25: Branchement Électrique
/ Spanningsbewakingsbox Si d’autres appareils triphasés sont bran- chés, nous recommandons d’utiliser le Voor aansluiting van meerdere kracht- boîtier de délestage CLAGE (N° de réf. stroomapparaten bevelen wij het gebruik 82260). En variante, il est également pos- van een CLAGE-spanningsbewakingsbox sible de brancher un relais de délestage... -
Seite 26: Réalisation Du Branchement Électrique
CEX-U ELECTRONIC MPS ® 7. Branchement électrique 7. Elektrische aansluiting Description LCD Beschrijving Fonctionnement normal, Normale bedrijfsmodus, réglage d'usine fabrieksinstelling Fonctionnement avec relais de Bedrijfsmodus met normale délestage normal afschakelrelais bij overbelasting Fonctionnement avec relais de délestage sensible Bedrijfsmodus met gevoelige... -
Seite 27: Branchement Électrique
7. Branchement électrique 7. Elektrische aansluiting Faites ensuite passer le câble à travers lengte zodat de kabel met mantel door le manchon de protection contre les het beschermrubber voor spatwater tot projections d’eau de telle sorte que la aan trekontlasting in het toestel kan gaine du câble puisse être fixée fer- worden ingebracht. -
Seite 28: Première Mise En Service
CEX-U ELECTRONIC MPS ® 8. Première mise en service 8. Eerste ingebruikneming 1. Avant de procéder au branchement 1. Voor de elektrische aansluitingen électrique, remplir les conduites te maken: de waterkraan meerdere d’eau et l’appareil avec de l’eau en keren langzaam open en dicht... -
Seite 29: Remarque À Propos De La « Remise En Service
S.A.V. central ou kaart naar de centrale klantenservice, enregistrez votre appareil en ligne sur of registreer het toestel online op de notre site Web www.clage.de. startpagina van onze site www.clage. Remarque à propos de la Opmerking: “Nieuwe « Remise en service » inbedrijfstelling”... -
Seite 30: Niveau De Blocage
CEX-U ELECTRONIC MPS ® 8. Première mise en service 8. Eerste ingebruikneming Niveau de blocage Blokkeerniveau L’étendue des fonctions de l’appareil peut Het aantal beschikbare functies kan wor- être limitée. La configuration s’effectue den beperkt. De instelling gebeurt via het Service-menu. -
Seite 31: Menu Service
9. Menu Service 9. Service-menu Le menu Service contient une vue Het Service-menu geeft een overzicht van d‘ensemble des paramètres du système et de systeemparameters en wordt gebrukt sert au diagnostic. voor diagnose. Pour accéder au menu, appuyez sur Druk om het menu te activeren minstens Affichage du menu Service Service-menu bekijken les touches pendant au moins... -
Seite 32: Service-Menu
CEX-U ELECTRONIC MPS ® 9. Menu Service 9. Service-menu jours indiqué par le code « 0 » et l’avant- te drukken kunnen de tien laatste foutcodes dernier une position avant (code « 1 »). chronologisch worden weergegeven. Op de display knippert afwisselend het foutnum- « LL » : Niveau de blocage... -
Seite 33: Vista De Conjunto
Tampa frontal Acessórios de ligação de protecção CEX-U para água fria e quente Cubierta del aparato CEX-U Conectador de 82800 agua caliente y fría 82807 Tubo de entrada... -
Seite 34: Meio Ambiente E Reciclagem
CEX-U ELECTRONIC MPS ® Índice Índice 1. Vista de conjunto ....... . . 33 1. -
Seite 35: Informações De Segurança
3. Informações de segurança 3. Instrucciones de seguridad A montagem, a primeira colocação em funcionamento e a Las tareas de instalación, primera puesta en marcha y manutenção deste aparelho só devem ser feitos por uma mantenimiento de este aparato sólo podrán realizarse empresa profissional autorizada que será... -
Seite 36: Especificações Técnicas
CEX-U ELECTRONIC MPS ® 4. Especificações técnicas 4. Datos técnicos Tipo CEX-U Tipo No. de referência 26213 Número de referencia Potência nominal (corrente nominal) 11 / 13,5 kW (16 / 19,5 A) Potencia nominal útil (corriente nominal) Potência seleccionada (corrente selecci-... -
Seite 37: Exemplo Para A Instalação
5. Exemplo para a instalação 5. Ejemplo de instalación Instalação com um acessório isento de pressão Instalación con armadura sin presión G3/8 Profundidade 108 / Profundidad 108 Ligação à corrente eléctrica com linha de rede (aprox. 600, cortá-la ≥70 eventualmente) Conexión eléctrica con cable de alimen- Indicações das... -
Seite 38: Instalação
CEX-U ELECTRONIC MPS ® 6. Instalação 6. Instalación A ter em conta: A tener en cuenta: • VDE 0100 • VDE 0100 • EN 806-2 • EN 806-2 • Regulamentos das empresas locais • Normas de las compañías locales de abastecimento de energia e de de suministro de agua y electrici- água... -
Seite 39: Fixar O Aparelho
6. Instalação 6. Instalación Fixar o aparelho Fijación del aparato 1. Limpar cuidadosamente as linhas De 1. Limpiar a fondo las tuberías de sumi- abastecimento de água antes de efec- nistro de agua mediante descargas de tuar a instalação, para retirar a sujida- agua para eliminar la suciedad de las de das tubagens. -
Seite 40: Ligação À Corrente Eléctrica
Al conectar dispositivos de corriente trifá- rente trifásica recomendamos a utilização sica adicionales, se recomienda utilizar el da caixa de rejeição de carga da CLAGE relé de desconexión CLAGE (nº de articulo (No. de referência 82260). Como alternati- 82260). Alternativamente, un relé de va pode ser ligado um relé... -
Seite 45: Estabelecer Uma Ligação À Corrente Eléctrica
7. Ligação à corrente eléctrica 7. Conexión eléctrica Carregue simultâneamente nas teclas vez los botones y espere para modificar o método de hasta que el valor deseado (0, 1 ó 2) operação, e aguarde até que o valor dese- aparezca en la pantalla y entonces puede jado (0, 1 ou 2) apareça no mostrador, lar- soltar los botones. -
Seite 46: Conexión Eléctrica
CEX-U ELECTRONIC MPS ® 7. Ligação à corrente eléctrica 7. Conexión eléctrica da linha de conexão. A anilha de pro- de los tres agujeros de cable (a la dere- tecção tem que ser utilizada! cha, izquierda o en la parte inferior del aparato). -
Seite 47: Primeira Colocação Em Funcionamento
8. Primeira colocação em funcionamento 8. Primera puesta en marcha 1. Antes de efectuar a ligação à 1. Antes realizar la conexión eléctrica corrente eléctrica, encher as cana- desairear las conducciones de agua lizações de água e o aparelho de y el aparato llenándolos completa- água, e purgá-los por consequência mente con agua abriendo y cerran-... -
Seite 48: Indicação »Nova Colocação Em Funcionamento
CEX-U ELECTRONIC MPS ® 8. Primeira colocação em funcionamento 8. Primera puesta en marcha 7. Abra a torneira de água quente. 7. Abra la toma de agua caliente. Controle o funcionamento do esquen- Compruebe el funcionamiento del tador instantâneo. calentador. -
Seite 49: Nível De Bloqueio
8. Primeira colocação em funcionamento 8. Primera puesta en marcha Nível de bloqueio Nivel de bloqueo O volume de funcionamento do apare- Se puede limitar el manejo del aparato. lho pode ser limitado. A configuração é La configuración se realiza a través del efectuada através do menú... -
Seite 50: Menú De Serviço De Assistência Técnica
CEX-U ELECTRONIC MPS ® 9. Menú de serviço de assistência técnica 9. Menú de servicio O menú de serviço de assistência técnica El menú de servicios ofrece una visión mostra uma vista de conjunto sobre os pará- general de los parámetros del sistema y Ver o menú... - Seite 51 9. Menú de serviço de assistência técnica 9. Menú de servicio anteriores correspondem a uma posição El último error se guarda siempre en la para trás. posición „0“, y el anterior correspondien- te va una posición atrás. »LL«: Nível de bloqueio „LL“: Nivel de bloqueo O volume de funcionamento do aparelho pode ser limitado.
-
Seite 52: Rysunek Poglądowy
CEX-U ELECTRONIC MPS ® 1. Rysunek poglądowy 1. Översiktsbild Przy zamawianiu części zamiennych zawsze podawać typ Ange alltid apparattyp och serienummer urządzenia i numer seryjny! vid beställning av reservdelar! Obudowa Przyłącze zimnej i urządzenia CEX-U ciepłej wody CEX-U apparathuv Anslutningsstycke för... - Seite 53 Spis treści Innehållsförteckning 1. Översiktsbild ........48 1.
-
Seite 54: Wskazówki Bezpieczeństwa
CEX-U ELECTRONIC MPS ® 3. Wskazówki bezpieczeństwa 3. Säkerhetsinformation Instalacja, pierwsze uruchomienie i konserwacja podgrze- Installation, driftstart och underhåll av denna varmvatten- wacza mogą być wykonywane jedynie przez autoryzowany värmare får bara utföras av en auktoriserad installations- zakład usługowy, odpowiedzialny za zgodność zainsta- firma, som fullt ut ansvarar för att befintliga normer och... -
Seite 55: Dane Techniczne
4. Dane techniczne 4. Tekniska data CEX-U Nr katalogowy 26213 Ordernr Moc nominalna (prąd znamionowy) 11 / 13,5 kW (16 / 19,5 A) Nominell effekt (märkström) Wybrana moc (wybrany prąd) 11 kW (16 A) 13,5 kW (19,5 A) Vald effekt (vald ström) Przyłącze elektryczne... -
Seite 56: Przykład Instalacji
CEX-U ELECTRONIC MPS ® 5. Przykład instalacji 5. Installationsexempel Przykład instalacji dla armatury bezciśnieniowej Installation med trycklös armatur G3/8 Głębokość 108 / Djup 108 Przyłącze elektryczne z przewodem sieciowym (ok. 600, w razie potrzeby ≥70 skrócić) Elanslutning med nätledning (ca 600, ev. kortare) Wymiary w mm Måttangivelser i mm... -
Seite 57: Instalacja
6. Instalacja 6. Installation Należy przestrzegać: Att tänka på: • VDE 0100 • VDE 0100 • EN 806-2 • EN 806-2 • Przepisów lokalnych zakładów ener- • Bestämmelser hos lokala energi- getycznych i zakładów wodociągo- och vattenförsörjningsföretag wych • Uppgifter på typskylt •... -
Seite 58: Montaż Urządzenia
CEX-U ELECTRONIC MPS ® 6. Instalacja 6. Installation Montaż urządzenia Uppmontering av apparaten 1. Przed montażem podgrzewacza grun- 1. Spola omsorgsfullt igenom inkomman- townie przepłukać instalację doprowa- de vattenledningar före installationen, dzającą wodę celem usunięcia z niej för att få bort smuts i ledningarna. -
Seite 59: Podłączenie Prądu
Alternativt kan ett belastningsreduktions- się zastosowanie skrzynki z przełącz- relä för elektroniska genomströmnings- nikiem priorytetowym firmy CLAGE (nr värmare (CLAGE art.nr 82250) anslutas till art. 82260). Alternatywnie do przewodu ytterledaren L . För detta måste ett speci- zewnętrznego L można podłączyć... -
Seite 60: Podłączenie Elektryczne
CEX-U ELECTRONIC MPS ® 7. Podłączenie prądu 7. Elanslutning W celu zmiany trybu pracy należy jedno- på displayen, släpp sedan knapparna. cześnie wcisnąć przyciski Därefter ska driftsätt 1 väljas och belast- i odczekać, aż na wyświetlaczu pojawi ningsreduktionsreläets funktion provas vid się... - Seite 61 7. Podłączenie prądu 7. Elanslutning do urządzenia wzdłuż przewodu zasila- 4. Avisolera kabeln och anslut den på jącego. Należy koniecznie zastosować anslutningsplinten i enlighet med tulejkę chroniącą przed bryzgami det avbildade kopplingsschemat. wody! Apparaten ska anslutas till skyddsle- daren. 3. Zamontować dławik kablowy. Należy koniecznie zastosować...
-
Seite 62: Pierwsze Uruchomienie
CEX-U ELECTRONIC MPS ® 8. Pierwsze uruchomienie 8. Idrifttagande första gång 1. Przed podłączeniem do sieci 1. Fyll vattenledningarna och appa- elektrycznej wielokrotnie powoli raten med vatten genom att otwierać i zamykać zawór ciepłej flera gånger långsamt öppna och wody tak, aby napełnić układ wodą... -
Seite 63: Wskazówka »Ponowne Uruchomienie
10. Wypełnić kartę rejestracyjną i wysłać do Centralnego Biura Obsługi Klienta lub zarejestrować urządzenie na stro- nie internetowej www.clage.de. Wskazówka »Ponowne Info»Förnyat idrifttagande« uruchomienie« Om apparaten efter installationen ånyo ska tas i drift i en annan installations- Jeśli urządzenie po pierwszym zainstalo-... -
Seite 64: Funkcja Blokowania
CEX-U ELECTRONIC MPS ® 8. Pierwsze uruchomienie 8. Idrifttagande första gång Funkcja blokowania Spärrnivå Zakres obsługi urządzenia może zostać Antalet inställningsfunktioner på appara- ograniczony. Konfiguracja jest przeprowa- ten kan begränsas. Konfigurationen görs dzana w menu serwisowym. via servicemenyn. Włączanie funkcji blokowania Aktivering av spärrfunktionen... -
Seite 65: Menu Serwisowe
9. Menu serwisowe 9. Servicemeny Menu serwisowe oferuje przegląd para- Servicemenyn ger en översikt över system- metrów systemu i służy do diagnozy. parametrar och hjälper till vid diagnos. Aby aktywować menu należy wcisnąć Aktivera menyn genom att trycka på Otworzyć menu serwisowe Se servicemenyn przyciski na co najmniej 2 sekun- knapparna... - Seite 66 CEX-U ELECTRONIC MPS ® 9. Menu serwisowe 9. Servicemeny miga pokazując na zmianę numer błędu mellan felnumret från »0« till »9« och det od »0« do »9« i przynależny błąd. Ostatni dithörande felet. Det senast uppkomna błąd występuje zawsze na pozycji »0«, a felet läggs alltid under positionen »0«...
- Seite 67 1. Přehled 1. Prehľad Při objednávání náhradních dílů vždy uvádějte Pri objednávke náhradných dielov vždy uveďte typ zariadenia a sériové číslo! typ přístroje a sériové číslo! Kryt přístroje CEX-U Přípojky studené a CEX-U Kryt zariadenia teplé vody 82900 Prípojka studenej a...
- Seite 68 CEX-U ELECTRONIC MPS ® Obsah Obsah 1. Přehled ......... 63 1.
-
Seite 69: Bezpečnostní Upozornění
3. Bezpečnostní upozornění 3. Bezpečnostné upozornenia Montáž, první uvedení do provozu a údržbu tohoto přístro- Montáž, prvé uvedenie do prevádzky a údržbu tohto zaria- je smějí provádět pouze specializované firmy, které jsou denia smie vykonávať len autorizované odborné servisné při tom plně zodpovědné za dodržování platných norem a stredisko, ktoré... -
Seite 70: Technické Údaje
CEX-U ELECTRONIC MPS ® 4. Technické údaje 4. Technické údaje CEX-U Obj. č. 26213 Objed. čís. Jmenovitý výkon (jmenovitý proud) 11 / 13,5 kW (16 / 19,5 A) Menovitý výkon (menovitý prúd) Zvolený výkon Zvolený výkon 11 kW (16 A) 13,5 kW (19,5 A) (zvolený... -
Seite 71: Příklad Instalace
5. Příklad instalace 5. Príklad inštalácie Instalace s beztlakovou armaturou Inštalácia s beztlakovou armatúrou G3/8 Hloubka 108 / Hĺbka 108 Elektrická přípojka s vedením (cca 600, příp. zkraťte) ≥70 Elektrická prípojka so sieťovým vedením (cca 600, popr. skráťte) Rozměry v mm Rozmerové... -
Seite 72: Instalace
CEX-U ELECTRONIC MPS ® 6. Instalace 6. Inštalácia Dodržujte: Musí sa dodržiavať: • VDE 0100 • VDE 0100 • EN 806-2 • EN 806-2 • Ustanovení místních dodavatelů • Ustanovenia miestneho elektroroz- elektřiny a vody vodného a vodárenského podniku • Údaje na typovém štítku •... -
Seite 73: Připevnění Přístroje
6. Instalace 6. Inštalácia Připevnění přístroje Upevnenie zariadenia 1. Před instalací důkladně propláchněte 1. Prívodné potrubie vody pred inštalá- přívodní potrubí, abyste z něj odstranili ciou dôkladne prepláchnite, aby sa nečistoty. odstránili nečistoty z potrubí. 2. Přidržte přístroj na stěně, poté pomocí 2. -
Seite 74: Elektrické Připojení
Při připojování dalších přístrojů na třífá- Keď sú zapojené ďalšie trojfázové prí- zový proud doporučujeme použít krabici stroje, doporučujeme použitie boxu pre s přednostním relé CLAGE (obj. č. 82260). odľahčenie záťaže CLAGE (čís. art. 82260). Alternativně lze na vnější vodič L připojit Alternatívne sa na vonkajší... -
Seite 75: Zhotovení Elektrické Přípojky
7. Elektrické připojení 7. Elektrická prípojka Pre zmenu druhu prevádzky stlačte súčas- současně tlačítka a počkej- ne tlačidlá a počkajte, až te, až se na displeji zobrazí požadovaná sa na displeji zobrazí želaná hodnota (0, hodnota (0, 1, nebo 2), poté tlačítka 1 alebo 2), potom tlačidlá... - Seite 76 CEX-U ELECTRONIC MPS ® 7. Elektrické připojení 7. Elektrická prípojka 3. Namontujte odlehčení tahu. Odlehčení 3. Namontujte odľahčenie od ťahu. tahu je nezbytné použít! Odľahčenie od ťahu sa musí používať! 4. Odizolujte kabel a připojte jej k připo- 4. Odizolujte káble a pripojte ich na pri- jovacím svorkám dle schématu zapoje-...
-
Seite 77: První Uvedení Do Provozu
8. První uvedení do provozu 8. Prvé uvedenie do prevádzky 1. Před elektrickým připojením naplň- 1. Pred elektrickým pripojením naplň- te vodovodní potrubí a přístroj te vodovodné potrubia a zaria- vodou několikanásobným pomalým denie vodou niekoľkonásobným otevřením a zavřením kohoutku pomalým otvorením a zatvorením teplé... -
Seite 78: Upozornění K Opětovnému Uvedení Do Provozu
CEX-U ELECTRONIC MPS ® 8. První uvedení do provozu 8. Prvé uvedenie do prevádzky bližně 10 sekundách nepřerušovaného 7. Otvorte odberový kohútik teplej vody. průtoku vody. Skontrolujte funkčnosť prietokového ohrievača. 9. Seznamte uživatele s používáním ohří- vače a předejte mu návod k použití. -
Seite 79: Úroveň Uzamknutí
8. První uvedení do provozu 8. Prvé uvedenie do prevádzky Úroveň uzamknutí Úroveň obmedzenia Rozsah obsluhy přístroje lze omezit. Rozsah ovládania zariadenia môže byť Konfigurace se provádí prostřednictvím obmedzený. Konfigurácia sa vykonáva cez servisní nabídky. servisné menu. Aktivace funkce uzamknutí Aktivácia obmedzovacej funkcie 1. -
Seite 80: Servisní Nabídka
CEX-U ELECTRONIC MPS ® 9. Servisní nabídka 9. Servisné menu Servisní nabídka poskytuje přehled systé- Servisné menu poskytuje prehľad o systé- mových parametrů a slouží k diagnostice. mových parametroch a slúži na diagnos- Zobrazení servisní nabídky tiku. Nabídku aktivujete stisknutím tlačítek Náhľad do servisného menu... - Seite 81 9. Servisní nabídka 9. Servisné menu příslušná chyba. Poslední vzniklá chyba »0« a predchádzajúce chyby sa posunú o se vždy zobrazuje na pozici »0« a před- jedno miesto dozadu. cházející chyby se vždy posouvají o jednu »LL«: Úroveň obmedzenia pozici dál. Rozsah ovládania zariadenia môže byť...
-
Seite 82: Notas
CEX-U ELECTRONIC MPS ® 10. Notizen / Notes / Notities / Notas / Notatki / Anmärkningar / Poznámka / Poznámky 10. Notizen 10. Notes 10. Notes 10. Notities 10. Notas 10. Notas 10. Notatki 10. Anmärkningar 10. Poznámka 10. Poznámky... - Seite 83 Notizen / Notes / Notities / Notas / Notatki / Anmärkningar / Poznámka / Poznámky...
- Seite 84 CLAGE GmbH Pirolweg 1–5 21337 Lüneburg Deutschland Telefon: +49 (0) 4131 · 89 01- 0 Telefax: +49 (0) 4131 · 83 200 E-Mail: service@CLAGE.de Internet: www.CLAGE.de Kurzanleitung Quick reference guide 11. Kurzanleitung Pfeiltaste nach oben 11. Quick reference guide Programmtaste 1...