Herunterladen Diese Seite drucken

SCS Sentinel AudioKit 3208D Installations- Und Bedienungsanleitung

Vorschau ausblenden Andere Handbücher für AudioKit 3208D:

Werbung

Verfügbare Sprachen
  • DE

Verfügbare Sprachen

  • DEUTSCH, seite 18
AudioKit
Interphone
O
o
o
O
Notice
d'utilisation
Instrucciones
de
uso
EvxELp[öL0
EMKc1Tåoxaonc
et d'installation
Installation
Installation
e instalaciön
Kat
xpnotuono[nonc
3208D
audio
filaire
Audio
door
Citofono
Intercomunicador
Audio-Türsprechanlage
Audio-Intercom
eupotnÄécbovou
O
and
user
manual
und
Bedienungsanleitung
phone
audio
audio
2 fils
100m
1 mélodie
Platine
encastrer
Manuale
d'installazione
e uso
Installatie
en Gebruiksaanwijzing
V.072020
max
de
rue
- IndF

Werbung

loading

Inhaltszusammenfassung für SCS Sentinel AudioKit 3208D

  • Seite 1 AudioKit 3208D Interphone audio filaire Audio door phone Citofono audio Intercomunicador audio Audio-Türsprechanlage Audio-Intercom eupotnÄécbovou 2 fils 100m 1 mélodie Platine encastrer Notice d'utilisation et d'installation Installation user manual Manuale d'installazione e uso Installation Bedienungsanleitung Installatie en Gebruiksaanwijzing Instrucciones e instalaciön EvxELp[öL0 EMKc1Tåoxaonc xpnotuono[nonc...
  • Seite 2 SOMMAIRE A- Précautions d'utilisation ..B- Descriptif ... Bl - Contenu du kit/ Dimensions B2 - Présentation C- Cäblage / Installation . Cl - Schéma de cåblage C2 - Installation et raccordement — D- Caractéristiques techniques • • • • •...
  • Seite 3 B2- Présentation du produit Combiné Haut parleur Porte étiquette lumineux Ouverture serrure ou Bouton d'appel gåche Microphone Vis ouverture boitier d'encastrement Cable prise intérieur C- CÄBLAGE / INSTALLATION Cl- Schéma de cäblage Combiné Les cäbles de liaison Platine ne sont pas fournis SERRURE OUGACHE en OPTION De O å...
  • Seite 4 C2- Installation et raccordement • Fixer la Platine de rue å 1,5 métres de hauteur sur un mur plat. L'installation sous un porche ou un lieu couvert est fortement recommandée. Oter Iavis du bas de Ia Platinede rue, souleverIégérementIe boitierd'encastrementpuisfaire coulisserIafacade. •...
  • Seite 5 E- ASSISTANCE TÉLÉPHONIQUE En cas de besoin, vous pouvez prendre contact avec notre assistance technique au numéro ci-dessous Service 0,35 € I min 0 892 +prix appel Hotline Horaire hotline, voir sur Ie site internet : scs-sentinel.com Nous vous demandons au préalable de relever la référence de votre matériel sur la notice ou l'emballage de votre produit. Nous vous conseillons également de brancher votre matériel «...
  • Seite 6 TABLE CONTENTS A- Safety instructions B- Description „ • • • • • BI - Contents/ Dimensions ..6 B2 - Components . C- Wiring / Installing . Cl - Wiring diagram . C2- Installing.. D- Technical features ..E- Warranty F- Warnings SAFETY...
  • Seite 7 B2- Components Handset Loudspeaker Illuminated label holder Call button Opening button Microphone Screw opening recessed housing Cable socket inside C- WIRING / INSTALLING Cl- Wiring diagram Handset Connecting cables Outdoor station not provided LOCK OR STRIKE : OPTIONAL From Oto 10 metres From Oto 50 metres: use 0.75 mm2 cable use Imm2 cable.
  • Seite 8 C2- Attaching and connecting the elements • Attach the outdoor station at a height of 1.5 metres mounted on a flat wall. • Installation under a porch or a covered area is highly recommended. Remove the bottom from the panel, slightly lift the flush-mounted unit then slide off the front panel. Connect the outdoor station wire (as shown in the diagram below) and insert the outdoor station onto its support.
  • Seite 9 WARRANTY The invoice will be required as proof of purchase date. Please keep it duringthe warranty period. Warranty 2 years Carefully keep the barcode and the proof of purchase, that will be necessary to claim warranty. F- WARNINGS • Maintain a minimum distance of 10 cm around...
  • Seite 10 INDICE A- Precauzioni per l'uso — B- Specifiche.. Bl - Contenuto del kit . 82 - Presentazionedel prodotto C- Cablaggio / Installazione — „ CI - Schemadi cablaggio — C2 - Impianto. D- Caratteristiche tecniche ..12 E- Assistenza telefonica —...
  • Seite 11 B2- Presentazione del prodotto Modulo ricevitore Altoparlante Porta-etichetta Pulsante di apertura Pulsante di chiamata luminoso Microfono Vite di apertura scatola incasso Cavo presa interna C- CABLAGGIO / INSTALLAZIONE Cl- Schema di cablaggio Modulo ricevitore Cavi di collegamento Pulsantiera esterna non forniti Serratura : opzione Da Oa 10 metri: cavo da I mm2 Da 0 a 50 metri: utilizzo del cavo da 0,75 mm2...
  • Seite 12 C2- Fissaggio e collegamento degli elementi Fissare la piastra esterna 1,5 metri di altezza su una parete piana. L'installazione sotto un portico o un Iuogo coperto é altamente raccomandata. Togliere la vite della parte inferiore della piastra, sollevare leggermente la scatola da incasso e far scorrere il frontalino.
  • Seite 13 E- ASSISTANZA TELEFONICA I tecnici del servizio post-vendita sono disponibili al numero . Hotline In caso di alfunzionamento del prodotto durante l'installazione o pochi giorni dopo la stessa si invita a contattare il servizio clienti rimanendo in prossimitå del prodotto in modo da consentire ai nostri tecnici di diagnosticare subito l'origine del problema.
  • Seite 14 (NDICE A- Precauciones para eI uso B- Descripciön • • • — BI - Contenido / Dimensiones . B2 - Presentaciön del producto C- Cableado / Cl - Esquema de cableado. C2 - Instalaciön D- Caracteristicas técnicas............ 16 E- Asistencia técnica..
  • Seite 15 B2- Presentaciön del producto Teléfono Altoparlante Porta etiqueta luminoso Apertura Botön de llamada de cerradura Microfåno Tornillo de apertura caja de empotrar Conector hembra interior C- CABLEADO / INSTALACIÖN Cl- Esquema de cableado Teléfono Cables de conexiön Placa exterior no incluidos Plancha o cerradura : opciön De0a 10 metros...
  • Seite 16 C2- Fijaciön y conexiön de Ios elementos Fijar la placa de calle a 1,5 metros de altura en un muro Plano. La instalaciön en un porche o lugar cubierto estå muy recomendada. Retirar el tornillo inferior de la placa, levantar ligeramente la caja de empotrar y seguidamente hacer deslizar el panel.
  • Seite 17 E- ASISTENCIA TÉCNICA Se puede contactar los técnicos del servicio posventa a la siguiente direcciön de email : asistencia.tecnica@scs-sentinel.com F- GARANTiA Conservar e I recibode compradurantetodoesteperiodode garantia. Garantia 2 anos Conservar eI cödigo de barra asi como que su justificante de compra, serån necesarios para hacer uso de la garantia G- AVISOS Mantener una distancia minima de 10 cm alrededor del aparato para asegurar una ventilaciån suficiente.
  • Seite 18 OBERSICHT A- Vorsichtsmassnahmen beim betrieb ... 18 B- Beschreibung........................Bl - Inhalt/abmessungen B2 - Produktpräsentation. — C- Anschluss/installation . 19 Cl - Schaltplan . C2 - Installation — D- Technische eigenschaften „ • • • • • •„ 20 E- Garantie ...
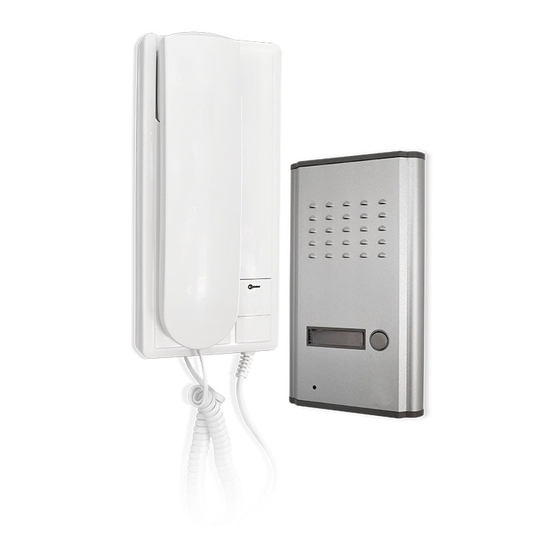
  • Seite 19 B2- Produktpräsentation Kombiniert Lautsprecher Leucht-Namensschild Offnungsknopf Klingelknopf Mikrofon Schraubenöffnung Einbaugehäuse Kabeldose im Inneren C- ANSCHLUSS / INSTALLATION Cl- Schaltplan Kombiniert Anschlusskabel Türstation nicht vorgesehen Lock streik Oder : optional Von 0 bis 10 Meter: Von Obis 50 Meter: O,75mm2- Kabel 1 mm2-Kabel Von 51 bis 100 Meter: Imm2 - Kabel...
  • Seite 20 C2- Befestigung und anschluss der komponenten Die Außensprechstelle auf 1,5Meter Höhe an einer glatten Wand befestigen. • Installation unter einer Veranda Oder einem überdachten Platz Wird dringend empfohlen. Die untere Schraube der Türsprechanlage mit Hilfe des mitgelieferten Schlüssels ausdrehen, das Gehäuse leicht anheben und die Vorderseite gleiten lassen.
  • Seite 21 E- GARANTIE Es ist zwingend erforderlich, den Kaufnachweis während der Garantie 2 Jahre Garantiezeit aufzubewahren. Bewahren Sie den Barcode und Ihren Kaufnachweis sorgfältig auf, da diese für Garantieansprüche erforderlich Sind. F- WARNHINWEISE • Ein Mindestabstand (10 cm) muss um das Gerät herumfür die ausreichende Lüftung eingehalten werden. •...
  • Seite 22 SAMENVATTING A- Voorzorgsmaatregelenbii gebruik ........... B- Beschrijving ..22 Bl - Inhoud / afmetingen 82 - Productpresentatie C- Bedrading / installatie........................— CI - Bedradingsschema. C2 - Installatie D- Technische specificaties ..24 E- Garantie —...
  • Seite 23 C- BEDRADING / INSTALLATIE Cl- Bedradingsschema Handset Aansluitkabels Straatunit niet voorzien Sluitplaat of lock : Optioneel gebruik kabel 1 mm2 0 tot 50 meter: gebruik kabel 0,75 mm2 51 tot 100meter: gebruik kabel 1 mm2 C2- Bevestiging Bevestig de berm tot 1,5 meter op een vlakke wand. Laat het deurstation niet installeren op een plaats in direct contact met regen of zon.
  • Seite 24 TECHNISCHE SPECIFICATIES Straatunit Installatie ingebouwd Gevel aluminium Besturing van een staking of elektrisch slot 12V /1,2A max Afmetingen 198 x 55 mm Hoorn Installatie Wand gemonteerd Bedrading Otot 50meter:0,75mm2kabel (niet meegeleverd) 51tot 100 meter: 1 mm 2 kabel (niet meegeleverd) Maximale bedrading afstand binnenshuis gebruikt worden Gebruik...
  • Seite 25 nEPlAHVH A- neptypa$LK6c ................25 A1 - Tteptvpa$h / öta0Tå0EIG ..25 A2 - neptvpa$rh -cov — B- KaXwöiwcn / EYKatåctaon ....................BI - TIPÖTUTIO KaÄ(DöOonq..26 B2 - -conoee-cnon Kat OUVÖEOQ -cc.ov EEapxnua-coov ..26 C- XapaKtnpL0TLKå npoiövtoq ................
  • Seite 26 / ErKATAETAEH Bl- TIP6tUrtO KaÄwöiwonq Euvöéovxac KaXd)öta gnoutovtEpa KRELöapta n anEpyta: rtpoatpETIKOC Écoq 10 uÉtpa xpnotuort0Lho-cE 'Ecoq 100 we-cpa (0-50m 0.75mm2, 51-100m Imm2). B2- tOTt09Etnon Kat OUVÖEon EEaptngatwv TOTTOéETh0XE 10 eupornÄé$wvo OE Kå9ETO -coixo OE ÖWoq TIEPiTIOU 1,5 uérpa anö xo éöa$oq.
  • Seite 27 C- XAPAKTHPIETIKA nPOTONTOE PTTOOTOVIEPa EYKa-cåoxaon -conoéé-cnon KÄE1öap1åq h YKapa(öTtoptaq 12VDC 1,2A Atct01å0ElG 116 x 198 x 55 eupotnÄE$wvo 'Eujq 100 uétpa (0-50m 0.75mm2, 51-100m Imm2) ALQ0Tå0Etq x 214 x 40 ErrYHEH Auxo TIPOiÖv EvvÖnon 2 EtcOv, Vla EEapxhuaxa EpvaTlKå, -cnv nuepounvia 2 xp6vta EYYünon avopåq.
  • Seite 28 Toutes les infos sur : www.scs-sentinel.com sentinel Route de St Symphorien 85130 Les Landes Génusson...