Herunterladen Inhalt Inhalt Diese Seite drucken
Inhaltsverzeichnis

Werbung

Verfügbare Sprachen

Verfügbare Sprachen

Gebrauchsanleitung
ab Seite 3
Instruction manual
starting on page 13
Mode d'emploi
à partir de la page 23
Handleiding
vanaf pagina 33
Z 09065_V2
DE
GB
FR
NL

Werbung

Inhaltsverzeichnis
loading

Inhaltszusammenfassung für Cleanmaxx MULTIZYKLON PLUS

  • Seite 1 Gebrauchsanleitung ab Seite 3 Instruction manual starting on page 13 Mode d'emploi à partir de la page 23 Handleiding vanaf pagina 33 Z 09065_V2...
  • Seite 3: Inhaltsverzeichnis

    Inhalt Bedeutung der Symbole in dieser Anleitung _________________________4 Bestimmungsgemäßer Gebrauch ________________________________4 Sicherheitshinweise ____________________________________________4 Verletzungsgefahren _______________________________________________ 4 Das richtige Anschließen ____________________________________________ 5 Der richtige Gebrauch ______________________________________________ 5 Lieferumfang und Geräteübersicht ________________________________6 Vor dem ersten Gebrauch ______________________________________7 Lieferumfang auspacken ____________________________________________ 7 Saugschlauch einsetzen/abnehmen ___________________________________ 7 Teleskoprohr einsetzen _____________________________________________ 7 Länge des Teleskoprohres verstellen __________________________________ 8 Zubehör _________________________________________________________ 8...
  • Seite 4: Bedeutung Der Symbole In Dieser Anleitung

    Bedeutung der Symbole in dieser Anleitung Alle Sicherheitshinweise sind mit diesem Symbol gekennzeichnet. Lesen Sie diese aufmerksam durch und halten Sie sich an die Sicherheitshinweise, um Personen- und Sachschäden zu vermeiden. Tipps und Empfehlungen sind mit diesem Symbol gekennzeichnet. Bestimmungsgemäßer Gebrauch ❐...
  • Seite 5: Das Richtige Anschließen

    ❐ Benutzen und lagern Sie das Gerät nur außerhalb der Reichweite von Kindern. Un- sachgemäße Bedienung kann zu Verletzungen und Stromschlägen führen. Auch das Netzkabel darf für Kinder nicht erreichbar sein. Das richtige Anschließen ❐ Schließen Sie das Gerät nur an eine vorschriftsmäßig installierte Steckdose mit Schutzkontakten an.
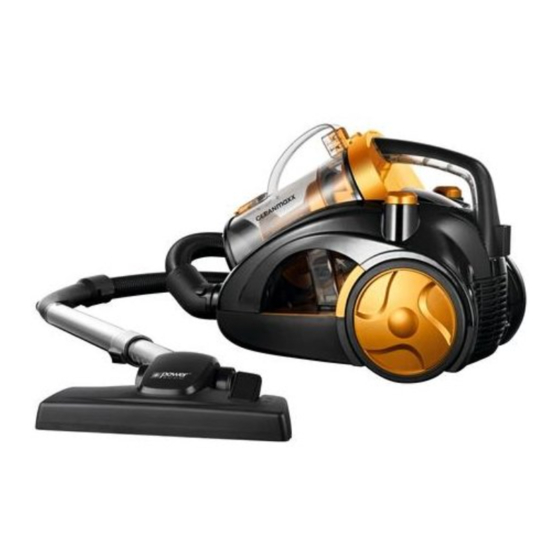
  • Seite 6: Lieferumfang Und Geräteübersicht

    ❐ Schalten Sie das Gerät sofort aus und ziehen Sie den Netzstecker aus der Steck- dose, – wenn Sie Ihre Arbeit mit dem Gerät für einige Zeit unterbrechen, – wenn Sie das Gerät nicht mehr verwenden, – bevor Sie die Düsen wechseln, –...
  • Seite 7: Vor Dem Ersten Gebrauch

    Vor dem ersten Gebrauch Lieferumfang auspacken ACHTUNG! ❐ Halten Sie Kinder und Tiere vom Verpackungsmaterial fern. Es besteht Erstickungs- gefahr! • Packen Sie alle Teile aus und überprüfen Sie den Lieferumfang auf Vollständig- keit (siehe „Lieferumfang und Geräteübersicht“) und Transportschäden. Falls die Bestandteile Schäden aufweisen sollten, verwenden Sie diese nicht(!), sondern kon- taktieren Sie unseren Kundenservice.
  • Seite 8: Länge Des Teleskoprohres Verstellen

    Länge des Teleskoprohres verstellen 1. Drücken Sie den Schieber in Pfeilrichtung und halten Sie ihn gedrückt. 2. Stellen Sie die gewünschte Länge des Teleskoprohres ein und lassen Sie den Schieber wieder los. 3. Bewegen Sie das Teleskoprohr noch ein Stück weiter, bis es hörbar einrastet.
  • Seite 9: Benutzung

    Benutzung ACHTUNG! ❐ Halten Sie die Düsen, den Handgriff und das Teleskoprohr niemals in die Nähe von Körperteilen oder Tieren. Sie könnten sich festsaugen. Sollte sich der Staubsauger doch einmal festsaugen, drücken Sie sofort auf den Ein-/Ausknopf, um das Gerät auszuschalten.
  • Seite 10: Staubbehälter Leeren

    Staubbehälter leeren 1. Drücken Sie die Entriegelungstaste und ziehen Sie den Staubbehälter gleichzeitig nach oben heraus. 2. Halten Sie den Staubbehälter über eine geöffnete Mülltonne. 3. Drücken Sie auf den Verschluss des Staubbehälters. Der Deckel des Behälters öff- net sich und Sie können den Behälter entleeren. 4.
  • Seite 11: Abluftfi Lter Reinigen

    Abluftfi lter reinigen 1. Öffnen Sie die Abluftklappe auf der Rückseite des Staubsaugers. Der Abluftfi lter befi ndet sich hinter der Abluftklappe. 2. Entnehmen Sie den Abluftfi lter. 3. Klopfen Sie den Filter über einer geöffneten Mülltonne aus. 4. Reinigen Sie den Filter bei Bedarf mit lauwarmem Wasser und lassen Sie ihn voll- ständig trocknen.
  • Seite 12: Fehlerbehebung

    Fehlerbehebung Sollte Ihr Gerät einmal nicht ordnungsgemäß funktionieren, einen Schaden aufweisen oder ein Ersatzteil benötigen, so wenden Sie sich bitte an den Kundenservice. Führen Sie zu Ihrer eigenen Sicherheit keine Reparaturen selbst durch. In der folgenden Tabel- le fi nden Sie Tipps, wie Sie kleine Probleme selbst beheben können. Problem mögliche Ursache/Lösung/Tipps •...
  • Seite 13 Contents Meaning of symbols in these instructions __________________________14 Intended use ________________________________________________14 Safety instructions ____________________________________________14 Risks of injury ____________________________________________________ 14 Connecting the vacuum cleaner properly _______________________________ 15 Proper use ______________________________________________________ 15 Product contents and product overview ___________________________16 Prior to fi rst use ______________________________________________17 Unpacking the product contents ______________________________________ 17 Inserting/removing the suction tube ___________________________________ 17 Inserting the telescoping tube _______________________________________ 17...
  • Seite 14: Meaning Of Symbols In These Instructions

    Meaning of symbols in these instructions All safety notices are marked with this symbol. Please carefully read through and obey the safety notices in order to avoid injury to persons and damage to property. Tips and recommendations are marked with this symbol. Intended use ❐...
  • Seite 15: Connecting The Vacuum Cleaner Properly

    Connecting the vacuum cleaner properly ❐ Only connect the device to a properly installed socket with protective earth contacts. The socket must also be readily accessible after the device has been connected. The mains voltage must correspond to the technical data of the device (see sec- tion “Technical data”).Only use proper extension cords, whose technical data cor- responds to that of the device.
  • Seite 16: Product Contents And Product Overview

    ❐ The device must be deactivated when you pull the mains plug out of the socket or insert it in the socket. ❐ Always pull on the plug itself and never on the cable! ❐ Do not attempt to grease the wheels with lubricants or oil. Otherwise, this may cause more dust or dirt to accumulate on the wheels.
  • Seite 17: Prior To Fi Rst Use

    Prior to fi rst use Unpacking the product contents ATTENTION! ❐ Keep children and pets away from the packaging. Risk of suffocation! • Unpack all parts and make sure that the product contents are complete (see section “Product contents and product overview”) and check for any transport damage. If any components are damaged, do not use them(!).
  • Seite 18: Adjusting The Length Of The Telescoping Tube

    Adjusting the length of the telescoping tube 1. Push the slider up and hold it down. 2. Set the desired length of the telescoping tube and release the slider. 3. Push the telescoping tube further until it audibly locks into place.
  • Seite 19: Use

    ATTENTION! ❐ Keep the nozzles, the handle and the telescoping tube away from body parts and pets. They could be caught by the vacuum cleaner. If the vacuum cleaner does hap- pen to get caught, immediately press the On/Off switch to turn off the device. ❐...
  • Seite 20: Cleaning The Motor Fi Lter

    3. Push down on the dust bin fastener. The container lid will open and you can empty the container. 4. Close the lid of the dust bin. The fastener must lock into place. Help closing the lid if necessary by pushing the fastener up against the dust bin lid. 5.
  • Seite 21: Cleaning The Housing And Nozzles

    4. If needed, clean the fi lter with lukewarm warm water and allow it to dry completely. Do not in any case insert the fi lter if it is still damp. 5. After cleaning and/or drying the exhaust fi lter, place it back in the exhaust fl ap and close the fl...
  • Seite 22: Troubleshooting

    Troubleshooting If your device no longer functions properly, exhibits damages or requires a spare part, please contact our customer service. For your own safety, do not perform any repairs yourself. The following table gives you tips on how to resolve minor problems yourself. Problem Potential cause/solution/tips •...
  • Seite 23 Sommaire Signifi cation des symboles contenus dans ce mode d’emploi ___________24 Utilisation adéquate ___________________________________________24 Consignes de sécurité _________________________________________24 Risques de blessure _______________________________________________ 24 Le bon raccordement ______________________________________________ 25 Le bon usage ____________________________________________________ 25 Étendue de la livraison et vue générale de l'appareil _________________26 Avant la première utilisation ____________________________________27 Déballer toutes les pièces __________________________________________ 27 Mettre en place/retirer le tuyau d’aspiration _____________________________ 27...
  • Seite 24: Signifi Cation Des Symboles Contenus Dans Ce Mode D'emploi

    Signifi cation des symboles contenus dans ce mode d’emploi Toutes les consignes de sécurité sont marquées de ce symbole. Veuillez lire attentivement et entièrement ces consignes et tenez-vous en aux consignes de sécurité pour éviter les dommages corporels et matériels. Tous les conseils et recommandations sont caractérisés par ce symbole.
  • Seite 25: Le Bon Raccordement

    cés. Si l’aspirateur devait rester coincé, appuyez immédiatement sur le bouton Arrêt/ Marche pour couper l’appareil. ❐ Utilisez et rangez l’appareil uniquement hors de portée des enfants. Une utilisation non appropriée peut causer des blessures et des électrocutions. Même le câble d’alimentation ne doit pas être accessible aux enfants.
  • Seite 26: Étendue De La Livraison Et Vue Générale De L'appareil

    ❐ Ne laissez pas l’appareil en marche sans surveillance. ❐ Arrêtez immédiatement l’appareil et débranchez la fi che électrique de la prise, – lors que vous interrompez le travail avec l’appareil pendant quelque temps, – lorsque vous n’utilisez pas l’appareil, –...
  • Seite 27: Avant La Première Utilisation

    Avant la première utilisation Déballer toutes les pièces ATTENTION ! ❐ Gardez les enfants et les animaux éloignés du matériel d’emballage. Il y a risque d’asphyxie ! • Déballez toutes les pièces et vérifi ez l’étendue de la livraison pour voir si elle est complète (Cf.
  • Seite 28: Régler La Longueur Du Tube Télescopique

    Régler la longueur du tube télescopique 1. Appuyez sur le poussoir vers le haut et maintenez-le appuyé. 2. Réglez la longueur souhaitée du tube télescopique et relâchez le poussoir. 3. Faites encore avancer le tube télescopique pour entendre un clic. Accessoires ATTENTION ! ❐...
  • Seite 29: Utilisation

    Utilisation ATTENTION ! ❐ Ne tenez jamais les buses, la poignée et le tube télescopique à proximité de parties du corps ou d’animaux. Vous pourriez les aspirer et rester coincé. Si l’aspirateur devait se coincer, appuyez immédiatement sur le bouton Marche/Arrêt pour couper l’appareil.
  • Seite 30: Vider Le Récipient À Poussière

    Vider le récipient à poussière 1. Appuyez sur la touche de déverrouillage et tirez en même temps vers le haut le récipient à poussière pour le sortir. 2. Maintenez le récipient à poussière au-dessus de la poubelle ouverte. 3. Appuyez sur le fermoir du récipient à poussière. Le couvercle du récipient s’ouvre et vous pouvez vider le récipient.
  • Seite 31: Nettoyer Le Fi Ltre D'air Évacué

    Nettoyer le fi ltre d’air évacué 1. Ouvrez le clapet d’air évacué au dos de l’aspirateur. Le fi ltre d’air évacué se trouve derrière le clapet. 2. Retirez le fi ltre d’air évacué. 3. Tapez le fi ltre au-dessus d’une poubelle ouverte. 4.
  • Seite 32: Suppression Des Défauts

    Suppression des défauts Si votre appareil devait en pas fonctionner correctement, présenter un dommage ou nécessiter une pièce de rechange, veuillez vous adresser au service après-vente. Pour votre propre sécurité, n’effectuez aucune réparation vous-même. Dans le tableau sui- vant, vous trouverez des astuces pour pouvoir résoudre de petits problèmes. Problème Cause possible/Remède/Astuces •...
  • Seite 33 Inhoud Betekenis van de symbolen in deze handleiding _____________________34 Reglementair gebruik _________________________________________34 Veiligheidsinstructies __________________________________________34 Verwondingsgevaren ______________________________________________ 34 Juiste aansluiting _________________________________________________ 35 Het juiste gebruik _________________________________________________ 35 Leveringspakket en overzicht van het apparaat _____________________36 Voor ingebruikname __________________________________________37 Leveringspakket uitpakken __________________________________________ 37 Zuigslang plaatsen/verwijderen ______________________________________ 37 Telescopische buis plaatsen ________________________________________ 37 Lengte van de telescopische buis verstellen ____________________________ 38...
  • Seite 34: Betekenis Van De Symbolen In Deze Handleiding

    Betekenis van de symbolen in deze handleiding Alle veiligheidsinstructies zijn aangeduid met dit symbool. Lees deze grondig en houd u aan de veiligheidsinstructies, zodat lichamelijke letsels en materiële schade worden vermeden. Tips en adviezen zijn aangeduid met dit symbool. Reglementair gebruik ❐...
  • Seite 35: Juiste Aansluiting

    ❐ Gebruik en bewaar het apparaat alleen buiten het bereik van kinderen. Verkeerd gebruik kan leiden tot letsels en elektrische schokken. Ook het elektrische snoer mag voor kinderen niet toegankelijk zijn. Juiste aansluiting ❐ Sluit het apparaat alleen aan op een reglementair geïnstalleerd geaard stopcontact. Het stopcontact moet ook na aansluiting goed toegankelijk zijn.
  • Seite 36: Leveringspakket En Overzicht Van Het Apparaat

    – als er tijdens het gebruik een fout of een storing optreedt, – als er vloeistoffen of vreemde voorwerpen in het apparaat zijn beland, – voor een onweer, – alvorens delen van het apparaat en de accessoires te reinigen. ❐ Het apparaat moet uitgeschakeld zijn als u aan de stekker trekt of hem in het stop- contact steekt.
  • Seite 37: Voor Ingebruikname

    Voor ingebruikname Leveringspakket uitpakken OPGELET! ❐ Houd kinderen en dieren uit de buurt van het verpakkingsmateriaal. Er bestaat gevaar voor verstikking! • Pak alle onderdelen uit en controleer de inhoud van de levering op volledigheid (zie hoofdstuk “Leveringspakket en overzicht van het apparaat”) en transportschade. Als er onderdelen schade zouden vertonen, mag u deze niet(!) gebruiken, maar dient u onze klantenservice te contacteren.
  • Seite 38: Lengte Van De Telescopische Buis Verstellen

    Lengte van de telescopische buis verstellen 1. Duw de schuiver naar boven en houd hem ingedrukt. 2. Stel de gewenste lengte in van de telescopische buis en laat de schuiver weer los. 3. Beweeg de telescopische buis nog een stuk verder, tot hij hoorbaar vastklikt.
  • Seite 39: Gebruik

    Gebruik OPGELET! ❐ Houd de mondstukken, de handgreep en de telescopische buis nooit in de buurt van lichaamsdelen of dieren. Ze kunnen worden vastgezogen. Zuigt de stofzuiger zich toch vast, duw dan direct op de aan/uit knop om het apparaat uit te schakelen. ❐...
  • Seite 40: Stofbak Leegmaken

    Stofbak leegmaken 1. Duw op de ontgrendelknop en trek de stofbak er tegelijk naar boven toe uit. 2. Houd de stofbak boven een geopende vuilnisbak. 3. Duw op de sluiting van de stofbak. Het deksel van de bak gaat open en u kunt de bak leegmaken.
  • Seite 41: Afvoerluchtfi Lter Reinigen

    Afvoerluchtfi lter reinigen 1. Open de afvoerluchtklep op de achterkant van de stofzuiger. De afvoerluchtfi lter bevindt zich achter de afvoerluchtklep. 2. Verwijder de afvoerluchtfi lter. 3. Klop de fi lter uit boven een geopende vuilnisbak. 4. Reinig de fi lter indien nodig met lauwwarm water en laat hem volledig drogen. Plaats de fi...
  • Seite 42: Oplossing Van Fouten

    Oplossing van fouten Als uw apparaat niet naar behoren functioneert, schade vertoont of als er een onder- deel moet worden vervangen, dient u zich te wenden tot de klantenservice. Voer voor uw eigen veiligheid zelf geen reparaties uit. In de volgende tabel vindt u tips om kleine problemen zelf op te lossen.

Diese Anleitung auch für:

Pc-c001-5Z 08000

Inhaltsverzeichnis