BURY CC 9068 Kurzanleitung
Vorschau ausblenden
Andere Handbücher für CC 9068:
- Kurzanleitung (2 Seiten) ,
- Anleitung (35 Seiten) ,
- Kurzanleitung (65 Seiten)

Verwandte Anleitungen für BURY CC 9068


Inhaltszusammenfassung für BURY CC 9068
- Seite 1 CC 9068 CC 9068 KURZANLEITUNG QUICK USER GUIDE STRUČNÝ NÁVOD OVERSIGTSVEJLEDNING GUÍA RÁPIDA GUIDE DE DÉMARRAGE GUIDA RAPIDA BEKNOPTE HANDLEIDING KRÓTKA INSTRUKCJA BREVE MANUAL КРАТКАЯ ИНСТРУКЦИЯ ÖVERSIKTSINSTRUKTION ÖZET KILAVUZ...
- Seite 2 Du har erhvervet et håndfrit installationssæt af mærket BURY og dermed bestemt dig for et produkt af høj kvalitet med maksimal betjeningskomfort. Estimado Cliente: Usted ha adquirido un kit de telefonía manos libres de la marca BURY, optando con ello por un producto de alta calidad y máximo confort de manejo. Chère cliente, cher client, Vous venez d’acheter un kit mains-libres de la marque BURY et avez ainsi choisi un produit de haute...
- Seite 3 Adquiriu um dispositivo de mãos livres da marca BURY e decidiu-se por um produto com elevada quali- dade, bem como por um grande conforto de operação. Du har köpt en handsfree av märket BURY och därmed bestämt dig för en produkt av hög kvalitet med maximal användningskomfort.
- Seite 4 Installation of the hands-free car kit CC 9068 Lieferumfang CC 9068 Scope of supply Alcance de suministro Fourniture Contenuto della fornitura Âmbito de fornecimento...
-
Seite 5: Ekstraudstyr
Beschreibung der Komponenten: 1. Elektronikbox 1. Electronic box 2. Multifunktionsdisplay mit Halterung und 2. Multifunction display with cradle and mount, Montagefuß, Schraube für Halterung und screws for the holder and rubber cover, adhe- Gummiabdeckung, Klebestreifen sive tape 3. Mikrofon 3. Microphone 4. - Seite 6 Installation of the hands-free car kit CC 9068 Contenido: 1. Boîtier électronique 2. Pantalla multifuncional con soporte y pie de 2. Écran multifonctionnel avec support et pied de montaje, tornillo para el soporte y cubierta de montage, vis pour le support et cache en caucho, cinta adhesiva caoutchouc, ruban adhésif...
-
Seite 7: Material Fornecido
W komplecie: Material fornecido: 1. Centralka elektroniczna 2. Visor multifunções com suporte & pé de montagem, parafuso para o suporte e cobertura de borracha, fita adesiva 3. Mikrofon 3. Microfone 4. Feixe de cabos ISO 5. Cabo de extensão 6. Kabel AUX- In 6. - Seite 8 Installation of the hands-free car kit CC 9068 1. Elektronik kutusu 3. Mikrofon 4. ISO Kablo grubu 5. Uzatma kablosu 6. AUX-In kablosu Opsiyonel aksesuar:...
- Seite 9 Installation of the hands-free car kit CC 9068 App CC 9068 App...
- Seite 10 Installation of the hands-free car kit CC 9068 App Beschreibung der Komponenten: 1. Elektronikbox 1. Electronic box 2. Halter - BURY ChargingCradle Universal 2. Cradle - BURY ChargingCradle Universal 3. Justiereinlagen 3. Alignment inserts 4. Dash Mount Adapter 4. Dash Mount Adapter 5.
- Seite 11 Contenido: 1. Boîtier électronique 2. Soporte - BURY ChargingCradle Universal 2. Support - BURY ChargingCradle Universal 3. Insertos de ajuste 3. Inserts d’ajustement 4. Dash Mount Adapter 4. Dash Mount Adapter 5. Antena plana pequeña 5. Petite antenne plate 6. Microphone 7.
- Seite 12 Installation of the hands-free car kit CC 9068 App W komplecie: Material fornecido: 1. Centralka elektroniczna 2. Uchwyt - BURY ChargingCradle Universal 2. Suporte - BURY ChargingCradle Universal 4. Dash Mount Adapter 4. Dash Mount Adapter 5. Antena plana e pequena 6.
- Seite 13 1. Elektronik kutusu 2. Tutucu - BURY ChargingCradle Universal 3. Yuva adaptörleri 4. Dash Mount Adaptörü 6. Mikrofon 7. ISO Kablo grubu 8. Uzatma kablosu 9. AUX-In kablosu Opsiyonel aksesuar:...
- Seite 14 Installation of the hands-free car kit Nákres instalace Plano geral de montagem Plano general de montaje Vue d’ensemble du montage Sommario del montaggio...
- Seite 15 Mini-USB Stromversorgung/Stummschaltung über ISO-Kabelbaum Mikrofon LINE-IN Multifunktionsdisplay Connections on the electronics box: Mini-USB Power supply/Muting using Mute via ISO cable tree Microphone LINE-IN Multifunction display Tilslutning af elektronikboks: Mini USB Mini-USB Napájení proudem/Ztlumení zvuku Strømforsyning/Stille radio på lydløs via ISO-kabelnettet Mikrofon Mikrofon LINE-IN...
- Seite 16 Installation of the hands-free car kit Conexiones en la caja electrónica: Connexions au boîtier électronique : Mini USB Mini-USB Suministro de corriente/Silenciamiento Alimentation/Mise en sourdine via a través del mazo de cables ISO le harnais de câbles ISO Microphone LINE-IN LINE-IN Pantalla multifuncional Écran multifonctionnel...
- Seite 17 Mini-USB Mini-USB Strömförsörjning/Ljudlösinställning via ISO-kabel Mikrofon LINE-IN LINE-IN Multifunktionsdisplay Mini USB üzerinden sessize alma Mikrofon LINE-IN Fonksiyonlu ekran...
- Seite 18 Installation of the hands-free car kit CC 9068 Montage des Systems Installation of the system Montagem do sistema Installation af systemet Montaje del sistema Montage du système Montaggio del sistema...
- Seite 20 Installation of the hands-free car kit CC 9068 App 1. Wählen Sie die geeigneten Justiereinlagen und passen Sie die Tiefe des Halters an Ihr Handy an. Um einen für einen bestimmten Modell des Mobiltelefons / Smartphones geeignete Typ der Eckhalter zu wählen, ma- chen Sie sich mit der entsprechenden Kompatibilitätsliste...
- Seite 21 3. Drücken Sie die 3 Entriegelungsstifte und ziehen Sie die Ecken vom Halter weg. Option Nokia Pin 2 mm Mikro-USB 4. Setzen Sie Ihr Mobiltelefon in den Halter ein.
- Seite 22 Installation of the hands-free car kit CC 9068 App 5. Stellen Sie nun die gewünschte Höhe oder Tiefe Ihres Handys ein. Lösen Sie dann die Entriegelungsstifte, um die Positionen beizubehalten. 6. Um einen sicheren Halt zu gewährleisten, passen Sie nun noch die Eckelemente an die Höhe an.
- Seite 23 To be able to select the suitable type of corner fastener for a certain model of mobile phone / smartphone, please familiarize yourself with the corresponding compatibility list. This list is available on our internet site in the download area for the product at www.bury.com. Important: Every corner fastener set is equipped with a letter notation which is positioned on the interior side of the corner fastener.
- Seite 24 Installation of the hands-free car kit CC 9068 App telefonu: ní tohoto produktu pod: www.bury.com.
- Seite 25 For at vælge en egnet hjørneholder til en bestemt type mobiltelefon/smartphone kan du bruge den tilsvarende kompatibilitetsliste. Denne liste finder du under downloads for produktet på vores hjemmeside: www.bury.com. Bemærk: Alle hjørneholdersæt er forsynet med en bogstavbetegnelse på indersiden af hjørneholderen.
- Seite 26 Installation of the hands-free car kit CC 9068 App ne, consulte la lista de compatibilidad correspondiente. Esta lista está disponible en el área de descargas de productos de nuestra página web en: www.bury.com. Atención: Cada juego de soportes angulares está señalizado con una letra en la parte interior de los soportes angulares.
- Seite 27 Afin de choisir un support d’angle de type approprié pour un certain modèle de téléphone mobile / smartphone, consultez la liste de compatibilité correspondante. Cette liste se trouve sur notre site Internet dans l’espace de téléchargement du produit à cette adresse : www.bury.com Attention : Chaque ensemble de supports d’angle est pourvu d’une lettre spécifique, située sur la face...
- Seite 28 Installation of the hands-free car kit CC 9068 App 1. Selezionare il dispositivo di regolazione più adatto e regolare la profondità del supporto al proprio telefono cellulare. Per scegliere un tipo di sostegno angolare adatto ad un determinato modello di telefono cellulare / smartphone, consultare la relativa lista di compatibilità.
- Seite 29 Als u een bepaalde hoekhouder wilt kiezen die geschikt is voor uw model mobiele telefoon / smartphone, dan dient u zich vertrouwd te maken met de betreffende compatibiliteitslijst. Deze lijst vindt u op onze internetpa- gina in het downloadgedeelte van het product: www.bury.com. Let op: Elke hoekhouderset wordt aan de binnenzijde van de hoekhouders voorzien van een letteraan- duiding.
- Seite 30 Installation of the hands-free car kit CC 9068 App...
- Seite 31 Pode encontrar esta lista na nossa página de in- ternet na secção de downloads: www.bury.com. Cada conjunto de cantos de encaixe é provido de uma designação alfabética no lado interior. 2. IMPORTANTE: Feche o suporte! 3.
- Seite 32 Installation of the hands-free car kit CC 9068 App...
- Seite 33 1. Välj ägnade justeringsinlägg och anpassa hållarens djup till din mobiltelefonen. För att välja en passande typ av hörnfäste för en bestämd mobiltelefon/smartphone-modell bör du konsultera kompabilitetslistan. Denna lista finner du på vår hemsida i produktens nedladdningsmeny: www.bury.com. Obs: Alla hörnfästesset har en bokstavsbeteckning på hörnfästets insida.
- Seite 34 Installation of the hands-free car kit CC 9068 App Dikkat:...
- Seite 35 Setzen Sie den BURY ChargingCradle Universal auf den Dash Mount Adapter, bis der Halter spürbar ein- rastet. For the fixing of the Dash Mount Adapter, depending on the type and brand of your car, specific attach- Push the BURY ChargingCradle Universal in the Dash Mount Adapter until you can feel it click into place.
- Seite 36 Pour fixer l’adaptateur Dash Mount, quel que soit le type ou la marque du véhicule, vous pouvez faire revendeur. Insérer le BURY ChargingCradle Universal dans le système Dash Mount Adapter jusqu’à ce qu’il s’enclenche. Per fissare il Dash Mount Adapter - a seconda del tipo di veicolo e del marchio del veicolo - possono essere lizzato.
- Seite 37 BURY ChargingCradle Universal no Dash Mount Adapter até que engate perceptivelmente. För att fästa Dash Mount-adaptern - beroende på fordonstyp och fordonsmärke - kan vissa inbyggnads- Universal på Dash Mount-adaptern tills den märkbart klickar i.
- Seite 38 Installation of the hands-free car kit PWR/LSP/LINE OUT Schritt 1: Ziehen Sie die ISO-Stecker hinten am Radio ab und ersetzen Sie diese durch die Stecker des ISO-Kabelbaums.
- Seite 39 Möchten Sie die Musik oder die Sprache über die vier LINE-Kabel übertragen, dann sind diese entsprechend an im Fachhandel erhältlich. Schritt 2: Die FSE unterstützt die Radio-Stummschaltfunktion, falls diese ebenfalls vom Radio unterstützt wird. Das Stummschaltsignal wird über das gelbe Kabel des ISO-Kabelbaums an das Radio ausgegeben. Das Kabel ist mit Beachten Sie bitte diesbezüglich die Hinweise im Bedienungshandbuch des Radios zum Thema „Pin-Belegung für Mute / Radiostummschaltung“.
- Seite 40 Installation of the hands-free car kit - 12V Power - 12/24V Ignition - Ground - Line-out 1 - Line-out 2 1-Line L + / Phone L + 1-Line R + / Phone R + 2-Line L - / Phone L - 2-Line R - / Phone R -...
- Seite 41 - connection to the vehicle’s speakers - connection to the vehicle’s power supply - connection to the car radio - connection to the car radio 1 - Mute 3 2 - Mute 2 3 - Mute 1 4 - Ignition 1 - C RR- 13 - C RR+ 5 - Antenna...
- Seite 42 Installation of the hands-free car kit PWR/LSP/LINE OUT Step 1: Pull the ISO jacks at the back of the radio off and replace them with the jacks at the ISO cable harness. Connect If you want music or voice signals to be fed via the four LINE cables, you must adjust them accordingly to the specialists shops.
- Seite 43 PWR/LSP/LINE OUT Krok 1: Krok 2: Krok 3:...
- Seite 44 Installation of the hands-free car kit PWR/LSP/LINE OUT Trin 1: Træk ISO-stikket ud bag på radioen, og udskift dette med stikket fra ISO-kabelsættet. Det nu ledige ISO-stik Hvis du vil overføre musik eller tale gennem de fire LINE-kabler, skal disse forsynes med adaptere, der passer til ninger.
- Seite 45 PWR/LSP/LINE OUT Paso 1: Retire el conector ISO de detrás de la radio y sustitúyalo por el conector del arnés de cables ISO. Conecte el Si desea transferir música o voz a través de los cuatro cables LINE, estos deberán adaptarse a la radio corres- comercios especializados.
- Seite 46 Installation of the hands-free car kit PORT PWR/LSP/LINE OUT Étape 1 : Retirez le connecteur ISO à l’arrière de l’autoradio et remplacez-le avec le connecteur du faisceau de câbles ISO. Si vous souhaitez transférer la musique ou la parole de votre interlocuteur par le câble à quatre LINE, alors il faut adaptateurs appropriés sont disponibles auprès votre revendeur.
- Seite 47 PWR/LSP/LINE OUT Fase 1: Estrarre i connettori ISO dietro alla radio e sostituirli con i connettori del fascio di cavi ISO. Collegare quindi Se volete trasmettere musica o voce attraverso i quattro cavi LINE, questi devono essere adatti alla vostra radio tori specializzati.
- Seite 48 Installation of the hands-free car kit PWR/LSP/LINE OUT Stap 1: Trek de ISO-stekers achter op de radio eruit en vervang deze door de stekers van de ISO-bedrading. De nu vrije Mocht u de muziek of de spraak via de vier LINE-kabels willen overdragen, dan moeten deze dienovereenkomstig adapters zijn in de speciaalzaak verkrijgbaar.
- Seite 49 PWR/LSP/LINE OUT Krok 1: Krok 2: kabel MUTE z odpowiednim gniazdem. Krok 3:...
- Seite 50 Installation of the hands-free car kit PWR/LSP/LINE OUT Passo 1: Retirar a ficha ISO da parte de trás do rádio e substituí-la pela ficha da cablagem ISO. Ligar as fichas ISO agora Caso deseje transferir música e voz pelos quatro cabos LINE, deve adaptar os cabos correspondentes ao res- lojas especializadas.
- Seite 51 PWR/LSP/LINE OUT...
- Seite 52 Installation of the hands-free car kit PWR/LSP/LINE OUT Steg 1: Dra ur ISO-anslutningen på radions baksida och ersätt den med kontakten för ISO-kablaget. Den nu lösa ISO- Om du vill överföra musik eller tal över de fyra LINE-kablarna skall dessa anslutas på motsvarande sätt till den Steg 2: Högtalarenheten stöder radio-ljudlösfunktion, om denna funktion även stöds av radion.
- Seite 53 PWR/LSP/LINE OUT...
- Seite 54 Oprettelse af Bluetooth -forbindelse Bluetooth Ansluta Bluetooth Establecer una conexión Bluetooth Bluetooth Etablir une connexion Bluetooth Stabilire un attacco Bluetooth „CC 9068” PIN: 1234 Wichtig: Das Gerät arbeitet im Frequenzbereich von 2400 MHz bis 2483,5 MHz mit einer maximalen Sendeleistung von 2,5 mW.
- Seite 55 Important: This device operates in frequency range from 2400 MHz bis 2483.5 MHz with maximal transmis- sion power of 2.5 mW. Vigtigt: Apparat bruger frekvenser mellem 2400 MHz og 2483,5 MHz med en maksimal sendestyrke på 2,5 mW. Importante: Este dispositivo opera en la banda de 2400 MHz a 2483,5 MHz máxima de 2,5 mW.
- Seite 56 Operating guidelines 2400 MHz do 2483,5 MHz, przy maksymalnej mocy transmisji 2,5 mW. Importante: Este dispositivo trabalha com frequências de 2400 MHz a 2483,5 MHz com a potência de trans- missão máxima 2,5 mW. Viktigt: Enhet på 2,5 mW. Önemli:...
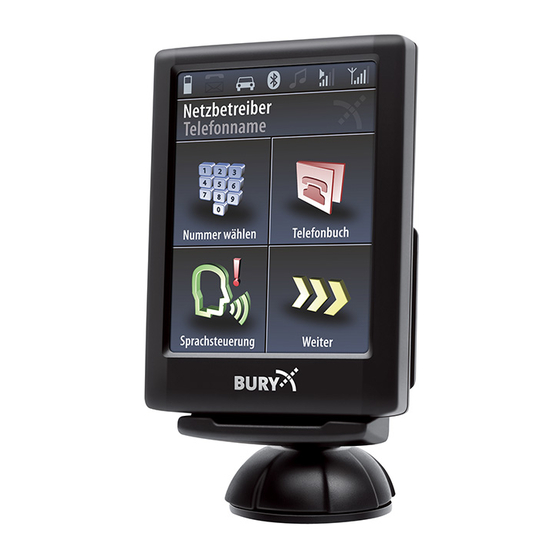
- Seite 57 Hier können Sie eine Telefonnummer eingeben Hier können Sie das Telefonbuch öffnen You can enter a telephone number here You can open the telephone book here Her kan indtastes et telefonnummer Her åbnes telefonbogen Aquí puede introducir un número de teléfono Aquí...
- Seite 58 Operating guidelines Aqui pode introduzir um número de telefone Här kan du slå in ett telefonnummer Här kan du öppna telefonboken Burada telefon rehberini açabilirsiniz Hier können Sie die Sprachsteuerung starten Hier können Sie nach weiteren Funktionen blättern You can start the voice control here You can flick through more functions here Her startes stemmestyringen Her kan bladres efter flere funktioner...
- Seite 59 Die Navigation erfolgt über die ggfs. vorhandenen Pfeiltasten. Mit den roten Symbolen können Sie Akti- onen abbrechen oder einen Schritt zurückgehen bzw. wenn Sie etwas länger drücken, kommen Sie direkt ins Hauptmenü zurück. Mit den grünen Symbolen werden Aktionen bestätigt oder ausgeführt. The operation can be carried out via possibly existing arrow keys.
- Seite 60 Operating guidelines Navigeren kunt u via de evt. aanwezige pijlknoppen. Met de rode symbolen kunt u handelingen afbreken of een stap teruggaan. Als u de knop iets langer ingedrukt houdt, komt u direct terug in het hoofdmenu. Met de groene symbolen worden handelingen bevestigd of uitgevoerd.
- Seite 61 Weiter -> Einstellungen -> Gerät -> Sprache Back to choose language More -> Settings -> Device -> Language Tilbage til Vælg Sprog Videre -> Indstillinger -> Apparat -> Sprog Siguiente -> Ajustes -> Aparato -> Idioma Plus -> Réglages -> Appareil -> Langue Avanti ->...
- Seite 62 Have a good trip! BURY ønsker dig god køretur. Encontrará un manual de instrucciones más detallado sobre el CC 9068, CC 9068 App de BURY Le deseamos un buen viaje. Une notice d’utilisation détaillée pour CC 9068, CC 9068 App est disponible sur notre site Nous vous souhaitons un bon voyage ! Vi auguriamo buon viaggio.
- Seite 63 Wij wensen u een goede reis. Desejamos-lhe boa viagem! BURY önskar dig mycket glädje med din handsfree.
- Seite 64 In case of general or technical queries, suggestions and comments, please do not hesitate to contact our team at any time. Suggestions and feedback are always welcomed: Administration: Producer: BURY GmbH & Co. KG BURY Spółka z o.o. Robert-Koch-Straße 1-7 ul. Wojska Polskiego 4 D-32584 Löhne...
- Seite 65 ISO 14001 Standard and Quality Management Requirements, according to the ISO/TS 16949 Standard. The device has Hereby, BURY declares that this device CC 9068 is in compliance with the essential requirements and other relevant provisions of Directive RED 2014/53/EU.