Herunterladen Inhalt Inhalt Diese Seite drucken
Inhaltsverzeichnis

Werbung

Verfügbare Sprachen

Verfügbare Sprachen

Bedienungsanleitung
Instruction Manual
Kullanım Kılavuzu
WLAN-Multiroom-Soundbar
WLAN multi-room-soundbar
WLAN-Multiroom-Soundbar
LIFEBEAT
®
P61078 (MD 43062)

Werbung

Inhaltsverzeichnis
loading

Inhaltszusammenfassung für Medion LIFEBEAT P61078

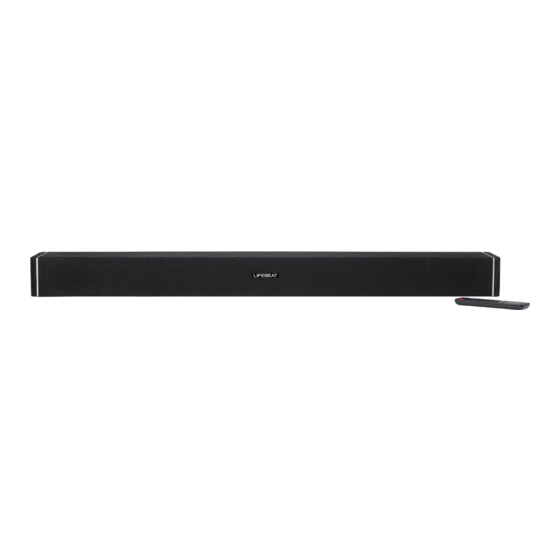
  • Seite 1 Bedienungsanleitung Instruction Manual Kullanım Kılavuzu WLAN-Multiroom-Soundbar WLAN multi-room-soundbar WLAN-Multiroom-Soundbar LIFEBEAT ® P61078 (MD 43062)
  • Seite 2: Inhaltsverzeichnis

    Inhaltsverzeichnis Hinweise zu dieser Anleitung ..............5 1.1. Verwendete Symbole und Signalwörter ............5 Bestimmungsgemäßer Gebrauch .............. 6 Sicherheitshinweise ..................6 3.1. Nicht zugelassener Personenkreis ..............6 3.2. Das Gerät sicher aufstellen .................. 7 3.3. Netzanschluss ......................8 3.4. Gewitter ........................8 3.5.
  • Seite 3 21.2. Gerät manuell Werkseinstellungen zurücksetzen ........25 Software-Update ..................26 Fehlerbehebung ..................27 Reinigung ....................28 Entsorgung ....................28 Technische Daten ..................29 Konformitätsinformationen ..............30 Impressum ....................31 4 von 90...
  • Seite 4: Hinweise Zu Dieser Anleitung

    1. Hinweise zu dieser Anleitung Lesen Sie vor der ersten Inbetriebnahme diese Bedienungsanleitung gründ- lich durch und befolgen Sie vor allen Dingen die Sicherheitshinweise! Bewahren Sie diese Bedienungsanleitung für den weiteren Gebrauch auf. Falls Sie das Gerät einmal weitergeben, legen Sie bitte auch diese Bedienungsanleitung dazu.
  • Seite 5: Bestimmungsgemäßer Gebrauch

    2. Bestimmungsgemäßer Gebrauch Das Gerät dient zum Abspielen von Audiodaten, die über ein WLAN- Netzwerk empfangen werden. Außerdem können Sie mit dem Gerät Audiosignale externer Geräte wiedergeben, sowie USB-Geräte aufla- den. Benutzen Sie das Gerät zu keinem anderen Zweck. Betreiben Sie das Gerät nur in Innenräumen.
  • Seite 6: Das Gerät Sicher Aufstellen

    und älter und werden beaufsichtigt; • Kinder jünger als 8 Jahre sollen vom Gerät und der Anschlusslei- tung ferngehalten werden. • GEFAHR! Halten Sie auch die Verpackungsfolien von Kindern fern. Es besteht Erstickungsgefahr! 3.2. Das Gerät sicher aufstellen • Stellen und betreiben Sie alle Komponenten auf einer stabilen, ebenen und vibrationsfreien Unterlage, um Stürze des Gerätes zu vermeiden.
  • Seite 7: Netzanschluss

    anderen Ort auf. • Bei großen Temperatur- oder Feuchtigkeitsschwankungen kann es durch Kondensation zur Feuchtigkeitsbildung innerhalb des Gerä- tes kommen, die einen elektrischen Kurzschluss verursachen kann. 3.3. Netzanschluss • Schließen Sie das Netzteil nur an eine gut erreichbare Steckdose (AC 100–240 V~ 50/60 Hz) an, die sich in der Nähe des Aufstellorts befindet.
  • Seite 8: Sicherer Umgang Mit Batterien

    3.6. Sicherer Umgang mit Batterien Die Fernbedienung des Geräts benötigt eine Knopfzelle. Beach- ten Sie hierzu folgende Hinweise: • Halten Sie Batterien von Kindern fern. Sie können bei Ver- schlucken lebensgefährlich sein. Wurde eine Batterie ver- schluckt, muss sofort medizinische Hilfe in Anspruch genom- men werden.
  • Seite 9: Vorbereitung

    4. Vorbereitung 4.1. Lieferumfang prüfen Entfernen Sie sämtliches Verpackungsmaterial, auch die Folie auf dem Display. GEFAHR! Lassen Sie kleine Kinder nicht mit Folie spielen. Es besteht Erstickungsgefahr! Bitte überprüfen Sie die Vollständigkeit der Lieferung und benachrichtigen Sie uns bitte innerhalb von 14 Tagen nach dem Kauf, falls die Lieferung nicht komplett ist. Mit dem von Ihnen erworbenen Produkt haben Sie erhalten: •...
  • Seite 10: Wandmontage

    5. Wandmontage WARNUNG Verletzungsgefahr durch Stromschlag! Es besteht die Gefahr eines elektrischen Schlags durch stromführende Leitungen. Wählen Sie zur Montage des Geräts einen geeigneten Ort und achten Sie darauf, beim Bohren keine verdeckten Elektro- oder Installations- leitungen zu beschädigen.  Markieren Sie an der Wand zwei Bohrlöcher im Abstand von 75 cm. ...
  • Seite 11: Übersicht Wlan-Lautsprecher

    7. Übersicht WLAN-Lautsprecher 7.1. Vorderseite L E D (hinter der Blende): Leuchtet rot Betriebsart OPTICAL IN Leuchtet grün Betriebsart LINE IN/AUDIO IN Blinkt gelb Wartet auf WLAN-Verbindung Blinkt schnell gelb Betriebsart WLAN (Suche Verbindung) Leuchtet gelb Betriebsart WLAN (Verbunden) Leuchtet blau Betriebsart BLUETOOTH(Verbunden) Blinkt blau Betriebsart BLUETOOTH (Pairing Modus)
  • Seite 12: Rückseite

    7.2. Rückseite D C I N : Buchse für Steckernetzteil W P S : WPS-Funktion verwenden L I N E - I N : Audioeingang 3,5 mm Stereobuchse A U D I O I N L / R : Audioeingang Cinchbuchse L/R U S B : USB-Anschluss zum Aufladen externer Geräte Ethernet: LAN-Anschluss (RJ45 Buchse) O P T I C A L I N : optischer Audioeingang (Toslink Buchse)
  • Seite 13: Fernbedienung

    7.3. Fernbedienung M U T E : Ton stumm schalten ► ǁ : Wiedergabe starten/ unterbrechen S K I P : vorheriger Titel/ nächster Titel Zifferntasten I N P U T : Betriebsart wechseln PA I R : Im Bluetooth-Modus Pairing Funktion aktivieren Batteriefach (a.
  • Seite 14: Led-Anzeigen

    8. LED-Anzeigen Anzeige Status Leuchtet blau Bluetooth Verbindung aktiv Blinkt blau Suche nach Bluetooth Verbindung Leuchtet rot Betriebsart OPTICAL Leuchtet grün Betriebsart LINE IN/ AUDIO IN Blinkt gelb Wartet auf WLAN-Verbindung Blinkt schnell gelb Betriebsart WLAN (Suche Verbindung) Leuchtet gelb Betriebsart WLAN (Verbunden) Standby Modus 9.
  • Seite 15: Netzwerkkonfiguration

    10. Netzwerkkonfi guration Der WLAN-Lautsprecher wird über WLAN oder LAN mit dem Netzwerk verbunden. Die WLAN-Antenne des Lautsprechers empfängt die Signale des Netzwerk-Routers. Um den WLAN-Lautsprecher über LAN mit Ihrem Heimnetzwerk zu verbinden, schließen Sie ein Netzwerkkabel an den Anschluss ETHERNET an. 10.1.
  • Seite 16: Wlan Verbindung Über Wps

     Öffnen Sie den Google Play oder den Apple App Store und suchen Sie nach dem Begriff „MEDION Lifebeat P“  Installieren Sie die “Lifebeat P” App von Medion. Folgen Sie dabei den Anwei- sungen zur Installation auf dem Bildschirm.
  • Seite 17: Wlan-Lautsprecher Zum Netzwerk Hinzufügen

    15. WLAN-Lautsprecher zum Netzwerk hinzufü-  Schalten Sie den Lautsprecher ein und warten Sie, bis das System vollständig hochgefahren ist (Begrüßungston ist zu hören.  Schalten Sie den Lautsprecher in den WLAN-Modus. Die L E D -LED blinkt gelb.  Verbinden Sie Ihr mobiles Gerät, mit Ihrem WLAN Netzwerk. ...
  • Seite 18: Musik Wiedergeben

    HINWEIS Ihr mobiles Gerät (Smartphone oder Tablet-PC), muss im WLAN Netz- werk des Routers angemeldet sein. 16. Musik wiedergeben Sie können auf Ihrem WLAN-Lautsprecher Musik aus dem Netzwerk, Musik von ei- nem über WLAN angemeldeten Gerät (Direkt-Modus) oder das Stereosignal eines extern angeschlossenen Gerätes wiedergeben.
  • Seite 19: Wlan Direktverbindung Über Lifebeat P Herstellen

    16.2. WLAN Direktverbindung über LIFEBEAT P herstellen Besteht keine Möglichkeit zum Aufbau einer Netzwerkverbindung über WPS, ver- wenden Sie die APP LIFEBEAT P Ihres Smartphones oder Tablets, um eine Ver- bindung mit dem Internet bzw. dem WLAN-Lautsprecher herzustellen.  Schalten Sie den Lautsprecher ein und warten Sie, bis das System vollständig hochgefahren ist (Begrüßungston).
  • Seite 20: Über Spotify® Musik Hören

    16.3. Über Spotify® Musik hören Sie können Audiodaten vom Musikstreaming-Dienst Spotify® über den WLAN-Lautsprecher abspielen. Voraus- setzung ist, dass Sie auf Ihrem Smartphone oder Tablet PC die Premium-Version der Spotify-App installiert haben und dass den WLAN-Lautsprecher und das Gerät mit der Spo- tify-App im selben Netzwerk angemeldet sind.
  • Seite 21: Wiedergabe Über Lifebeat P App

    17. Wiedergabe über LIFEBEAT P App  Schalten Sie den Lautsprecher ein und warten Sie, bis das System vollständig hochgefahren ist (Be- grüßungston ist zu hören.  Schalten Sie den Lautsprecher in den WLAN-Mo- dus. Die L E D -LED blinkt gelb. ...
  • Seite 22: Wiedergabe Über Bluetooth

     Um einen WLAN-Lautsprecher von einer Gruppe zu lösen, „ziehen“ Sie einfach einen gewünschten WLAN-Lautsprecher aus der Gruppe raus. Nun können Sie über jeden einzelnen WLAN-Lautspre- cher eine andere Musik abspielen. HINWEIS Sie können die Wiedergabe auf anderen Lautspre- chern auch in den Wiedergabearten (LINE IN, AUDIO IN, OPTICAL IN oder BLUETOOTH) verwenden! 18.
  • Seite 23: Usb-Gerät Am Usb-Anschluss Aufladen

    20. USB-Gerät am USB-Anschluss aufl aden Sie können den Akku eines Gerätes, das über einen USB-Anschluss geladen wird, am USB-Anschluss des WLAN-Lautsprechers aufladen.  Verbinden Sie das Gerät, das Sie aufladen wollen über ein USB-Kabel mit dem USB-Anschluss an der Rückseite des WLAN-Lautsprechers. HINWEIS Der USB-Anschluss am WLAN-Lautsprecher liefert einen Ladestrom von 1 A bei einer Ausgangsspannung von max.
  • Seite 24: Gerät Manuell Werkseinstellungen Zurücksetzen

     Tippen Sie nun auf Multi-Room Lautsprecher Daten.  Tippen Sie nun auf Werkseinstellungen wiederherstel- len.  Tippen Sie nun auf Bestätigen. 21.2. Gerät manuell Werkseinstellungen zurücksetzen Für den Fall, dass der Lautsprecher sich nicht mehr mit dem WLAN-Access Point ver- bindet oder sie die WLAN-Verbindung erneut ausführen wollen, können Sie den Lautsprecher manuell auf die Werkseinstellungen zurücksetzen.
  • Seite 25: Software-Update

    22. Software-Update • Sie können die Software des WLAN-Lautsprecher über die App aktualisieren. Die App sucht ob ein Software-Update verfügbar ist und lädt dieses über das Inter- net auf den WLAN-Lautsprecher.  Schalten Sie den WLAN-Lausprecher ein  Starten Sie die LIFEBEAT P App. ...
  • Seite 26: Fehlerbehebung

    23. Fehlerbehebung Bei einer Störung des Geräts prüfen Sie bitte zunächst, ob Sie das Problem mit Hilfe der folgenden Übersicht selbst beheben können. Versuchen Sie auf keinen Fall, die Geräte selbst zu reparieren. Wenn eine Reparatur notwendig ist, wenden Sie sich bitte an unser Service Center oder eine andere ge- eignete Fachwerkstatt.
  • Seite 27: Reinigung

    24. Reinigung  Schalten Sie das Gerät aus, bevor Sie es reinigen.  Verwenden Sie ein weiches, trockenes Tuch, ab es abzuwischen. Benutzen Sie keine rauen Tücher, keine scharten Reinigungsmittel, keine Verdünner oder alko- holische Lösungen für die Reinigung. Solche Mittel können das Gerät beschädi- gen.
  • Seite 28: Technische Daten

    26. Technische Daten Netzadapter Modell: TP06-240250W Hersteller: FIT-POWER., China Eingangsspannung: AC 100 – 240 V ~ 50/60 Hz, 1,5 A max Ausgangsspannung: 24 V 2,5 A Gerät Lautsprecher: 2 x 18 W RMS Subwoofer: 36 W RMS Abmessungen: ca. 906 x 75 x 120 mm Gewicht: ca.
  • Seite 29: Konformitätsinformationen

    27. Konformitätsinformationen Mit diesem Gerät wurden folgende Funkausstattungen ausgeliefert: • Wireless LAN Hiermit erklärt die Medion AG, dass das Produkt mit den folgenden europäischen Anforderungen übereinstimmt: • R&TTE Richtline 1999/5/EG • EMV-Richtlinie 2014/30/EU • Niederspannungsrichtlinie 2014/35/EU • Öko-Design Richtlinie 2009/125/EG •...
  • Seite 30: Impressum

    Vervielfältigung in mechanischer, elektronischer und jeder an- deren Form ohne die schriftliche Genehmigung des Herstellers ist verboten Das Copyright liegt bei der Firma: Medion AG Am Zehnthof 77 45307 Essen Deutschland Die Anleitung kann über die Service Hotline nachbestellt werden und steht über das Serviceportal www.medionservice.de zum Download zur Verfügung.
  • Seite 31 32 von 90...
  • Seite 32 Table of contents Notes on how to use these instructions ........... 35 1.1. Symbols and keywords used in these instructions ........35 Proper use ....................36 Safety information ..................36 3.1. People not permitted to use this device ............36 3.2. Setting up the device safely ................37 3.3.
  • Seite 33 21.2. Manually resetting the device to factory settings ........55 Software update ..................56 Troubleshooting ..................57 Cleaning ...................... 58 Disposal ...................... 58 Technical data .................... 59 Compliance information ................60 Legal notice ....................61 34 of 90...
  • Seite 34: Notes On How To Use These Instructions

    1. Notes on how to use these instructions Before using the device for the first time, read these operating instructions thoroughly and follow the safety advice! Please keep these instructions in a safe place for future reference. Always include these instructions if you pass the device on to a new owner. 1.1.
  • Seite 35: Proper Use

    2. Proper use This device is used for playing audio files streamed over a WLAN net- work. In addition, you can use the device to play audio signals from external devices, as well as to charge USB devices. Never use the device for any other purpose. Only use the device in- doors.
  • Seite 36: Setting Up The Device Safely

    3.2. Setting up the device safely • Set up and operate all the components on a stable, level and vibra- tion-free surface to prevent the product from falling. • Do not subject the product to knocks and vibrations. Knocks and vibrations may damage the sensitive electronics.
  • Seite 37: Thunderstorms

    connect the mains adapter to other connectors as this may cause damage. • If the product has been moved from a cold room to a warm room, wait before connecting it to the power supply. The resulting con- densation may damage the device. The device can be operated safely as soon as it has reached room temperature.
  • Seite 38 • Remove the batteries if the device is not going be used for long periods. • Remove spent batteries immediately from the device! There is an increased risk of leakage! • Do not expose the batteries to extreme conditions; for exam- ple, do not place the device on top of radiators! There is an in- creased risk of leakage! •...
  • Seite 39: Getting Started

    4. Getting started 4.1. Check package contents Remove all packaging materials including the film on the display. DANGER! Do not let children play with the plastic film. There is a risk of suffocation! Please check your purchase to ensure that all items are included. If anything is miss- ing, please contact us within 14 days of purchase.
  • Seite 40: Wall Mounting

    5. Wall mounting WARNING Risk of injury from electric shock! There is a risk of electric shock from live wires. Choose a suitable location to install the product and take care not to damage any concealed electric or wiring cables when drill- ing.
  • Seite 41: Overview Of The Wlan Loudspeaker

    7. Overview of the WLAN loudspeaker 7.1. Front LED (behind the cover): Lights up red OPTICAL IN operating mode Lights up green LINE IN/AUDIO IN operating mode Flashes in yellow Waiting for a WLAN connection Flashes quickly in yellow WLAN operating mode (searching for connec- tion) Lights up yellow WLAN operating mode (connected)
  • Seite 42: Rear

    7.2. Rear DC IN : Socket for power cable WPS: Use the WPS function LINE-IN: Audio input, 3.5 mm stereo socket AUDIO IN L/R: Audio cinch sockets L/R USB: USB port for charging external devices Ethernet: LAN socket (RJ45 socket ) OPTICAL IN: Optical audio input (Toslink socket) 43 of 90...
  • Seite 43: Remote Control

    7.3. Remote control MUTE: Switch sound to mute ►ǁ: Start/pause playback SKIP : Previous track/next track Number buttons INPUT: Change operating mode PAIR: Activate pairing function in Bluetooth mode Battery compartment (on the rear) EQ/LEARN: Set Equalizer; Long press for learning function VOL -/VOL +: Decrease volume/increase volume STANDBY/ON: Switch to standby mode/switch on device IR sensor...
  • Seite 44: Led Displays

    8. LED displays Display Status Blue light Bluetooth connection active Flashes blue Searching for Bluetooth connection Lights up red OPTICAL operating mode Green light LINE IN/ AUDIO IN operating mode Flashes yellow Waiting for WLAN connection Flashes quickly yellow WLAN operating mode (searching for connection) Lights up yellow WLAN operating mode (connected) Standby mode...
  • Seite 45: Network Configuration

    10. Network confi guration The WLAN loudspeaker is connected to the network via WLAN or LAN. The WLAN antenna on the loudspeaker receives the signals from your network router. In order to connect the WLAN loudspeaker to your home network via LAN, connect a network cable to the ETHERNET socket .
  • Seite 46: Wlan Connection Via Wps

    14.2. Installation via Google Play or the Apple App Store  Open Google Play or the Apple App Store and search for the term "MEDION Lifebeat P"  Install the "Lifebeat P" app from Medion. Follow the installation instructions on the screen.
  • Seite 47: Adding The Wlan Loudspeaker To A Network

    15. Adding the WLAN loudspeaker to a network  Switch on the loudspeaker and wait until the system has completely powered up (you will hear a welcome tone).  Switch the loudspeaker to WLAN mode. The LED LED flashes in yellow. ...
  • Seite 48: Playing Back Music

    16. Playing back music You can use your WLAN loudspeaker to play music from the network, play music from a device registered via WLAN (direct mode) or play stereo signals from an ex- ternally connected device. The following section describes the operating modes on the WLAN loudspeaker and the different audio sources.
  • Seite 49: Establishing A Direct Wlan Connection Via Lifebeat P

    16.2. Establishing a direct WLAN connection via LIFEBEAT P If it is not possible to establish a network connection via WPS, use the LIFEBEAT P app on your smartphone or tablet to establish a connection with the Internet or the WLAN loudspeaker. ...
  • Seite 50: Listening To Music Via Spotify

    16.3. Listening to music via Spotify® You can play back audio files from the music streaming ser- vice Spotify® via the WLAN loudspeaker. The prerequisite is that you have the premium version of the Spotify app installed on your smartphone or tablet PC and the WLAN loud- speaker and the device with the Spotify app are registered on the same network.
  • Seite 51: Playback Via The Lifebeat P App

    17. Playback via the LIFEBEAT P app  Switch on the loudspeaker and wait until the sys- tem has completely powered up (you will hear a welcome tone).  Switch the loudspeaker to WLAN mode. The LED LED flashes in yellow. ...
  • Seite 52: Playback Via Bluetooth

     In order to delete a WLAN loudspeaker from a group, simply "pull" the desired WLAN loudspeaker out of the group. You can now play different music via each individual WLAN loudspeaker. NOTICE You can also use the playback modes (LINE IN, AUDIO IN, OPTICAL IN or BLUETOOTH) to play music on other loudspeakers! 18.
  • Seite 53: Charging A Usb Device Via The Usb Socket

    20. Charging a USB device via the USB socket You can charge the battery on a device that is capable of being charged via a USB connection using the USB socket on the WLAN loudspeaker.  Connect the device that you want to charge to the USB socket on the rear of the WLAN loudspeaker using a USB cable.
  • Seite 54: Manually Resetting The Device To Factory Settings

     Now tap on Speaker Info.  Now tap on Restore Factory Settings.  Now tap on Confirm. 21.2. Manually resetting the device to factory settings If the loudspeaker no longer connects to the WLAN access point or you want to re-establish the WLAN connection, you can manually reset the device to the facto- ry settings.
  • Seite 55: Software Update

    22. Software update • You can update the software for the WLAN loudspeaker via the app. The app searches to see if a software update is available and then downloads the update onto the WLAN loudspeaker from the Internet.  Switch the WLAN loudspeaker on. ...
  • Seite 56: Troubleshooting

    23. Troubleshooting If the product malfunctions, please check first if you can remedy the problem your- self with the help of the following hints. Never try to repair the product yourself. Please contact our Service Centre or anoth- er professional repair shop if a repair is necessary. Problem Possible cause Solution...
  • Seite 57: Cleaning

    24. Cleaning  Switch off the device before cleaning it.  Use a soft, dry cloth to wipe the device. Never use rough cloths, abrasive de- tergent, thinners or solutions containing alcohol to clean the device. These can damage the device. 25.
  • Seite 58: Technical Data

    26. Technical data Mains adapter Model: TP06-240250W Manufacturer: FIT-POWER., China Input voltage: AC 100 – 240 V ~ 50/60 Hz, 1.5 A max Output voltage: 24 V 2.5 A Device Speakers: 2 x 18 W RMS Subwoofer: 36 W RMS Dimensions: approx.
  • Seite 59: Compliance Information

    27. Compliance information This device is supplied with the following wireless features: • Wireless LAN Medion AG hereby declares that the product conforms to the following European requirements: • R&TTE Directive 1999/5/EC • EMC Directive 2014/30/EU • Low Voltage Directive 2014/35/EU •...
  • Seite 60: Legal Notice

    Germany The operating manual can be reordered via the service hotline and is available for download via the service portal at www.medion.com/gb/service/start/. You can also scan the QR code above and download the operating manual onto your mobile device via the service portal.
  • Seite 61 62 of 90...
  • Seite 62 İçindekiler Bu kılavuz ile ilgili açıklamalar ..............65 1.1. Kullanılan simgeler ve uyarı sözcükleri ............65 Amaca uygun kullanım ................66 Güvenlik uyarıları ..................66 3.1. Müsaade edilmeyen kişiler ................66 3.2. Cihazın güvenli kurulumu .................67 3.3. Elektrik bağlantısı....................67 3.4. Fırtına ........................68 3.5.
  • Seite 63 Hatalı çalışmada sıfırlama ................. 84 21.1. Cihaza uygulama üzerinden fabrika ayarlarını yükleme ......84 21.2. Cihaza manüel olarak fabrika ayarlarını yükleme ........85 Yazılım güncellemesi ................. 86 Hata giderme ..................... 87 Temizlik ....................... 88 Bertaraf etme ..................... 88 Teknik bilgiler .................... 89 Uygunluk bilgileri ..................
  • Seite 64: Bu Kılavuz Ile Ilgili Açıklamalar

    1. Bu kılavuz ile ilgili açıklamalar Cihazı ilk kez işletime almadan önce bu kullanım kılavuzunu özenle oku- yun ve güvenlik uyarılarına mutlaka uyun! Bu kullanım kılavuzunu bir başvuru kaynağı olarak muhafaza edin. Ciha- zı başka bir kullanıcıya vermek istediğinizde, lütfen beraberinde bu kul- lanım kılavuzunu da verin.
  • Seite 65: Amaca Uygun Kullanım

    2. Amaca uygun kullanım Cihaz, WLAN ağı üzerinden alınan audio verilerini çalmak içindir. Ayrı- ca cihazı kullanarak harici cihazların audio sinyallerini çalabilir ve USB cihazları şarj edebilirsiniz. Cihazı başka bir amaçla kullanmayın. Cihazı sadece kapalı ortamlarda çalıştırın. • Cihaz endüstriyel/ticari kullanım için değil, sadece kişisel kullanım için tasarlanmıştır.
  • Seite 66: Cihazın Güvenli Kurulumu

    3.2. Cihazın güvenli kurulumu • Cihazın düşmesini önlemek için tüm bileşenleri sağlam, düz ve tit- reşimsiz bir zemin üzerine koyup çalıştırın. • Cihazı sarsıntılara maruz bırakmayın. Sarsıntılar, hassas elektronik sisteme hasar verebilir. • Cihazı doğrudan ısı kaynaklarına (örn. kalorifer) maruz bırakmayın. •...
  • Seite 67: Fırtına

    bileceği için prize kolayca erişebilmeniz gerekmektedir. • Sadece ürünle birlikte gelen elektrik adaptörünü kullanın. Asla elektrik adaptörünü başka yuvalara bağlamaya çalışmayın, aksi hal- de hasara sebep olabilirsiniz. • Cihaz soğuk bir ortamdan sıcak bir ortama alındığı zaman elektrik adaptörünü hemen takmayın. Bu esnada oluşan yoğuşma suyu ci- haza zarar verebilir.
  • Seite 68 leyin. • Pilleri yerleştirdiğinizde, kutuplara (+/–) dikkat edin. • Cihazı uzun süre kullanmayacaksanız, pilleri çıkartın. • Tükenen pilleri hemen cihazdan çıkartın! Bu durumda daha yüksek akma tehlikesi söz konusudur! • Pilleri aşırı zorlu koşullara maruz bırakmayın; örneğin ciha- zı kaloriferlerin üzerine koymayın! Bu durumda daha yüksek akma tehlikesi söz konusudur! •...
  • Seite 69: Hazırlık

    4. Hazırlık 4.1. Teslimat kapsamının kontrolü Ekran üzerindeki folyo dahil olmak üzere tüm ambalaj malzemelerini çıkarın. TEHLİKE! Küçük çocukların folyo ile oynamasına izin vermeyin. Bun- lar boğulma tehlikesine yol açabilir. Lütfen teslimatın eksiksiz olup olmadığını kontrol edin ve herhangi bir eksiklik du- rumunda, alış...
  • Seite 70: Duvara Montaj

    5. Duvara montaj UYARI Elektrik çarpması nedeniyle yaralanma tehlikesi! Elektrik taşıyan hatlar nedeniyle elektrik çarpması tehlike- si söz konusudur. Cihazı monte etmek için uygun bir yer seçin ve delme esnasında kapa- lı olan elektrik veya montaj hatlarına hasar vermemeye dikkat edin. ...
  • Seite 71: Wlan Hoparlörüne Genel Bakış

    7. WLAN hoparlörüne genel bakış 7.1. Ön taraf LED (kapağın arkasında): Kırmızı yandığında Çalışma modu OPTICAL IN Yeşil yanıyorsa Çalışma modu LINE IN/AUDIO IN Sarı yanıp sönüyorsa WLAN bağlantısını bekliyor Hızlı sarı yanıp sönüyorsa Çalışma modu WLAN (Bağlantı aranıyor) Sarı yanıyorsa Çalışma modu WLAN (Bağlı) Mavi yanıyorsa Çalışma modu BLUETOOTH (Bağlı)
  • Seite 72: Arka Taraf

    7.2. Arka taraf DC IN: Fişli elektrik adaptörü için yuva WPS: WPS işlevinin kullanımı LINE-IN: 3,5 mm stereo yuva audio girişi AUDIO IN L/R: Audio girişi RCA yuvası L/R USB: Harici cihazları şarj etmek için USB bağlantısı Ethernet: LAN bağlantısı (RJ45 yuvası) OPTICAL IN: optik Audio girişi (Toslink yuvası) 73/90...
  • Seite 73: Uzaktan Kumanda

    7.3. Uzaktan kumanda MUTE: Sesi kapatma ►ǁ: Yürütmeyi başlatma/durdurma SKIP : önceki parça / sonraki parça Rakam tuşları INPUT: Çalışma modunu değiştirme PAIR: Bluetooth modunda eşleştirme işlevini etkinleştirme Pil yuvası (arka tarafta) EQ/LEARN: Ses efektlerini ayarlama/ Öğrenmek fonksiyonu için daha uzun butonun üzerine basiniz VOL -/VOL +: Ses seviyesini azaltma/ses seviyesini arttırma STANDBY/ON: Bekleme moduna alma/ Cihazı...
  • Seite 74: Led Göstergeler

    8. LED göstergeler Gösterim Durum Mavi yanıyorsa Bluetooth bağlantısı etkin Mavi yanıp sönüyorsa Bluetooth bağlantısı aranıyor Kırmızı yanıyorsa Çalışma modu OPTICAL Yeşil yanıyorsa Çalışma modu LINE IN/ AUDIO IN Sarı yanıp sönüyorsa WLAN bağlantısı bekleniyor Hızlı sarı yanıp sönüyorsa Çalışma modu WLAN (Bağlantı aranıyor) Sarı...
  • Seite 75: Ağ Konfigürasyonu

    10. Ağ konfigürasyonu WLAN hoparlörü, WLAN veya LAN üzerinden ağ ile bağlanır. Hoparlörün WLAN ante- ni, ağ yönlendiricisinin sinyallerini alır. WLAN hoparlörü LAN üzerinden ev ağınıza bağlamak için ağ kablosunu ETHERNET bağlantısına bağlayın. 10.1. Gerekli ağ özellikleri Cihazın ağdaki müzik dosyalarına erişebilmesi için ağın aşağıdaki özelliklere sahip olması...
  • Seite 76: Wps Üzerinden Wlan Bağlantısı

    14.2. Google Play veya Apple App Store üzerinden yükleme  Google Play veya Apple App Store'u açın ve "MEDION Lifebeat P" sözcüğü ile arama yapın  Medion'un "Lifebeat P" uygulamasını yükleyin. Bu esnada ekranda yükleme işle- mine yönelik talimatları izleyin.
  • Seite 77: Wlan Hoparlörü Ağa Ekleme

    15. WLAN hoparlörü ağa ekleme  Hoparlörü açın ve sistemin komple açılmasını bekleyin (karşılama sesi duyulur).  Hoparlörü WLAN moduna ayarlayın. LED LED'i sarı yanıp söner.  Mobil cihazınızı WLAN ağınıza bağlayın.  LIFEBEAT P uygulamasını başlatın ve Add Device üze- rine tıklayın.
  • Seite 78: Müzik Çalma

    16. Müzik çalma WLAN hoparlörünüz ile ağdan müzik çalabilir, WLAN üzerinden kayıtlı cihazdan (di- rekt mod) müzik çalabilir veya harici bağlı bir cihazın stereo sinyalini çalabilirsiniz. Aşağıda WLAN hoparlörün çeşitli ses kaynaklarıyla çalışma modları açıklanmaktadır. BİLGİ! Akıllı telefon veya tablet bilgisayar ile ağdan müzik çalmayı kontrol et- mek için UPNP özellikli bir uygulama gerekmektedir.
  • Seite 79: Lifebeat P Üzerinden Doğrudan Wlan Bağlantısı Kurma

    16.2. LIFEBEAT P üzerinden doğrudan WLAN bağlantısı kurma WPS üzerinden ağ bağlantısı kurulamıyorsa İnternet'e veya WLAN hoparlöre bağ- lanmak için akıllı telefonunuzdaki veya tabletinizdeki LIFEBEAT P uygulaması- nı kullanın.  Hoparlörü açın ve sistemin komple açılmasını bekleyin (Karşılama sesi).  Hoparlörü WLAN moduna ayarlayın. LED LED'i sarı yanıp söner.
  • Seite 80: Spotify® Üzerinden Müzik Dinleme

    16.3. Spotify® üzerinden müzik dinleme Spotify® müzik yayınlama hizmetinin audio verilerini WLAN hoparlör üzerinden çalabilirsiniz. Bunun için akıllı telefonu- nuza veya tablet bilgisayarınıza Spotify uygulamasının Pre- mium versiyonunu yüklemiş olmanız gerekmekte ve WLAN hoparlör ile cihaz aynı ağda Spotify uygulamasına kayıtlı ol- malıdır.
  • Seite 81: Lifebeat P Uygulaması Üzerinden Çalma

    17. LIFEBEAT P uygulaması üzerinden çalma  Hoparlörü açın ve sistemin komple açılmasını bek- leyin (karşılama sesi duyulur).  Hoparlörü WLAN moduna ayarlayın. LED LED'i sarı yanıp söner.  LIFEBEAT P uygulamasını başlatın. Uygulamanın başlangıç sayfası açılır. Burada çalma listelerini açabilir, sonraki ve önceki parçalara geçe- bilir, ses seviyesini değiştirebilir veya favoriler seçe- bilirsiniz.
  • Seite 82: Bluetooth Üzerinden Çalma

     Bir WLAN hoparlörü bir gruptan kaldırmak için iste- diğiniz WLAN hoparlörü grubun dışına "çekin". Şimdi her bir WLAN hoparlör üzerinden farklı müzikler çalabilirsiniz. BİLGİ Başka hoparlörlerde çalma işlevini, çalma türlerinde (LINE IN, AUDIO IN, OPTICAL IN veya BLUETOOTH) de kullanabilirsiniz! 18.
  • Seite 83: Usb Cihazını Usb Bağlantı Yeri Üzerinden Şarj Etme

    20. USB cihazını USB bağlantı yeri üzerinden şarj etme USB bağlantı yeri üzerinden şarj edilebilen cihazın bataryasını WLAN hoparlörün USB bağlantısı üzerinden şarj edebilirsiniz.  Şarj etmek istediğiniz cihazı bir USB kablosu ile WLAN hoparlörün arkasındaki USB bağlantı yerine bağlayın. BİLGİ...
  • Seite 84: Cihaza Manüel Olarak Fabrika Ayarlarını Yükleme

     Şimdi Speaker Settings üzerine tıklayın.  Şimdi Restore Factory Settings üzerine tıklayın.x v  Şimdi Confirm üzerine tıklayın. 21.2. Cihaza manüel olarak fabrika ayarlarını yükleme Hoparlör, WLAN-Access Point ile bağlantı kurmazsa veya WLAN bağlantısını yeniden uygulamak istiyorsanız, hoparlöre manüel olarak fabrika ayarlarını yükleyebilirsiniz. ...
  • Seite 85: Yazılım Güncellemesi

    22. Yazılım güncellemesi • WLAN hoparlörün yazılımını uygulama üzerinden güncelleyebilirsiniz. Uygula- ma, yazılım güncellemesi olup olmadığını arar ve varsa güncellemeyi İnternet üzerinden WLAN hoparlöre yükler.  WLAN hoparlörü açın  LIFEBEAT P uygulamasını başlatın.  Uygulamanın başlangıç sayfasında parmağınızı sağdan sola doğru sürükleyerek cihaz listesini açın.
  • Seite 86: Hata Giderme

    23. Hata giderme Cihaz arızalandığında önce sorunu aşağıdaki genel bakış yardımıyla kendiniz giderip gideremeyeceğinizi kontrol edin. Hiçbir surette cihazları kendi başınıza tamir etmeye çalışmayın. Tamir edilmesi gere- kiyorsa lütfen servis merkezimize ya da uygun olan başka bir servise başvurun. Sorun Olası...
  • Seite 87: Temizlik

    24. Temizlik  Cihazı temizlemeden önce kapatın.  Silmek için yumuşak ve kuru bir bez kullanın. Temizlemek için sert bezler, aşın- dırıcı temizlik maddeleri, inceltici veya alkol içeren çözeltiler kullanmayın. Bu tür maddeler cihaza zarar verebilir. 25. Bertaraf etme Ambalaj Cihazınız, nakliye hasarlarına karşı...
  • Seite 88: Teknik Bilgiler

    26. Teknik bilgiler Elektrik adaptörü Model: TP06-240250W Üretici: FIT-POWER., Çin Giriş gerilimi: AC 100 – 240 V ~ 50/60 Hz, 1,5 A maks Çıkış gerilimi: 24 V 2,5 A Cihaz Hoparlör: 2 x 18 W RMS Subwoofer: 36 W RMS Ölçüler: yakl.
  • Seite 89: Uygunluk Bilgileri

    27. Uygunluk bilgileri Bu cihaz ile birlikte aşağıdaki telsiz donanımları teslim edilmiştir: • Kablosuz LAN Medion AG işbu belgeyle ürünün aşağıdaki Avrupa yönergeleri ile uyumlu olduğu- nu beyan eder: • R&TTE Yönergesi 1999/5/AT • Yönergesi 2014/53/AT • EMC Yönergesi 2014/30/AB •...
  • Seite 90 MSN 5005 2046...

Diese Anleitung auch für:

Md 43062

Inhaltsverzeichnis