Herunterladen Inhalt Inhalt Diese Seite drucken

Werbung

Verfügbare Sprachen

Verfügbare Sprachen

Vertex Series
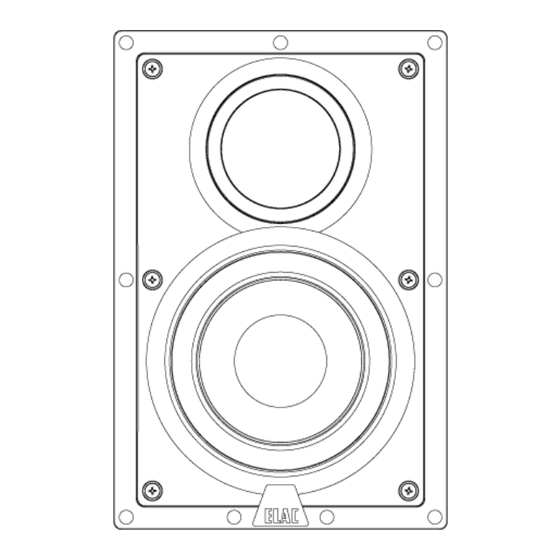
IW-V62-W Vertex Series 2 - 6.5" In-Wall Speaker
IW-D61-W Debut Series 6.5" In-Wall Speaker
IC-V62-W Vertex Series 2 - 6.5" In-Ceiling Speaker
IC-D61-W Debut Series 6.5" In-Ceiling Speaker
IW-DC51-W Debut Series Dual 5.25" In-Wall Center Speaker
IW-VC52-W Vertex Series 2 - Dual 5.25" In-Wall Center Speaker
IC-DT-61-W Debut Series 6.5" Home Theater In-Ceiling Speaker
IC-VT-62-W Vertex Series 2 - 6.5" Home Theater In-Ceiling Speaker
IC-V82-W Vertex Series 2 - 8" In-Ceiling Speaker
OPERATING INSTRUCTIONS

Werbung

Inhaltsverzeichnis
loading

Inhaltszusammenfassung für ELAC Vertex 2 Serie

  • Seite 1 Vertex Series ™ OPERATING INSTRUCTIONS OPERATING INSTRUCTIONS IW-V62-W Vertex Series 2 - 6.5” In-Wall Speaker IW-D61-W Debut Series 6.5” In-Wall Speaker IC-V62-W Vertex Series 2 - 6.5” In-Ceiling Speaker IC-D61-W Debut Series 6.5” In-Ceiling Speaker IW-DC51-W Debut Series Dual 5.25” In-Wall Center Speaker IW-VC52-W Vertex Series 2 - Dual 5.25”...
  • Seite 2 “aim” it at the listener. The typical range provided in practice produces almost no change in the sound balance, and does nothing to address the directivity of the woofer. The ELAC IC-VT62-W is designed so that both the woofer and tweeter are mounted at a 30 degree angle that allows the sound to be...
  • Seite 3: Safety Instructions

    SAFETY INSTRUCTIONS Use Only As Directed • Observe all warnings on the speaker and in this manual. • Please check the speaker for damage before use. • Carefully consider the proper location before beginning the installation • Observe the correct polarity when connecting these speakers, according to the instructions in this manual.
  • Seite 4: Speaker Placement

    SPEAKER PLACEMENT Once installed, In-Wall speakers are not easily repositioned or moved. Please take a bit of extra time to carefully consider the best speaker locations before you begin. Each room is unique, so decide what works best for you. As a general rule •...
  • Seite 5 SPEAKER PLACEMENT - continued Set-up Diagram #2 – Rear Channel Left and Right Surround Speakers • The rear-channel speakers should be located behind the main listening position and above ear level, if possible. • These speakers can be either wall-mounted or ceiling mounted, depending on the specific requirements &...
  • Seite 6 When connecting the speaker wires it is important to retain the correct polarity. Be sure that the wire attached to the “+”, red, positive, or hot terminal on your ELAC speaker connects to the “+”, red, positive, or hot terminal on the other component.
  • Seite 7 INSTALLATION - continued • Attach the speaker cables to the speaker terminals, observing the correct polarity • Remove the grille from the speaker frame. The grille is held on by magnetic attraction. To remove simply hold the edge of the grille and gently pull toward you. •...
  • Seite 8 SPECIFICATIONS IW-V62-W IW-VC52-W IC-V62-W IC-VT62-W IC-V82-W Tweeter 1 x 1-inch cloth dome 1 x 1-inch cloth dome 1 x 1-inch cloth 1 x 1-inch cloth dome 1 x 1-inch cloth dome dome Woofer 1x 6.5-inch aluminum 2 x 5.25-inch alumi- 1x 6.5-inch alumi- 1x 6.5-inch aluminum 1x 8-inch aluminum cone...
  • Seite 9 Passive Speakers (No Built-in Amplifier) ELAC Americas Inc. Warrants to the original purchaser that this product will be free from defects and or workmanship for a period of 3 (three) years from the original date of purchase. During this time, repair or replacement of parts will be free of charge to the original owner.
  • Seite 10 Vertex Series ™ OPERATING INSTRUCTIONS BEDIENUNGSANLEITUNG IW-V62-W Vertex Serie 2 16,5 cm Einbaulautsprecher IW-D61-W Debut Series 6.5” In-Wall Speaker IC-V62-W Vertex Serie 2 16,5 cm Deckenlautsprecher IC-D61-W Debut Series 6.5” In-Ceiling Speaker IW-VC52-W Vertex Serie 2 Doppel-13 cm Einbaulautsprecher IW-DC51-W Debut Series Dual 5.25” In-Wall Center Speaker IC-DT-61-W Debut Series 6.5”...
  • Seite 11 Hochtöner, der in einem engen Bereich gedreht werden kann, um ihn auf den Hörplatz zu richten. Doch damit ist das Problem im Tiefmitteltonbereich nicht gelöst. Der ELAC IC-DT61-W wurde so konstruiert, dass sowohl der Tief- als auch der Hochtöner im 30° Winkel eingebaut ist. Das erlaubt beim Einbau eine genaue Ausrichtung auf...
  • Seite 12: Sicherheitshinweise

    Sicherheitshinweise Gebrauch nur wie angegeben • Lesen und beachten Sie die Sicherheitshinweise dieser Bedienungsanleitung. • Überprüfen Sie den Lautsprecher vor der Inbetriebnahme auf vorhandene Schäden. • Wählen Sie vor Installation sorgfältig einen Platz aus. • Bitte beachten Sie den richtigen Anschluss (Polung) der Lautsprecher bei der Installation. Positionierung •...
  • Seite 13: Lautsprecher-Anbringung

    Lautsprecher-Anbringung Einmal installiert, lassen sich Einbaulautsprecher nicht ohne Weiteres umbauen oder entfernen. Nehmen Sie sich deshalb vor dem Einbau etwas Zeit und entscheiden Sie sorgfältig, welches die optimale Lautsprecherposition ist. Allgemeine Hinweise • Die Lautsprecher sollten – wenn möglich – auf oder oberhalb der Ohrhöhe angebracht werden. •...
  • Seite 14: Lautsprecher-Anbringung Teil

    Lautsprecher-Anbringung Teil 2 Set-up Diagramm #2 – Effektkanäle: die Surroundlautsprecher links & rechts • Die hinteren Effektlautsprecher sollten hinter dem (Haupt-) Hörplatz angebracht sein und, wenn möglich, etwas oberhalb der Ohrhöhe. • Diese Lautsprecher können entweder in der Wand oder in der Decke eingebaut werden – je nach den Anforderungen Ihres Hörraums.
  • Seite 15 Installation Teil 1 Verkabelung • Für kürzere Distanzen unter 10 Metern sind Lautsprecherkabel mit einem Querschnitt von 1,00 Quadratmillimeter ausreichend. Für größere Längen empfehlen sich Kabel mit einem Querschnitt von 1,5 Quadratmillimeter oder größer: Die Lautsprecherklemmen nehmen Kabel bis zu 2,00 Quadratmillimeter Stärke auf.
  • Seite 16 Installation Teil 2 • Achten Sie beim Anschluss der Kabel an die Lautsprecherklemmen auf die richtige Polung – siehe oben. • Entfernen Sie den Bespannrahmen vom Lautsprecher. Der Rahmen wird von kleinen Magneten gehalten. Um ihn zu lösen, müssen Sie den Rahmen einfach nur an einer Ecke anfassen und vorsichtig zu Ihnen ziehen.
  • Seite 17: Technische Daten

    Technische Daten IW-V62-W IW-VC52-W IC-V62-W IC-VT62-W IC-V82-W Hochtöner 1 x 25 Millimeter Kalotte 1 x 25 Millimeter Kalotte 1 x 25 Millimeter 1 x 25 Millimeter 1 x 25 Millimeter Kalotte Kalotte Kalotte Tiefmitteltöner 1x 16,5 cm Bass mit Alu- 2 x 13 cm Bass mit 1x 16,5 cm Bass mit 1x 16,5 cm Bass mit...
  • Seite 18 Monaten ab Kaufdatum des jeweiligen ELAC-Produktes registrieren lässt. Zur Registrierung ist die Einsendung einer Kopie des Kaufbeleges innerhalb der oben genannten Drei-Monats- Frist erforderlich. Dies kann auf elektronischem und postalischem Weg erfolgen. Die E-Mail-Adresse von ELAC lautet: info@elac.de. Weitere Kontaktmöglichkeiten unter www.elac.de. Zur Adresse siehe unten.
  • Seite 19 Garantiefrist und setzt auch keine neue Garantiefrist in Gang. Die Haftung ist auf den Wert des Produktes beschränkt. ELAC haftet nicht für weitere eintretende Schäden oder Ver- luste direkter oder indirekter Art. Dies gilt nicht für Schäden, welche aufgrund Vorsatzes oder grober Fahrlässigkeit...
  • Seite 20 Vertex Series ™ OPERATING INSTRUCTIONS MODE D’EMPLOI IW-V62-W Haut-parleur encastrable 6,5 po. série Vertex 2 IW-D61-W Debut Series 6.5” In-Wall Speaker IC-V62-W Haut-parleur de plafond 6,5 po. de la série Vertex 2 IC-D61-W Debut Series 6.5” In-Ceiling Speaker IW-DC51-W Debut Series Dual 5.25” In-Wall Center Speaker IW-VC52-W Haut-parleur central double encastrable 5,25 po.
  • Seite 21 » l’auditeur. Une gamme typique ne produit presque aucun changement dans l’équilibre sonore et ne fait rien pour résoudre la directivité du haut-parleur de graves. Le ELAC IC-VT62-W est conçu pour que le haut- parleur de graves et le haut-parleur d’aigus soient montés à un angle de 30 degrés et dirigent mieux le son vers...
  • Seite 22: Consignes De Sécurité

    CONSIGNES DE SÉCURITÉ Suivre impérativement le mode d’emploi • Respectez tous les avertissements figurant sur le haut-parleur et dans ce manuel. • Vérifiez la présence de tout dommage sur le haut-parleur avant de l’utiliser. • Soyez absolument certain ou certaine de l’emplacement avant de commencer l’installation. •...
  • Seite 23 POSITION DU HAUT-PARLEUR Une fois encastrés, les haut-parleurs sont difficilement repositionnables ou déplaçables. Prenez tout le temps dont vous avez besoin pour choisir les meilleurs emplacements des haut-parleurs avant de commencer. Chaque chambre est unique, donc trouvez ce qui convient le mieux à chacune. En règle générale •...
  • Seite 24 EMPLACEMENT DES HAUT-PARLEURS - suite Schéma de montage #2 – haut-parleurs Surround arrière-gauche et arrière-droite • Les haut-parleurs arrière doivent être placés derrière la position d’écoute principale, si possible au-des- sus de l’oreille. • Ces haut-parleurs peuvent être fixés au mur ou au plafond, dépendant des exigences spécifiques et des limites de la conception de votre chambre d’écoute.
  • Seite 25 Assurez-vous que le fil attaché à la borne « + », rouge, positive ou électrique sur vos haut- parleurs ELAC soit connecté à la borne « + », rouge, positive ou électrique sur l’autre composant.
  • Seite 26 INSTALLATION - suite • Fixez les câbles de haut-parleur aux bornes du haut-parleur avec la bonne polarité • Retirez la grille de l’armature du haut-parleur. La grille est tenue par liaison magnétique. Retirez simple- ment le bord de la grille et tirez doucement. •...
  • Seite 27: Fiches Techniques

    FICHES TECHNIQUES IW-V62-W IW-VC52-W IC-V62-W IC-VT62-W IC-V82-W Haut-parleur d'aigus Dôme de tissu 1 x 1 Dôme de tissu 1 x 1 Dôme de tissu 1 x 1 Dôme de tissu 1 x 1 Dôme de tissu 1 x 1 pouce pouce pouce pouce...
  • Seite 28 Haut-parleurs passifs (sans amplificateur intégré) ELAC Americas Inc. Garantit à l’acheteur original que ce produit sera exempt de vices et/ou de fabrication pendant une période de trois (3) ans à compter de la date originale d’achat. Pendant ce temps, la réparation ou le remplacement des pièces seront offerts gratuitement au propriétaire d’origine.

Diese Anleitung auch für:

Iw-v62-wIc-v62-wIw-vc52-wIc-vt-62-wIc-v82-w

Inhaltsverzeichnis