Herunterladen Inhalt Inhalt Diese Seite drucken

Werbung

Verfügbare Sprachen
  • DE

Verfügbare Sprachen

  • DEUTSCH, seite 1
Induktionskochfeld
10031757

Werbung

Inhaltsverzeichnis
loading

Inhaltszusammenfassung für Klarstein 10031757

  • Seite 1 Induktionskochfeld 10031757...
  • Seite 2: Inhaltsverzeichnis

    Geeignetes Kochgeschirr 4 Inbetriebnahme und Bedienung 5 Reinigung und Pflege 8 Fehlersuche und Fehlerbehebung 8 Hinweise zur Entsorgung 9 Konformitätserklärung 9 Technische Daten Artikelnummer 10031757 Stromversorgung 220-240 V ~ 50-60 Hz Leistung 2900 W Einstellbare Temperatur 60-240 °C Timer 1-180 Minuten Sicherheitshinweise •...
  • Seite 3 • Verwenden Sie das Gerät nicht in der Nähe von brennbaren Gegenständen oder unter Vorhängen. Die Tem- peratur der Oberflächen ist in der Nähe des Geräts ist heißer als üblich. Stellen Sie das Gerät in ausreichender Entfernung zu anderen Gegenständen auf, um eine ausreichende Luftzirkulation zu gewährleisten, die für den ordnungsgemäßen Betrieb erforderlich ist.
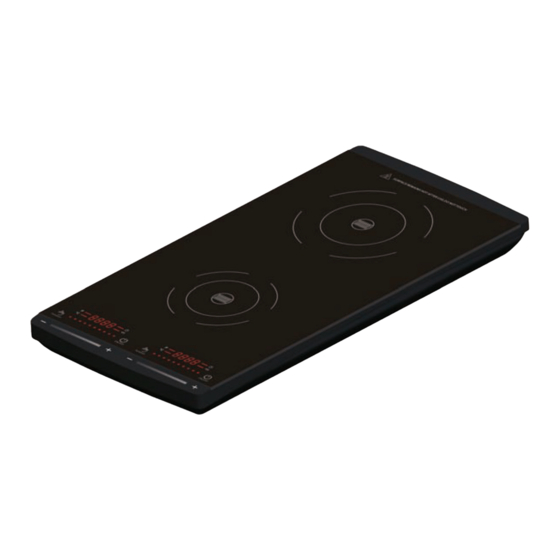
  • Seite 4: Geräteübersicht

    Geräteübersicht Gerät 1 Kochplatten 2 [+] und [-] Taste/ Slidertasten 3 Bedienfeld mit Display 4 Lufteinlassöffnungen 5 Entlüftungsöffnungen Display und Bedienfeld Ein/Aus-Taste: zum ein- und aus- schalten des Gerät oder um das Gerät in den Standby-Zustand zu versetzen. Display: zeigt die eingestellte Leis- tung, die eingestellte Temperatur, die Timer-Laufzeit und Warnmel- dungen an.
  • Seite 5: Inbetriebnahme Und Bedienung

    Das Induktionskochfeld ist sofort bereit zum Kochen. Legen Sie niemals leere Töpfe oder Pfannen auf die Kochplatten. Setzen Sie den Topf bzw. die Pfanne immer in mittig auf die Kochplatte, sonst wird der untere Teil der Pfanne ungleichmäßig erwärmt und das Essen in der Pfanne kann verbrennen. Ungeeignetes Kochgeschirr: Keramik, Glas, Aluminium, Pfannen oder Töpfe mit abgerundeten oder konvexen Böden.
  • Seite 6 (3) Temperatur einstellen 1. Drücken Sie 2x auf die Funktionstaste und die Kontrollleuchte [°C] für die Temperatur geht an. 2. Nach dem Einschalten ist die Temperatur automatisch auf 240 °C gestellt. 3. Benutzen Sie die Slidertasten, indem sie mit dem Finger zwischen [+] und [-] hin- und herwischen, um die Temperatur in 10 Stufen von 60-240 °C anzupassen.
  • Seite 7 (2) Leistung einstellen 1. Drücken Sie auf die Funktionstaste und die Kontrollleuchte [P] für die Leistung geht an. 2. Nach dem Einschalten ist die Leistung automatisch auf 1600 W gesetzt. 3. Benutzen Sie die Slidertasten, indem sie mit dem Finger zwischen [+] und [-] hin- und herwischen, um die Leistung in 10 Stufen von 200-1600 W zu anzupassen.
  • Seite 8: Reinigung Und Pflege

    Reinigung und Pflege • Ziehen Sie vor der Reinigung den Stecker aus der Steckdose und lassen Sie das Gerät vollständig abkühlen. • Halten Sie Kinder vom Gerät fern, solange die Oberfläche noch heiß ist. • Nachdem das Gerät abgekühlt ist, reinigen Sie das Bedienfeld mit einem weichen Lappen. Verwenden Sie zur Reinigung stark verschmutzter Stellen etwas Spülmittel.
  • Seite 9: Hinweise Zur Entsorgung

    Hinweise zur Entsorgung Befindet sich die linke Abbildung (durchgestrichene Mülltonne auf Rädern) auf dem Pro- dukt, gilt die Europäische Richtlinie 2012/19/EU. Diese Produkte dürfen nicht mit dem nor- malen Hausmüll entsorgt werden. Informieren Sie sich über die örtlichen Regelungen zur getrennten Sammlung elektrischer und elektronischer Gerätschaften.
  • Seite 10: Technical Data

    Suitable Cokware 12 Use and Operation 13 Cleaning and Care 16 Troubleshooting 16 Hints on Disposal 17 Declaration of Conformity 17 Technical Data Item number 10031757 Power supply 220-240 V ~ 50-60 Hz Power consumtion 2900 W Adjustable temperature 60-240 °C Timer...
  • Seite 11 • Do not use the induction hob near inflammable items or underneath them, for example, near curtains. The temperature of surfaces near the operating appliance is hotter than usual. Place the induction hob away of other objects to ensure sufficient air circulation needed for its proper operation . Do not put anything on the hob‘s surface (e.
  • Seite 12: Product Description

    Product Description Induction Hob 1 Cooktop 2 Control button 3 Control panel with display 4 Air intake openings 5 Air vents Display and Control Panel ON/OFF button: Turning the induc- tion hob on or switching to standby mode. Display: Display of power level, set temperature, automatic switch off timer or warning notice.
  • Seite 13: Use And Operation

    The induction hob is ready for cooking nearly immediately. Never place empty pots/pans on the ceramic glass cootop. Place the pot/pan always at the center of the induction zone, otherwise the lower part of the pan is heated unevenly and the food in the pan may burn. Unsuitable cookware: ceramic, glass, aluminum, pans/pots with rounded/convex bottom or with a diameter less than 12 cm or greater than 30 cm.
  • Seite 14 (3) Setting the temperature 1. Press the „Function“ button twice and the light indicator of temperature [°C] turns on. 2. After switching on, the temperature is automatically set to 240 °C. 3. Using the control button, set the temperature to required level in the range of 60-240 °C (10-stage tem- perature control).
  • Seite 15 (2) Setting the power level 1. Press the „Function“ button and the light indicator of power [P] turns on. 2. After switching on, the power level is automatically set to 1600 W. 3. Set the desired power using the control knob in range 200-1600 W (10-stage settings altogether). (3) Setting the temperature 4.
  • Seite 16: Cleaning And Care

    Cleaning and Care • Before cleaning and any handling of the induction hob, unplug it from the power outlet and allow the hob to cool! • Keep the hob out of reach of children until it cools! • After cooling, clean the ceramic glass cooktop and the control panel of the hob with a cloth and use a cloth moistened with dish detergent for more soiled places.
  • Seite 17: Hints On Disposal

    Hints on Disposal According to the European waste regulation 2012/19/EU this symbol on the product or on its packaging indicates that this product may not be treated as household waste. Instead it should be taken to the appropriate collection point for the recycling of electrical and electronic equipment.
  • Seite 18: Datos Técnicos

    Limpieza y cuidado 24 Detección y resolución de problemas 24 Indicaciones para la retirada del aparato 25 Declaración de conformidad 25 Datos técnicos Número de artículo 10031757 Suministro eléctrico 220-240 V ~ 50-60 Hz Potencia 2900 W Temperatura ajustable 60-240 °C...
  • Seite 19 • No utilice el aparato cerca objetos inflamables o debajo de cortinas. La temperatura de las superficies cer- canas al aparato será superior de lo normal. Coloque el aparato a suficiente distancia de otros objetos para garantizar suficiente circulación del aire, necesario para un correcto funcionamiento del aparato. No coloque nada sobre la superficie de la placa de cocción (p.
  • Seite 20: Descripción Del Aparato

    Descripción del aparato Dispositivo 1 Placas de cocción 2 Botones [+] y [-] 3 Panel de control con display 4 Orificios de entrada de aire 5 Orificios de ventilación Display y panel de control Botón on/off: para encender y apa- gar el aparato o para pasar al apara- to al modo standby.
  • Seite 21: Puesta En Marcha Y Uso

    La placa de cocción ya está lista para cocinar. Nunca coloque ollas o sartenes vacías sobre las placas de cocción. Coloque las ollas o sartenes en el centro de la placa de cocción; de lo contrario, la parte inferior del recipiente se calentará...
  • Seite 22 (3) Ajustar la temperatura 1. Pulse dos veces el botón de función y el indicador luminoso [°C] para la temperatura se enciende. 2. Tras encender el aparato, la temperatura se ajusta automáticamente a 240 °C. 3. Utilice los botones [+] y [-] para ajustar la temperatura en 10 niveles de 60-240 °C. (4) Ajustar el temporizador Si desea cocinar con una 1.
  • Seite 23 (2) Ajustar la potencia 1. Pulse el botón de función para que el indicador luminoso [P] para la potencia se encienda. 2. Tras encender el aparato, la potencia se establece automáticamente en 1600 W. 3. Utilice los botones [+] y [-] para ajustar la potencia en 10 niveles de 200-1600 W. (3) Ajustar la temperatura 1.
  • Seite 24: Limpieza Y Cuidado

    Limpieza y cuidado • Desconecte el enchufe antes de limpiar el aparato y deje que este se enfríe por completo. • Mantenga a los niños alejados del aparato mientras la superficie todavía esté caliente. • Cuando el aparato se haya enfriado, limpie el panel de control con un paño suave. Utilice un poco de deter- gente lavavajillas para limpiar las zonas con suciedad incrustada.
  • Seite 25: Indicaciones Para La Retirada Del Aparato

    Indicaciones para la retirada del aparato Si el aparato lleva adherida la ilustración de la izquierda (el contenedor de basura tachado) entonces rige la normativa europea, directiva 2012/19/UE. Este producto no debe arrojar- se a un contenedor de basura común. Infórmese sobre las leyes territoriales que regulan la recogida separada de aparatos eléctricos y electrónicos.
  • Seite 26: Fiche Technique

    Mise en service et utilisation 29 Nettoyage et entretien 32 Identification et résolution des problèmes 32 Conseils pour le recyclage 33 Déclaration de conformité 33 Fiche technique Numéro d’ a rticle 10031757 Alimentation 220-240 V ~ 50-60 Hz Puissance 2900 W Températures réglables 60-240 °C...
  • Seite 27 • N’utilisez pas l’ a ppareil à proximité d’ o bjets inflammables ou sous un rideau. La température des surfaces ainsi qu’ a ux abords de l’ a ppareil est élevée. Installez l’ a ppareil à distance suffisante des autres objets pour permettre une bonne circulation de l’...
  • Seite 28: Aperçu De L' A Ppareil

    Aperçu de l’ a ppareil Appareil 1 Plaques de cuisson 2 Touches [+] et [-] 3 Panneau de commande avec écran 4 Entrées d’ a ir 5 Ouvertures d’ a ération Ecran et panneau de commande Touche marche/arrêt : pour allumer et éteindre l’...
  • Seite 29: Mise En Service Et Utilisation

    Les plaques à induction sont prêtes à l’ e mploi. Ne posez jamais de casseroles ou de poêles vides sur les plaques de cuisson. Placez toujours la casserole ou la poêle au milieu de la plaque, sinon le fond sera chauffé inégale- ment et les aliments risquent de brûler.
  • Seite 30 3) Réglage de la température 1. Appuyez 2x sur la touche de fonction, le voyant de contrôle [°C] pour température s’ a llume. 2. A l’ a llumage, la température est réglée par défaut sur 240 °C. 3. Utilisez les touches [+] et [-] pour ajuster la température en 10 niveaux entre 60 et 240 °C. (4) Réglage du minuteur Pour cuire à...
  • Seite 31 (2) Réglage de la puissance 1. Appuyez sur la touche de fonction, le voyant de contrôle [P] pour puissance s’ a llume. 2. A l’ a llumage, la puissance est réglée automatiquement sur 1600 W. 3. Utilisez les touches [+] et [-] pour ajuster la puissance en 10 niveaux de 200 à 1600 W. (3) Réglage de la température 1.
  • Seite 32: Nettoyage Et Entretien

    Nettoyage et entretien • Avant le nettoyage, débranchez la fiche de la prise et laissez l’ a ppareil refroidir complètement. • Tenez les enfants à l’ é cart tant que la surface est encore chaude. • Après que l’ a ppareil s’ e st complètement refroidi, nettoyez le panneau de commande avec un chiffon doux. Pour nettoyer les endroits très sales, utilisez un peu de liquide vaisselle.
  • Seite 33: Conseils Pour Le Recyclage

    Conseils pour le recyclage Le pictogramme ci-contre apposé sur le produit signifie que la directive européenne 2012/19/UE (DEEE) s‘applique (poubelle à roulettes rayée). Ces produits ne peuvent être jetés dans les poubelles domestiques courantes. Renseignez-vous concernant les règles appliquées pour la collecte d’ a ppareils électriques et électroniques. Conformez-vous aux réglementations locales et ne jetez pas vos anciens produits avec les ordures ménagères.
  • Seite 34: Dati Tecnici

    Messa in funzione e utilizzo 37 Pulizia e manutenzione 40 Ricerca e risoluzione dei problemi 40 Smaltimento 41 Dichiarazione di conformità 41 Dati tecnici Articolo numero 10031757 Alimentazione 220-240 V ~ 50-60 Hz Potenza 2900 W Temperatura impostabile 60-240 °C...
  • Seite 35 • Non utilizzare il dispositivo vicino o sotto a oggetti infiammabili (come ad esempio tende). La temperatura delle superfici vicino al dispositivo in uso è più elevata. Collocare il dispositivo ad una distanza sufficiente da altri oggetti affinché ci sia un‘adeguata ventilazione necessaria per il corretto funzionamento del dispositivo. Non collocare oggetti sul dispositivo (ad esempio oggetti metallici come posate o simili).
  • Seite 36: Descrizione Del Prodotto

    Descrizione del prodotto Dispositivo 1 Piastre 2 Tasto [+] e [-] 3 Pannello dei comandi con display 4 Fessure ingresso aria 5 Fessure ventilazione Display e pannello dei comandi Tasto on/off: per accendere e spegnere il dispositivo oppure per mettere il dispositivo in modalità standby.
  • Seite 37: Messa In Funzione E Utilizzo

    Il piano di cottura a induzione è subito pronto per l´uso. Non mettere mai pentole o padelle vuote sul piano di cottura. Sistemare la pentola al centro della piastra altrimenti il fondo della pentola si riscalda in modo non uniforme e gli alimenti possono bruciarsi. Stoviglie non idonee: stoviglie in ceramica, vetro, alluminio, padelle o pentole con fondo tondo o convesso.
  • Seite 38 (3) Impostare la temperatura 1. Premere 2 volte il tasto funzione e la spia di controllo [°C] relativa alla temperatura si accende. 2. All´accensione la temperatura è impostata automaticamente su 240°C. 3. Usare i tasti [+] e [-] per regolare la temperatura da 60 a 240°C (temperatura regolabile in 10 livelli). (4) Impostare il timer Per cucinare con una 1.
  • Seite 39 (2) Regolare la potenza 1. Premere il tasto funzione e la spia di controllo [P] relativa alla potenza si accende. 2. All‘accensione la potenza è impostata automaticamente su 1600 W. 3. Usare i tasti [+] e [-] per regolare la potenza da 200 a 1600 W (temperatura regolabile in 10 livelli). (3) Impostare la temperatura 1.
  • Seite 40: Pulizia E Manutenzione

    Pulizia e manutenzione • Staccare la spina dalla presa prima della pulizia e far raffreddare completamente il dispositivo. • Tenere i bambini lontano dal dispositivo fintanto che le superfici sono ancora calde. • Dopo che il dispositivo si è raffreddato, pulire il pannello dei comandi con un panno morbido. Utilizzare un po´...
  • Seite 41: Smaltimento

    Smaltimento Se sul prodotto è presente la figura a sinistra (il cassonetto dei rifiuti mobile sbarrato), si applica la direttiva europea 2012/19/UE. Questi prodotti non possono essere smaltiti con i rifiuti normali. Informarsi sulle disposizioni vigenti in merito alla raccolta separata di dis- positivi elettrici ed elettronici.

Inhaltsverzeichnis