Herunterladen Inhalt Inhalt Diese Seite drucken
Inhaltsverzeichnis

Werbung

Verfügbare Sprachen
  • DE

Verfügbare Sprachen

  • DEUTSCH, seite 51
U PWIN D SA IL
C E ILI NG FAN W I TH AC MO TOR
V E NTIL A DO R DE TECHO CO N MO TOR AC
USER MANUAL

Werbung

Inhaltsverzeichnis
loading

Inhaltszusammenfassung für Create UPWIND SAIL

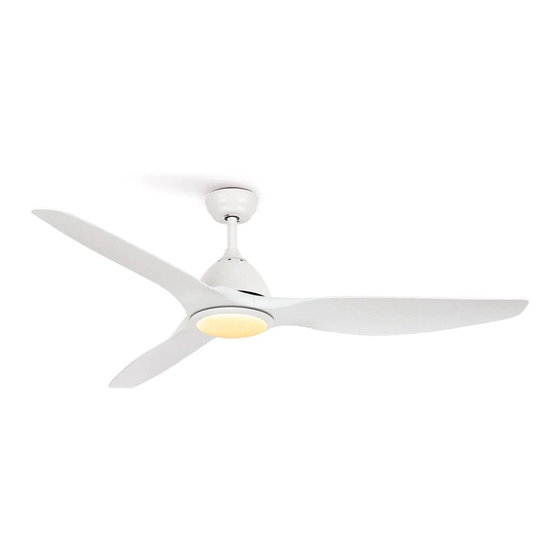
  • Seite 1 U PWIN D SA IL C E ILI NG FAN W I TH AC MO TOR V E NTIL A DO R DE TECHO CO N MO TOR AC USER MANUAL...
  • Seite 4: Inhaltsverzeichnis

    UPW IND SA IL IND E X ENGLISH ESPAÑOL Safety instructions Instrucciones de seguridad Parts list Lista de partes Location and Installation requirements Seleccionando la ubicación Installation Instructions Instrucciones de instalación Ceiling fan with led light Ventilador de techo con luz led Ceiling fan without led light Mando a distancia Remote control...
  • Seite 5 U PWIND SA IL I NDE X ITALIANO DEUTSCH Istruzioni di sicurezza Sicherheitsanweisungen Elenco delle parti Teileliste Selezione della posizione Standort auswählen Istruzioni per l'installazione Installationsanleitung Ventilatore da soffitto con luce led Deckenventilator mit LED-Licht Ventilatore da soffitto senza luce Deckenventilator ohne Licht telecomando Fernbedienung...
  • Seite 6: English

    ENGL ISH Thank you for choosing our ceiling fan. Before using the appliance, and to ensure the best use, carefully read these instructions. The safety precautions enclosed herein reduce the risk of death, injury and electrical shock when correctly adhered to. Keep the manual in a safe place for future reference, along with the completed warranty card, purchase receipt and package.
  • Seite 7: Parts List

    NOTE: The important safety precautions and instructions appearing in the manual are not meant to cover all possible conditions and situations that may occur. It must be understood that common sense and caution are necessary factors in the installation and operation of this fan. PARTS LIST Ceiling Downrod ( x2 &...
  • Seite 8: Location And Installation Requirements

    LOCATION AND INSTALLATION REQUIREMENTS Mechanical issues • According to safety regulations, the lowest point of the fan blade must be at least 2.3m (7 feet) from the floor. • Please, make sure the chosen location will not allow the rotating fan blades to come into contact with any objects.
  • Seite 9: Installation Instructions

    Notch Receiver Ridge 1. Hang the motor housing on the mounting bracket. Rotate the fan so that the notch on the ball engages the ridge in the mounting bracket. 2. Place the remote control receiver in the slot on the mounting bracket as shown in the figure. •...
  • Seite 10 Downrod installation Choose the suspension bar that best suits your situation: it has a 15 cm and a 25 cm sus- pension bar. Remove the bar bolt, removing the pin, and pass the canopy (roof trim) and the engine canopy through the suspension bar. Next, route the fan motor cables through the inside of the suspension bar.
  • Seite 11 1. Remove the cotter pin from the clevis pin and pull the clevis pin out. 2. Unscrew the fixing screws. 3. Push the downrod into the top of the motor housing and align the holes on the downrod. 4. Insert the clevis pin back in and lock it with the cotter pin. 5.
  • Seite 12: Ceiling Fan With Led Light

    Installing the fan blades Blade screws Align the holes on the blade holder with the holes on the blades and the motor body and screw them in place (1), but don’t tighten them until they are all placed and screwed in. Once the blades are tighten on the blade holder, screw the structure to the motor housing (2) until it is secured as in picture (3).
  • Seite 13: Ceiling Fan Without Led Light

    CEILING FAN WITHOUT LED LIGHT Installing the decorative cover After installing the blades, align the decorative cover with the motor axis and screw it clock- wisely until it is securely fixed. Check the installation • Check the correct operation of the ceiling fan, checking that no strange movement or misalignment is observed in any part of the fan.
  • Seite 14: Troubleshooting

    TROUBLESHOOTING When the remote control doesn’t work, check if: • The fan has power. • The fan is properly connected. • The battery in the remote control is charged. • There are other products controlled by remote control nearby and in operation. Remote control products with the same frequency that are working in proximity will interfere with each other.
  • Seite 15: Instrucciones De Seguridad

    E SPAÑOL Gracias por elegir nuestro ventilador de techo. Antes de utilizar este electrodoméstico y para asegurar su mejor uso, por favor, lea detenidamente las instrucciones. Las medidas de seguridad aquí indicadas reducen el riesgo de incendio, descarga eléctrica y lesiones cuando se siguen correctamente.
  • Seite 16: Lista De Partes

    NOTA: Las instrucciones y precauciones de seguridad que aparecen en este manual pueden no abarcar todos los problemas y situaciones posi- bles. Debe entender que tanto el sentido común como la precaución son esenciales para la instalación y el uso del ventilador. LISTA DE PARTES Florón Barra de suspensión...
  • Seite 17: Seleccionando La Ubicación

    SELECCIONANDO LA UBICACIÓN Requerimientos mecánicos • Las aspas del ventilador deben estar a una altura mínima de 2,3 metros. • Asegúrese de que, donde lo instale, las aspas del ventilador no hagan contacto con cualquier objeto en ningún momento. • La estructura que soporta el ventilador debe ser capaz de resistir un peso de al menos el ventilador.
  • Seite 18 Instalación del soporte de montaje La caja de salida y la viga deben ir instaladas de manera segura y deben ser capaces de soportar de forma fiable por lo menos el peso del ventilador. Techos de madera Techos de hormigón/escayola Sujete de manera segura el soporte de Taladre agujeros con una broca de 8mm, montaje con tornillos para madera y aran-...
  • Seite 19 Conexión de la barra de suspensión a la carcasa del motor Cables del ventilador Florón Barra de sus- pensión Embellecedor del motor Perno Pasador de bloqueo Tornillo de Adaptador fijación 1. Remove the cotter pin from the clevis pin and pull the clevis pin out. 2.
  • Seite 20 Suspensión del ventilador • Cuelgue el ventilador en el soporte de techo. Acerque el eje de suspensión al soporte y deje que el conjunto del motor descanse sobre el soporte del techo. Inserte el receptor del control remoto en el espacio izquierdo al instalar el soporte de techo, entre el techo y la barra de suspensión.
  • Seite 21: Ventilador De Techo Con Luz Led

    Instalación de las aspas Tornillos de las aspas Alinee los orificios del soporte de las aspas con los orificios de las aspas y el cuerpo del motor y atorníllelas en su sitio (1), pero no apriete los tornillos hasta que estén todos colo- cados y atornillados levemente.
  • Seite 22: Mando A Distancia

    VENTILADOR DE TECHO SIN LUZ Instalación de la cubierta decorativa Después de instalar las aspas, alinee la cubierta decorativa con el eje del motor y atorníllela girando hasta que quede fijada de forma segura. Comprobar la instalación • Compruebe el correcto funcionamiento del ventilador de techo, revisando que no se ob- serve algún movimiento extraño o desajuste en alguna pieza del ventilador.
  • Seite 23: Resolución De Problemas

    RESOLUCIÓN DE PROBLEMAS 1. Cuando el mando a distancia no funcione, compruebe si: • El ventilador tiene corriente. • El ventilador está correctamente conectado. • La pila en el mando a distancia está cargada. • Hay otros productos controlados por mando a distancia cerca y en funcionamiento. Pro- ductos teledirigidos con la misma frecuencia que estén funcionando con proximidad, interferirán entre ellos.
  • Seite 24: Português

    PORT U G UÊ S Obrigado por escolher nosso ventilador de teto. Antes de utilizar este aparelho e para garan- tir a sua melhor utilização, leia atentamente as instruções. As medidas de segurança listadas aqui reduzem o risco de incêndio, choque elétrico e feri- mentos, quando devidamente seguidas.
  • Seite 25: Lista De Peças

    Também não devem realizar tarefas de limpeza e manutenção do aparel- • ho, a menos que tenham idade superior a 8 anos e estejam supervisiona- das. É necessário supervisionar as crianças de perto quando utilizarem qualquer eletrodoméstico. NOTA: as instruções e precauções de segurança constantes neste manual podem não abranger todos os possíveis problemas e situações.
  • Seite 26: Selecionando O Local

    SELECIONANDO O LOCAL Requisitos mecânicos • As pás do ventilador devem estar a uma altura mínima de 2,3 metros. • Certifique-se de que, no local de instalação, as pás da ventoinha não entrem em contato com nenhum objeto em nenhum momento. •...
  • Seite 27 Instalação do suporte de montagem A caixa de saída e a viga devem ser instaladas com segurança e capazes de suportar de for- ma confiável pelo menos o peso do ventilador. Telhados de madeira Tetos de concreto / gesso Prenda firmemente o suporte de mon- Faça os furos com uma broca de 8 mm, de tagem com parafusos de madeira e arrue- acordo com o comprimento dos parafusos...
  • Seite 28 Conexão da barra de suspensão à carcaça do motor Cabos de ventilador Canopla Barra de cabide Guarnição do motor Parafuso de tampa Pino de travamento Parafuso de Adaptador fixação 1. Remova a cupilha do pino da manilha e puxe o pino da manilha para fora. 2.
  • Seite 29 Suspensão de ventilador • Pendure o ventilador no suporte de teto. Traga o eixo de suspensão para perto do suporte e deixe o conjunto do motor descansar no suporte de teto. Insira o receptor do controle re- moto no espaço esquerdo ao instalar o suporte de teto, entre o teto e a barra de suspensão. Para que os cabos de conexão fiquem fora da placa metálica para poder conectar os cabos.
  • Seite 30: Ventilador De Teto Com Luz Led

    Instalação da lâmina Parafusos de lâmina Alinhe os orifícios no suporte das lâminas com os orifícios nas lâminas e no corpo do motor e aparafuse-os (1), mas não aperte os parafusos até que estejam todos no lugar e ligeiramente aparafusados. Assim que as lâminas estiverem apertadas no suporte, aparafuse a estrutura do suporte com os suportes na carcaça do motor (2) até...
  • Seite 31: Ventilador De Teto Sem Luz

    VENTILADOR DE TETO SEM LUZ Instalando a tampa decorativa Depois de instalar as lâminas, alinhe a tampa decorativa com o eixo do motor e aparafuse-a girando até que fique bem fixada. Verifique a instalação • Verifique o correto funcionamento do ventilador de teto, verificando se nenhum movimento estranho ou desalinhamento é...
  • Seite 32: Resolução De Problemas

    RESOLUÇÃO DE PROBLEMAS 1. Quando o controle remoto não funcionar, verifique se: • O ventilador tem poder. • O ventilador está conectado corretamente. • A bateria do controle remoto está carregada. • Outros produtos controlados remotamente estão próximos e em operação. Produtos de controle remoto com a mesma frequência que estão operando nas proximidades irão in- terferir uns nos outros.
  • Seite 33: Français

    F R A NÇ AIS Merci d'avoir choisi notre ventilateur de plafond. Avant d'utiliser cet appareil et pour garantir son utilisation optimale, veuillez lire attentivement les instructions. Les mesures de sécurité énumérées ici réduisent le risque d'incendie, de choc électrique et de blessure lorsqu'elles sont correctement suivies.
  • Seite 34: Liste Des Pièces

    REMARQUE : les instructions et les précautions liées à la sécurité figu- rant dans ce manuel ne sont pas exhaustives. Pour installer et utiliser ce ventilateur, il est nécessaire de faire preuve de bon sens et de prendre des précautions. LISTE DES PIÈCES Canopée Barre de suspension...
  • Seite 35: Sélection De L'emplacement

    SÉLECTION DE L'EMPLACEMENT Exigences mécaniques • Les pales du ventilateur doivent être à une hauteur minimale de 2,3 mètres. • Assurez-vous que, là où vous l'installez, les pales du ventilateur n'entrent en contact avec aucun objet à aucun moment. • La structure qui supporte le ventilateur doit être capable de supporter un poids d'au moins le ventilateur.
  • Seite 36 Installation du support de montage La boîte de sortie et la poutre doivent être solidement installées et capables de supporter de manière fiable au moins le poids du ventilateur. Toits en bois Plafonds en béton/plâtre Fixez solidement le support de montage Percez des trous avec un foret de 8 mm, avec des vis à...
  • Seite 37 Connexion de la barre de suspension au carter du moteur Câbles de ventilateur Canopée Barre de sus- pension Garniture du moteur Vis à capuchon Broche de verrouillage Vis de Adaptateur fixation 1. Retirez la goupille fendue de l'axe de chape et retirez l'axe de chape. 2.
  • Seite 38 Suspension de ventilateur • Accrochez le ventilateur sur le support de plafond. Approchez l'arbre de suspension du support et laissez l'ensemble moteur reposer sur le support de plafond. Insérez le récep- teur de télécommande dans l'espace de gauche lors de l'installation du support de plafond, entre le plafond et la barre de suspension.
  • Seite 39: Ventilateur De Plafond Avec Lumière Led

    Installation de la lame Vis de pale Alignez les trous du support de lame avec les trous des lames et du corps du moteur et vis- sez-les en place (1), mais ne serrez pas les vis tant qu'elles ne sont pas toutes en place et légèrement vissées.
  • Seite 40: Ventilateur De Plafond Sans Lumière

    VENTILATEUR DE PLAFOND SANS LUMIÈRE Installation de la couverture décorative Après avoir installé les lames, alignez le couvercle décoratif avec l'arbre du moteur et vis- sez-le en tournant jusqu'à ce qu'il soit solidement fixé. Vérifier l'installation • Vérifiez le bon fonctionnement du ventilateur de plafond, en vérifiant qu'aucun mouvement étrange ou désalignement n'est observé...
  • Seite 41: Résolution Des Problèmes

    Mises en garde 1. Veuillez utiliser ce produit sous la tension correcte. Une tension trop basse entraînera un échec de l'opération. 2. Retirez les piles de la télécommande si vous ne comptez pas l'utiliser pendant une longue période. Noter: Pour des raisons de sécurité et pour garantir des performances optimales, con- nectez correctement le fil de terre.
  • Seite 42: Italiano

    I TA LIA NO Grazie per aver scelto il nostro ventilatore da soffitto. Prima di utilizzare questo apparecchio e per assicurarne il miglior utilizzo, leggere attentamente le istruzioni. Le misure di sicurezza qui elencate riducono il rischio di incendi, scosse elettriche e lesioni se seguite correttamente.
  • Seite 43: Elenco Delle Parti

    Nota: non è detto che le istruzioni e precauzioni di sicurezza presenti in questo manuale indichino tutti i problemi e le situazioni che si possono verificare. Bisogna intendere che sia il senso comune sia la precauzione sono essenziali per l’installazione e l’uso del ventilatore. ELENCO DELLE PARTI Rosone Asta di sostegno...
  • Seite 44: Selezione Della Posizione

    SELEZIONE DELLA POSIZIONE Requisiti meccanici • Le pale del ventilatore devono trovarsi ad un'altezza minima di 2,3 metri. • Assicurarsi che, dove lo si installa, le pale del ventilatore non entrino mai in contatto con alcun oggetto. • La struttura che sostiene il ventilatore deve essere in grado di sostenere un peso almeno pari al ventilatore.
  • Seite 45 Installazione della staffa di montaggio La scatola di derivazione e la trave devono essere installate in modo sicuro e in grado di sos- tenere in modo affidabile almeno il peso del ventilatore. Tetti in legno Soffitti in cemento/intonaco Fissare saldamente la staffa di montaggio Praticare dei fori con una punta da trapa- con viti per legno e rondelle ai travetti.
  • Seite 46 Collegamento della barra di sospensione all'alloggiamento del motore Cavi della ventola Calotta Barra appen- diabiti Assetto motore Vite a testa Pin di blocco cilindrica Vite di Adattatore fissaggio 1. Rimuovere la coppiglia dal perno con testa ed estrarre il perno con testa. 2.
  • Seite 47 Sospensione della ventola • Appendere il ventilatore alla staffa a soffitto. Avvicinare l'asta di sospensione alla staffa e lasciare che il gruppo motore poggi sulla staffa a soffitto. Inserire il ricevitore del teleco- mando nello spazio a sinistra durante l'installazione della staffa da soffitto, tra il soffitto e la barra di sospensione.
  • Seite 48: Ventilatore Da Soffitto Con Luce Led

    Installazione della lama Viti della pala Allineare i fori nella staffa della lama con i fori nelle lame e nel corpo motore e avvitarli in posizione (1), ma non serrare le viti finché non sono tutte in posizione e leggermente avvitate. Una volta che le lame sono ben serrate sulla staffa, avvitare il telaio della staffa con le staffe all'alloggiamento del motore (2) fino a fissarlo come in figura (3).
  • Seite 49: Ventilatore Da Soffitto Senza Luce

    VENTILATORE DA SOFFITTO SENZA LUCE Installazione della copertura decorativa Dopo aver installato le lame, allineare il coperchio decorativo con l'albero del motore e avvi- tarlo ruotandolo finché non è fissato saldamente. Controllare l'installazione • Verificare il corretto funzionamento del ventilatore da soffitto, verificando che non si noti- no movimenti anomali o disallineamenti in nessuna parte del ventilatore.
  • Seite 50: Risoluzione Del Problema

    RISOLUZIONE DEL PROBLEMA 1. Quando il telecomando non funziona, controlla se: • La ventola ha potenza. • La ventola è collegata correttamente. • La batteria del telecomando è carica. • Altri prodotti telecomandati sono nelle vicinanze e in funzione. I prodotti di controllo re- moto con la stessa frequenza che operano nelle immediate vicinanze interferiranno l'uno con l'altro.
  • Seite 51: Sicherheitsanweisungen

    D EU TSC H Vielen Dank, dass Sie sich für unseren Deckenventilator entschieden haben. Bevor Sie dieses Gerät verwenden und um eine optimale Nutzung zu gewährleisten, lesen Sie bitte die Anweisungen sorgfältig durch. Die hier aufgeführten Sicherheitsmaßnahmen reduzieren die Gefahr von Feuer, Stromschlag und Verletzungen, wenn sie richtig befolgt werden.
  • Seite 52: Teileliste

    Sie dürfen das gerät nur reinigen und pflegen, wenn sie älter als 8 jahre • sind und beaufsichtigt werden. Kinder müssen beim gebrauch jedes ele- ktrischen haushaltsgeräts genau beaufsichtigt werden. Anmerkung: die in dieser anleitung enthaltenen anweisungen und sicher- heitsmaßnahmen können nicht auf alle möglichen probleme und situatio- nen eingehen.
  • Seite 53: Standort Auswählen

    STANDORT AUSWÄHLEN Mechanische Anforderungen • Die Lüfterflügel müssen eine Mindesthöhe von 2,3 Metern haben. • Stellen Sie sicher, dass die Lüfterflügel am Einbauort zu keiner Zeit mit Gegenständen in Berührung kommen. • Die Konstruktion, die den Ventilator trägt, muss mindestens das Gewicht des Ventilators tragen können.
  • Seite 54 Montage der Montagehalterung Der Auslasskasten und der Balken müssen sicher installiert sein und mindestens das Ge- wicht des Ventilators zuverlässig tragen können. Holzdächer Beton- / Gipsdecken Befestigen Sie die Montagehalterung mit Bohren Sie mit einem 8-mm-Bohrer Löch- Holzschrauben Unterlegscheiben er entsprechend der Länge der Dehn- sicher an den Balken.
  • Seite 55 Verbindung der Aufhängeschiene zum Motorgehäuse Lüfterkabel Rossete Kleiderbügel Motorverkleidung Kopfschraube Sicherungss- tift Adapter Befestigungsschraube 1. Entfernen Sie den Splint vom Gabelkopfstift und ziehen Sie den Gabelkopfstift heraus. 2. Lösen Sie die Befestigungsschrauben. 3. Drücken Sie die Unterstange in die Oberseite des Motorgehäuses und richten Sie die Löcher auf der Unterstange aus.
  • Seite 56 Lüfteraufhängung • Hängen Sie den Ventilator an die Deckenhalterung. Bringen Sie die Aufhängewelle in die Nähe der Halterung und lassen Sie die Motorbaugruppe auf der Deckenhalterung ruhen. Setzen Sie den Fernbedienungsempfänger in den linken Raum ein, wenn Sie die Decken- halterung installieren, zwischen Decke und Aufhängestange.
  • Seite 57: Deckenventilator Mit Led-Licht

    Klingeninstallation Klingenschrau- Richten Sie die Löcher in der Messerhalterung mit den Löchern in den Messern und im Mo- torgehäuse aus und schrauben Sie sie fest (1), aber ziehen Sie die Schrauben erst fest, wenn sie alle angebracht und leicht eingeschraubt sind. Sobald die Messer fest auf der Halterung sitzen, schrauben Sie den Halterungsrahmen mit den Halterungen an das Motorgehäuse (2), bis er wie im Bild (3) befestigt ist.
  • Seite 58: Deckenventilator Ohne Licht

    DECKENVENTILATOR OHNE LICHT Anbringen der dekorativen Abdeckung Richten Sie nach der Montage der Messer die Zierblende zur Motorwelle aus und schrauben Sie sie durch Drehen fest, bis sie fest sitzt. Installation prüfen • Überprüfen Sie den korrekten Betrieb des Deckenventilators und stellen Sie sicher, dass keine seltsamen Bewegungen oder Fehlausrichtungen in irgendeinem Teil des Ventilators beobachtet werden.
  • Seite 59: Problemlösung

    Warnungen 1. Bitte verwenden Sie dieses Produkt unter der richtigen Spannung. Eine zu niedrige Span- nung führt zu einem erfolglosen Vorgang. 2. Entfernen Sie die Batterien aus der Fernbedienung, wenn Sie sie längere Zeit nicht ver- wenden. Hinweis: Schließen Sie aus Sicherheitsgründen und um eine optimale Leistung zu gewährleisten, das Erdungskabel richtig an.
  • Seite 60: Nederlands

    N E DE R L A ND S Bedankt voor het kiezen van onze plafondventilator. Lees de instructies aandachtig door voordat u dit apparaat gebruikt en voor een optimaal gebruik. De hier vermelde veiligheidsmaatregelen verminderen het risico op brand, elektrische schokken en letsel als ze correct worden opgevolgd.
  • Seite 61: Lijst Met Onderdelen

    Kinderen moeten nauwlettend worden gevolgd bij het gebruik van een • apparaat. Notitie: de instructies en veiligheidsmaatregelen in deze handleiding de- kken mogelijk niet alle mogelijke problemen en situaties. U moet begri- jpen dat zowel gezond verstand als voorzichtigheid essentieel zijn bij de installatie en het gebruik van de ventilator.
  • Seite 62: De Locatie Selecteren

    DE LOCATIE SELECTEREN Mechanische vereisten: • De ventilatorbladen moeten minimaal 2,3 meter hoog zijn. • Zorg ervoor dat, waar u het installeert, de ventilatorbladen op geen enkel moment contact maken met enig object. • De constructie die de ventilator ondersteunt, moet een gewicht van minimaal de ventilator kunnen dragen.
  • Seite 63 Montagebeugel installatie De uitlaatdoos en balk moeten stevig worden geïnstalleerd en in staat zijn om op betrouw- bare wijze het gewicht van de ventilator te dragen. Houten daken Beton / gipsplafonds Bevestig de montagebeugel stevig met Boor gaten met een boor van 8 mm, afhan- houtschroeven en ringen aan de balken.
  • Seite 64 Ophangstang verbinding met motorhuis Ventilatork- abels Overkapping Ophangstang Motorbekleding Dopschroef Borgpen Adapter Bevestigingsschroef 1. Verwijder de splitpen van de gaffelpen en trek de gaffelpen eruit. 2. Draai de bevestigingsschroeven los. 3. Duw de downrod in de bovenkant van de motorbehuizing en lijn de gaten op de downrod uit. 4.
  • Seite 65 Ventilatorophanging • Hang de ventilator aan de plafondbeugel. Breng de ophangas dicht bij de beugel en laat de motorconstructie op de plafondbeugel rusten. Steek de ontvanger van de afstandsbe- diening in de linker ruimte bij het installeren van de plafondbeugel, tussen het plafond en de ophangstang.
  • Seite 66: Plafondventilator Met Led Licht

    Installatie van het mes: Blade schroeven Lijn de gaten in de mesbeugel uit met de gaten in de messen en het motorhuis en schroef ze op hun plaats (1), maar draai de schroeven pas vast als ze allemaal op hun plaats zitten en licht zijn vastgedraaid.
  • Seite 67: Plafondventilator Zonder Licht

    PLAFONDVENTILATOR ZONDER LICHT De decoratieve afdekking installeren Na het installeren van de messen, lijnt u de decoratieve afdekking uit met de motoras en schroeft u deze vast door te draaien totdat deze stevig vastzit. Installatie controleren • Controleer de juiste werking van de plafondventilator en controleer of er geen vreemde beweging of verkeerde uitlijning wordt waargenomen in enig deel van de ventilator.
  • Seite 68: Probleem Oplossing

    Waarschuwingen 1. Gebruik dit product onder de juiste spanning. Een te lage spanning leidt tot een mislukte werking. 2. Haal de batterijen uit de afstandsbediening als u deze lange tijd niet gaat gebruiken. Opmerking: Om veiligheidsredenen en om optimale prestaties te garanderen, moet u de aardingskabel correct aansluiten.
  • Seite 69: Polski

    POLSKI Dziękujemy za wybranie naszego wentylatora sufitowego. Przed użyciem tego urządzenia oraz w celu zapewnienia jak najlepszego użytkowania, prosimy o dokładne zapoznanie się z instrukcją. Wymienione tutaj środki bezpieczeństwa zmniejszają ryzyko pożaru, porażenia prądem i obrażeń, jeśli są właściwie przestrzegane. Instrukcję należy przechowywać w bezpiecznym miejscu do wykorzystania w przyszłości, podobnie jak gwarancję, dowód sprzedaży i opakowanie.
  • Seite 70: Lista Części

    Nie powinni oni również przeprowadzać prac związanych z czyszcze- • niem i konserwacją urządzenia, chyba że mają więcej niż 8 lat i są pod nadzorem. Dzieci powinny być nadzorowane podczas korzystania z jakie- gokolwiek sprzętu gospodarstwa domowego. Uwaga: instrukcje i środki bezpieczeństwa zawarte w niniejszej instrukcji mogą...
  • Seite 71: Wybór Lokalizacji

    WYBÓR LOKALIZACJI Wymagania mechaniczne • Łopatki wentylatora muszą znajdować się na wysokości co najmniej 2,3 metra. • Upewnij się, że w miejscu instalacji łopatki wentylatora nigdy nie stykają się z żadnym przedmiotem. • Konstrukcja podtrzymująca wentylator musi być w stanie utrzymać ciężar co najmniej wen- tylatora.
  • Seite 72 Montaż wspornika montażowego Skrzynka wylotowa i belka muszą być bezpiecznie zainstalowane i zdolne do niezawodnego utrzymania co najmniej ciężaru wentylatora. Dachy drewniane Sufity betonowe / gipsowe Bezpiecznie przymocuj wspornik mon- Wywierć otwory wiertłem 8 mm, zgodnie tażowy za pomocą wkrętów do drewna i z długością...
  • Seite 73 Połączenie drążka nośnego z obudową silnika Kable wen- tylatorów Rozeta Wieszak Wykończenie silnika Śruba z nakrętką Kołek bloku- jący Śruba Adapter mocująca 1. Wyjmij zawleczkę z strzemiączka i wyciągnij strzemię. 2. Odkręć śruby mocujące. 3. Wciśnij drążek do górnej części obudowy silnika i wyrównaj otwory na drążku. 4.
  • Seite 74 Zawieszenie wentylatora • Zawieś wentylator na wsporniku sufitowym. Zbliż oś zawieszenia do wspornika i po- zwól, aby zespół silnika spoczął na wsporniku sufitowym. Włóż odbiornik pilota w lewą przestrzeń podczas montażu wspornika sufitowego, między sufitem a wieszakiem. Aby ka- ble połączeniowe znajdowały się poza metalową płytką, aby można było podłączyć kable. •...
  • Seite 75: Wentylator Sufitowy Ze Światłem Led

    Instalacja łopatki Śruby łopatki Wyrównaj otwory we wsporniku ostrza z otworami w ostrzach i korpusie silnika i wkręć je na miejsce (1), ale nie dokręcaj śrub, dopóki wszystkie nie znajdą się na miejscu i lekko dokręcone. Po dokręceniu ostrzy do wspornika, przykręć ramę wspornika ze wspornikami do obudowy silnika (2), aż...
  • Seite 76: Wentylator Sufitowy Bez Światła

    WENTYLATOR SUFITOWY BEZ ŚWIATŁA Instalowanie ozdobnej osłony Po zamontowaniu ostrzy, wyrównaj ozdobną osłonę z wałem silnika i wkręć ją, obracając, aż zostanie bezpiecznie zamocowana. Sprawdź instalację • Sprawdź poprawność działania wentylatora sufitowego, sprawdzając, czy w żadnej części wentylatora nie zaobserwowano dziwnych ruchów lub niewspółosiowości. •...
  • Seite 77: Rozwiązanie Problemu

    Ostrzeżenia 1. Proszę używać tego produktu pod odpowiednim napięciem. Zbyt niskie napięcie spowodu- je nieudaną operację. 2. Wyjmij baterie z pilota, jeśli nie zamierzasz go używać przez dłuższy czas. Uwaga: Ze względów bezpieczeństwa oraz w celu zapewnienia optymalnej wydajności podłącz przewód uziemiający prawidłowo. 3.
  • Seite 80 Made in P.R.C.

Inhaltsverzeichnis