Werbung
Verfügbare Sprachen
Verfügbare Sprachen
Quicklinks
D :
Irrtum und Änderung vorbehalten.
GB :
Errors and alteration excepted.
F :
Sous réserve des modifications et des erreurs.
E :
Nos reservamos el derecho de errores y modificaciones.
I :
Ci riserviamo il diritto di modifiche e errori.
© MULTIPLEX Modellsport GmbH & Co. KG, Neuer Weg 2, D-75223 Niefern, GERMANY
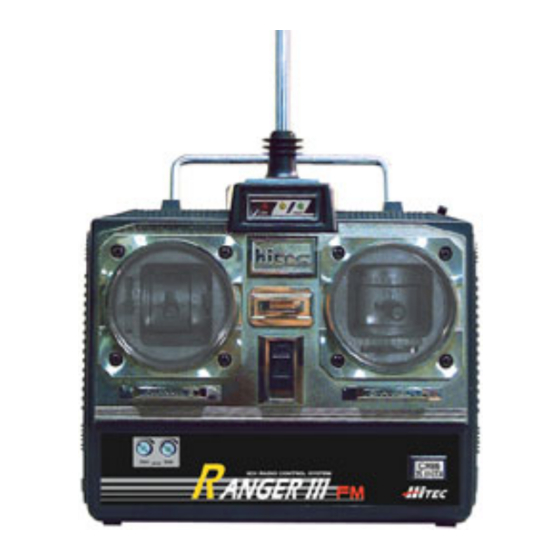
Ranger III
Anleitung
Instructions
Instructions
Instrucciones
Istruzioni
Werbung

Inhaltszusammenfassung für Multiplex RANGER III
- Seite 1 Errors and alteration excepted. Sous réserve des modifications et des erreurs. Nos reservamos el derecho de errores y modificaciones. Ci riserviamo il diritto di modifiche e errori. © MULTIPLEX Modellsport GmbH & Co. KG, Neuer Weg 2, D-75223 Niefern, GERMANY...
- Seite 2 Bereich weniger Bedeutung, jedoch evtl. bei Ver- B: Empfänger wendung der Fernsteuerung in anderen Modellen. - 4 K-FM Empfänger - Wechselbarer Steckquarze Informieren Sie sich über das weitere MULTIPLEX/ - Leicht und kompakt HiTEC-Programm an Fernsteuerungen für Einsteiger, Hobby-Piloten und Expert bei Ihrem Fachhändler. C: Servos Diese Anleitung ist Bestandteil des Produktes.
- Seite 3 IV. Inbetriebnahme und Anschluß a) Batteriemontage 1. Sender • Der Sender benötigt acht Batterien der Größe AA. Dies kön- nen entweder Trockenbatterien oder wiederaufladbare NiCd- Lesen Sie bitte den folgenden Abschnitt sorgfältig durch, be- Zellen sein. Letztere können mt dem optional erhältlichen vor Sie beginnen, die Ranger 3 FM Sky Anlage zu installie- HiTEC-Lader CG-22 über Nacht geladen werden.
- Seite 4 3. Prüfung und Einstellungen Ist der Sender mit Batterien bestückt, sind die richtigen Quarze in Sender und Empfänger eingesteckt, Servos und evtl Regler am Empfänger angeschlossen und der Empfänger/Antriebsakku frisch geladen, dann steht der ersten Inbetriebnahme nichts mehr im Weg. Senderantenne voll ausziehen, Sender einschalten.
-
Seite 5: System-Layout
I. Introduction II. Features and Specifications III. System Layout touch your dreams IV. Setting and Operation 1. Transmitter a. Loading Batteries b. Reading the LED Battery Indicators c. Recharging Nicad Batteries d. Changing Crystals ANGER III 2. Installation of Receiver and Servos 3. - Seite 6 1. Transmitter a. Loading Batteries arrow then lift up the cover You may use either Alkaline "AA" size batteries or 3rd · Load 8 AA batteries (Be sure the polarity is correct) party Nicad batteries. · Reinstall battery case with installed AA batteries. ·...
- Seite 7 Transmitter, Receiver and Servo Settings Now we come to the critical part as proper installation of these components are essential. a. Checking Operation of the Servo After installation of the servo and receiver into your model is complete, turn the power "ON" the transmitter (fully extend the antenna) now turn on the receiver.
- Seite 8 - prise de charge pour les accus 8 éléments NiCd vous équiperez d’autres modèles avec cette installation. de type AA - Quartz interchangeable à connecter Renseignez-vous sur notre programme MULTIPLEX/ - contrôle de charge de l’accu par LED HiTEC concernant les radiocommandes pour les B: Récepteur débutants, pilotes occasionnels ou confirmés, auprès...
- Seite 9 IV. Mise en service et connexion a) Montage de l’accu 1. Emetteur - L’émetteur nécessite huit accus de la taille AA. Ceux- ci peuvent être des piles sèches ou des accus du type Lisez attentivement les prochains paragraphes avant éléments NiCd. Les dernières peuvent être chargées de démarrer l’installation du système de ou rechargées avec le chargeur HiTEC CG-22 en option.
- Seite 10 3. Remarques importantes : - toujours mettre d’abord en marche l’émetteur puis le récepteur, le contraire pour l’arrêt de l’ensemble. Dans le cas d’une alimentation par l’accu de propulsion, la mise en marche ou l’arrêt du récepteur se fait en branchant/ débranchant l’accu ! - pour effectuer un test de fonctionnement, il ne faut pas encore installer les tringles de commande aux servos.
- Seite 11 Indice I. introducción II. contenido y datos técnicos III. illustración touch your dreams IV. Poner en marcha y ajustes a) Montaje de la batería b) La carga de baterías NiCd ANGER III c) Cambio de cuarzos d) cambiar cuarzos 2. conectar el receptor y los servos 3.
- Seite 12 IV. Puesta en funcionamiento con conexión a) Montaje de la batería - La emisora necesita ochos baterías del tamaño AA. Por favor, lea atentamente el siguiente párrafo antes Pueden ser baterías normales o de recarga de células de empezar a instalar el equipo Ranger 3 FM SkY . NiCd.
- Seite 13 3. Advertencias importantes: - Encender siempre primero la emisora, después el receptor. Al apagar, primero el receptor, luego la emisora. En caso de alimentaicón por la batería de arranque, el priceso de encendido y apagado del receptor suele proceder mediante la conexión de la batería de arranque! - Para un funcionamiento de prueba no se debe conectar aún el varillaje con los servos.
- Seite 14 - possibilità di cambiare il quarzo radio in un altro modello. - segnalazione batteria scarica con LED B: Ricevente Per altri componenti radio della gamma MULTIPLEX/ - 4 anali, FM HiTEC, adatti sia per il modellista principiante che - possibilità di cambiare il quarzo esperto, si rivolga al Suo rivenditore di fiducia.
- Seite 15 a) inserire le batterie IV. Messa in funzione e regolazioni - Per funzionare, la radio necessita di 8 batterie tipo AA. Possono essere usate le comuni batterie usa e 1. Radio getta oppure batterie ricaricabili al NiCd. Queste Prima di installare l’impianto radio Ranger 3 FM Sky, ultime, possono essere caricate in una notte con il le leggere attentamente il seguente capitolo.
- Seite 16 3. Regolare la radio, la ricevente ed i servi Prima della messa in funzione dell’impianto, controllare l’avvenuto inserimento delle batterie nella radio, l’inserimento dei quarzi giusti, il corretto collegamento dei servi ed eventualmente del regolatore di giri. Controllare inoltre che il pacco batteria della ricevente si carico. Estrarre completamente l’antenna della radio e accendere la radio.


