Vieweg smartBOX eco-PEN300 Bedienungsanleitung

Verwandte Anleitungen für Vieweg smartBOX eco-PEN300


Inhaltszusammenfassung für Vieweg smartBOX eco-PEN300
- Seite 1 VIEWEG Bedienungsanleitung Operating Instructions smartBOX – eco-PEN-Steuerung smartBOX – eco-PEN controller 508337 Version 2022/02-01 © VIEWEG GmbH...
- Seite 2 Bedienungsanleitung smartBOX VIEWEG...
-
Seite 3: Inhaltsverzeichnis
Bedienungsanleitung smartBOX VIEWEG Inhaltsverzeichnis 1 Allgemeines . . . . . . . . . . . . . . . . . . . . . . . . . . . . . . . . . . . . . . . . . . . . . . 4 1 . -
Seite 4: Allgemeines
Falls Sie weitere Informationen benötigen oder wenn Fragen auftreten sollten, die in dieser Bedienungsanleitung für Sie nicht ausführlich genug behandelt werden, dann wenden Sie sich bitte direkt an uns . Ihre VIEWEG GmbH 1.1 Die smartBOX Die smartBOX Serie umfasst mehrere Modelle, die sich in ihren technischen Aus- führungen nur geringfügig voneinander unterscheiden . -
Seite 5: Lieferumfang
Bedienungsanleitung smartBOX VIEWEG 1.3 Lieferumfang Im Lieferumfang sind folgende Teile enthalten: Bedienungsanleitung smartBOX controller Kaltgerätekabel 230V A (Art . - Nr . 504576) Erweiterungsplatine in ESD-Box (Art . - Nr . 504609) Platinenanschlusskabel mit Staubschutzdeckel, Schrauben und Kabelbinder (enthalten in Artikel 504609) -
Seite 6: Sicherheitshinweise
Bedienungsanleitung smartBOX VIEWEG 2 Sicherheitshinweise 2.1 Allgemeines zur Sicherheit Wird dieses Gerät für andere Zwecke eingesetzt, als in WARNUNG dieser Bedienungsanleitung beschrieben, kann es zu Personen- oder Sachschäden kommen . Setzen Sie das Gerät nur gemäß der Anleitung ein . -
Seite 7: Über Ihre Smartbox
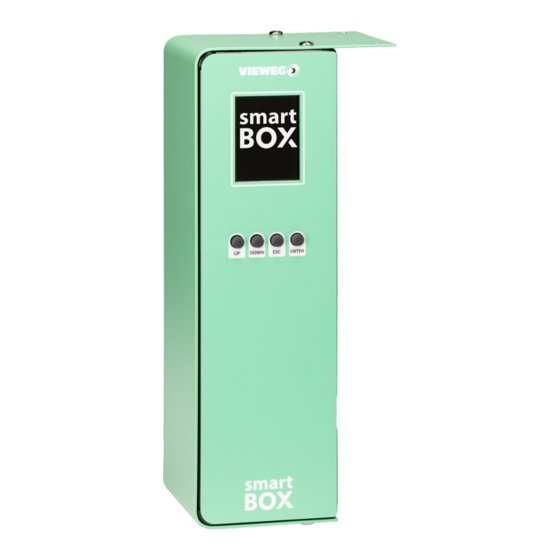
Bedienungsanleitung smartBOX VIEWEG 3 Über Ihre smartBOX 1 Display 3 Anschluss eco-PEN 2 Bedientasten 4 I/O-Port 5 Netzeingang 6 Sicherung 2 A T 7 Ein-/Aus-Schalter... -
Seite 8: Installation
Bedienungsanleitung smartBOX VIEWEG 4 Installation 4.1 Einbau der Hardware Schritt 1 Lösen Sie die Befestigungsschrauben auf der Rückseite des Roboters . Schritt 2 Entfernen Sie die Abdeckung unterhalb des Arbeitstisches . Schritt 3 Entfernen Sie die im Bild markierte Schraube... - Seite 9 Bedienungsanleitung smartBOX VIEWEG Schritt 4 Lösen Sie das Kabel des Positionssensors und lassen es in das Gehäuse rutschen . Schritt 5 Entfernen Sie die im Bild markierten Schrauben (auf beiden Seiten) Schritt 6 Nehmen Sie die Frontblende nach vorne ab . Ziehen Sie dann die Schublade...
- Seite 10 Bedienungsanleitung smartBOX VIEWEG Schritt 7 Entfernen Sie die im Bild markierten Schrauben von der Hauptplatine . Schritt 8 Schrauben Sie statt dessen die Distanzbolzen ein . Schritt 9 Schrauben Sie die Erweiterungsplatine mit den zuvor entfernten Schrauben auf den Distanzbolzen fest .
- Seite 11 Bedienungsanleitung smartBOX VIEWEG Schritt 10 Bauen Sie die Steckbuchse des Platinenanschlusskabels auf der Rückseite des Roboters an der Position I/O-MT ein . Schritt 11 Stecken Sie die beiden Stecker am anderen Ende des Kabels auf der Erweiterungsplatine an .
- Seite 12 Bedienungsanleitung smartBOX VIEWEG Schritt 12 Bauen Sie den Roboter wieder zusammen . Führen Sie dabei die Schritte 1 bis 6 in umgekehrter Reihenfolge durch . Schritt 13 Montieren Sie den Montagewinkel mit den mitgelieferten Schrauben . Nur bei grüner smartBOX! Schritt 14 Entfernen Sie die Schrauben auf der Oberseite der Roboterkonsole .
- Seite 13 Bedienungsanleitung smartBOX VIEWEG Schritt 16 Verbinden Sie die I/O Schnittstellen von Roboter und smartBOX mit dem Steuerkabel . Schritt 17 Schließen Sie das Kabel des eco-PENs an die smartBOX an .
-
Seite 14: Software Update
Bedienungsanleitung smartBOX VIEWEG 4.2 Software Update Um den Roboter mit den zusätzlichen Funktionen der Erweiterungskarte auszustatten, ist ein Firmwareupdate notwendig . . Bitte führen Sie die folgenden Schritte durch: • Schalten Sie den Roboter AUS . • Stecken Sie den USB Speicher Stick in den USB-Port mit der Bezeichnung "MEMORY"... -
Seite 15: Betrieb
Bedienungsanleitung smartBOX VIEWEG 5 Betrieb 5.1 Service Menü Um ins Service Menü zu gelangen, halten Sie die UP und DOWN Taste gedrückt und schalten Sie die smartBOX ein . Verwenden Sie die UP, DOWN, ESC und ENTER Tasten, um durch das Menü zu navigieren und Einstellungen zu ändern . -
Seite 16: Status Menu
Bedienungsanleitung smartBOX VIEWEG 5.2 Status menu angeschlossener und erkannter eco-PEN Dosierung oder Not OK (Abhängig von Robotereinstellung) siehe auch INDIVIDUAL PROGRAM SETTINGS eco-PEN Status: STOP (Dosierung EIN) STOP (Dosierung AUS) eco-PEN dosiert eco-PEN Rückzug aktiv 5.3 Alarm Wenn die smartBOX keine Encoder-Rückmeldung vom eco-PEN Motor erhält, z . B . wenn... -
Seite 17: Programmierung Jr/Vr 3000 Roboter Serie
Bedienungsanleitung smartBOX VIEWEG 6 Programmierung JR/VR 3000 Roboter Serie Die folgenden Informationen beziehen sich auf die spezifischen Einstellungen der smartBOX auf der Roboterseite . Für weitere Informationen zur Programmierung lesen Sie bitte auch das Original-Handbuch . 6.1 Voreinstellung der smartBOX – Programm-Spezifische Einstellungen Führen Sie die folgende Vorgehensweise immer als ersten Schritt aus, wenn Sie ein... - Seite 18 Bedienungsanleitung smartBOX VIEWEG Wait Time at Stop Wartezeit nachdem die Bewegung des Roboters abgeschlos- sen ist . Sie dient dazu, einen sauberen Fadenabriss sowie einen Ausgleich des Staudrucks zu erzielen . Return Type Rückzugsbewegung des Roboters nach Erreichen des Endes einer Dosierlinie .
- Seite 19 Bedienungsanleitung smartBOX VIEWEG Flow Rate Max. (ml/min) Höchste verwendbare Fließrate für das ausgewählte eco-PEN Modell in diesem Programm als Limit für hoch viskoses Material . Waiting Time to Suckback Wartezeit zwischen Vorwärts- und Rückwärtsdrehung des eco-PEN Suckback Amount Menge die durch eco-PEN zurückgezogen wird Suckback Amount Unit Einheit für die Rückzugsmenge in [μl], [ml] oder [g]...
-
Seite 20: Voreinstellung Der Smartbox - Allgemeine Einstellungen
Bedienungsanleitung smartBOX VIEWEG 6.2 Voreinstellung der smartBOX – Allgemeine Einstellungen Rufen Sie das folgende Menü auf: MENU / DISPENSER SETTINGS: I/O-Function Assignment Nicht relevant für smartBOX-Einstellungen . Detaillierte Informationen entnehmen Sie bitte dem Original-Handbuch des Roboters . Purge Switch Legt fest, ob der Schalter PURGE in der Startbox aktiv ist . -
Seite 21: Voreinstellung Der Smartbox - Programmerstellung
Bedienungsanleitung smartBOX VIEWEG During SW Pressing Der eco-PEN dosiert, solange die PURGE Taste gedrückt bleibt . (In einem Intervall von 0,5 Sekunden) 6.3 Voreinstellung der smartBOX – Programmerstellung Für detaillierte Anweisungen zum Teachvorgang lesen Sie bitte auch das Original- Roboterhandbuch . -
Seite 22: Punkt Dosierung (Point Dispense)
Bedienungsanleitung smartBOX VIEWEG Die folgende Beschreibung bezieht sich nur auf die smartBOX-spezifischen Punkttypen . Für alle anderen Punkttypen lesen Sie bitte auch das Original-Handbuch des Roboters . 6.3.1 Punkt Dosierung (Point Dispense) Dosierung einer bestimmten Menge auf einen Punkt ohne Bewegung der Roboterachsen . - Seite 23 Bedienungsanleitung smartBOX VIEWEG Start der Linien Dosierung Folgende Einstellungen sind vorzunehmen: Line Dispense Setting Unit Wählen Sie, ob Sie die Geschwindigkeit/Menge nach Achsengeschwindigkeit ([mm/s]), Volumen ([μl], [ml]) oder Gewicht ([mg], [g]) angeben möchten . -> Geben Sie den numerischen Wert der zuvor gewähten Geschwindigkeit/Menge ein .
- Seite 24 Bedienungsanleitung smartBOX VIEWEG Keep / Change Konstant: Wählen Sie diese Option, wenn Sie möchten, dass die Linienbreite konstant bleibt (die Fließrate wird automatisch erhöht/verringert, wenn sich die Achsen- geschwindigkeit ändert) Ändern: Wählen Sie diese Option, wenn Sie nicht wollen, dass die Linienbreite konstant ist . Es wird keine Änderung der am Linienanfang angegebenen Fließrate vorge-...
-
Seite 25: Wartung Und Reinigung
7 Wartung und Reinigung Die smartBOX ist wartungsfrei . Eventuell notwendige Reparaturen müssen von einer autorisierten Fachwerkstatt oder durch Einsendung des Gerätes an die VIEWEG GmbH durchgeführt werden . Verwenden Sie zur Reinigung des Gerätes und des Gehäuses nur trockene oder feuchte Tücher und keine Reinigungsmittel wie Benzin, Verdünner oder andere brennbare oder... -
Seite 26: Konformitätserklärung
Bauart, sowie in der von uns in Verkehr gebrachten Ausführung den ein- schlägigen Bestimmungen entspricht . Ventilsteuergerät Produkt: Typ: smartBOX Hersteller: VIEWEG Dosier- und Mischtechnik Gewerbepark 13 85402 Kranzberg Tel . : +49 8166 6784 -0 Fax: +49 8166 6784 -20 Folgende harmonisierte europäische Normen wurden angewandt: •... - Seite 52 VIEWEG www.dosieren.de VIEWEG GmbH Dosier- und Mischtechnik Gewerbepark 13 85402 Kranzberg Deutschland / Germany Tel. +49 8166 6784 -0 info@dosieren.de www.dosieren.de...