Maico PP 45 O Montageanleitung
G endmontage-set
Vorschau ausblenden
Andere Handbücher für PP 45 O:
- Bedienungsanleitung (116 Seiten) ,
- Installations- und inbetriebnahmeanleitung (102 Seiten) ,
- Kurzanleitung (12 Seiten)
Inhaltsverzeichnis
Werbung
Verfügbare Sprachen
Verfügbare Sprachen
Quicklinks
Werbung
Inhaltsverzeichnis

Verwandte Anleitungen für Maico PP 45 O


Inhaltszusammenfassung für Maico PP 45 O
- Seite 1 Montageanleitung Endmontage-Set Installation instructions for final installation kit Notice de montage Kit de montage final PP 45 O PP 45 K PP 45 RC RLS 45 O RLS 45 K DS 45 RC www.maico-ventilatoren.com PushPull Lüftungssysteme PushPull ventilation systems Installations de ventilation PushPull...
- Seite 2 Inhaltsverzeichnis Deutsch......... English .......... Français ........
-
Seite 3: Inhaltsverzeichnis
............. Anwendungsbeispiele ......Anschluss- und Verdrahtungspläne..81 Technische Daten ........Anschlussplan RLS 45 O / PP 45 O . 81 6.1 Anforderungen Aufstellungsort ..Anschlussplan RLS 45 K / PP 45 K .. 84 6.2 Technische Daten PP 45.... - Seite 4 Steuerungskonzept PP 45 Steuerungskonzept PP 45...
-
Seite 5: Steuerungskonzept Pp 45
Steuerungskonzept PP 45 RC / PPB 30 RC Steuerungskonzept PP 45 RC / PPB 30 RC... -
Seite 6: Vorwort
1 Vorwort 1 Vorwort 3 Lieferumfang Diese Anleitung enthält wichtige Informationen Lieferumfang abhängig von Systemzusam- zur Endmontage der Geräteeinschübe und In- menstellung. nenabdeckungen. Die Endmontage erfolgt nach Lüftungsgerät PP 45 O Abschluss der Putz- und Malerarbeiten. • Geräteeinschub komplett mit Ventilatoreinheit Beachten Sie die beigefügten Sicherheits- und Keramik-Wärmeübertrager hinweise. -
Seite 7: Anwendungsbeispiele
• Steuerung RLS 45 O oder RLS 45 K Beispiel 2: Kombination PPB 30 K + PP 45-Ge- für PP 45 O / PP 45 K und PPB 30 O / PPB 30 räte • Funkschalter DS 45 RC für PP 45 RC / PPB 30 RC. -
Seite 8: Technische Daten
DS 45 RC → PP 45 RC 30 m PP 45 EO → PP 45 RC 30 m PP 45 RC → PP 45 RC 30 m Bei PP 45 RC als Signalver- 40 m stärker Für weitere technische Daten → Typenschild. Für Kennlinien → www.maico-ventilatoren.com... -
Seite 9: Geräteübersicht Und Anschlussmöglichkeiten
7 Geräteübersicht und Anschlussmöglichkeiten Nachfolgende Tabellen zeigen die mögliche 7 Geräteübersicht und Anschluss- Anzahl der Komponenten und deren Kombina- möglichkeiten tionsmöglichkeiten. 7.1 Kombinationen K1–K18 (RLS 45 K) Lüftungs- PP 45 O / PPB 30 O PPB 30 K Abluftge- Sensoren Sensor in- EnOcean gerät, Sen- PP 45 K räte z. -
Seite 10: Kombinationen
Zusatzfunktionen K25: Abluftbetrieb möglich bei 1x PPB 30 O + RLS 45 O. Zum Start die optionale Taste Lüf- tungsstufe > 2 Sekunden drücken. 7.3 EnOcean-Kombinationen K30 (Funk) Lüftungsgerät, PP 45 RC PP 45 O / Abluftgeräte Abluftgeräte EnOcean Sensor PP 45 K z. B. ER... / z. B. ER... / Funk-Senso- ECA... *... -
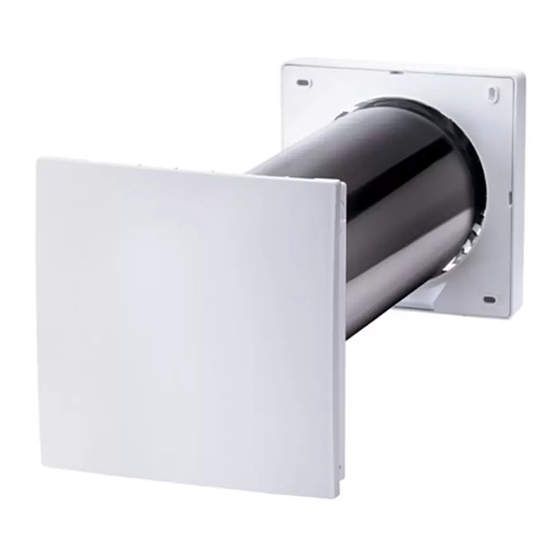
Seite 11: Montage
Abdeckung abnehmen. oder PP 45 RC-Lüftungsgerät. Betriebsspan- 5. Bei PP 45 O und PP 45 K-Geräten die 12 V- nung für PP 45 O /PP 45 K-Geräte = 12 V DC. Steuerleitung der Raumluftsteuerung von der • Geeignetes Befestigungsmaterial ist bauseitig Rückseite in das Innengehäuse der Innenab- bereitzustellen. - Seite 12 Aufkleber Oben/Top nach oben aus- Ventilator-Anschlussleitung gerichtet ist. Stecker Beigefügtes Blech 12.Bei PP 45 O-Geräten (12 V DC) beigefügtes Blech in die 2 Rastnasen stecken, so dass dieses einrastet. Stecker mit der 12 V-Steuer- leitung der Raumluftsteuerung verdrahten (An- schluss- und Verdrahtungspläne [} 81] im An- hang).
-
Seite 13: Elektrischer Anschluss 230 V
Geräte gemäß Anschlussplan anschließen. Zu- lässige Anzahl an Lüftungsgeräten je Raumluft- steuerung/Leistungsteil einhalten. 1. Geräteeinschub und Innenabdeckung wie in PP 45 O / PP 45 K, Schritt 1 bis 11 beschrie- WARNUNG Gefahr durch elektrischen ben, montieren. Schlag bei keiner oder unzureichender Tren- nung der 12 V-Kleinspannung und 230 V. -
Seite 14: Pp 45-Lüftungsgerät Mit Schalldäm- Melement Pp 45 Se Erweitern
8 Montage 6. Frontabdeckung-Innengehäuse oben in die 4. Geräteeinschub (PP 45 O/ PP 45 K/ beiden Zapfen des Gehäuses einhängen und PP 45 RC) so weit wie möglich in der Hülse nach unten schwenken, bis die Frontabde- nach außen schieben. ACHTUNG: Verbin- ckung am Rasthebel einrastet. dungskabel darf nicht spannen. -
Seite 15: Montage Rls 45 O Und Rls 45 K
8 Montage Für den Einbau der Raumluftsteuerung empfeh- Zusätzliche Lüftungsgeräte sind bei Ver- len wir grundsätzlich eine tiefe UP-Dose. Für den wendung von Leistungsteilen PP 45 LT einsetz- Anschluss von mehr als 2 Geräten empfehlen wir bar. eine Verdrahtung in einer Doppel-UP-Dose oder 4. -
Seite 16: Einbau Feuchtesensor
8 Montage PP 45-Kombisystem mit PP 45 EOErweite- rungsmodul PP 45 EO nur mit PP 45 RC-Gerä- tepaaren kombinierbar. Für andere Gerätety- pen ist ein kabelgebundener Betrieb notwen- dig. 4. EnOcean-Erweiterungsmodul PP 45 EOinstal- lieren. Für nähere Informationen → Zubehör- anleitung. -
Seite 17: Inbetriebnahme
Zusatzinformationen erhalten ACHTUNG: Keine Funktion bei fehlerhaftem Sie in der Inbetriebnahmeanleitung im Internet Einbau des Feuchtesensors. Pins nicht ver- (Download unter www.maico-ventilato- biegen. Sensor bis zum Anschlag in die Buch- se einstecken. ren.comwww.maico-ventilatoren.com). Hier können Sie auch die Inbetriebnahmesoftware 3. -
Seite 18: Service-Mode - Bedienung
9 Inbetriebnahme 9.1 Service-Mode – Bedienung Service-Mode starten Beide Tasten LED Betriebs- * Die Lüftungsstufen-LEDs leuchten wieder dau- für 5 Sekun- art blinkt. Sie erhaft. den drücken. befinden sich ** An RC-Geräten leuchten alle 3 LEDs und ge- im 1. Unterme- hen dann nacheinander aus. -
Seite 19: Service-Menü Rls 45 O
9 Inbetriebnahme 9.2 Service-Menü RLS 45 O Fett Werkseinstellung LED blinkt langsam LED blinkt schnell LEDs Parameter Einstellwert / Einstellung / Beschreibung Binäre Anzeige* Gerätetyp an RLS PP 45 (Fan1/Fan2) PPB 30 O Hier wird die Typenfamilie aus- gewählt, die an der Lüfter- schnittstelle Fan1/Fan2 ange- schlossen wird. - Seite 20 9 Inbetriebnahme Fett Werkseinstellung LED blinkt langsam LED blinkt schnell LEDs Parameter Einstellwert / Einstellung / Beschreibung Binäre Anzeige* Leistungsteile (LT´s) Betrieb ohne weitere(s) LT/ oder Raumluftsteuerun- gen (RLS) Betrieb mit 1 LT oder RLS Betrieb mit 2 LT´s oder RLS Betrieb mit 3 LT´s oder RLS Slave Nr.
- Seite 21 9 Inbetriebnahme Fett Werkseinstellung LED blinkt langsam LED blinkt schnell LEDs Parameter Einstellwert / Einstellung / Beschreibung Binäre Anzeige* ModBus-Einstellungen RS 485 inaktiv ModBus aktiv 9600 Baud ModBus aktiv 19200 Baud Mit diesem Einsteller wird der ModBus akiviert und die Bau- drate gesetzt. Achtung: Bei aktiver Modbus-Schnittstelle ist der Anschluss von exter- nen Sensoren/LTs/RLS nicht...
-
Seite 22: Service-Menü Rls 45 K
9 Inbetriebnahme 9.3 Service-Menü RLS 45 K Fett Werkseinstellung LED blinkt langsam LED blinkt schnell LEDs Parameter Einstellwert / Einstellung / Binäre Anzeige* Beschreibung Gerätetyp an RLS PP 45 (Fan1/Fan2) PPB 30 O Hier wird die Typenfamilie aus- gewählt, die an der Lüfter- schnittstelle Fan1/Fan2 ange- schlossen wird. - Seite 23 9 Inbetriebnahme Fett Werkseinstellung LED blinkt langsam LED blinkt schnell LEDs Parameter Einstellwert / Einstellung / Binäre Anzeige* Beschreibung Leistungsteile (LT´s) Betrieb ohne weitere(s) LT´s/ oder Raumluftsteuerun- gen (RLS) Betrieb mit 1 LT oder RLS Betrieb mit 2 LT´s oder RLS Betrieb mit 3 LT´s oder RLS Slave Nr.
- Seite 24 9 Inbetriebnahme Fett Werkseinstellung LED blinkt langsam LED blinkt schnell LEDs Parameter Einstellwert / Einstellung / Binäre Anzeige* Beschreibung Sensoren Kein Sensor 1 Sensor intern 1 Sensor intern + 1 Sensor ex- tern 1 Sensor intern + 2 Sensoren extern 1 Sensor intern + 3 Sensoren extern 0 Sensor intern + 1 Sensor ex- tern 0 Sensor intern + 2 Sensoren...
- Seite 25 9 Inbetriebnahme Fett Werkseinstellung LED blinkt langsam LED blinkt schnell LEDs Parameter Einstellwert / Einstellung / Binäre Anzeige* Beschreibung Nicht belegt PPB 30 K Kein PPB 30 K 1 PPB 30 K 2 PPB 30 K 3 PPB 30 K Geben Sie hier die Anzahl der an der RS 485-Schnittstelle an- geschlossenen PPB 30 K-Ge- räte an. ModBus- Einstellungen RS-485 inaktiv ModBus aktiv 9600 Baud...
-
Seite 26: Service-Menü Ds 45 Rc
9 Inbetriebnahme 9.4 Service-Menü DS 45 RC Fett Werkseinstellung LED blinkt langsam LED blinkt schnell DS 45 RC LEDs Parameter Einstell- Einstellung / Beschreibung wert Die orange Be- Zuluftbetrieb Zuluftbetrieb ohne Nachlauf triebsarten-LED Zuluftbetrieb mit Nachlauf 6 Min. (rote LED 1x) blinkt zyklisch je Zuluftbetrieb mit Nachlauf 15 Min. - Seite 27 9 Inbetriebnahme DS 45 RC LEDs Parameter Einstell- Einstellung / Beschreibung wert Die blaue Be- Einschlaffunkti- 30 Minuten (rote LED 1x) triebsarten-LED 60 Minuten (rote LED 2x) blinkt zyklisch 90 Minuten (rote LED 3x) je 2x Hier wird die Dauer der Einschlaffunktion (Stu- fe 0) parametriert (Werkseinstellung 60 Minuten). Die blaue Be- Filterlaufzeit 2 Monate (rote LED 1x)
-
Seite 28: Ersatzteile
0059.1176.0000 und örtlichen Vorschriften. Wabenkeramik 0192.0657.0000 Profildichtung 0175.0310.0000 Impressum Ventilatoranschluss-Pla- 0101.1422.0000 © Maico Elektroapparate-Fabrik GmbH. Deut- tine PP 45 K sche Original-Betriebsanleitung. Druckfehler, Irr- Funk-Platine PP 45 RC 0101.1423.0001 tümer und technische Änderungen vorbehalten. Anschlussstecker Venti- 0157.1397.0000 Die in diesem Dokument erwähnten Marken, lator Handelsmarken und geschützte Warenzeichen... - Seite 29 PP 45 RC / PPB 30 RC control concept 31 Installation dimensions, drilling dis- Preface ............ tances ............Safety ............Installation dimensions for PP 45 O.. 000 Scope of delivery ........Installation dimensions for PP 45 K / Intended use........... PP 45 RC ..........
-
Seite 30: Pp 45 Control Concept
PP 45 control concept PP 45 control concept... -
Seite 31: Pp 45 Rc / Ppb 30 Rc Control Concept
PP 45 RC / PPB 30 RC control concept PP 45 RC / PPB 30 RC control concept... -
Seite 32: Preface
1 Preface 1 Preface 3 Scope of delivery These instructions contain important information Scope of delivery depends on system con- about final installation of the slide-in modules figuration. and internal covers. Final installation takes PP 45 O ventilation unit place once the plastering and paint work is com- •... -
Seite 33: Application Examples
• Control RLS 45 O or RLS 45 K for PP 45 O / PP 45 K and PPB 30 O / PPB 30 • Radio switch DS 45 RC for PP 45 RC / PPB 30 RC. -
Seite 34: Technical Data
With PP 45 RC as amplifier 40 m 6 Technical data For more technical data → rating plate. 6.1 Requirements at the installation For characteristic curves → www.maico-ventil- site atoren.com • Ambient temperature - 15 °C to + 40 °C. -
Seite 35: Unit Overview And Connection Options
7 Unit overview and connection options The following tables show the possible 7 Unit overview and connection number of components and how they can be options combined. 7.1 Combinations K1–K18(RLS 45 K) Ventilation PP 45 O / PPB 30 O PPB 30 K Exhaust External Internal EnOcean unit, PP 45 K... -
Seite 36: Enocean Combinations K30
K25: Exhaust air mode possible with 1x PPB 30 O + RLS 45 O. To start, press the op- tional ventilation level button for > 2 seconds. 7.3 EnOcean combinations K30 (wireless) Ventilation PP 45 RC PP 45 O / Exhaust air Exhaust air EnOcean ex- unit, sensor PP 45 K units, e.g.,... -
Seite 37: Slide-In Module
PP 45 RC ventilation unit. Operating derside of housing and take off cover. voltage for PP 45 O / PP 45 K units = 12 V DC. 5. With PP 45 O and PP 45 K units, route the • Suitable mounting material is to be provided by room air control’s 12 V control cable from the... -
Seite 38: Electrical Connection
8 Installation 12.With PP 45 O units (12 V DC), insert the en- Minimum wall thickness 265 mm, slide-in closed sheet metal in the 2 locking tabs so module must not protrude out of wall sleeve. that it engages. Wire connector with the 12 V... -
Seite 39: Pp 45 Rc
Strip wires of connection cables sufficiently. 8.5 PP 45 RC 1. Mount slide-in module and internal cover as described in PP 45 O / PP 45 K, steps 1 to 11. 2. Loosen screw for circuit board cover, take off circuit board cover. -
Seite 40: Connecting Room Air Controls
8 Installation 5. Insert PP 45 SE elements into the wall sleeve. 8.8 Installation of RLS 45 O and RLS When doing so, guide the connection cable of 45 K the slide-in module through PP 45 SE. Then cut PP 45 SE to a suitable length with a knife 1. -
Seite 41: Installing Radio Switch (Enocean)
8 Installation 5. Fit frame. Ensure that the sensor opening lies 5. Connect EnOcean extension module to the above the integrated PP 45 HYI (if present). RLS 45 K control (RS485)→ Connection and 6. Commissioning ventilation system→ . wiring diagrams [} 81] in the appendix. 6. -
Seite 42: Installation Of Humidity Sensor In Pp 45 Rc
Additional informa- tion can be found in the online commissioning instructions in the internet (download at www.maico-ventilatoren.com)www.maico-ventil- atoren.com). Here you can also download the commissioning software for the RLS 45 K control. This provides you with a wide range of setting parameters for individual system adjustments. -
Seite 43: Service Mode - Operation
9 Commissioning Changing parameter value 9.1 Service mode – operation Once you Once the para- Starting service mode have reached meter has a certain sub- been changed, Press both Operating menu, the the ventilation buttons for mode LED parameters level LEDs 5 seconds. -
Seite 44: Rls 45 O Service Menu
9 Commissioning 9.2 RLS 45 O service menu Factory settings LED flashes slowly LED flashes quickly LEDs Parameters Set value / Bin- Setting / description ary display* Device type on RLS PP 45 (Fan1/Fan2) PPB 30 O The type family, which is con- nected to the Fan1/Fan2 fan in- terface, is selected here. - Seite 45 9 Commissioning Power units (LTs) or Operation without further room air controls (RLS) LTs/RLS Operation with 1 LT or RLS Operation with 2 LTs or RLS Operation with 3 LTs or RLS Slave no. 1 Slave no. 2 Slave no. 3 Adjuster for adding further room air controls (RLS) or power units (LTs) to this room air con-...
-
Seite 46: Rls 45 K Service Menu
9 Commissioning ModBus settings RS 485 inactive ModBus act- ive 9600 Baud ModBus active 19200 Baud This adjuster activates the ModBus and sets the baud rate. Notice: When the Mod- bus interface is active, ex- ternal sensors/LTs/RLS can- not be connected. ModBus address Address 10 Address 11 Address 12... - Seite 47 9 Commissioning is taken into account in another sub-menu (PPB 30 K paramet- ers) Ventilation levels Ventilation level “0” possible Ventilation level “0” blocked If ventilation level “0” is set to blocked, the ventilation units cannot be switched off at this control. The units then run with at least ventilation level 1.
- Seite 48 9 Commissioning For setting an additional func- tion. This can be activated with a button or switch at the 230 V input. * The service menu items are set according to the 3-digit binary code 111, e.g. the adjuster "5" is dis- played as 101 →...
-
Seite 49: Ds 45 Rc Service Menu
9 Commissioning LEDs Parameters Set value / Setting / Binary display* description Not assigned PPB 30 K No PPB 30 K 1 PPB 30 K 2 PPB 30 K 3 PPB 30 K State the number of PPB 30 K units connected to the RS 485 interface here. ModBus settings RS-485 inactive ModBus act- ive 9600 Baud ModBus active 19200 Baud This adjuster activates the ModBus and sets the baud... - Seite 50 9 Commissioning The orange op- Supply air mode 0 Supply air mode without overrun erating mode Supply air mode with overrun of 6 min. (red LED flashes 1x LED 1x) per cycle Supply air mode with overrun of 15 min. (red LED 2x) Supply air mode for exhaust air units (e.g. ER.../ECA...) is released and paramet- erised here.
-
Seite 51: Spare Parts
Cover for circuit boards 0059.1182.0000 unit type and serial number of the ventilation – PP 45 K / PP 45 RC unit. Slide-in module, com- E093.1425.0000 For inquiries, contact plete Maico Elektroapparate-Fabrik GmbH Fan, complete E093.1426.0000 Steinbeisstraße 20 78056 Villingen-Schwenningen, Filter holder 0059.1176.0000 Deutschland Honeycomb ceramics 0192.0657.0000... -
Seite 52: Environmentally Responsible Disposal
3. Observe the respective country-specific and local regulations. Company information © Maico Elektroapparate-Fabrik GmbH. Trans- lation of the original operating instructions. Mis- prints, errors and technical changes are reserved. The brands, brand names and protected trade marks that are referred to in this document refer to their owners or their products. - Seite 53 Sommaire 9.1 Mode Service – Commande ..... 67 Sommaire 9.2 Menu de service RLS 45 O....68 Concept de commande PP 45 ....9.3 Menu de service RLS 45 K ....71 Concept de commande PP 45 RC / 9.4 Menu de service DS 45 RC ....75 PPB 30 RC ..........10 Pièces de rechange........
-
Seite 54: Concept De Commande Pp 45
Concept de commande PP 45 Concept de commande PP 45... -
Seite 55: Concept De Commande Pp 45 Rc / Ppb 30 Rc
Concept de commande PP 45 RC / PPB 30 RC Concept de commande PP 45 RC / PPB 30 RC... -
Seite 56: Avant-Propos
1 Avant-propos 1 Avant-propos 2 Sécurité La présente notice contient des informations im- • Avant le montage, lisez attentivement cette no- portantes sur le montage final des modules tice et les consignes de sécurité fournies. d'insertion et des capots intérieurs. Le mon- •... -
Seite 57: Exemples D'application
• commande RLS 45 O ou RLS 45 K pour PP 45 O / PP 45 K et PPB 30 O / PPB 30 • interrupteur radio DS 45 RC pour PP 45 RC / PPB 30 RC. -
Seite 58: Caractéristiques Techniques
Pour des caractéristiques techniques supplémen- taires → Plaque signalétique. • Température ambiante de - 15 °C à + 40 °C. Pour courbes caractéristiques → www.maico- • Température des fluides max. 40 °C. ventilatoren.com • Humidité max. autorisée dans le local d'installa- tion PP 45 : 70 % (à... -
Seite 59: Vue D'ensemble De L'appareil Et Possi
7 Vue d'ensemble de l'appareil et possibilités de raccordement Les tableaux suivants indiquent le nombre 7 Vue d'ensemble de l'appareil et éventuels de composants et leurs possibilités possibilités de raccordement de combinaisons. 7.1 Combinaisons K1–K18 (RLS 45 K) Appareil PP 45 O / PPB 30 O PPB 30 K Appareils Détecteurs Détecteur... -
Seite 60: Combinaisons Enocean K30 (Radio)
1x PPB 30 O + RLS 45 O. Pour démarrer, ap- puyer sur la touche optionnelle « Niveau de venti- lation » pendant > 2 secondes. 7.3 Combinaisons EnOcean K30 (radio) Appareil de PP 45 RC PP 45 O / Appareils d'air Appareils d'air Détecteurs ra- ventilation, dé- PP 45 K sortant p. -
Seite 61: Module D'insertion
à crans à la partie inférieure du pareil de ventilation PP 45 RC. Tension de ser- boîtier et retirer le cache de protection. vice des appareils PP 45 O / PP 45 K = 5. Sur les appareils PP 45 O et PP 45 K, intro- 12 V CC. -
Seite 62: Branchement Électrique
8 Montage 12.Sur les appareils PP 45 O(12 V CC), intro- moment d'introduire le module d'insertion, duire la tôle fournie dans les 2 ergots d'encli- veiller à ce que l'autocollant Haut / Top soit quetage où elle s'enclenche. Raccorder le dirigé vers le haut. -
Seite 63: Pp 45 Rc
1. Monter le module d'insertion et le capot inté- d'une séparation insuffisante entre la basse rieur comme décrit dans PP 45 O / PP 45 K, tension de 12 V et 230 V. étapes 1 à 11. -
Seite 64: Raccordement Des Commandes D'air Ambiant
8 Montage * Si deux éléments d'insonorisation sont montés, Un système de ventilation PP 45 autorise ainsi nous recommandons de les tourner à 45°, l'un l'utilisation de 4 commandes d'air ambiant au par rapport à l'autre. Cela augmente l'insonorisa- maximum. tion. -
Seite 65: Montage De L'interrupteur Radio (Enocean)
8 Montage * En mode de fonctionnement Ventilation trans- 6. Mise en service du système de ventilation → . versale, cet appareil de ventilation commute sur 8.9 Montage de l'interrupteur radio air sortant. ** Avec un nombre impair d'appareils de ventila- (EnOcean) tion, le plus petit nombre d'appareils sera connec- Dès que le mode Radio est activé, on peut procé-... -
Seite 66: Montage Du Détecteur D'humidité
8 Montage 4. Installer le module d'extension EnOcean PP 8.10.2 Montage du détecteur d'humidité dans 45 EO. Pour tout complément d'information → RLS 45 O ou RLS 45 K Instructions d'utilisation des accessoires. Le 1. Installer la commande d'air ambiant comme cas échéant, prévoir un boîtier de distribution décrit précédemment. -
Seite 67: Mise En Service
Vous trouverez des informations supplémentaires dans la notice de mise en service sur internet (téléchargement sous www.maico-ventilatoren.comwww.maico-venti- latoren.com). Vous pouvez aussi télécharger le logiciel de mise en service pour la com- mande RLS 45 K. Ce logiciel vous offre plu- sieurs paramètres de réglage pour une adap-... -
Seite 68: Menu De Service Rls 45 O
9 Mise en service ** Sur les appareils RC, les 3 LED s'allument et Dès qu'un Les LED de ni- s'éteignent l'une après l'autre. La valeur de para- sous-menu veau de venti- mètre est reprise, le menu Service terminé. donné est at- lation cli- teint, les pa- gnotent après... - Seite 69 9 Mise en service Nombre de paires d'ap- 1 paire d'appareils PP 45 ou pareils / appareils reliés 1 PPB 30 à RLS (Fan1 / Fan2) 2 paires d'appareils PP 45 ou 2 PPB 30 3 paires d'appareils PP 45 ou 3 PPB 30 Nombre impair 3 appareils PP 45 Nombre impair 5 appareils PP 45 Le nombre d'appareils raccor- dés à...
- Seite 70 9 Mise en service d'air ambiant (RLS) ou élé- ments de puissance (LT). Exemple : deux autres RLS (RLS #2 et #3) sont raccordées à la RLS #1. Valeur de réglage = 2. Choisir sur RLS #2 la valeur de réglage 4 et sur RLS #3 la va- leur de réglage 5.
-
Seite 71: Menu De Service Rls 45 K
9 Mise en service Réglages ModBus RS 485 inactive ModBus actif 9600 Baud ModBus actif 19200 Baud Ce module de réglage permet d'activer le ModBus et de ré- gler le taux de transfert. At- tention : si l'interface Modbus est active, il est impossible de raccorder des détecteurs externes / LT / RLS. - Seite 72 9 Mise en service Nombre de paires d'ap- 1 paire d'appareils PP 45 ou pareils / appareils reliés 1 PPB 30 à RLS (Fan1 / Fan2) 2 paires d'appareils PP 45 ou 2 PPB 30 3 paires d'appareils PP 45 ou 3 PPB 30 Nombre impair 3 appareils PP 45 Nombre impair 5 appareils PP 45 Le nombre d'appareils raccor- dés à...
- Seite 73 9 Mise en service Module de réglage pour étendre cette commande d'air ambiant à d'autres commandes d'air ambiant (RLS) ou élé- ments de puissance (LT). Exemple : deux autres RLS (RLS #2 et #3) sont raccordées à la RLS #1. Valeur de réglage = 2.
- Seite 74 9 Mise en service teurs externes 0 détecteur interne + 3 détec- teurs externes Sélectionnez combien de dé- tecteurs internes et externes sont raccordés / combinés. Le détecteur interne PP 45 HYI et les détecteurs externes PP 45 HY, PP 45 CO2 et PP 45 VOC sont disponibles. EnOcean Module EnOcean inexistant Module EnOcean existant Ce module de réglage permet d'activer l'utilisation du module...
-
Seite 75: Menu De Service Ds 45 Rc
9 Mise en service Réglages ModBus RS-485 inactive ModBus actif 9600 Baud ModBus actif 19200 Baud Ce module de réglage permet d'activer le ModBus et de régler le taux de transfert. Attention : si l'interface Modbus est active, il est impossible de raccorder PPB 30 K ou des dé- tecteurs externes / LT / RLS. - Seite 76 9 Mise en service La LED orange Détecteur Inactif de mode de actif (LED rouge 1x) fonctionnement Le détecteur d'humidité interne PP 45 HYI est clignote 2x de activé ici. Ce détecteur peut être installé ulté- façon cyclique rieurement en option (seulement dans l'appa- reil maître) et n'est pas fourni.
-
Seite 77: Pièces De Rechange
Filtre PP 45 G2 : Pack 0093.0273 méro de série de l'appareil de ventilation. de filtres de 2 filtres G2 Adressez vos questions à : (non tissé) Maico Elektroapparate-Fabrik GmbH Filtre PP 45 G3 : Pack 0093.0274 Steinbeisstraße 20 de filtres de 2 filtres G3 78056 Villingen-Schwenningen (non tissé) -
Seite 78: Mentions Légales
3. Respectez les prescriptions nationales et lo- cales. Mentions légales © Maico Elektroapparate-Fabrik GmbH. Tra- duction du mode d'emploi d'origine en langue al- lemande. Sous réserve de fautes d'impression, d'erreurs et de modifications techniques. Les marques, marques commerciales et marques dé- posées, dont il est fait mention dans ce document... -
Seite 79: Einbaumaße, Bohrabstände
écarts de perçage Einbaumaße, Bohrabstände / Installation dimensions, drilling distan- ces / Cotes de montage, écarts de perçage Einbaumaße PP 45 O Bohrabstände Innenabdeckung Einbaumaße PP 45 K / PP 45 RC Abmessungen weiterer Komponenten / Dimensions of further components / Dimensi-... - Seite 80 Einbaumaße, Bohrabstände / Installation dimensions, drilling distances / Cotes de montage, écarts de perçage Composant Dimensions (lxhxp) Commande d'air ambi- 80 x 80 x 49 mm RLS 45 O / RLS 45 K Interrupteur radio DS 80 x 80 x 15 mm 45 RC Élément de puissance 80 x 80 x 49 mm...
-
Seite 81: Anschluss- Und Verdrahtungspläne
Anschluss- und Verdrahtungspläne / Connection and wiring diagrams / Schémas de raccordement et de câblage Anschlussplan RLS 45 O / PP 45 O / Connection diagram for RLS 45 O / PP 45 O / Sché- ma de raccordement RLS 45 O / PP 45 O... - Seite 82 Anschluss- und Verdrahtungspläne / Connection and wiring diagrams / Schémas de raccor- dement et de câblage RLS 45 O Raumluftsteuerung PushPull 45 Ob- jekt PP 45 O Lüftungsgerät PushPull 45 Objekt Fan 1.1 Lüftungsgerät 1, Gerätepaar 1 Fan 2.1 Lüftungsgerät 2, Gerätepaar 1 Fan 1.2 Lüftungsgerät 1, Gerätepaar 2 Fan 2.2 Lüftungsgerät 2, Gerätepaar 2 Fan 1.3 Lüftungsgerät 1, Gerätepaar 3 Fan 2.3 Lüftungsgerät 2, Gerätepaar 3 UP-L...
-
Seite 83: Rls 45 Opp 45 O
Anschluss- und Verdrahtungspläne / Connection and wiring diagrams / Schémas de raccor- dement et de câblage PP 45 O Appareil de ventilation PushPull 45 Objet RLS 45 O PushPull 45 Object room air control Fan 1.1 Appareil de ventilation 1, paire d'ap- pareils 1 PP 45 O PushPull 45 Object ventilation unit Fan 2.1 Appareil de ventilation 2, paire d'ap- Fan 1.1 Ventilation unit 1, unit pair 1... -
Seite 84: Anschlussplan Rls 45 O / Pp 45 O . 81 Anschlussplan Rls 45 K / Pp 45 K
Anschluss- und Verdrahtungspläne / Connection and wiring diagrams / Schémas de raccor- dement et de câblage Anschlussplan RLS 45 K / PP 45 K / Connection diagram for RLS 45 K / PP 45 K / Schéma de raccordement RLS 45 K / PP 45 K RLS 45 K Raumluftsteuerung PushPull 45 Komfort... - Seite 85 Anschluss- und Verdrahtungspläne / Connection and wiring diagrams / Schémas de raccor- dement et de câblage PP 45 K Lüftungsgerät PushPull 45 Komfort Fan 1.1 Lüftungsgerät 1, Gerätepaar 1 Fan 2.1 Lüftungsgerät 2, Gerätepaar 1 Fan 1.2 Lüftungsgerät 1, Gerätepaar 2 Fan 2.2 Lüftungsgerät 2, Gerätepaar 2 Fan 1.3 Lüftungsgerät 1, Gerätepaar 3 Fan 2.3 Lüftungsgerät 2, Gerätepaar 3 Taster/Schalter Zusatzfunktion (Einschlaf-, Intensiv-, Zuluftbetrieb-, Sicherheits-Funktion) Einbindung der Abluftgeräte erfolgt...
- Seite 86 Anschluss- und Verdrahtungspläne / Connection and wiring diagrams / Schémas de raccor- dement et de câblage PP 45 K Appareil de ventilation PushPull 45 Confort RLS 45 K PushPull 45 Comfort room air con- Fan 1.1 Appareil de ventilation 1, paire trol d'appareils 1 PP 45 K PushPull 45 Comfort ventilation unit Fan 2.1 Appareil de ventilation 2, paire d'appareils 1...
-
Seite 87: Schéma De Raccordement Rls 45 O - Bus Système
Anschluss- und Verdrahtungspläne / Connection and wiring diagrams / Schémas de raccor- dement et de câblage Anschlussplan RLS 45 O – Systembus / Connection diagram for RLS 45 O – System bus / Schéma de raccordement RLS 45 O – Bus système RLS 45 O Raumluftsteuerung PushPull 45 Objekt... - Seite 88 Anschluss- und Verdrahtungspläne / Connection and wiring diagrams / Schémas de raccor- dement et de câblage PP 45 HY Feuchtesensor PP 45 zur UP- Montage PP 45 CO2 CO2-Sensor PP 45 zur UP-Mon- tage PP 45 VOC VOC-Sensor PP 45 zur UP-Mon- tage X1.1 Netzanschlussklemme RLS 45 O X1.2 Steckerbuchse Fan/Bus Steckerbuchse Bus RS-485 Fan 1.1-1.3 Lüftungsgerät 1, 3, 5 an RLS...
- Seite 89 Anschluss- und Verdrahtungspläne / Connection and wiring diagrams / Schémas de raccor- dement et de câblage RLS 45 O PushPull 45 Object room air con- RLS 45 O Commande d'air ambiant Push- trol Pull 45 Objet PP 45 LT PP 45 power unit PP 45 LT Élément de puissance PP 45 PP 45 HY PP 45 humidity sensor for flush PP 45 HY Détecteur d'humidité...
-
Seite 90: Schéma De Raccordement Rls 45 K - Bus Système
Anschluss- und Verdrahtungspläne / Connection and wiring diagrams / Schémas de raccor- dement et de câblage Anschlussplan RLS 45 K – Systembus / Connection diagram for RLS 45 K – System bus / Schéma de raccordement RLS 45 K – Bus système... - Seite 91 Anschluss- und Verdrahtungspläne / Connection and wiring diagrams / Schémas de raccor- dement et de câblage RLS 45 K Raumluftsteuerung PushPull 45 Komfort PP 45 LT Leitungsteil PP 45 PP 45 HY Feuchtesensor PP 45 zur UP- Montage PP 45 CO2 CO2-Sensor PP 45 zur UP- Montage PP 45 VOC VOC-Sensor PP 45 zur UP- Montage X1.1 Netzanschlussklemme...
- Seite 92 Anschluss- und Verdrahtungspläne / Connection and wiring diagrams / Schémas de raccor- dement et de câblage RLS 45 K PushPull 45 Comfort room air RLS 45 K Commande d'air ambiant Push- control Pull 45 Confort PP 45 LT PP 45 power unit PP 45 LT Élément de puissance PP 45 PP 45 HY PP 45 humidity sensor for flush PP 45 HY Détecteur d'humidité...
-
Seite 93: Anschlussplan Rls 45 O / Rls
Anschluss- und Verdrahtungspläne / Connection and wiring diagrams / Schémas de raccor- dement et de câblage cordement peut aussi être uti- lisé comme interface Modbus RTU. Anschlussplan RLS 45 O / RLS 45 K – ModBus / Connection diagram for RLS 45 O / RLS 45 K–... - Seite 94 Anschluss- und Verdrahtungspläne / Connection and wiring diagrams / Schémas de raccor- dement et de câblage RLS 45 K PushPull 45 Comfort room air control ModBus interface also available for RLS 45 O. X1.1 Mains connection terminal X1.2 Fan/bus connector bush Connection cable for building control system (ModBus).
-
Seite 95: Anschlussplan Pp 45 Rc
Anschluss- und Verdrahtungspläne / Connection and wiring diagrams / Schémas de raccor- dement et de câblage Anschlussplan PP 45 RC / PP 45 RC connection diagram / Schéma de raccordement PP 45 RC PP 45 RC Lüftungsgerät PushPull 45 RC (Funk) Anschlussleitung Netz, max. zulässi- ger Leitungsquerschnitt = 1,5 mm Empfohlener Leitungstyp: NYM- J 3 x 1,5 mm... - Seite 96 Anschluss- und Verdrahtungspläne / Connection and wiring diagrams / Schémas de raccor- dement et de câblage PP 45 RC PushPull 45 RC ventilation unit (wi- reless) Mains connection cable, max. per- missible cable cross-section = 1.5 mm Recommended cable type: NYM- J 3 x 1,5 mm PP 45 RC Appareil de ventilation Push- Pull 45 RC (radio) Câble de raccordement secteur, sec- tion de câble max.
-
Seite 97: Produktdatenblätter
Produktdatenblätter / Product data sheets / Fiches techniques du produit Produktdatenblätter / Product data sheets / Fiches techniques du produit PP 45 O / PP 45 K... -
Seite 98: Pp 45 O / Pp 45 K Mit Pp 45 Hyi
Produktdatenblätter / Product data sheets / Fiches techniques du produit PP 45 O / PP 45 K mit PP 45 HYI... - Seite 99 Produktdatenblätter / Product data sheets / Fiches techniques du produit PP 45 RC...
-
Seite 100: Pp 45 Rc Mit Pp 45 Hyi
Produktdatenblätter / Product data sheets / Fiches techniques du produit PP 45 RC mit PP 45 HYI... - Seite 101 Notizen...
- Seite 104 Maico Elektroapparate-Fabrik GmbH Steinbeisstr. 20 78056 Villingen-Schwenningen Deutschland Service +49 7720 6940 info@maico.de 0185.1213.0003_RLF.9_04.22_DSW-AS...