Zanussi ZCAN26EW1 Benutzerinformation
Vorschau ausblenden
Andere Handbücher für ZCAN26EW1:
- Benutzerinformation (77 Seiten) ,
- Benutzerinformation (65 Seiten) ,
- Benutzerinformation (53 Seiten)
Inhaltsverzeichnis

Verwandte Anleitungen für Zanussi ZCAN26EW1


Inhaltszusammenfassung für Zanussi ZCAN26EW1
- Seite 1 User Manual GETTING STARTED? EASY. ZCAN26EW1 DE Benutzerinformation Gefriertruhe FR Notice d'utilisation Congélateur coffre Istruzioni per l’uso Congelatore a pozzo EN User Manual Chest Freezer...
-
Seite 2: Sicherheitshinweise
BESUCHEN SIE UNSERE WEBSITE, UM: Anwendungshinweise, Prospekte, Informationen zu Fehlerbehebung, Service und Reparatur zu erhalten: www.zanussi.com/support SICHERHEITSHINWEISE Lesen Sie vor der Montage und dem Gebrauch des Geräts zuerst die Bedienungsanleitung. Bei Verletzungen oder Schäden infolge nicht ordnungsgemäßer Montage oder Verwendung übernimmt der Hersteller keine Haftung. - Seite 3 Dieses Gerät ist für den Hausgebrauch in einem • Einfamilienhaus in Innenräumen bestimmt. Dieses Gerät darf in Büros, Hotelzimmern, Gästezimmern in • Pensionen, Bauernhöfen und anderen ähnlichen Unterkünften verwendet werden, wenn diese Nutzung das (durchschnittliche) Nutzungsniveau im Haushalt nicht überschreitet. Um eine Kontaminierung von Lebensmitteln zu vermeiden, •...
-
Seite 4: Sicherheitsanweisungen
SICHERHEITSANWEISUNGEN MONTAGE • Achten Sie darauf, elektrische Bauteile (wie Netzstecker, Netzkabel und Kompressor) nicht WARNUNG! Die Montage des Geräts zu beschädigen. Wenden Sie sich an den darf nur von einer qualifizierten autorisierten Kundendienst oder einen Elektriker, Fachkraft durchgeführt werden. um die elektrischen Bauteile auszutauschen. •... -
Seite 5: Innenbeleuchtung
• Frieren Sie aufgetaute Lebensmittel nicht wieder ausschließlich Originalersatzteile verwendet ein. werden. • Befolgen Sie die Hinweise auf der Verpackung • Bitte beachten Sie, dass eigene Reparaturen zur Aufbewahrung tiefgekühlter Lebensmittel. oder Reparaturen, die nicht von Fachkräften • Wickeln Sie die Lebensmittel in durchgeführt werden, die Sicherheit des Geräts Lebensmittelkontaktmaterial ein, bevor Sie sie in beeinträchtigen und zum Erlöschen der Garantie... -
Seite 6: Abmessungen
ABMESSUNGEN 85° Gesamtabmessungen Platzbedarf insgesamt im Betrieb 1) Höhe, Breite und Tiefe des Geräts einschließlich Griff plus des notwendigen Freiraums für die Zirku- lation der Kühlluft, zuzüglich des Platzes, der not- wendig ist, um eine Türöffnung bis zu dem minima- 1) Breite, Höhe und Tiefe des Geräts ohne Griff len Winkel zu ermöglichen, der die Entfernung der Innenausstattung erlaubt... -
Seite 7: Positionierung
lassen Sie das Gerät gemäß den geltenden Es muss möglich sein, das Gerät vom Vorschriften von einem qualifizierten Elektriker Netz zu trennen. Daher muss der erden. Stecker nach der Installation • Der Hersteller übernimmt keinerlei Haftung bei zugänglich bleiben. Missachtung der vorstehenden Sicherheitshinweise. -
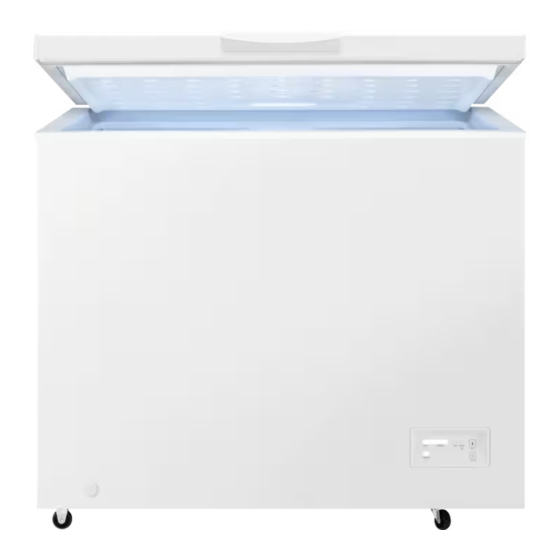
Seite 8: Gesamtansicht
GESAMTANSICHT GERÄTEBESCHREIBUNG Griff Äußerer Ablassstopfen Korb Räder Bedienfeld BEDIENFELD BEDIENFELD Temperaturanzeige SUPER-Anzeige SET-Taste AUS-Taste Betriebsanzeige EIN-/AUSSCHALTEN 1. Schalten Sie das Gerät durch Einstecken des Netzsteckers in die Steckdose ein. 2. Leuchten die Anzeigen nicht, halten Sie die AUS-Taste 3 Sekunden gedrückt. -
Seite 9: Vor Der Ersten Verwendung
3. Um das Gerät auszuschalten, halten Sie die FUNKTION SUPER AUS-Taste 3 Sekunden gedrückt. Die SUPER-Funktion ist eine Schnellgefrierfunktion, die die Tiefkühlung neu TEMPERATURREGELUNG hinzukommender Lebensmittel beschleunigt und gleichzeitig die bereits tiefgekühlten Lebensmittel Einstellen der Temperatur: vor unerwünschter Erwärmung schützt. 1. -
Seite 10: Lagern Von Gefrorenen Lebensmitteln
Schalten Sie die Funktion SUPER 24 VORSICHT! Kam es zum Beispiel Stunden vor dem Einlegen von durch einen Stromausfall, der länger Lebensmitteln in das Gerät ein. dauerte als der in der Tabelle mit den technischen Daten angegebene Wert Der Gefriervorgang dauert 24 Stunden: Legen Sie (siehe „Lagerzeit bei Störung“), zu während dieses Zeitraums keine weiteren einem ungewollten Abtauen, dann... -
Seite 11: Einkaufstipps
• Lassen Sie ausreichend Platz um die Lebensmittel möglicherweise nicht unter den Lebensmittel herum, damit die Luft frei optimalen Bedingungen gelagert und das zirkulieren kann. Auftauen hat eventuell bereits begonnen. • Die Haltbarkeit von Lebensmitteln ist auf dem • Um den Auftauprozess zu minimieren, kaufen Etikett der Lebensmittelverpackung angegeben. -
Seite 12: Reinigung
REINIGUNG VORSICHT! Ziehen Sie vor jeder Wartungsmaßnahme immer den Netzstecker aus der Steckdose. Benutzen Sie zur Reinigung des Innenraums keinesfalls Putzmittel, Scheuerpulver, stark parfümierte Reinigungsmittel oder Wachspolituren. Reinigen Sie das Gerät nicht mit einem Dampfstrahlreiniger. Bitte achten Sie darauf, das Kühlsystem nicht zu beschädigen. - Seite 13 5. Stellen Sie einen Behälter unter den äußeren Achten Sie darauf, dass das Wasser Ablassstopfen. nicht aus dem Behälter spritzt. 6. Ziehen Sie den äußeren Ablassstopfen heraus. 8. Reinigen Sie den Innenraum und trocknen Sie ihn gründlich. 9. Schalten Sie das Gerät ein. 10.
- Seite 14 Störung Mögliche Ursache Lösung Das Gerät funktioniert nicht. Das Gerät ist ausgeschaltet. Schalten Sie das Gerät ein. Der Netzstecker ist nicht richtig Überprüfen Sie, ob der Gerä- in die Netzsteckdose einge- testecker richtig eingesteckt steckt. ist. Die Netzsteckdose hat keine Schließen Sie das Gerät an ei- Netzspannung.
- Seite 15 Störung Mögliche Ursache Lösung Die Funktion SUPER ist einge- Siehe Abschnitt „Funktion SU- schaltet. PER“. Zu viel Frost und Eis. Der Deckel ist nicht richtig ge- Prüfen Sie, ob der Deckel rich- schlossen oder die Dichtung tig schließt. Reinigen Sie die hat sich verformt/ist ver- Dichtung oder ersetzen Sie sie schmutzt.
-
Seite 16: Geräusche
GERÄUSCHE SSSRRR! BRRR! CLICK! HISSS! BLUBB! TECHNISCHE DATEN Die technischen Daten befinden sich auf dem Frequenz 50 Hz Typenschild innen im Gerät sowie auf der Energieplakette. Spannung 220 - 240 V INFORMATIONEN FÜR PRÜFINSTITUTE Die Installation und die Vorbereitung des Geräts für Bedienungsanleitung in Kapitel 3 beschrieben. - Seite 17 GARANTIE Kundendienst Servicestellen Industriestrasse 10 Le Trési 6 Via Violino 11 5506 Mägenwil 1028 Préverenges 6928 Manno Morgenstrasse 131 3018 Bern Langgasse 10 9008 St. Gallen Am Mattenhof 4a/b 6010 Kriens Schlossstrasse 1 4133 Pratteln Comercialstrasse 19 7000 Chur Ersatzteilverkauf Industriestrasse 10, 5506 Garantieleistung umfasst die Kosten für Material, Mägenwil, Tel.
-
Seite 18: Sécurité Des Enfants Et Des Personnes Vulnérables
VISITEZ NOTRE SITE WEB POUR : Obtenir des conseils d’utilisation, des brochures, un dépanneur, des informations sur le service et les réparations : www.zanussi.com/support INFORMATIONS DE SÉCURITÉ Avant d'installer et d'utiliser cet appareil, lisez soigneusement les instructions fournies. Le fabricant ne pourra être tenu pour responsable des blessures et dégâts résultant d'une mauvaise... - Seite 19 Cet appareil peut être utilisé dans les bureaux, les chambres • d’hôtel, les chambres d’hôtes, les maisons d’hôtes de ferme et d’autres hébergements similaires lorsque cette utilisation ne dépasse pas le niveau (moyen) de l’utilisation domestique. Pour éviter la contamination des aliments, respectez les •...
-
Seite 20: Consignes De Sécurité
CONSIGNES DE SÉCURITÉ INSTALLATION service après-vente agréé ou un électricien pour changer les composants électriques. AVERTISSEMENT! L'appareil doit • Le câble d'alimentation doit rester en dessous être installé uniquement par un du niveau de la fiche secteur. professionnel qualifié. • Ne branchez la fiche secteur dans la prise secteur qu'à... -
Seite 21: Mise Au Rebut
• Emballez les aliments dans un emballage adapté • Veuillez noter qu’une autoréparation ou une au contact avec des aliments avant de les réparation non professionnelle peuvent avoir placer dans le compartiment congélateur. des conséquences sur la sécurité et annuler la garantie. -
Seite 22: Emplacement
DIMENSIONS 85° Dimensions globales Espace total requis en service 1) hauteur, largeur et profondeur de l’appareil avec la poignée, plus l’espace nécessaire pour la libre circulation de l’air de refroidissement, plus l’espace nécessaire pour autoriser l’ouverture de la porte à 1) la largeur, la hauteur et la profondeur de l’appa- l’angle minimal permettant le retrait de tous les reil sans la poignée... -
Seite 23: Branchement Électrique
pas mise à la terre, branchez l'appareil à une L’appareil doit pouvoir être débranché mise à la terre séparée conformément aux de l’alimentation électrique. C’est réglementations en vigueur, en consultant un pourquoi la prise électrique doit être électricien spécialisé. facilement accessible après •... -
Seite 24: Présentation Générale
PRÉSENTATION GÉNÉRALE DESCRIPTION DE L'APPAREIL Poignée Bouchon de vidange extérieur Panier Roulettes Bandeau de commande BANDEAU DE COMMANDE BANDEAU DE COMMANDE Indicateur de température Voyant SUPER Touche SET (Réglage) Bouton ARRÊT Voyant de fonctionnement MISE EN FONCTIONNEMENT/ARRÊT 1. Pour allumer l’appareil, insérez la fiche dans la prise électrique. -
Seite 25: Avant La Première Utilisation
3. Pour éteindre l'appareil, appuyez sur le bouton SUPER FONCTION ARRÊT pendant 3 secondes. La fonction SUPER accélère la congélation des aliments frais et protège en même temps les RÉGLAGE DE LA TEMPÉRATURE denrées déjà entreposées contre un réchauffement indésirable. Pour régler la température : Pour activer la fonction : 1. - Seite 26 Lancez la fonction SUPER 24 heures ATTENTION! En cas de dégivrage avant de placer des aliments dans involontaire, par exemple en cas de l’appareil. panne de courant, si le courant a été interrompu pendant un délai supérieur Le processus de congélation demande 24 heures. à...
-
Seite 27: Durée De Conservation
• L’ensemble du compartiment du congélateur est détériorés. Si l’emballage est gonflé ou mouillé, adapté à la conservation de produits il n’a peut-être pas été conservé dans des alimentaires congelés. conditions optimales et la décongélation a peut- • Laissez suffisamment d’espace autour des être déjà... -
Seite 28: Entretien Et Nettoyage
ENTRETIEN ET NETTOYAGE Le givre peut s’accumuler sur la surface du châssis AVERTISSEMENT! Reportez-vous ou sur le revêtement intérieur après un certain aux chapitres concernant la sécurité. temps. Il est recommandé de gratter le givre tous les mois NETTOYAGE à l’aide du grattoir à glace en plastique (inclus dans le sac d’accessoires). - Seite 29 1. Mettez à l’arrêt l’appareil. 2. Sortez les denrées congelées, enveloppez-les dans plusieurs couches de papier journal et conservez-les dans un endroit frais. 3. Retirez le bouchon de vidange de l’intérieur de l’appareil. 4. Laissez le couvercle ouvert. 5. Placez un bac sous le bouchon de vidange extérieur.
- Seite 30 Problème Cause probable Solution L’appareil est bruyant. L’appareil n’est pas positionné Vérifiez que l’appareil est sta- correctement. ble. Reportez-vous à la section « Emplacement ». L'appareil est appuyé contre un Déplacez légèrement l’appa- mur ou d'autres objets. reil. Reportez-vous à la section «...
- Seite 31 Problème Cause probable Solution La température est mal réglée. Reportez-vous à la section « Réglementation de tempéra- ture ». Le compresseur ne démarre C’est normal, aucune erreur Le compresseur démarre au pas immédiatement après avoir n’est survenue. bout d’un certain temps. appuyé...
-
Seite 32: Données Techniques
BRUITS SSSRRR! BRRR! CLICK! HISSS! BLUBB! DONNÉES TECHNIQUES Les caractéristiques techniques figurent sur la Fréquence 50 Hz plaque signalétique située sur à l’intérieur de l’appareil et sur l’étiquette énergétique. Tension 220 - 240 V INFORMATIONS POUR LES LABORATOIRES D’ESSAIS L’installation et la préparation de l’appareil pour une correspondre aux indications du chapitre 3 de cette vérification EcoDesign doivent être conformes à... -
Seite 33: En Matière De Protection De L'environnement
GARANTIE Service-clientèle Points de Service Industriestrasse 10 Le Trési 6 Via Violino 11 5506 Mägenwil 1028 Préverenges 6928 Manno Morgenstrasse 131 3018 Bern Langgasse 10 9008 St. Gallen Am Mattenhof 4a/b 6010 Kriens Schlossstrasse 1 4133 Pratteln Comercialstrasse 19 7000 Chur Points de vente de rechange Industriestrasse couvre les frais de mains d’œuvres et de 10, 5506 Mägenwil,Tel. -
Seite 34: Informazioni Di Sicurezza
VISITA IL NOSTRO SITO WEB PER: Ricevere consigli, scaricare i nostri opuscoli, eliminare eventuali anomalie, ottenere informa- zioni sull'assistenza e la riparazione: www.zanussi.com/support INFORMAZIONI DI SICUREZZA Leggere attentamente le istruzioni fornite prima di installare e utilizzare l'apparecchiatura. I produttori non sono responsabili di eventuali lesioni o danni derivanti da un'installazione o un uso scorretti. - Seite 35 Quest’apparecchiatura è progettata per un uso domestico • singolo in un ambiente interno. Quest’apparecchiatura può essere utilizzata in uffici, camere • d'albergo, camere di bed & breakfast, alloggi in agriturismi e altre sistemazioni simili in cui tale utilizzo non superi i livelli di utilizzo domestico (medi).
-
Seite 36: Istruzioni Di Sicurezza
ISTRUZIONI DI SICUREZZA INSTALLAZIONE di alimentazione, il compressore). Contattare il Centro di Assistenza Autorizzato o un elettricista AVVERTENZA! L’installazione per sostituire i componenti elettrici. dell'apparecchiatura deve essere • Il cavo di alimentazione deve rimanere sotto il eseguita da personale qualificato. livello della spina di alimentazione. - Seite 37 ILLUMINAZIONE INTERNA • Tenere presente che la riparazione autonoma o non professionale possono avere conseguenze AVVERTENZA! Pericolo di scosse sulla sicurezza e potrebbero invalidare la elettriche. garanzia. • I seguenti pezzi di ricambio saranno disponibili • Per quanto riguarda la lampada o le lampade per 7 anni dopo la cessazione della produzione all'interno di questo prodotto e le lampade di del modello: termostati, sensori di temperatura,...
- Seite 38 DIMENSIONI 85° Spazio complessivo necessario durante l’u- Dimensioni complessive 1) l'altezza, la larghezza e la profondità dell'appa- recchiatura, compresa la maniglia, più lo spazio ne- cessario per la libera circolazione dell'aria di raf- 1) larghezza, altezza e profondità dell'apparecchia- freddamento, più lo spazio necessario per consen- tura senza la maniglia tire l'apertura della porta con l'angolazione minima che permette la rimozione di tutte le apparecchiatu-...
- Seite 39 collegata a terra, allacciare l'apparecchiatura a Deve essere possibile scollegare una presa di terra separata in conformità alle l’apparecchiatura dalla rete elettrica. norme in vigore, rivolgendosi a un elettricista Eseguire perciò l’installazione facendo qualificato. sì che la spina rimanga facilmente •...
-
Seite 40: Descrizione Dell'apparecchiatura
PANORAMICA DESCRIZIONE DELL’APPARECCHIATURA Maniglia Tappo di scarico esterno Cestello Ruote Pannello dei comandi PANNELLO DEI COMANDI PANNELLO DEI COMANDI Indicatore della temperatura Indicatore SUPER Pulsante SET Pulsante OFF Indicatore di funzionamento ACCENSIONE/SPEGNIMENTO 1. Per accendere l'apparecchio inserire la spina nella presa di corrente. 2. -
Seite 41: Prima Del Primo Utilizzo
3. Per spegnere l'apparecchiatura, premere il SUPER FUNZIONE tasto OFF per 3 secondi. La funzione SUPER accelera il congelamento degli alimenti freschi e, allo stesso tempo, protegge gli REGOLAZIONE DELLA TEMPERATURA alimenti già conservati dal riscaldamento indesiderato. Per impostare la temperatura: Per attivare la funzione: 1. -
Seite 42: Consigli E Suggerimenti Utili
SCONGELAMENTO Il processo di congelamento dura 24 ore: finché non è concluso, non aggiungere altro cibo da Prima dell'utilizzo, i cibi surgelati o congelati congelare possono essere scongelati nel frigorifero o, per un processo più veloce, a temperatura ambiente. CONSERVAZIONE DEI SURGELATI Gli alimenti divisi in piccole porzioni possono Al primo avvio o dopo un periodo di non utilizzo, essere cucinati direttamente, senza essere prima... - Seite 43 • L’intero scomparto del congelatore è adatto alla la confezione è gonfia o bagnata, potrebbe non conservazione di prodotti alimentari surgelati. essere stata conservata nelle condizioni ottimali • Lasciare abbastanza spazio intorno al cibo per e lo sbrinamento potrebbe essere già iniziato. permettere all’aria di circolare liberamente.
-
Seite 44: Pulizia E Cura
PULIZIA E CURA Dopo un certo periodo di utilizzo la brina può AVVERTENZA! Fare riferimento ai accumularsi sulla superficie del telaio del mobiletto capitoli sulla sicurezza. o del rivestimento interno. Si consiglia di rimuovere la brina con l’apposito PULIZIA raschietto in plastica (incluso nel sacchetto degli accessori) ogni mese. -
Seite 45: Risoluzione Dei Problemi
2. Togliere gli eventuali alimenti conservati, avvolgerli in diversi strati di carta di giornale e riporli in un luogo fresco. 3. Rimuovere il tappo di scarico dall'interno dell'apparecchiatura. 4. Lasciare il coperchio aperto. 5. Collocare un vassoio sotto il tappo di scarico esterno. - Seite 46 Problema Causa possibile Soluzione L’apparecchiatura è rumorosa. L’apparecchiatura non è sup- Controllare che l'apparecchia- portata correttamente. tura abbia una posizione stabi- le. Fare riferimento al paragra- fo "Posizione". L’apparecchiatura è a contatto Spostare leggermente l’appa- con la parete o con altri ogget- recchiatura.
- Seite 47 Problema Causa possibile Soluzione La temperatura non è imposta- Fare riferimento al paragrafo ta correttamente. "Regolazione della temperatu- ra". Il compressore non si avvia im- È normale, non si tratta di un’a- Il compressore si avvia dopo mediatamente dopo avere pre- nomalia di funzionamento.
-
Seite 48: Dati Tecnici
RUMORI SSSRRR! BRRR! CLICK! HISSS! BLUBB! DATI TECNICI I dati tecnici sono riportati sulla targhetta dei dati Frequenza 50 Hz applicata sul lato esterno dell’apparecchiatura e sull’etichetta dei valori energetici. Tensione 220 – 240 V INFORMAZIONI PER GLI ISTITUTI DI TEST L'installazione e la preparazione posteriore devono essere conformi a quanto dell'apparecchiatura per qualsiasi verifica di... -
Seite 49: Considerazioni Sull'ambiente
GARANZIA Servizio clienti Servizio dopo vendita Industriestrasse 10 Le Trési 6 Via Violino 11 5506 Mägenwil 1028 Préverenges 6928 Manno Morgenstrasse 131 3018 Bern Langgasse 10 9008 St. Gallen Am Mattenhof 4a/b 6010 Kriens Schlossstrasse 1 4133 Pratteln Comercialstrasse 19 7000 Chur Vendita pezzi di ricambio Industriestrasse 10, fattura, del certificato di garanzia o dello scontrino... -
Seite 50: Safety Information
VISIT OUR WEBSITE TO: Get usage advice, brochures, trouble shooter, service and repair information: www.zanussi.com/support SAFETY INFORMATION Before the installation and use of the appliance, carefully read the supplied instructions. The manufacturer is not responsible for any injuries or damage that are the result of incorrect installation or usage. -
Seite 51: Safety Instructions
accommodation where such use does not exceed (average) domestic usage levels. To avoid contamination of food respect the following • instructions: do not open the door for long periods; – clean regularly surfaces that can come in contact with food –... -
Seite 52: Electrical Connection
• Before carrying out any operations on the • Do not put electrical appliances (e.g. ice cream appliance, remove the plug from the power makers) in the appliance unless they are stated socket. applicable by the manufacturer. • Do not install the appliance close to radiators or •... - Seite 53 SERVICE • Disconnect the appliance from the mains supply. • To repair the appliance contact the Authorised • Cut off the mains cable and discard it. Service Centre. Use original spare parts only. • Remove the door to prevent children and pets to •...
- Seite 54 It must be possible to disconnect the appliance from the mains power Overall dimensions supply. The plug must therefore be easily accessible after installation. POSITIONING This appliance is not intended to be used as a built- in appliance. This appliance should be installed in a dry, well 1) the width, height and depth of the appliance ventilated indoor position.
-
Seite 55: General Overview
Open and close the lid several times to make sure the handle is properly fastened. GENERAL OVERVIEW DESCRIPTION OF THE APPLIANCE Handle Control panel Basket Outer drain plug... -
Seite 56: Control Panel
Wheels CONTROL PANEL CONTROL PANEL 2. The temperature sets 5 seconds after the last press. The exact setting should be chosen keeping in mind that the temperature inside the appliance depends on: • room temperature • how often the lid is opened •... -
Seite 57: Daily Use
DAILY USE WARNING! Refer to Safety chapters. You can remove the basket to get more storage space. CAUTION! In the event of accidental FREEZING FRESH FOOD defrosting, for example due to a power The freezer compartment is suitable for freezing failure, if the power has been off for fresh food and storing frozen and deep-frozen food longer than the value shown in the... -
Seite 58: Shelf Life
Higher temperature setting inside the appliance swollen or wet, it might have not been stored in may lead to shorter shelf life. the optimal conditions and defrosting may have • The whole freezer compartment is suitable for already started. storage of frozen food products. •... -
Seite 59: Defrosting The Freezer
CLEANING CAUTION! Unplug the appliance before carrying out any maintenance operation. Do not use detergents, abrasive products, highly perfumed cleaning products or wax polishes to clean the inner side of the appliance. Do not use the steam cleaners to clean the appliance. Prevent damage to the cooling system. - Seite 60 Make sure the water does not spill out of the tray. 8. Clean the interior and dry it thoroughly. 9. Switch on the appliance. 10. Set the temperature to higher setting and close the lid. Wait two or three hours before you reload previously removed food into the appliance.
- Seite 61 Problem Possible cause Solution The mains plug is not connec- Check if the appliance is plug- ted to the mains socket cor- ged correctly. rectly. There is no voltage in the Connect the appliance to a mains socket. different electrical mains sock- et.
- Seite 62 Problem Possible cause Solution Temperature is set incorrectly. Refer to "Temperature regula- tion" section. The compressor does not start This is normal, no error has oc- The compressor starts after a immediately after pressing the curred. period of time. SUPER, or after changing the temperature.
-
Seite 63: Technical Data
NOISES SSSRRR! BRRR! CLICK! HISSS! BLUBB! TECHNICAL DATA The technical information is situated in the rating Frequency 50 Hz plate on the internal side of the appliance and on the energy label. Voltage 220-240 V INFORMATION FOR TEST INSTITUTES Installation and preparation of the appliance for any as stated in this User Manual at Chapter 3. -
Seite 64: Environmental Concerns
GUARANTEE Customer Service Centres Point of Service Industriestrasse 10 Le Trési 6 Via Violino 11 5506 Mägenwil 1028 Préverenges 6928 Manno Morgenstrasse 131 3018 Bern Langgasse 10 9008 St. Gallen Am Mattenhof 4a/b 6010 Kriens Schlossstrasse 1 4133 Pratteln Comercialstrasse 19 7000 Chur Spare parts service Industriestrasse 10, 5506 covers the costs of materials, labour and travel. - Seite 68 WWW.ZANUSSI.COM/SHOP...