Herunterladen Inhalt Inhalt Diese Seite drucken

Werbung

Verfügbare Sprachen
  • DE

Verfügbare Sprachen

  • DEUTSCH, seite 1
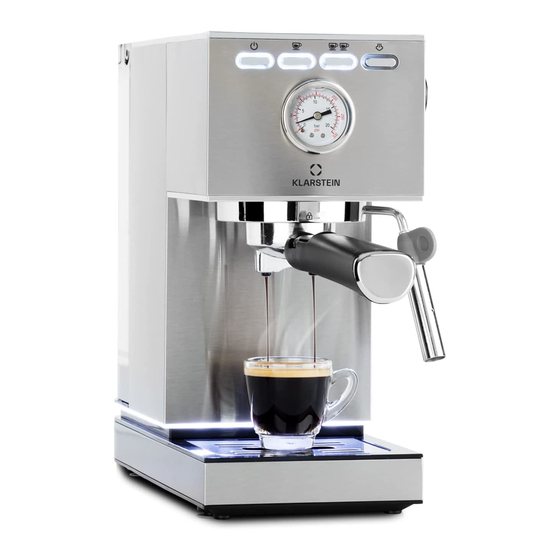
PAUSA
Espressomaschine
Espresso Maker
Cafetera espreso
Cafetière expresso
Macchina per espresso
10038393 10038394
www.klarstein.com

Werbung

Inhaltsverzeichnis
loading

Inhaltszusammenfassung für Klarstein PAUSA

  • Seite 1 PAUSA Espressomaschine Espresso Maker Cafetera espreso Cafetière expresso Macchina per espresso 10038393 10038394 www.klarstein.com...
  • Seite 3: Inhaltsverzeichnis

    Sehr geehrter Kunde, wir gratulieren Ihnen zum Erwerb Ihres Gerätes. Lesen Sie die folgenden Hinweise sorgfältig durch und befolgen Sie diese, um möglichen Schäden vorzubeugen. Für Schäden, die durch Missachtung der Hinweise und unsachgemäßen Gebrauch entstehen, übernehmen wir keine Haftung. Scannen Sie den folgenden QR-Code, um Zugriff auf die aktuellste Bedienungsanleitung und weitere Informationen rund um das Produkt zu erhalten.
  • Seite 4: Sicherheitshinweise

    SICHERHEITSHINWEISE • Lesen Sie diese Bedienungsanleitung sorgfältig durch, um Gefahren durch physische Beschädigung, Brand, elektrischen Stromschlag, Verletzungen und Sachschäden zu vermeiden. • Dieses Gerät ist für das Zubereiten von Kaff ee mittels Druckfi lter („Espresso“) und den Hausgebrauch in Innenräumen bestimmt. •...
  • Seite 5: Geräteübersicht

    GERÄTEÜBERSICHT Wassertankabdeckung Abtropfschale Wassertank 1-Tassen-Filter Schaumknopf 2-Tassen-Filter Bedienfeld Trichter Druckmesser Filterhalter (aluminiumlegiert) Tassenhalterung Kaffeelöffel Schaumdüse Lampenring...
  • Seite 6: Bedienfeld

    BEDIENFELD Schaumknopf Eine Tasse Zwei Tassen Ein-/Austaste BEDIENUNG Erste Verwendung/ Vorbereitung der noch kalten Kaffeemaschine Befüllen Sie den Wassertank mit Wasser und achten Sie darauf, dass das Wasser die Maximalmarkierung im Wassertank nicht übersteigt. Entnehmen Sie den Trichter aus der Verpackung, stecken Sie diesen in den Filter und befestigen Sie beides an der entsprechenden Stelle im Gerät.
  • Seite 7 Einen Espresso aufbrühen Während das Gerät vorheizt, kann das Kaffeepulver (das Kaffeepulver sollte Pulver der Größe 1 sein, nicht zu grob und nicht zu fein) in den Kaffeefilter gefüllt werden und anschließend mit der Pulverpresse komprimiert werden. Entfernen Sie in der Zwischenzeit das Kaffeepulver an den Trichterrändern mit der Hand oder mit einer Bürste (wenn eine Tasse benötigt wird, verwenden Sie den Filter für eine Tasse;...
  • Seite 8 Milchschaumfunktion Drücken Sie zunächst die Taste und anschließend die Taste . Zu diesem Zeitpunkt beginnt die Leuchtanzeige zu blinken. Sobald die Leuchtanzeige permanent leuchtet, ist der Vorheizvorgang beendet. Befüllen Sie 1/3 der Milchkanne mit gekühlter Vollmilch. Tauchen Sie die Dampfdüse 1 cm tief in die Milchoberfläche ein und öffnen Sie anschließend langsam den Dampfknopf, bis vorne aus der Düse Dampf austritt.
  • Seite 9 Zusatzfunktion – Speicherfunktion Nachdem sich das Gerät aufgeheizt hat (sobald die Anzeigeleuchten stetig erleuchtet sind) halten Sie die Taste gedrückt. Aus dem Trichter fließt dann Kaffee heraus. Lassen Sie die Taste los, sobald die gewünschte Kaffeemenge erreicht ist. Das Gerät gibt einen Ton von sich, was bedeutet, dass die Zeit, in welcher Sie die Taste gedrückt hatten, gespeichert wurde.
  • Seite 10: Reinigung Und Wartung

    Entkalken Wenn Sie etwa 500 Mal die Kaffee- oder Dampffunktion benutzt haben, sollte das Gerät manuell entkalkt werden. Gehen Sie hierfür folgendermaßen vor: Fügen Sie etwas Entkalker in den Wassertank hinzu (circa 10 g) und befüllen Sie den Wassertank anschließend bis zur Maximalmarkierung mit frischem Wasser.
  • Seite 11: Fehlerbehebung

    FEHLERBEHEBUNG Problem Mögliche Ursache Lösungsansatz Kein Wasser/ Es befindet sich kein Befüllen Sie den Wassertank mit Wasser, schalten Sie Dampf. Wasser im Wassertank/ das Gerät ein und drücken Sie die Kaffeetaste. der Wassertank ist blockiert. Es wurde nicht genug Drücken Sie die Heißwassertaste und das Gerät Wasser hinzugefügt.
  • Seite 12: Hinweise Zur Entsorgung

    HINWEISE ZUR ENTSORGUNG Wenn es in Ihrem Land eine gesetzliche Regelung zur Entsorgung von elektrischen und elektronischen Geräten gibt, weist dieses Symbol auf dem Produkt oder auf der Verpackung darauf hin, dass dieses Produkt nicht im Hausmüll entsorgt werden darf. Stattdessen muss es zu einer Sammelstelle für das Recycling von elektrischen und elektronischen Geräten gebracht werden.
  • Seite 13: English

    Dear Customer, Congratulations on purchasing this device. Please read the following instructions carefully and follow them to prevent possible damages. We assume no liability for damage caused by disregard of the instructions and improper use. Scan the QR code to get access to the latest user manual and more product information.
  • Seite 14: Safety Instructions

    SAFETY INSTRUCTIONS • Read this booklet thoroughly before using the device to protect against damage to the device, fi re, electric shock and injury to persons or property. • Save this manual for future reference. • This device is intended to prepare coff ee using high pressure (“Espresso”) and to be used in indoors household, only.
  • Seite 15: Device Overview

    DEVICE OVERVIEW Water tank cover Drip tray Water tank 1 cup filter Froth button 2 cup filter Control panel Funnel Pressure gauge Filter holder (aluminium alloy) Cup holder Coffee spoon Froth nozzle Lamp ring...
  • Seite 16: Control Panel

    CONTROL PANEL Froth button One cup Two cups On / off button OPERATION First use/preparation of the still-cold coffee machine Fill the water tank with water, making sure that the water does not exceed the maximum mark in the water tank. Remove the funnel from the packaging, insert it into the filter and attach both to the appropriate place in the device.
  • Seite 17 Brew an espresso While the device is preheating, the coffee powder (the coffee powder should be size 1 powder, not too coarse and not too fine) can be filled into the coffee filter and then compressed with the powder press. In the meantime, remove the coffee powder from the edges of the funnel by hand or with a brush (if one cup is needed, use the filter for one cup;...
  • Seite 18 Milk foam function First press the button and then the button. At this time, the indicator light will start flashing. As soon as the indicator light is permanently on, the preheating process is finished. Fill 1/3 of the milk jug with chilled whole milk. Dip the steam nozzle 1 cm deep into the milk surface and then slowly open the steam knob until steam emerges from the front of the nozzle.
  • Seite 19 Additional function - memory function After the unit has heated up (once the indicator lights steadily lit), press and hold the button. Coffee then flows out of the funnel. Release the button as soon as the desired amount of coffee is reached. The device will emit a sound, which means that the length of time you pressed the button has been saved.
  • Seite 20: Cleaning And Maintenance

    Decalcification After you have used the coffee or steam function about 500 times, the device must be decalcified manually. Proceed as follows: Add some descaler to the water tank (approximately 10 g) and then fill the water tank with fresh water up to the maximum mark. After you have switched on the appliance and the preheating process is complete, turn the steam knob to the position.
  • Seite 21: Troubleshooting

    TROUBLESHOOTING Problem Potential cause Possible solution No water/steam. There is no water in the Fill the water tank with water, switch on the appliance water tank/the water tank and press the coffee button. is blocked. Not enough water has Press the hot water button and the machine will start been added.
  • Seite 22: Disposal Considerations

    DISPOSAL CONSIDERATIONS If there is a legal regulation for the disposal of electrical and electronic devices in your country, this symbol on the product or on the packaging indicates that this product must not be disposed of with household waste. Instead, it must be taken to a collection point for the recycling of electrical and electronic equipment.
  • Seite 23: Datos Técnicos

    Estimado cliente: Le felicitamos por la adquisición de este producto. Lea atentamente el siguiente manual y siga cuidadosamente las instrucciones de uso con el fin de evitar posibles daños. La empresa no se responsabiliza de los daños ocasionados por un uso indebido del producto o por haber desatendido las indicaciones de seguridad.
  • Seite 24: Indicaciones De Seguridad

    INDICACIONES DE SEGURIDAD • Lea atentamente estas instrucciones de uso para evitar riesgos de daños físicos, incendios, descargas eléctricas, lesiones y daños materiales. • Este aparato está destinado a la preparación de café con fi ltro a presión ("espresso") y a su uso doméstico en el interior. •...
  • Seite 25: Vista General Del Aparato

    VISTA GENERAL DEL APARATO Tapa del depósito de agua Bandeja para escurrir Depósito de agua Filtro de 1 taza Botón de espuma Filtro de 2 tazas Panel de control Tolva Portafiltros (aleación de Medidor de presión aluminio) Soporte para tazas Cuchara de café...
  • Seite 26: Panel De Control

    PANEL DE CONTROL Botón de espuma Una taza Dos tazas Botón de encendido/apagado PUESTA EN MARCHA Primer uso/preparación de la máquina de café cuando aún está fría Llene el depósito de agua con agua, asegurándose de que no supere la marca máxima del depósito.
  • Seite 27 Preparar un espresso Mientras se precalienta la máquina, se puede poner el café en polvo (el polvo de café debe ser de tamaño 1, no demasiado grueso ni demasiado fino) en el filtro de café y luego comprimirlo con la prensa de polvo. Mientras tanto, retire el polvo de café...
  • Seite 28 Función de espuma de leche A continuación, pulse el botón y después el botón . En ese momento, el indicador luminoso comienza a parpadear. En cuanto el indicador luminoso esté permanentemente encendido, el proceso de precalentamiento habrá terminado. Llene 1/3 de la jarra de leche con leche entera fría. Sumerja la boquilla de vapor 1 cm en la superficie de la leche y, a continuación, abra lentamente el mando de vapor hasta que salga vapor por la parte delantera de la boquilla.
  • Seite 29 Función adicional: función de memoria Una vez que el aparato se haya calentado (una vez que el indicador ilumine de forma constante), mantenga el botón pulsado . El café sale entonces por el embudo. Suelte el botón en cuanto se alcance la cantidad de café...
  • Seite 30: Limpieza Y Mantenimiento

    Descalcificación Cuando haya utilizado la función de café o vapor unas 500 veces, la máquina debe descalcificarse manualmente. Proceda de este modo: Añada un poco de descalcificador al depósito de agua (unos 10 g) y luego llene el depósito de agua con agua dulce hasta la marca máxima. Una vez que haya encendido la máquina y haya finalizado el proceso de precalentamiento, gire el mando de vapor a la posición .
  • Seite 31: Reparación De Anomalías

    REPARACIÓN DE ANOMALÍAS Anomalía Posible causa Propuesta de solución No hay agua/ No hay agua en el Llene el depósito de agua, encienda la máquina y vapor. depósito de agua/el pulse el botón de café. depósito de agua está bloqueado. No se ha añadido Pulse el botón de agua caliente y la máquina suficiente agua.
  • Seite 32: Indicaciones Sobre La Retirada Del Aparato

    INDICACIONES SOBRE LA RETIRADA DEL APARATO Si en su país existe una disposición legal relativa a la eliminación de aparatos eléctricos y electrónicos, este símbolo estampado en el producto o en el embalaje advierte de que no debe eliminarse como residuo doméstico.
  • Seite 33: Fiche Technique

    Cher client, chère cliente, Toutes nos félicitations pour l’acquisition de ce nouvel appareil. Lisez attentivement les indications suivantes et suivez-les pour éviter d'éventuels dommages. Nous ne saurions être tenus pour responsables des dommages dus au non-respect des consignes et à la mauvaise utilisation de l’appareil.
  • Seite 34: Consignes De Sécurité

    CONSIGNES DE SÉCURITÉ • Lisez attentivement ce mode d'emploi pour éviter les risques de dommages physiques, d'incendie, de décharge électrique, de blessures et de dommages matériels. • Cet appareil est destiné à la préparation de café à l'aide d'un fi ltre à pression («...
  • Seite 35: Aperçu De L'appareil

    APERÇU DE L'APPAREIL Couvercle du réservoir d'eau Bac récepteur Réservoir d'eau Filtre 1 tasse Bouton du mousseur Filtre 2 tasses Panneau de commande Entonnoir Manomètre Porte-filtre (alliage d'aluminium) Porte-tasse Cuillère à café Buse à mousse Anneau de lampe...
  • Seite 36: Panneau De Commande

    PANNEAU DE COMMANDE Bouton du mousseur Une tasse Deux tasses Touche de marche/arrêt FONCTIONNEMENT Première utilisation/préparation de la machine à café froide Remplissez le réservoir d'eau en veillant à ce que l'eau ne dépasse pas la limite de remplissage du réservoir. Retirez l'entonnoir de l'emballage, insérez-le dans le filtre et fixez les deux éléments à...
  • Seite 37 Préparer un espresso Pendant que la machine préchauffe, le café moulu (la café moulu doit être de taille 1, ni trop grossièrement ni trop finement) peut être versé dans le filtre à café, puis comprimé avec le piston à café moulu. Pendant ce temps, retirez le café...
  • Seite 38 Fonction mousseur à lait Appuyez d'abord sur le bouton puis sur le bouton . À ce moment-là, le témoin lumineux commence à clignoter. Une fois que le témoin lumineux est allumé en permanence, le processus de préchauffage est terminé. Remplissez 1/3 du pot à lait avec du lait entier réfrigéré. Plongez la buse de vapeur de 1 cm dans le lait, puis ouvrez lentement le bouton de vapeur jusqu'à...
  • Seite 39 Fonction supplémentaire - fonction de sauvegarde Une fois que l'appareil a chauffé (dès que les témoins lumineux sont allumés en permanence), maintenez le bouton enfoncé . Le café coule ensuite de l'entonnoir. Relâchez le bouton dès que la quantité de café souhaitée est atteinte.
  • Seite 40: Nettoyage Et Maintenance

    Détartrage Lorsque vous avez utilisé la fonction café ou vapeur environ 500 fois, il est nécessaire de détartrer manuellement l'appareil. Pour ce faire, procédez comme suit : Ajoutez un peu de détartrant dans le réservoir d'eau (environ 10 g), puis remplissez le réservoir d'eau fraîche jusqu'à...
  • Seite 41: Résolution Des Problèmes

    RÉSOLUTION DES PROBLÈMES Problème Cause possible Solution Pas d'eau/de Il n'y a pas d'eau dans Remplissez le réservoir d'eau, allumez l'appareil et vapeur. le réservoir d'eau/le appuyez sur la touche café. réservoir d'eau est bloqué. Il n'y a pas assez d'eau. Appuyez sur le bouton d'eau chaude et la machine commence à...
  • Seite 42: Informations Sur Le Recyclage

    INFORMATIONS SUR LE RECYCLAGE Si l'élimination des appareils électriques et électroniques est réglementée dans votre pays, ce symbole sur le produit ou sur l'emballage indique qu'il ne doit pas être mis au rebut avec les ordures ménagères. Vous devez l'acheminer vers un point de collecte pour le recyclage des appareils électriques et électroniques.
  • Seite 43: Dati Tecnici

    Gentile cliente, la ringraziamo per l'acquisto del dispositivo. La preghiamo di leggere attentamente le seguenti istruzioni per l’uso e di seguirle per evitare possibili danni. Non ci assumiamo alcuna responsabilità per danni scaturiti da una mancata osservanza delle avvertenze di sicurezza e da un uso improprio del dispositivo.
  • Seite 44: Avvertenze Di Sicurezza

    AVVERTENZE DI SICUREZZA • Leggere attentamente questo manuale d'uso per evitare il rischio di danni fi sici, incendi, scosse elettriche, lesioni e danni materiali. • Questo dispositivo è destinato alla preparazione di caff è con fi ltro a pressione ("espresso") e per uso domestico al chiuso. •...
  • Seite 45: Descrizione Del Dispositivo

    DESCRIZIONE DEL DISPOSITIVO Coperchio del serbatoio Vaschetta di raccolta Serbatoio dell'acqua Filtro per 1 tazza Manopola per la schiuma Filtro per 2 tazze Pannello di controllo Imbuto Manometro Portafiltro (in lega d'alluminio) Griglia portatazza Cucchiaino Ugello per schiuma Anello luminoso...
  • Seite 46: Pannello Di Controllo

    PANNELLO DI CONTROLLO Manopola per la schiuma Una tazza Due tazze Tasto on/off UTILIZZO Primo utilizzo/Preparazione della macchina per caffè ancora fredda Riempire d'acqua il serbatoio assicurandosi che l'acqua non superi la tacca del livello del massimo. Togliere l'imbuto dall'imballaggio, inserirlo nel filtro e fissare entrambi nell'apposita posizione sul dispositivo.
  • Seite 47 Preparare l'espresso Mentre il dispositivo si riscalda, riempire il filtro con il caffè in polvere (la polvere deve essere di grandezza 1, né troppo fine né troppo grossolana) da comprimere infine con la pressa. Rimuovere nel frattempo il caffè sui bordi dell'imbuto con la mano o con una spazzola (se si necessita di una tazza utilizzare il filtro per una tazza;...
  • Seite 48 Funzione del montalatte Premere prima e infine . A questo punto la spia lampeggia . Non appena la spia lampeggia costantemente, significa che il preriscaldamento si è concluso. Riempire 1/3 della brocca del latte con del latte intero freddo. Immergere di 1 cm l'ugello del vapore nel latte e aprire lentamente la manopola del vapore finché...
  • Seite 49 Funzione aggiuntiva - Funzione di memoria Dopo che il dispositivo si è riscaldato (non appena le spie sono costantemente illuminate), tenere premuto . Dall'imbuto scorre poi il caffè. Rilasciare il tasto non appena è stata raggiunta la quantità di caffè desiderata.
  • Seite 50: Pulizia E Manutenzione

    Decalcificazione Dopo aver usato per circa 500 volte la funzione caffè o vapore, il dispositivo va decalcificato manualmente. Per fare ciò procedere nel modo seguente: Riempire il serbatoio con un po' di anticalcare (circa 10 g) e con acqua fresca fino alla tacca del livello massimo.
  • Seite 51: Correzione Degli Errori

    CORREZIONE DEGLI ERRORI Problema Possibile causa Soluzione Non c'è acqua/ Non c'è acqua nel Riempire il serbatoio d'acqua, accendere il dispositivo vapore. serbatoio/il serbatoio è e premere il tasto del caffè. ostruito. Non è stata aggiunta Quando si preme il tasto dell'acqua bollente il acqua a sufficienza.
  • Seite 52 AVVISO DI SMALTIMENTO Se nel vostro Paese sono vigenti regolamenti legislativi relativi allo smaltimento di dispositivi elettrici ed elettronici, questo simbolo sul prodotto o sull'imballaggio indica che non è consentito smaltire questo prodotto nei rifiuti casalinghi. Il dispositivo deve invece essere portato in un centro di raccolta per il riciclaggio di dispositivi elettrici ed elettronici.

Diese Anleitung auch für:

1003839310038394

Inhaltsverzeichnis