Herunterladen Inhalt Inhalt Diese Seite drucken
Inhaltsverzeichnis

Werbung

Verfügbare Sprachen

Verfügbare Sprachen

Notice d'utili‐
Benutzerin‐
User Manual
sation
formation
Oven
Four
Backofen
JH070B2

Werbung

Inhaltsverzeichnis
loading

Inhaltszusammenfassung für JUNO JH070B2

  • Seite 1 Notice d'utili‐ Benutzerin‐ User Manual sation formation Oven Four Backofen JH070B2...
  • Seite 2: Inhaltsverzeichnis

    Subject to change without notice. VISIT OUR WEBSITE TO: Get usage advice, brochures, trouble shooter, service and repair information: www.juno.de/support SAFETY INFORMATION Before the installation and use of the appliance, carefully read the supplied instructions. The manufacturer is not responsible for any injuries or damage that are the result of incorrect installation or usage.
  • Seite 3: General Safety

    WARNING: Keep children and pets away from the • appliance when it operates or when it cools down. Accessible parts become hot during use. If the appliance has a child safety device, it should be • activated. Children shall not carry out cleaning and user maintenance •...
  • Seite 4: Safety Instructions

    Do not use harsh abrasive cleaners or sharp metal • scrapers to clean the glass door since they can scratch the surface, which may result in shattering of the glass. SAFETY INSTRUCTIONS Installation Width of the front of 594 mm WARNING! Only a qualified the appliance person must install this...
  • Seite 5 • Make sure not to cause damage to the mains plug and to the mains cable. Connecting to terminal board Should the mains cable need to be The appliance has a six-pole terminal replaced, this must be carried out by board.
  • Seite 6: Internal Lighting

    – do not put aluminium foil directly on the bottom of cavity of the Total power (W) Section of the ca‐ appliance. ble (mm²) – do not put water directly into the hot 3 phases: 5 x 2.5 appliance. – do not keep moist dishes and food maximum 10380 2 phases: 4 x 4.0 in the appliance after you finish the...
  • Seite 7: Installation

    • Concerning the lamp(s) inside this • Use original spare parts only. product and spare part lamps sold Disposal separately: These lamps are intended to withstand extreme physical WARNING! Risk of injury or conditions in household appliances, suffocation. such as temperature, vibration, humidity, or are intended to signal •...
  • Seite 8: Product Description

    PRODUCT DESCRIPTION General overview Control panel Knobs for the hob Power lamp / symbol Knob for the heating functions Control knob (for the temperature) Temperature indicator / symbol Air vents for the cooling fan Heating element Lamp Cavity embossment - Aqua cleaning container Shelf support, removable Shelf positions...
  • Seite 9: Before First Use

    Retractable knobs To use the appliance press the knob. The knob comes out. BEFORE FIRST USE WARNING! Refer to Safety chapters. Before first use The oven can emit an odour and smoke during preheating. Make sure that the room is ventilated.
  • Seite 10: Using The Accessories

    Heating Application Heating Application function function To roast large meat joints or This function is designed to poultry with bones on one save energy during cooking. shelf position. To make gra‐ When you use this function, Turbo Moist Fan tins and to brown. the temperature in the cavity Grilling Baking...
  • Seite 11: Additional Functions

    Wire shelf: Push the shelf between the guide bars of the shelf support and make sure that the feet point down. Baking tray: Push the tray between the guide bars of the shelf support. Wire shelf, Baking tray: Push the tray between the guide bars of the shelf support and the wire shelf on the guide bars above.
  • Seite 12: Hints And Tips

    HINTS AND TIPS If you use two baking trays at the same Refer to Safety chapters. time, keep one empty level between them. Cooking meat and fish Leave the meat for approximately 15 Cooking recommendations minutes before carving so that the juice The oven has four shelf positions.
  • Seite 13 (°C) (min) Sweet rolls, 12 baking tray or dripping 35 - 40 pieces Rolls, 9 pieces baking tray or dripping 35 - 40 Pizza, frozen, wire shelf 35 - 40 0.35 kg Swiss roll baking tray or dripping 30 - 40 Brownie baking tray or dripping 30 - 40...
  • Seite 14 (°C) (min) Tartlets, 8 pieces baking tray or dripping 20 - 30 Vegetables, baking tray or dripping 35 - 40 poached, 0.4 kg Vegetarian ome‐ pizza pan on wire shelf 30 - 45 lette Mediterranean baking tray or dripping 35 - 40 vegetables, 0.7 Information for test institutes Tests according to IEC 60350-1.
  • Seite 15: Care And Cleaning

    (°C) (min) Beef Grill Wire max. 20 - 30 Put the wire burger, shelf shelf on the third level and the pieces, dripping dripping pan on 0.6 kg the second level of the oven. Turn the food halfway through the cooking time.
  • Seite 16 How to remove: Shelf supports Remove the shelf supports to clean the oven. Step 1 Turn off the oven and wait un‐ til it is cold. Step 2 Pull the front of the shelf sup‐ port away from the side wall. Step 3 Pull the rear end of the shelf support away from the side...
  • Seite 17 Step 3 Close the oven door halfway Step 4 Put the door on a soft cloth on to the first opening position. a stable surface and release Then lift and pull forward and the locking system to remove remove the door from its seat. the internal glass panel.
  • Seite 18: Troubleshooting

    How to replace: Lamp WARNING! Risk of electric shock. The lamp can be hot. Before you replace the lamp: Step 1 Step 2 Step 3 Turn off the oven. Wait until Disconnect the oven from Put a cloth on the bottom of the oven is cold.
  • Seite 19: Energy Efficiency

    Serial number (S.N.) ......... ENERGY EFFICIENCY Product Information and Product Information Sheet* Supplier's name Juno Model identification JH070B2 944068074 Energy Efficiency Index 95.1 Energy efficiency class Energy consumption with a standard load, conventional 0.89 kWh/cycle mode Energy consumption with a standard load, fan-forced 0.78 kWh/cycle...
  • Seite 20: Environmental Concerns

    Residual heat Keep food warm When the cooking duration is longer than Choose the lowest possible temperature 30 min, reduce the oven temperature to setting to use residual heat and keep a minimum 3 - 10 min before the end of meal warm.
  • Seite 21: Information Sur La Sécurité

    VISITEZ NOTRE SITE WEB POUR : Obtenir des conseils d’utilisation, des brochures, un dépanneur, des informations sur le service et les réparations : www.juno.de/support INFORMATION SUR LA SÉCURITÉ Avant d'installer et d'utiliser cet appareil, lisez soigneusement les instructions fournies. Le fabricant ne pourra être tenu pour responsable des blessures et dégâts...
  • Seite 22: Sécurité Générale

    AVERTISSEMENT : tenez les enfants et les animaux • éloignés de l'appareil lorsqu'il est en cours de fonctionnement ou lorsqu'il refroidit. Les parties accessibles deviennent chaudes en cours d'utilisation. Si l'appareil est équipé d'un dispositif de sécurité enfants, • nous vous recommandons de l'activer. Le nettoyage et l'entretien par l'usager ne doivent pas être •...
  • Seite 23: Consignes De Sécurité

    N'utilisez pas de nettoyeur à vapeur pour nettoyer • l'appareil. N'utilisez pas de produits abrasifs ni de racloirs pointus en • métal pour nettoyer la porte en verre car ils peuvent rayer la surface, ce qui peut briser le verre. CONSIGNES DE SÉCURITÉ...
  • Seite 24: Branchement Électrique

    • L'installation électrique doit comporter un dispositif d'isolation qui vous permet Type Puissance maximale de déconnecter l'appareil du secteur à JKFN604F5 6000 W tous les pôles. Le dispositif d'isolement doit avoir une largeur d'ouverture de JKFN606F5 7600 W contact de 3 mm minimum. •...
  • Seite 25 • Ne laissez pas l'appareil sans surveillance durant son Raccordement au bornier fonctionnement. • Éteignez l'appareil après chaque 1 2 3 4 5 utilisation. 230V 3~ • Soyez prudent lors de l'ouverture de la porte de l'appareil lorsque celui-ci fonctionne. De l'air chaud peut se 1 2 3 4 5 230V 1~ dégager.
  • Seite 26: Éclairage Intérieur

    des taches qui peuvent être • Concernant la/les lampe(s) à l’intérieur permanentes. de ce produit et les lampes de • Cet appareil est exclusivement destiné rechange vendues séparément : Ces à un usage culinaire. Il ne doit pas être lampes sont conçues pour résister à utilisé...
  • Seite 27: Installation

    INSTALLATION Encastrement AVERTISSEMENT! Reportez- vous aux chapitres concernant la sécurité. (*mm) min. 550 min. 560 Fixation du four au meuble DESCRIPTION DE L'APPAREIL Vue d’ensemble Bandeau de commande Manettes de la table de cuisson Voyant / symbole de mise sous tension Manette de sélection des modes de cuisson...
  • Seite 28: Bandeau De Commande

    Bac de la cavité - Bac de nettoyage Niveaux de la grille Aqua Clean Support de grille, amovible Accessoires • Plateau de cuisson Pour les gâteaux et biscuits. • Grille métallique Pour les plats de cuisson, les moules à gâteaux, les rôtis. BANDEAU DE COMMANDE Manettes des zones de cuisson AVERTISSEMENT! Reportez-vous au chapitre «...
  • Seite 29: Utilisation Quotidienne

    Avant la première utilisation Une odeur et de la fumée peuvent s'échapper du four durant le préchauffage. Assurez- vous que la pièce est ventilée. Étape 1 Étape 2 Nettoyez le four Préchauffez le four à vide 1. Retirez les supports de grille amovibles 1.
  • Seite 30: Utilisation Des Accessoires

    Remarques sur : Chaleur tournante humide Mode de Application cuisson Cette fonction était utilisée pour se conformer à la classe d'efficacité Pour cuire et rôtir des ali‐ énergétique et aux exigences Ecodesign ments sur un seul niveau. selon les normes EU 65/2014 et UE Reportez-vous au chapitre Chauffage 66/2014.
  • Seite 31: Fonctions Supplémentaires

    Grille métallique: Poussez la grille entre les barres de gui‐ dage des supports de grille et assurez- vous que les pieds sont orientés vers le bas. Plateau de cuisson: Poussez la plaque entre les rails du sup‐ port de grille. Grille métallique, Plateau de cuisson: Poussez la plaque entre les rails du sup‐...
  • Seite 32: Conseils Et Astuces

    CONSEILS ET ASTUCES Cuisson de gâteaux Reportez-vous aux chapitres N'ouvrez la porte du four qu'aux 3/4 du concernant la sécurité. temps de cuisson défini. Si vous utilisez deux plaques de cuisson Conseils de cuisson en même temps, laissez un niveau libre Le four dispose de quatre niveaux de entre les deux.
  • Seite 33 Chaleur tournante humide Pour de meilleurs résultats, suivez les suggestions indiquées dans le tableau ci- dessous. (°C) (min) Petits pains su‐ Plateau de cuisson ou 35 - 40 crés, (12 pièces) plat à rôtir Petits pains, Plateau de cuisson ou 35 - 40 (9 pièces) plat à...
  • Seite 34 (°C) (min) Muffins, (12 piè‐ Plateau de cuisson ou 30 - 40 ces) plat à rôtir Pâtisserie salée, Plateau de cuisson ou 35 - 45 (16 pièces) plat à rôtir Biscuits à pâte Plateau de cuisson ou 40 - 50 brisée, (20 piè‐...
  • Seite 35: Entretien Et Nettoyage

    (°C) (min) Génoi‐ Chauffage Grille 35 - 45 se, mou‐ Haut/ Bas métalli‐ le à gâ‐ teau de 26 cm Sablé Chauffage Plateau 20 - 35 Préchauffez le Haut/ Bas de cuis‐ four pendant 10 minutes. Toasts, Gril Grille max. 2 à...
  • Seite 36 Nettoyez la cavité après chaque utilisation. L’accumulation de graisse ou d’autres résidus peut provoquer un incendie. De l'humidité peut se déposer dans l'enceinte du four ou sur les vitres de la porte. Pour diminuer la condensation, laissez fonctionner le four pendant 10 minutes avant la cuisson.
  • Seite 37 Éta‐ Éteignez le four. pe 5 Étape Attendez que le four ait refroidi. Séchez la cavité avec un chif‐ fon doux. Comment démonter et installer : Porte La porte du four est dotée de deux panneaux de verre. Vous pouvez retirer la porte du four ainsi que le panneau de verre intérieur afin de le nettoyer.
  • Seite 38 90° Éta‐ Nettoyez les panneaux de verre avec de l'eau savonneuse. Séchez soigneuse‐ pe 7 ment les panneaux de verre. Ne nettoyez pas les panneaux de verre au lave-vais‐ selle. Éta‐ Après le nettoyage, installez le panneau de verre et la porte du four. pe 8 Lorsque le cadre de la porte est installé...
  • Seite 39: Dépannage

    Numéro de série (S.N.) ......... RENDEMENT ÉNERGÉTIQUE Informations produit et Fiche d’informations produit* Nom du fournisseur Juno Identification du modèle JH070B2 944068074 Index d'efficacité énergétique 95.1 Classe d’efficacité énergétique Consommation d'énergie avec charge standard et mo‐ 0.89 kWh/cycle de traditionnel...
  • Seite 40: Économie D'énergie

    Consommation d'énergie avec charge standard et mo‐ 0.78 kWh/cycle de air pulsé Nombre de cavités Source de chaleur Électricité Volume 65 l Type de four Four encastrable sous un plan de travail Masse 27.9 kg * Pour l’Union européenne conformément aux Règlements UE 65/2014 et 66/2014. Pour la République de Biélorussie conformément à...
  • Seite 41 électriques et électroniques. Ne jetez pas produit dans votre centre local de recyclage ou contactez vos services les appareils portant le symbole avec municipaux. les ordures ménagères. Emmenez un tel...
  • Seite 42: Sicherheitshinweise

    Änderungen vorbehalten. BESUCHEN SIE UNSERE WEBSITE, UM: Anwendungshinweise, Prospekte, Informationen zu Fehlerbehebung, Service und Reparatur zu erhalten: www.juno.de/support SICHERHEITSHINWEISE Lesen Sie vor der Montage und dem Gebrauch des Geräts zuerst die Bedienungsanleitung. Bei Verletzungen oder Schäden infolge nicht ordnungsgemäßer Montage oder Verwendung übernimmt der Hersteller keine Haftung.
  • Seite 43: Allgemeine Sicherheit

    Halten Sie sämtliches Verpackungsmaterial von Kindern • fern und entsorgen Sie es ordnungsgemäß. WARNUNG: Halten Sie Kinder und Haustiere von dem • Gerät fern, wenn es in Betrieb oder in der Abkühlphase ist. Die zugänglichen Geräteteile werden beim Betrieb sehr heiß.
  • Seite 44: Sicherheitsanweisungen

    Ziehen Sie die Einhängegitter zuerst vorne und dann • hinten von den Seitenwänden weg. Setzen Sie die Einhängegitter in umgekehrter Reihenfolge ein. Reinigen Sie das Gerät nicht mit einem • Dampfstrahlreiniger. Benutzen Sie zum Reinigen der Glastür keine scharfen • Scheuermittel oder Metallschwämmchen;...
  • Seite 45: Elektrischer Anschluss

    nicht ohne Werkzeug entfernt werden können. Mindestgröße der 560x20 mm • Stecken Sie den Netzstecker erst nach Belüftungsöffnung. Abschluss der Montage in die Öffnung auf der Steckdose. Stellen Sie sicher, dass der Rückseite unten Netzstecker nach der Montage noch Befestigungsschrau‐ 4x25 mm zugänglich ist.
  • Seite 46 Anschluss an die Klemmleiste Gesamtleistung Kabelquerschnitt (mm²) Das Gerät verfügt über eine sechspolige Klemmenleiste. Die Jumper (Brücken) sind 3 Phasen: 5 x 2.5 für den Betrieb an einem 400-V-Drehstrom maximal 10380 2 Phasen: 4 x 4.0 mit einem Neutralleiter eingestellt. 1 Phase: 3 x 6.0 1 = 45 mm 2 = 45 mm...
  • Seite 47: Innenbeleuchtung

    • Um Beschädigungen und Verfärbungen • Reinigen Sie das Gerät regelmäßig, um der Emailbeschichtung zu vermeiden: eine Verschlechterung des – Stellen Sie feuerfestes Geschirr Oberflächenmaterials zu verhindern. oder andere Gegenstände nicht • Reinigen Sie das Geräts mit einem direkt auf den Boden des Geräts. weichen, feuchten Tuch.
  • Seite 48: Montage

    • Schneiden Sie das Netzkabel in der • Entfernen Sie das Türschloss, um zu Nähe des Geräts ab, und entsorgen verhindern, dass sich Kinder, oder Sie es. Haustiere im Gerät einschließen. MONTAGE Montage WARNUNG! Siehe Kapitel Sicherheitshinweise. (*mm) min. 550 min.
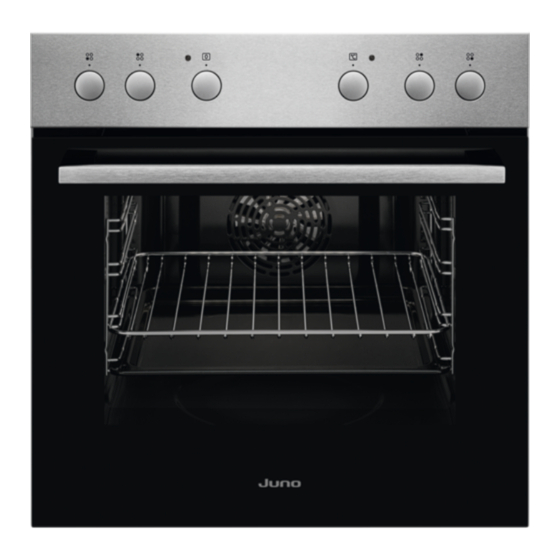
  • Seite 49: Gerätebeschreibung

    GERÄTEBESCHREIBUNG Gesamtansicht Bedienfeld Kochfeld-Einstellknöpfe Betriebskontrolllampe/-symbol Einstellknopf für die Ofenfunktionen Einstellknopf (für die Temperatur) Temperaturanzeige / -symbol Lüftungsöffnungen für den Kühlventilator Heizelement Lampe Ventilator Garraumvertiefung - Behälter für Aqua-Reinigungsfunktion Einschubschienen, herausnehmbar Einschubebenen Zubehör • Backblech Für Kuchen und Plätzchen. • Kombirost Für Kochgeschirr, Kuchenformen, Braten.
  • Seite 50: Vor Der Ersten Verwendung

    Versenkbare Knöpfe 1. Drehen Sie den Knopf im Uhrzeigersinn auf die Stellung 9. Drücken Sie zum Benutzen des Geräts 2. Drehen Sie den Knopf langsam auf den Knopf. Der Knopf kommt dann das Symbol , bis er hörbar heraus. einrastet. Jetzt sind beide Kochzonen eingeschaltet.
  • Seite 51: Funktion

    Ofen‐ Gerät Ofen‐ Gerät funktion funktion Der Backofen ist ausge‐ Diese Funktion ist entwickelt schaltet. worden, um während des Kochvorgangs Energie zu Stellung Feuchte sparen. Wenn Sie diese Umluft Funktion nutzen, kann die Zum Braten oder zum Bra‐ Temperatur im Garraum von ten und Backen von Speisen der eingestellten Temperatur mit derselben Kochtempera‐...
  • Seite 52: Zusatzfunktionen

    umlaufend erhöhten Rand des Rosts ist das Kochgeschirr gegen Abrutschen vom Rost gesichert. Kombirost: Schieben Sie den Rost zwischen die Führungsschienen der Einhängegitter mit den Füßen nach unten zeigend. Backblech: Schieben Sie das Backblech zwischen die Führungsstäbe der Einhängegitter. Kombirost, Backblech: Schieben Sie das Backblech zwischen die Führungsstäbe der Einhängegitter und dem Kombirost auf die Führungsstä‐...
  • Seite 53: Tipps Und Hinweise

    TIPPS UND HINWEISE Wenn Sie zwei Backbleche gleichzeitig Siehe Kapitel nutzen, lassen Sie eine Ebene Sicherheitshinweise. dazwischen frei. Garen von Fleisch und Fisch Garempfehlungen Lassen Sie das Fleisch vor dem Der Backofen hat vier Einschubebenen. Anschneiden etwa 15 Minuten ruhen, damit der Fleischsaft nicht ausläuft.
  • Seite 54 Feuchte Umluft Beachten Sie für beste Ergebnisse die unten in der Tabelle aufgeführten Empfehlungen. (°C) (Min.) Brötchen, süß, Backblech oder tiefes 35 - 40 12 Stück Blech Brötchen, 9 Backblech oder tiefes 35 - 40 Stück Blech Pizza, gefroren, Kombirost 35 - 40 0,35 kg Biskuitrolle...
  • Seite 55: Informationen Für Prüfinstitute

    (°C) (Min.) Muffins, 12 Stück Backblech oder tiefes 30 - 40 Blech Kleingebäck, pi‐ Backblech oder tiefes 35 - 45 kant, 16 Stück Blech Mürbeteigplätz‐ Backblech oder tiefes 40 - 50 chen, 20 Stück Blech Törtchen, 8 Backblech oder tiefes 20 - 30 Stück Blech...
  • Seite 56: Reinigung Und Pflege

    (°C) (Min.) Toast, 4 Grill Kombi‐ Max. 2 - 4 Minuten Backofen 3 Mi‐ rost auf der ers‐ nuten vorheizen. Stück ten Seite, 2 - 3 Minuten auf der zweiten Seite Hambur‐ Grill Kombi‐ Max. 20 - 30 Kombirost in die ger aus rost dritte und Fett‐...
  • Seite 57: Entfernen: Einhängegitter

    Reinigen Sie alle Zubehörteile nach jedem Gebrauch und lassen Sie sie trocknen. Feuchten Sie ein weiches Tuch mit warmem Wasser und einem milden Reinigungsmittel an. Reinigen Sie die Zubehörteile nicht im Geschirr‐ spüler. Reinigen Sie das Zubehör mit Antihaftbeschichtung nicht mit Scheuermitteln Zubehör oder scharfkantigen Gegenständen.
  • Seite 58: Aus- Und Einbau Der: Tür

    Aus- und Einbau der: Tür Die Backofentür hat zwei Glasscheiben. Die Backofentür und die innere Glasscheibe können zur Reinigung ausgebaut werden. Lesen Sie die gesamte Anleitung „Aus- und Einbauen der Tür“, bevor Sie die Glasscheiben entfernen. VORSICHT! Benutzen Sie den Backofen nicht ohne die Glasscheiben. Schritt Öffnen Sie die Backofentür Schritt 2...
  • Seite 59: Austausch: Lampe

    Schritt Reinigen Sie die Glasscheiben mit Wasser und Spülmittel. Trocknen Sie die Glas‐ scheiben sorgfältig ab. Reinigen Sie die Glasscheiben nicht im Geschirrspüler. Schritt Setzen Sie nach der Reinigung die Glasscheibe und die Backofentür ein Bei korrektem Einbau macht die Türabde‐ ckung ein Klickgeräusch.
  • Seite 60: Servicedaten

    Wir empfehlen Ihnen, die Daten hier zu notieren: Modell (MOD.): ......... Produktnummer (PNC) ......... Seriennummer (S.N.) ......... ENERGIEEFFIZIENZ Produktinformationen und Produktdatenblatt* Herstellername Juno Modellidentifikation JH070B2 944068074 Energieeffizienzindex 95.1 Energieeffizienzklasse Energieverbrauch bei Standardbeladung, Ober-/Unter‐ 0.89 kWh/Programm hitze Energieverbrauch bei Standardbeladung, Umluft 0.78 kWh/Programm Anzahl der Garräume Wärmequelle Strom Fassungsvermögen...
  • Seite 61: Energiesparen

    * Für die Europäische Union gemäß EU-Richtlinien 65/2014 und 66/2014. Für die Republik Weißrussland gemäß STB 2478-2017, Anhang G; STB 2477-2017, Anlagen A und B. Für die Ukraine gemäß 568/32020. Die Energieeffizienzklasse gilt nicht für Russland. EN 60350-1 - Elektrische Kochgeräte für den Hausgebrauch - Teil 1: Herde, Backöfen, Dampf‐ garer und Grillgeräte - Verfahren zur Messung der Gebrauchseigenschaften.
  • Seite 64 867368608-A-282021...

Inhaltsverzeichnis