Sunny Health & Fitness SF-RW5987 Bedienungsanleitung
Inhaltsverzeichnis
Verfügbare Sprachen
Verfügbare Sprachen
Quicklinks
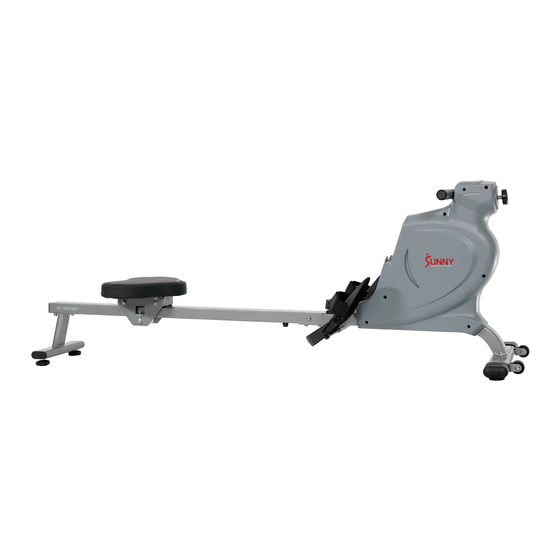
CONVENIENT ROWING MACHINE
IMPORTANT! Please retain owner's manual for maintenance and adjustment instructions. Your satisfaction is
English, Page 13 ~ 19
very
support@sunnyhealthfitness.com or 1-877-90SUNNY (877-907-8669).
¡ IMPORTANTE! Conserve el manual del propietario para las instrucciones de mantenimiento y ajuste.
Español, Page 20 ~ 26
Susatisfacción es muy importante para nosotros, NO DEVUELVA HASTA HABERNOS CONTACTADO:
support@sunnyhealthfitness.com ó 1-877-90SUNNY (877-907-8669).
IMPORTANT! Veuillez conserver le manuel du propriétaire pour les instructions de réglage etd'entretien.Votre
Français, Page 27 ~ 33
satisfaction est trè s importante pour nous, VEUILLEZ NE PAS EFFECTUER DE RETOURAVANT DE NOUS
AVOIR CONTACTÉ: support@sunnyhealthfitness.com ou 1-877-90SUNNY (877-907-8669).
Deutsch, Seite 34 ~ 40
WICHTIG! Bitte bewahren Sie das Benutzerhandbuch für Wartungs- und Einstellanweisungen auf. Ihre
Zufriedenheit ist besonders wichtig für uns, BITTE SCHICKEN SIE DAS PRODUKT NICHT ZURÜCK,
BEVOR SIE SICH MIT UNS IN VERBINDUNG GESETZT HABEN: support@sunnyhealthfitness.com oder
1-877-90SUNNY (877-907-8669).
SF-RW5987
USER MANUAL
important
to
us,
PLEASE
DO
NOT
RETURN
UNTIL
YOU
HAVE
CONTACTED
US:
Inhaltsverzeichnis

Verwandte Anleitungen für Sunny Health & Fitness SF-RW5987


Inhaltszusammenfassung für Sunny Health & Fitness SF-RW5987
- Seite 1 CONVENIENT ROWING MACHINE SF-RW5987 USER MANUAL IMPORTANT! Please retain owner’s manual for maintenance and adjustment instructions. Your satisfaction is English, Page 13 ~ 19 very important PLEASE RETURN UNTIL HAVE CONTACTED support@sunnyhealthfitness.com or 1-877-90SUNNY (877-907-8669). ¡ IMPORTANTE! Conserve el manual del propietario para las instrucciones de mantenimiento y ajuste.
-
Seite 3: Informations De Sécurité Importantes
INFORMATIONS DE SÉCURITÉ IMPORTANTES Nous vous remercions d’avoir choisi notre produit. Pour votre santé et votre sécurité, veuillez utiliser correctement cet appareil. Il est important de lire entièrement le présent manuel avant d’assembler l’appareil et de l’utiliser. L’utilisation sûre et efficace n’est possible que si l’appareil est correctement assemblé, entretenu et utilisé. -
Seite 4: Exploded Diagram
EXPLODED DIAGRAM 1... - Seite 5 EXPLODED DIAGRAM 2...
- Seite 11 TEILELISTE Bezeichnung Spezif. Menge Bezeichnung Spezif. Menge Endkappe Gleitschiene Transporträd Stabilisator Vorne Bolzen M8*40 Stabilisator Hinten Bolzen M8*125 φ28*1.5 Lenkstange Magnetplatte Sitz Magnet φ8*φ16*1.5 Beilagscheibe Bolzen M6*25 φ8 Federscheibe Schraubenmutter φ8*φ1*58 Bolzen M8*20 Sprungfeder Sitzstützbrett Spannungeinstellknopf φ5 U-Form-Halterung Beilagscheibe Bolzen M8*100 Bolzen M5*35...
- Seite 12 Bezeichnung Spezif. Menge Bezeichnung Spezif. Menge Schraube ST4.2*25 Bolzen M4*10 Linke Abdeckung Inbusschlüssel S10, 13, 17, Rechte Abdeckung Schraubenschlü ssel Flaschenhalter Befestigungsplatte S10, 13, 14, Bolzen M8*10 Schraubenschlü ssel Plastik Magnetische Arc φ8*φ20*2.0 Beilagscheibe Platte Computer Bolzen M5*15 φ10*φ5*1.0 Beilagscheibe Sensordraht L=200 Hauptrahmen...
- Seite 13 HARDWARE PACKAGE Ordering Replacement Parts (U.S. and Canadian Customers only) Please provide the following information in order for us to accurately identify the part(s) needed: ✓ The model number (found on cover of manual) ✓ The product name (found on cover of manual) ✓...
- Seite 35 MONTAGEANLEITUNG Wir schätzen Ihre Erfahrung im Umgang mit den Produkten von Sunny Health and Fitness. Fü r Fragen zu Teilen oder Hilfe bei der Fehlerbehebung kontaktieren Sie uns bitte unter support@sunnyhealthfitness.com oder 1-877-90SUNNY (877-907-8669). SCHRITT 1: Entfernen Sie die 2 Bolzen (Nr. 67) und 2 Plastik Beilagscheiben (Nr.
- Seite 36 Wir schätzen Ihre Erfahrung im Umgang mit den Produkten von Sunny Health and Fitness. Fü r Fragen zu Teilen oder Hilfe bei der Fehlerbehebung kontaktieren Sie uns bitte unter support@sunnyhealthfitness.com oder 1-877-90SUNNY (877-907-8669). SCHRITT 3: Stecken Sie die 2 Bolzen (Nr. 28) in das obere Loch Position...
- Seite 37 Wir schätzen Ihre Erfahrung im Umgang mit den Produkten von Sunny Health and Fitness. Für Fragen zu Teilen oder Hilfe bei der Fehlerbehebung kontaktieren Sie uns bitte unter support@sunnyhealthfitness.com oder 1-877-90SUNNY (877-907-8669). SCHRITT 6: Befestigen Sie die Gleitschiene (Nr. 2) am Hauptrahmen (Nr. 80), indem Bolzen (Nr.
-
Seite 38: Pedalriemen-Einstellung
EINSTELLUNGEN UND GEBRAUCHSANWEISUNG VORSICHT! Bewegliche Teile, wie z.B. der Sitz, können zu Schnittverletzungen und Quetschungen führen. Halten Sie während der Benutzung die Hände von der Gleitschiene fern! PEDALRIEMEN-EINSTELLUNG Der Pedalriemen ist verstellbar und kann an die Fußgröße des Benutzers angepasst werden. TRANSPORTIEREN DES RUDERGERÄTES Um das Rudergerät zu transportieren, heben Sie die Stabilisator Hinten (Nr. -
Seite 39: Installation Und Austausch Der Batterie
INSTALLATION UND AUSTAUSCH DER BATTERIE EINLEGEN DER BATTERIEN: 1. Drücken Sie die Verschlussklappe an der Unterseite des Computer (Nr. 69) und entfernen Sie dann den Computer (Nr. 69) vom Hauptrahmen (Nr. 80). Öffnen Sie dann den Klettverschluss oberhalb des Batteriefachs auf der Rückseite des Computer (Nr. 69). 2. - Seite 40 FALTFÜHRUNG VORSICHT! Seien Sie vorsichtig, wenn Sie die Gleitschiene (Nr. 2) vertical zusammenklappen, da Ihr Kopf die Stabilisator Hinten (Nr. 4) berü hren kann. Bei Nichtgebrauch können Sie Platz sparen, indem Sie den Ruderer mit dem Fußpolster (Nr. VORSICHT! 59) aufrecht auf den Boden stellen. Der Sitz (Nr.
-
Seite 41: Funktionen Und Betrieb
TRAININGSCOMPUTER FUNKTIONSTASTEN: MODE: Auswä hlen Spezifikationsmodus und/oder Einschalten desComputers. SET: Um einen Wert fü r ZEIT, ANZAHL oder KALORIEN einzustellen (wenn Sie sich nicht im SCAN-Modus befinden). RESET: Drü cken Sie diese Taste, um ZEIT, ANZAHL oder KALORIEN zurückzusetzen. Halten Sie diese Taste ca. 3 Sekunden lang gedrückt, um alle Werte außer der GESAMTANZAHL zurückzusetzen FUNKTIONEN UND BETRIEB AUTO ON/OFF: Das Gerät schaltet sich automatisch aus, sobald es 4 Minuten lang kein Signal empfängt.