
Verwandte Anleitungen für Klarstein GÄRKELLER PRO


Inhaltszusammenfassung für Klarstein GÄRKELLER PRO
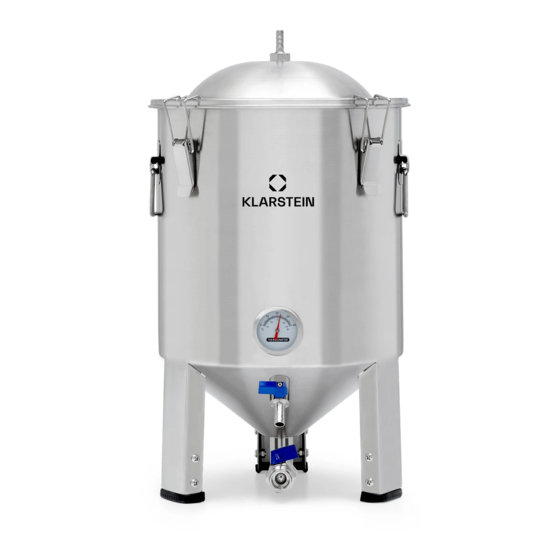
- Seite 1 GÄRKELLER PRO Fermentierkessel Fermenting Kettle Cuve de fermentation Caldera de fermentación Caldaia di fermentazione 10037666 www.klarstein.com...
-
Seite 3: Inhaltsverzeichnis
Sehr geehrter Kunde, wir gratulieren Ihnen zum Erwerb Ihres Gerätes. Lesen Sie die folgenden Hinweise sorgfältig durch und befolgen Sie diese, um möglichen Schäden vorzubeugen. Für Schäden, die durch Missachtung der Hinweise und unsachgemäßen Gebrauch entstehen, übernehmen wir keine Haftung. Scannen Sie den folgenden QR-Code, um Zugriff auf die aktuellste Bedienungsanleitung und weitere Informationen rund um das Produkt zu erhalten. -
Seite 4: Montageteile
MONTAGETEILE Bezeichnung Bild Anzahl Thermometersonde ∅ 3,8 mm ∅ 16 schwarzer Stopfen für Thermometermontage M14-Ausblasstutzen mit O-Ring und M14-Mutter M14 Edelstahl-Stopfen mit O-Ring und M14 Mutter M14 Tauchrohr mit O-Ring und M14 Mutter Drehbarer Gestellarm mit O-Ring Unterlegscheibe für ¾“ Ablassventil (für die zukünftige Verwendung aufbewahren) ∅... -
Seite 5: Zusammenbau
ZUSAMMENBAU Platzieren Sie das Tauchrohr innerhalb des Geräts und fixieren Sie dieses mit der M14 Mutter. Platzieren Sie den schwarzen Stopfen im Loch des Tauchrohrs. Schieben Sie anschließend die Thermometersonde durch das kleine Loch im Stopfen. Ein digitales Thermometer kann ebenfalls direkt mit dem Tauchrohr verwendet werden. -
Seite 6: Fermentierung
Fixieren Sie den Deckel mit den Spannverschlüssen. FERMENTIERUNG Erste Verwendung und Vorbereitung Reinigen Sie das Gerät vor der ersten Verwendung gründlich und spülen Sie dieses durch, da sich durch den Herstellungsprozess Staub- oder Ölrückstände im Gerät befi nden könnten. Zur Reinigung kann Geschirrspülmittel verwendet werden. -
Seite 7: Hersteller
HERSTELLER Manufacturer | Fabricante | Fabricant | Produttore Chal-Tec GmbH, Wallstraße 16, 10179 Berlin, Deutschland (Germany). IMPORTEUR FÜR GROSSBRITANNIEN Importer for Great Britain | Importador para Gran Bretaña | Importateur pour la Grande Bretagne | Importatore per la Gran Bretagna Chal-Tec UK limited Unit 6 Riverside Business Centre Brighton Road... -
Seite 9: Technical Data
Dear Customer, Congratulations on purchasing this device. Please read the following instructions carefully and follow them to prevent possible damages. We assume no liability for damage caused by disregard of the instructions and improper use. Scan the QR code to get access to the latest user manual and more product information. - Seite 10 COMPONENTS Component Image Quantity Probe ∅ 3,8 mm thermometer ∅ 16 black plug for thermometer assembly M14 Blow-Off Barb with O-Ring and M14 nut M14 SS Plug with O-Ring and M14 nut M14 thermowell with O-ring and M14 nut Rotatable racking arm with O-ring Washer for 3/4 "...
- Seite 11 ASSEMBLY Please place the thermowell inside the fermenter and secure in place with an M14 nut Place the black plug into the hole of thermowell, then get the probe of thermometer go through the small hole of plug. A digital thermometer can also be used directly with thermowell.
- Seite 12 Lock the lid with the buckles. FERMENTATION Initial use and preparation Please clean and fl ush fermenter thoroughly before fi rst use as dust and oils can remain from manufacturing We have found that using dish soap will work well. After the fi rst through clean, soak with hot water and StarSan (or other sanitizer).
- Seite 13 HERSTELLER Manufacturer | Fabricante | Fabricant | Produttore Chal-Tec GmbH, Wallstraße 16, 10179 Berlin, Deutschland (Germany). IMPORTEUR FÜR GROSSBRITANNIEN Importer for Great Britain | Importador para Gran Bretaña | Importateur pour la Grande Bretagne | Importatore per la Gran Bretagna Chal-Tec UK limited Unit 6 Riverside Business Centre Brighton Road...
-
Seite 15: Fiche Technique
Cher client, chère cliente, Toutes nos félicitations pour l’acquisition de ce nouvel appareil. Lisez attentivement les indications suivantes et suivez-les pour éviter d'éventuels dommages. Nous ne saurions être tenus pour responsables des dommages dus au non-respect des consignes et à la mauvaise utilisation de l’appareil. -
Seite 16: Pièces Détachées
PIÈCES DÉTACHÉES N° Description Illustration Nombre Thermomètre sonde ∅ 3,8 mm Bouchon noir ∅ 16 pour le montage du thermomètre Embout d'échappement M14 avec joint torique et écrou M14 Bouchon inox M14 avec joint torique et écrou M14 Tube d'immersion M14 avec joint torique et écrou M14 Bras de cadre rotatif avec joint torique... - Seite 17 ASSEMBLAGE Placez le tube d'immersion à l'intérieur de l'appareil et fi xez-le avec l'écrou M14. Placez le bouchon noir dans le trou du tube plongeur. Poussez ensuite la sonde du thermomètre à travers le petit trou du bouchon. Vous pouvez aussi utiliser un thermomètre numérique directement avec le tube plongeur.
- Seite 18 Fixez le couvercle avec les fermetures à serrage. FERMENTATION Première utilisation et préparation Avant d'utiliser l'appareil pour la première fois, nettoyez-le soigneusement et rincez-le, car le processus de fabrication pourrait entraîner la formation de poussières ou de résidus d'huile dans l'appareil. Vous pouvez utiliser du liquide vaisselle pour le nettoyage.
- Seite 19 HERSTELLER Manufacturer | Fabricante | Fabricant | Produttore Chal-Tec GmbH, Wallstraße 16, 10179 Berlin, Deutschland (Germany). IMPORTEUR FÜR GROSSBRITANNIEN Importer for Great Britain | Importador para Gran Bretaña | Importateur pour la Grande Bretagne | Importatore per la Gran Bretagna Chal-Tec UK limited Unit 6 Riverside Business Centre Brighton Road...
-
Seite 21: Datos Técnicos
Estimado cliente, Le felicitamos por la adquisición de este producto. Lea atentamente el siguiente manual y siga cuidadosamente las instrucciones de uso con el fin de evitar posibles daños. La empresa no se responsabiliza de los daños ocasionados por un uso indebido del producto o por haber desatendido las indicaciones de seguridad. - Seite 22 COMPONENTES DE ENSAMBLAJE Descripción Imagen Cant. Sonda del termómetro ∅3,8 mm. ∅ 16 Tapón negro para el montaje del termómetro Boquilla de salida M14 con junta tórica y tuerca M14 Tapón de acero inoxidable M14 con junta tórica y tuerca M14 Tubo de inmersión M14 con junta tórica y tuerca M14 Brazo del bastidor giratorio con...
- Seite 23 MONTAJE Coloque el tubo de inmersión dentro de la unidad y fíjelo con la tuerca M14. Coloque el tapón negro en el agujero del tubo de inmersión. A continuación, introduce la sonda del termómetro por el pequeño orifi cio del tapón. También se puede utilizar un termómetro digital directamente con el tubo de inmersión.
- Seite 24 Fije la cubierta con los cierres de tensión. FERMENTACIÓN Primer uso y preparación Antes de utilizar el aparato por primera vez, límpielo a fondo y aclárelo, ya que puede haber residuos de polvo o aceite en el aparato debido al proceso de fabricación.
- Seite 25 HERSTELLER Manufacturer | Fabricante | Fabricant | Produttore Chal-Tec GmbH, Wallstraße 16, 10179 Berlin, Deutschland (Germany). IMPORTEUR FÜR GROSSBRITANNIEN Importer for Great Britain | Importador para Gran Bretaña | Importateur pour la Grande Bretagne | Importatore per la Gran Bretagna Chal-Tec UK limited Unit 6 Riverside Business Centre Brighton Road...
-
Seite 27: Dati Tecnici
Gentile Cliente, La ringraziamo per aver acquistato il dispositivo. La preghiamo di leggere attentamente le seguenti istruzioni per l’uso e di seguirle per evitare possibili danni tecnici. Non ci assumiamo alcuna responsabilità per danni scaturiti da una mancata osservazione delle avvertenze di sicurezza e da un uso improprio del dispositivo. - Seite 28 COMPONENTI DI MONTAGGIO Denominazione Immagine Quantità Termometro a sonda ∅ 3,8 mm Tappi neri ∅ 16 per montaggio termometro Supporti di scarico M14 con O-Ring e dado M14 Tappi di acciaio inox M14 con O-Ring e dado M14 Tubo a immersione M14 con O-Ring e dado M14 Braccio a cremagliera girevole con O-Ring...
- Seite 29 MONTAGGIO Posizionare il tubo a immersione all'interno del dispositivo e fissarlo con il dado M14. Posizionare il tappo nero nel foro del tubo a immersione. Spingere poi il termometro a sonda nel piccolo foro sul tappo. Può essere utilizzato anche un termometro digitale direttamente con il tubo a immersione.
- Seite 30 Fissare il coperchio con le chiusure a leva. FERMENTAZIONE Primo utilizzo e preparazione Prima di procedere all'utilizzo del dispositivo, lavarlo e sciacquarlo con cura, dato che ci potrebbero essere resti di polvere o olio dovuti al processo produttivo. Per la pulizia si può utilizzare del detergente per piatti. Dopo la prima pulizia, riempire il dispositivo con acqua bollente e detergente.
- Seite 31 HERSTELLER Manufacturer | Fabricante | Fabricant | Produttore Chal-Tec GmbH, Wallstraße 16, 10179 Berlin, Deutschland (Germany). IMPORTEUR FÜR GROSSBRITANNIEN Importer for Great Britain | Importador para Gran Bretaña | Importateur pour la Grande Bretagne | Importatore per la Gran Bretagna Chal-Tec UK limited Unit 6 Riverside Business Centre Brighton Road...