Herunterladen Inhalt Inhalt Diese Seite drucken
BRAND accu-jet S Gebrauchsanleitung
Vorschau ausblenden Andere Handbücher für accu-jet S:
Inhaltsverzeichnis

Werbung

Verfügbare Sprachen
  • DE

Verfügbare Sprachen

  • DEUTSCH, seite 7
Gebrauchsanleitung | Operating manual |
Mode d'emploi | Instrucciones de manejo |
Istruzione | 操作手册
accu-jet® S
Pipettierhelfer | Pipette controllers

Werbung

Inhaltsverzeichnis
loading

Inhaltszusammenfassung für BRAND accu-jet S

  • Seite 1 Gebrauchsanleitung | Operating manual | Mode d'emploi | Instrucciones de manejo | Istruzione | 操作手册 accu-jet® S Pipettierhelfer | Pipette controllers...
  • Seite 2 Impressum BRAND GMBH + CO KG Otto-Schott-Str. 25 97877 Wertheim (Germany) T +49 9342 808 0 F +49 9342 808 98000 info@brand.de www.brand.de Languages Gebrauchsanleitung............2 Operating manual ............32 Mode d'emploi ..............58 Instrucciones de manejo ..........84 Istruzione............... 110 操作手册...
  • Seite 5 Declaration of conformity – China RoHS 2 BRAND GMBH + CO KG has made reasonable efforts to ensure that hazardous materials and substances may not be used in BRAND products. In order to determine the concentration of hazardous substances in all homogeneous materials of the subassemblies, a “Product Conformity Assessment”...
  • Seite 6 (PBB), and polybrominated diphenyl ethers (PBDE). Products manufactured by BRAND may enter into further devices or can be used together with other appli- ances. With these third party products and appliances in particular, please note the EFUP labeled on these products.
  • Seite 7: Inhaltsverzeichnis

    Inhaltsverzeichnis 1 Einleitung ................Lieferumfang ................Gebrauchsbestimmung ............... 2 Sicherheit ................10 Funktion..................11 Einsatzgrenzen ................11 Einsatzausschlüsse ..............12 Lagerbedingungen ............... 12 3 Funktions- und Bedienelemente ..........13 4 Inbetriebnahme ..............14 Akku anschließen ................. 14 Akku laden ..................15 Gerät starten.................
  • Seite 8 Inhaltsverzeichnis Gerät ..................... 27 Ersatzteile ..................27 10 Reparatur ................29 10.1 Zur Reparatur einsenden............. 29 11 Mängelhaftung ................ 31 12 Entsorgung ................31 Gebrauchsanleitung 9974 18...
  • Seite 9: Einleitung

    1 Einleitung 1.1 Lieferumfang Pipettierhelfer, Nickel-Metallhydrid Akku, Netzteil, 2 Ersatz-Membranfilter 0,2 µm, Wandhalter, Gebrauchsanleitung 1.2 Gebrauchsbestimmung • Lesen Sie die Gebrauchsanleitung vor dem ersten Gebrauch sorgfäl- tig durch. • Die Gebrauchsanleitung ist Teil des Geräts und muss leicht zugäng- lich aufbewahrt werden. •...
  • Seite 10: Darstellung

    2 Sicherheit 1.2.3 Darstellung Darstellung Bedeutung Darstellung Bedeutung 1. Task Kennzeichnet eine Aufgabe. > Kennzeichnet eine Voraus- setzung. a., b., c. Kennzeichnet einzelne Schritte der Kennzeichnet ein Ergeb- Aufgabe. nis. 2 Sicherheit Bitte unbedingt sorgfältig durchlesen! Das Laborgerät accu-jet® S kann in Kombination mit gefährlichen Materia- lien, Arbeitsvorgängen und Apparaturen verwendet werden.
  • Seite 11: Funktion

    2 Sicherheit 7. Nie Gewalt anwenden. 8. Nur Originalzubehör und Originalersatzteile verwenden. Keine tech- nischen Veränderungen vornehmen. Das Gerät nicht weiter zerlegen, als in der Gebrauchsanleitung beschrieben ist! 9. Vor Verwendung stets den ordnungsgemäßen Zustand des Gerätes prüfen. Sollten sich Störungen des Gerätes ankündigen, sofort auf- hören zu pipettieren und das Kapitel Störung - Was tun? befolgen.
  • Seite 12: Einsatzausschlüsse

    2 Sicherheit • Dichte bis 9 g/cm 2.3 Einsatzausschlüsse Das Gerät darf nicht für Flüssigkeiten eingesetzt werden, deren Dämpfe korrodierend wirken bzw. die Materialien Silikon oder EPDM angreifen. Das Gerät ist nicht geeignet für den Gebrauch mit Pasteurpipetten. WARNUNG Gerätebetrieb in explosionsgefährdeter Umgebung Das Gerät darf nicht in explosionsgefährdeter Umgebung be- trieben oder geladen werden.
  • Seite 13: Funktions- Und Bedienelemente

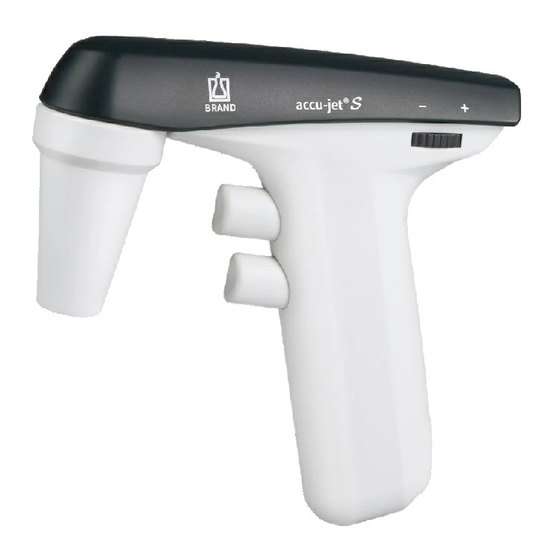
    3 Funktions- und Bedienelemente 3 Funktions- und Bedienelemente (oben | top) (unten | bottom) Oberer Pipettierknopf (Flüssigkeit auf- Gehäuseoberschale nehmen) Unterer Pipettierknopf (Flüssigkeit abge- Einstellrad für Motordrehzahl ben) Wahlschalter für Betriebsart Stellfläche Gehäuseoberschale Netzteil Länderadapter Stellfläche Griff Ladebuchse Adaptergehäuse (PP) Adapter/Rückschlagventil (SI/PTFE) Membranfilter (PP/PTFE) Druckausgleichsöffnung...
  • Seite 14: Inbetriebnahme

    4 Inbetriebnahme Abk. Material Polypropylen PTFE Polytetrafluorethylen Silikon 4 Inbetriebnahme 4.1 Akku anschließen Adaptergehäuse abschrauben. Adap- ter und Filter verbleiben im Adapter- gehäuse. Gehäuse abnehmen. ð Das Akkufach wird sichtbar. Stecker des Akkus am Kabel halten, entsprechend ausrichten und fest in die Buchse einstecken, bis er hörbar einrastet.
  • Seite 15: Akku Laden

    4 Inbetriebnahme Gehäuse einsetzen. Dabei darauf ach- ten, dass das Gehäuse in die vorgese- henen Aussparungen oberhalb des Einstellrads (1) und in die Verschrau- bung des Adaptergehäuses (2) ein- greift. Gehäuseoberteil in die Gehäusescha- len drücken und Adaptergehäuse auf- schrauben. Akku laden, bis LED-Ladeindikator grün blinkt.
  • Seite 16 4 Inbetriebnahme HINWEIS Nur Original-Netzteil des Herstellers verwenden! Der Gebrauch eines anderen Netzteils kann das Gerät sowie den Akku schädigen. Länderadapter auf Netzteil stecken. Netzteil mit Gerät verbinden. Netzteil in den Netzstecker stecken. ð Das Gerät wird geladen. Dies ist er- kennbar am LED-Ladeindikator auf dem Gehäuseoberteil.
  • Seite 17: Gerät Starten

    4 Inbetriebnahme 4.3 Gerät starten Das Gerät ist betriebsbereit, wenn ein geladener Akku eingesetzt ist. Einen ON/OFF-Schalter gibt es nicht. 4.4 Betriebsart wählen Wahlschalter, siehe Funktions- und Bedienelemente, S. 13 . Betriebsart „Freier Ablauf“: Wahlschalter nach oben schieben. Betriebsart „Ausblasen mit Motorunterstützung“: Wahlschalter nach un- ten schieben.
  • Seite 18: Gerät Aufbewahren

    4 Inbetriebnahme 4.8 Gerät aufbewahren 4.8.1 Tischablage Der accu-jet® S kann auf ebener Fläche mit eingesteckter Pipette abgestellt wer- den. 4.8.2 Wandhalter Befestigungsoberfläche mit geeigne- tem Reinigungsmittel (keine rückfet- tenden Haushaltsreiniger) und fussel- freiem Tuch reinigen und gut trock- nen lassen. Schutzfolie von Klebestreifen abzie- Wandhalter fest auf die Befestigungs- oberfläche aufdrücken.
  • Seite 19: Pipettieren

    5 Pipettieren 5 Pipettieren 1. Pipette aufstecken WARNUNG Auf festen Sitz der Pipette achten. Nie Gewalt anwenden! Be- sonders bei dünnen Pipetten besteht die Gefahr von Glas- bruch! Verletzungsgefahr! Pipette stets möglichst dicht am obe- ren Ende halten und vorsichtig in den Adapter einschieben, bis sie fest sitzt.
  • Seite 20: Volumen Einstellen

    5 Pipettieren wenn Sie den Meniskus einstellen oder aber Pipetten mit kleinen Volu- mina verwenden. HINWEIS Pipette nicht überfüllen. 3. Volumen einstellen Pipettenspitze ggf. mit geeignetem flusenfreien Tuch abwischen. Unteren Pipettierknopf langsam ein- drücken und Flüssigkeit ablassen, bis der Meniskus genau an der ge- wünschten Marke eingestellt ist.
  • Seite 21: Reinigung

    6 Reinigung 6 Reinigung HINWEIS accu-jet® S ist nicht autoklavierbar Gehäuseteile gelegentlich mit einem feuchten Tuch abwischen. Bei ord- nungsgemäßer Benutzung ist das Gerät wartungsfrei. 6.1 Dichtigkeit prüfen Nach dem Einstellen des Meniskus darf ohne Betätigung der Ventile keine Flüs- sigkeit aus der Pipette tropfen.
  • Seite 22 6 Reinigung HINWEIS Ein Filtertausch oder die Reinigung ist nur notwendig, wenn eine Pipette überfüllt wurde oder die Saugleistung beeinträchtigt ist. Pipette herausziehen. Adaptergehäuse abschrauben. Obergehäuse abnehmen. Adapter und Membranfilter von der konisch zulaufenden Seite des Adap- tergehäuses herausdrücken. Defekten Membranfilter abziehen. Gebrauchsanleitung 9974 18...
  • Seite 23 6 Reinigung Zur Reinigung Adapter sorgfältig mit einer Spritzflasche ausspülen, die mit einer geeigneten Reinigungsflüssig- keit, z.B. Wasser, gefüllt ist. Anschlie- ßend ausblasen und trocknen. Neuen Membranfilter mit dem dicke- ren Anschluss nach unten zuerst in den Adapter eindrücken (die dünne- re, konische Seite nach oben) und in das Adaptergehäuse einsetzen.
  • Seite 24 6 Reinigung HINWEIS Hinweis zu autoklavierbaren Filtern Die Wirksamkeit des Autoklavierens ist vom Anwender jeweils selbst zu prüfen. Nicht jeder Membranfilter ist geeignet! Nur Original-Zubehör ver- wenden. > Serienmäßig ist das Gerät mit 0,2 µm Membranfilter (roter Farbcode) ausgestattet. > Der Membranfilter ist bis zu fünfmal bei 121 °C (250 °F) autoklavier- bar.
  • Seite 25: Störung - Was Tun

    7 Störung - Was tun? 7 Störung - Was tun? Störung Ursache Was tun? Saugleistung Motordrehzahl ist reduziert Motordrehzahl erhöhen, siehe Motor- beeinträchtigt drehzahl einstellen, S. 17 . Rückschlagventil Wahlschalter auf Ausblasen stellen geschlossen und unteren Pipettierknopf drücken, siehe Betriebsart wählen, S. 17 Pipette tropft Filter sitzt nicht richtig Filter richtig einsetzen, siehe Filter...
  • Seite 26: Technische Daten

    UKCA: United Kingdom Conformity Assessed Mit diesem Zeichen bestätigen wir, dass das Produkt den in den UK Designated Standards festgelegten Anforderun- gen entspricht. www.brand.de/ip Patentinformationen China RoHS (EFUP) EFUP definiert den Zeitraum in Jahren, in dem die in Elek- tro- und Elektronikgeräten enthaltenen gefährlichen Stof- fe unter normalen Betriebsbedingungen nicht auslaufen oder sich verändern.
  • Seite 27: Bestellinformationen

    9 Bestellinformationen 9 Bestellinformationen 9.1 Gerät Farbe des Gehäuseoberteils Best.-Nr. Best.-Nr. (mit Universalnetzteil und (ohne Universalnetzteil und Länderadapter) ohne Länderadapter) Anthrazit 26350 26360 Beere 26351 26361 Petrol 26352 26362 Amethyst 26353 26363 Lieferumfang, siehe Lieferumfang. Beachten Sie die Bestellnummern, mit oder ohne Netzteil.
  • Seite 28: Silikon-Adapter Mit Rückschlagventil

    9 Bestellinformationen Akkupack Technische Daten zum Akku, siehe Technische Daten, S. 26 . Beschreibung Best.-Nr. Akkupack NiMH 26630 Silikon-Adapter mit Rückschlagventil Beschreibung Best.-Nr. Silikon-Adapter 26508 Adaptergehäuse Farbe Best.-Nr. weiß 26658 Wandhalter Farbe Best.-Nr. weiß 26539 Haftband Verp. Einh. Best.-Nr. 3 Sets 26547 Gebrauchsanleitung 9974 18...
  • Seite 29: Reparatur

    Gerät an Hersteller oder Händler senden. Vordrucke können beim Händler oder Hersteller angefordert werden, bzw. stehen unter www.brand.de zum Download bereit. Innerhalb der USA und Kanada Bitte klären Sie mit BrandTech Scientific, Inc. die Voraussetzungen für die Rücksendung bevor Sie das Gerät zum Service einschicken.
  • Seite 30 10 Reparatur Kontaktadressen Deutschland: USA und Kanada: ® BRAND GMBH + CO KG BrandTech Scientific, Inc. Otto-Schott-Straße 25 11 Bokum Road 97877 Wertheim (Germany) Essex, CT 06426-1506 (USA) T +49 9342 808 0 T +1-860-767 2562 F +49 9342 808 98000 F +1-860-767 2563 info@brand.de...
  • Seite 31: Mängelhaftung

    11 Mängelhaftung 11 Mängelhaftung Wir haften nicht für Folgen unsachgemäßer Behandlung, Verwendung, Wartung, Bedienung oder nicht autorisierter Reparatur des Gerätes oder für Folgen normaler Abnutzung, insbesondere von Verschleißteilen wie z.B. Kolben, Dichtungen, Ventilen sowie bei Glasbruch. Gleiches gilt für die Nichtbeachtung der Gebrauchsanleitung.
  • Seite 32 Operating manual 9974 18...
  • Seite 33 Table of contents Table of contents 1 Introduction................35 Scope of delivery................35 Terms of use ................. 35 2 Safety..................36 Function..................37 Limitations of use................. 37 Operating exclusions ..............38 Storage Conditions ..............38 3 Functional and operating elements........... 39 4 Assembly ................
  • Seite 34 Table of contents 10 Repairs ................... 55 10.1 Sending for repair ................ 55 11 Warranty ................56 12 Disposal.................. 57 Operating manual 9974 18...
  • Seite 35: Introduction

    1 Introduction 1.1 Scope of delivery Pipette controller, nickel-metal hydride battery, power adapter, 2 re- placement membrane filters (0.2 µm), wall mount, operating manual 1.2 Terms of use • Please carefully read the operating manual before using the device for the first time. •...
  • Seite 36: Safety

    2 Safety 1.2.3 Format Layout Meaning Layout Meaning 1. Task Indicates a task. > Indicates a condition. a., b., c. Indicates the individual steps of a Indicates a result. task. 2 Safety Please read carefully! The accu-jet® S can be used in combination with hazardous materials, work processes and equipment.
  • Seite 37: Function

    2 Safety 8. Use only original accessories and replacement parts. Do not make any technical modifications. Do not dismantle the instrument any further than is described in the operating manual! 9. Always check that the instrument is in proper working condition be- fore use.
  • Seite 38: Operating Exclusions

    2 Safety 2.3 Operating exclusions The instrument must not be used for liquids with vapors that can cause corrosion or attack the materials silicone or EPDM. The instrument is not suitable for use with Pasteur pipettes. WARNING Operating the instrument in a potentially explosive atmos- phere The instrument must never be operated or charged in a poten- tially explosive atmosphere.
  • Seite 39: Functional And Operating Elements

    3 Functional and operating elements 3 Functional and operating elements (oben | top) (unten | bottom) Upper housing shell Upper pipetting button (aspirate liquid) Bottom pipetting button (dispense liq- Motor speed adjustment wheel uid) Operating mode selection switch Upper housing shell base Power adapter Country adapter Handle base...
  • Seite 40: Assembly

    4 Assembly Abbreviation Material Polypropylene PTFE Polytetrafluoroethylene Silicone 4 Assembly 4.1 Connecting the battery Unscrew the adapter housing. Adapter and filter remain in the adapter housing. Remove housing. ð The battery compartment becomes visible. Grip battery plug by the wire, confirm alignment of the plug and insert it into the socket.
  • Seite 41: Charging The Battery

    4 Assembly Insert housing. While doing so, make sure that the housing engages in the designated slots above the adjust- ment wheel (1) and in the screw con- nection of the adapter housing (2). Press the upper housing section into the housing shells and screw on the adapter housing.
  • Seite 42 4 Assembly NOTICE Use only the original power adapter supplied by the manufacturer! Using another power adapter can damage the instrument and the bat- tery. Place the country adapter onto the power adapter. Connect the power adapter to the in- strument.
  • Seite 43: Turning On The Instrument

    4 Assembly 4.3 Turning on the instrument The instrument is ready for operation when a charged battery is inserted. There is no ON/OFF switch. 4.4 Selecting the operating mode Selection switch, see Functional and operating elements, p. 39 . “Gravity delivery” operating mode: slide the selection switch upward. “Blow-out with motor support”...
  • Seite 44: Storing The Instrument

    4 Assembly 4.8 Storing the instrument 4.8.1 Table placement The accu-jet® S can be set down on an even surface with an inserted pipette. 4.8.2 Wall mount Clean the mounting surface with a suitable cleaner (no moisturizing household cleaners) and a lint-free cloth, and allow it to dry thoroughly.
  • Seite 45: Pipetting

    5 Pipetting 5 Pipetting 1. Attaching the pipette WARNING Ensure that the pipette is firmly in place. Never use force! Es- pecially with thin pipettes, there is a risk of glass breakage! Risk of injury! Always hold the pipette as close as possible to the upper end and push it carefully into the adapter until it is firmly in place.
  • Seite 46: Setting The Volume

    5 Pipetting ularly helpful when adjusting the meniscus or when using small vol- ume pipettes. NOTICE Do not overfill the pipette. 3. Setting the volume If necessary, wipe the tip of the pipette with a suitable lint-free cloth. Press the lower pipetting button slowly and dispense liquid until the meniscus is adjusted exactly to the desired volume.
  • Seite 47: Cleaning

    6 Cleaning 6 Cleaning NOTICE accu-jet® S is not autoclavable Occasionally clean the housing parts with a damp cloth. When used prop- erly, the instrument is maintenance-free. 6.1 Check tightness After adjusting the meniscus, no liquid should drip from the pipette without op- erating the valves.
  • Seite 48 6 Cleaning NOTICE Filter replacement or cleaning is only necessary if a pipette has been overfilled or the suction capacity is impaired. Pull out pipette. Unscrew the adapter housing. Pull out the upper housing. Push out the adapter and membrane filter from the tapered side of the adapter housing.
  • Seite 49 6 Cleaning For cleaning, rinse the adapter care- fully with a spray bottle filled with a suitable cleaning liquid (e.g., water). Then blow out and dry. First press the new membrane filter into the adapter with the thicker con- nection facing downwards (the thin- ner, conical side facing upwards) and insert it into the adapter housing.
  • Seite 50 6 Cleaning NOTICE Information on autoclavable filters It is the user's responsibility to ensure effective autoclaving. Not every membrane filter is suitable! Use only original accessories. > The instrument comes equipped with a 0.2 µm membrane filter (red color code). >...
  • Seite 51: Troubleshooting

    7 Troubleshooting 7 Troubleshooting Problem Cause Corrective action Suction capacity Motor speed is reduced Increase motor speed, see Setting the impaired motor speed, p. 43 . Non-return valve Set the selection to “Blow-out” and closed press the lower pipetting button, see Selecting the operating mode, p. 43 Pipette dripping Filter not properly positioned...
  • Seite 52: Technical Data

    UKCA: United Kingdom Conformity Assessed With this mark, we confirm that the product complies with the requirements set out in the UK Designated Stan- dards. www.brand.de/ip Patent information China RoHS (EFUP) EFUP defines the time period in years, in which the haz-...
  • Seite 53: Ordering Information

    9 Ordering Information 9 Ordering Information 9.1 Instrument Color of the upper housing Order no. Order no. section (with universal power (without universal power adapter and country adapter and without country adapter) adapter) Anthracite 26350 26360 Berry 26351 26361 Petrol 26352 26362 Amethyst...
  • Seite 54: Battery Pack

    9 Ordering Information Battery pack Technical specifications for battery, see Technical data, p. 52 . Description Order No. Battery pack NiMH 26630 Silicone adapter with non-return valve Description Order No. Silicone adapter 26508 Adapter housing Color Order No. white 26658 Wall mount Color Order No.
  • Seite 55: Repairs

    Complete the “Declaration on Absence of Health Hazards” and send the instrument to the manufacturer or supplier. Ask your supplier or manu- facturer for the form. The form can also be downloaded from www.brand.de. Within USA and Canada Please clarify the requirements for the return delivery with BrandTech Sci- entific, Inc before sending the instrument in for service.
  • Seite 56: Contact Addresses

    11 Warranty Contact addresses Germany: USA and Canada: ® BRAND GMBH + CO KG BrandTech Scientific, Inc. Otto-Schott-Str. 25 11 Bokum Road 97877 Wertheim (Germany) Essex, CT 06426-1506 (USA) T +49 9342 808 0 T +1-860-767 2562 F +49 9342 808 98000 F +1-860-767 2563 info@brand.de...
  • Seite 57: Disposal

    12 Disposal USA and Canada: Find more warranty information on www.brandtech.com. 12 Disposal This symbol means that at the end of their service life, batteries/accumulators and electronic devices must be disposed of separately from household waste (un- sorted municipal waste). Electronic devices must be disposed of in accordance with Directive 2012/09/ EU of the European Parliament and of the Council from July 04, 2012 on waste from electrical and electronic equipment and in compli-...
  • Seite 58 Mode d'emploi 9974 18...
  • Seite 59 Table des matières Table des matières 1 Introduction................61 Étendue de la livraison ..............61 Conditions d'utilisation ............... 61 2 Sécurité .................. 62 Fonction..................63 Limites d'utilisation ..............63 Interdictions d’emploi ..............64 Conditions de stockage ............... 64 3 Éléments fonctionnels et de commande ........65 4 Mise en service ................
  • Seite 60 Table des matières 10 Réparation................81 10.1 Retour pour réparation..............81 11 Responsabilité pour défauts ............. 82 12 Évacuation................83 Mode d'emploi 9974 18...
  • Seite 61: Introduction

    1 Introduction 1.1 Étendue de la livraison Auxiliaire de pipetage, accu nickel-hydrure de métal, bloc secteur, 2 filtres à membrane de rechange 0,2 µm, support mural, manuel d'utilisation 1.2 Conditions d'utilisation • Veuillez lire attentivement le mode d'emploi avant la première utili- sation.
  • Seite 62: Sécurité

    2 Sécurité 1.2.3 Représentation Représenta- Signification Représenta- Signification tion tion 1. Task Caractérise une tâche. > Caractérise une condition. a., b., c. Caractérise une étape individuelle Caractérise un résultat. de la tâche. 2 Sécurité À lire attentivement ! L’appareil de laboratoire accu-jet® S peut être utilisé avec des matériaux, des procédés et des appareillages dangereux.
  • Seite 63: Fonction

    2 Sécurité 7. Ne jamais employer la force. 8. N’utiliser que des accessoires originaux et des pièces de rechange originales. Ne pas effectuer de modifications techniques. Ne pas dé- monter l’appareil plus que ce qui est décrit dans le mode d’emploi ! 9.
  • Seite 64: Interdictions D'emploi

    2 Sécurité 2.3 Interdictions d’emploi L’appareil ne doit pas être utilisé pour des liquides dont les vapeurs ont un effet corrosif ou attaquent le silicone ou l’EPDM. L’appareil n’est pas adapté à une utilisation avec des pipettes Pasteur. AVERTISSEMENT Fonctionnement de l’appareil dans un environnement à risque d’explosion L’appareil ne doit pas être utilisé...
  • Seite 65: Éléments Fonctionnels Et De Commande

    3 Éléments fonctionnels et de commande 3 Éléments fonctionnels et de commande (oben | top) (unten | bottom) Bouton de pipetage supérieur (absorp- Coque supérieure du boîtier tion de liquide) Bouton de pipetage inférieur (dosage de Molette de réglage pour vitesse de rota- liquide) tion du moteur Surface d’appui de la coque supérieure...
  • Seite 66: Mise En Service

    4 Mise en service Abr. Matériau Polypropylène PTFE Polytétrafluoréthylène Silicone 4 Mise en service 4.1 Raccordement de l'accu Dévisser le boîtier d’adaptateur. L’adaptateur et le filtre restent dans le boîtier de l'adaptateur. Retirer le boîtier. ð Le compartiment à batterie devient visible.
  • Seite 67: Chargement De L'accu

    4 Mise en service Placer le boîtier. Ce faisant, veiller à ce que le boîtier s’enclenche dans les cavités prévues au-dessus de la mo- lette de réglage (1) et dans le raccord vissé du boîtier de l'adaptateur (2). Appuyer la partie supérieure du boî- tier dans les coques du boîtier et vis- ser le boîtier d’adaptateur.
  • Seite 68 4 Mise en service AVIS N’utiliser que le bloc secteur original du fabricant ! L’utilisation d'un autre bloc secteur peut endommager l’appareil ainsi que l’accu. Brancher l’adaptateur de pays sur le bloc secteur. Raccorder le bloc secteur à l’appareil. Brancher le bloc secteur sur la fiche secteur.
  • Seite 69: Démarrer L'appareil

    4 Mise en service AVIS > La charge de maintien empêche la surcharge et réduit l’effet de lazy- battery. Pour conserver la capacité maximale, ne recharger l’accu que si cela est requis par l’indicateur de chargement à LED. 4.3 Démarrer l’appareil L’appareil est prêt au fonctionnement lorsqu’un accu charge est inséré.
  • Seite 70: Conserver L'appareil

    4 Mise en service La vitesse de rotation du moteur peut être réglée en continu du maximum (+) au minimum (-) en tournant la molette de réglage. Nous recomman- dons la vitesse de rotation du moteur maximale pour les pipettes de grand volume et une vitesse de rotation du moteur plus basse pour les pi- pettes de petit volume.
  • Seite 71: Pipetage

    5 Pipetage 5 Pipetage 1. Insérer la pipette AVERTISSEMENT Veiller à la bonne assise de la pipette. Ne jamais employer la force ! Il existe un risque de bris de verre, en particulier pour les pipettes fines ! Risque de blessures ! Toujours tenir la pipette le plus près possible de l’extrémité...
  • Seite 72: Régler Le Volume

    5 Pipetage Si les deux boutons de pipetage sont appuyés, vous pouvez absorber ou doser le liquide très précisément. Ce- la est particulièrement utile si vous réglez le ménisque ou si vous utilisez des pipettes avec de petits volumes. AVIS Ne pas remplir excessivement la pipette.
  • Seite 73: Nettoyage

    6 Nettoyage 6 Nettoyage AVIS Le accu-jet® S n’est pas autoclavable Essuyer les pièces du boîtier de temps en temps avec un chiffon humide. L'appareil ne requiert pas d’entretien s’il est utilisé correctement. 6.1 Contrôler l’étanchéité Après le réglage du ménisque, le liquide ne doit pas goutter hors de la pipette sans actionnement des soupapes.
  • Seite 74 6 Nettoyage AVIS Un remplacement du filtre ou le nettoyage est uniquement nécessaire si une pipette a été trop remplie ou si la puissance d’aspiration est compro- mise. Retirer la pipette. Dévisser le boîtier d’adaptateur. Retirer le boîtier supérieur. Chasser l’adaptateur et la membrane filtrante du côté...
  • Seite 75 6 Nettoyage Pour le nettoyage de l’adaptateur, rincer soigneusement avec un flacon pulvérisateur rempli d’un liquide de nettoyage approprié, par ex. de l’eau. Puis, souffler et sécher. Enfoncer le nouveau filtre à mem- brane tout d'abord dans l’adapta- teur, avec le raccord plus épais vers le bas (le côté...
  • Seite 76 6 Nettoyage AVIS Remarque sur les filtres autoclavables L’efficacité de l’autoclavage doit être contrôlée par l’utilisateur lui- même. Les filtres à membrane ne sont pas tous adaptés ! Utiliser unique- ment des accessoires d’origine. > L’appareil est équipé en série d’une membrane filtrante 0,2 µm (code couleur rouge).
  • Seite 77: Dysfonctionnement - Que Faire

    7 Dysfonctionnement - que faire ? 7 Dysfonctionnement - que faire ? Dysfonctionnement Cause Que faire ? Puissance d’aspiration La vitesse de rotation du mo- Augmenter la vitesse de rotation du compromise teur est réduite moteur, voir Régler la vitesse de rota- tion du moteur, p. 69 . Soupape antiretour Mettre le sélecteur sur Soufflage et ap- fermée...
  • Seite 78: Caractéristiques Techniques

    UKCA : United Kingdom Conformity Assessed Par ce label, nous confirmons que le produit correspond aux exigences spécifiées dans les UK Designated Stan- dards. www.brand.de/ip Informations relatives aux brevets China RoHS (EFUP) L'EFUP définit la période en années durant laquelle les substances dangereuses contenues dans les appareils électriques et électroniques ne s'écoulent pas ou ne...
  • Seite 79: Informations Sur La Commande

    9 Informations sur la commande 9 Informations sur la commande 9.1 Appareil Couleur de la partie supé- Réf. de commande Réf. de commande rieure du boîtier (avec bloc secteur universel (sans bloc secteur universel et et adaptateur de pays) sans adaptateur de pays) Anthracite 26350 26360...
  • Seite 80 9 Informations sur la commande Bloc d’accu Caractéristiques techniques de l’accu, voir Caractéristiques techniques, p. 78 . Description N° de commande Bloc d’accu NiMH 26630 Adaptateur silicone avec soupape antiretour Description N° de commande Adaptateur silicone 26508 Boîtier d’adaptateur Couleur N° de commande blanc 26658 Support mural...
  • Seite 81: Mode D'emploi

    Remplir « l’Attestation de Décontamination » et la retourner avec l’appa- reil au fabricant ou au revendeur. Demander le formulaire au fournisseur ou au fabricant ou bien en téléchargement gratuit sous www.brand.de. Aux États-Unis et au Canada : Merci de contacter BrandTech Scientific, Inc. pour demander les condi- tions de retour de l’appareil avant de le renvoyer au service après-vente.
  • Seite 82: Adresses De Contact

    11 Responsabilité pour défauts Adresses de contact Allemagne : États-Unis et Canada : ® BRAND GMBH + CO KG BrandTech Scientific, Inc. Otto-Schott-Straße 25 11 Bokum Road 97877 Wertheim (Germany) Essex, CT 06426-1506 (USA) T +49 9342 808 0 T +1- 860- 767 2562...
  • Seite 83: Évacuation

    12 Évacuation États-Unis et Canada : Vous trouverez des informations sur la responsabilité en cas de vices sous www.brandtech.com. 12 Évacuation Le symbole ci-contre signifie que les piles/batteries ainsi que les appareils électroniques qui ont atteint la fin de leur durée de vie doivent être éliminés sépa- rément des déchets domestiques (dé- chets d'agglomération non triés).
  • Seite 84 Instrucciones de manejo 9974 18...
  • Seite 85 Índice Índice 1 Introducción ................87 Contenido de la entrega .............. 87 Información general sobre las instrucciones de uso....87 2 Seguridad ................88 Función ..................89 Límites de empleo................ 90 Condiciones de empleo ............... 90 Condiciones de almacenamiento..........90 3 Elementos de mando y funcionamiento ........
  • Seite 86 Índice 10 Reparación ................107 10.1 Envíos para reparación ..............107 11 Responsabilidad por defectos........... 108 12 Eliminación ................109 Instrucciones de manejo 9974 18...
  • Seite 87: Introducción

    1 Introducción 1.1 Contenido de la entrega Auxiliar de pipeteado, batería de níquel-metalhidruro, fuente de alimen- tación, 2 filtros de membrana de repuesto de 0,2 µm, soporte de pared, manual de instrucciones 1.2 Información general sobre las instrucciones de • Leer con atención el manual de instrucciones antes de utilizar el pro- ducto por primera vez.
  • Seite 88: Seguridad

    2 Seguridad Símbolo Significado Símbolo Significado Utilizar gafas protectoras Utilizar guantes de protec- ción 1.2.3 Visualización Viñeta Significado Viñeta Significado 1. Tarea Hace referencia a una tarea. > Hace referencia a un requi- sito. a., b., c. Hace referencia a cada uno de los Hace referencia a un resul- pasos para realizar una tarea.
  • Seite 89: Función

    2 Seguridad 5. Utilizar el equipo solo para pipetear líquidos y exclusivamente den- tro del marco de los límites de empleo que se hayan definido. Con- templar las condiciones de empleo, véase Condiciones de empleo, p. 90 . En caso de dudas, será imprescindible contactar con el fabri- cante o distribuidor.
  • Seite 90: Límites De Empleo

    2 Seguridad 2.2 Límites de empleo El equipo se emplea para pipetear líquidos teniendo en cuenta las si- guientes limitaciones físicas: • De +10 °C a +40 °C (de 50 °F a 104 °F) (equipo y reactivo) • Presión de vapor hasta máx. 500 mbares. Por encima de 300 mbares, aspirar lentamente para evitar la ebullición del líquido.
  • Seite 91: Elementos De Mando Y Funcionamiento

    3 Elementos de mando y funcionamiento 3 Elementos de mando y funcionamiento (oben | top) (unten | bottom) Botón de pipeteado superior (aspirar lí- Cubierta superior de la carcasa quido) Botón de pipeteado superior (dosificar lí- Rueda de ajuste del número de revolu- quido) ciones del motor Superficie de la cubierta superior de la...
  • Seite 92: Puesta En Marcha

    4 Puesta en marcha Abrev. Material Polipropileno PTFE Politetrafluoroetileno Silicona 4 Puesta en marcha 4.1 Conexión de la batería Desenroscar la carcasa de adaptador. El adaptador y el filtro quedan en la carcasa de adaptador. Retirar la carcasa. ð Se puede ver el compartimiento de la batería.
  • Seite 93: Carga De La Batería

    4 Puesta en marcha Colocar la carcasa. Al hacerlo, obser- var que la carcasa encaje en los hue- cos previstos para eso sobre la rueda de ajuste (1) y la unión roscada de la carcasa de adaptador (2). Presionar la parte superior de la car- casa y enroscar la carcasa de adapta- dor.
  • Seite 94 4 Puesta en marcha AVISO ¡Usar solo la fuente de alimentación original del fabricante! Utilizar una fuente de alimentación diferente puede dañar el equipo o la batería. Enchufar el adaptador para países en la fuente de alimentación. Conectar la fuente de alimentación con el equipo.
  • Seite 95: Inicio Del Equipo

    4 Puesta en marcha AVISO > La carga de mantenimiento impide la sobrecarga y reduce el efecto memoria. Para conservar la capacidad máxima, cargar la batería solo cuando el indicador de carga LED lo indique. 4.3 Inicio del equipo El equipo está listo para funcionar cuando se coloca una batería cargada. No hay un botón de ENCENDIDO/APAGADO.
  • Seite 96: Almacenamiento Del Equipo

    4 Puesta en marcha El número de revoluciones del motor puede ajustarse de manera conti- nua de máximo (+) a mínimo (-) girando la rueda de ajuste. Recomenda- mos el número de revoluciones máximo del motor para pipetas de volú- menes grandes y un número de revoluciones menor para pipetas de volú- menes pequeños.
  • Seite 97: Pipeteo

    5 Pipeteo 5 Pipeteo 1. Insertar la pipeta ADVERTENCIA Verificar que la pipeta se haya ajustado con firmeza. ¡No utili- zar nunca la fuerza! ¡En especial, en el caso de las pipetas del- gadas, existe el riesgo de rotura del vidrio! ¡Riesgo de lesiones! En lo posible, sujetar siempre la pipe- ta por el extremo superior con firme- za e introducirla con cuidado en el...
  • Seite 98: Ajustar El Volumen

    5 Pipeteo Si se presionan ambos botones de pi- peteado, es posible aspirar o dosifi- car líquido de forma muy suave. Esto es muy útil, en especial, cuando se ajusta el menisco o se utilizan pipetas con volúmenes chicos. AVISO No sobrecargar la pipeta.
  • Seite 99: Limpieza

    6 Limpieza 6 Limpieza AVISO accu-jet® S no se puede esterilizar en autoclave Limpiar las partes de la carcasa con un paño húmedo de forma esporádi- ca. Si el equipo se utiliza de manera adecuada, no requiere mantenimien- 6.1 Control de estanqueidad Tras ajustar el menisco, la pipeta no debe gotear ningún líquido en tanto no se ac- cione ninguna válvula.
  • Seite 100 6 Limpieza AVISO El cambio de filtro o la limpieza solo son necesarios si una pipeta se ha llenado en exceso o se encuentra afectada la capacidad de succión. Extraer la pipeta. Desenroscar la carcasa de adaptador. Retirar la carcasa superior. Extraer el adaptador y el filtro de membrana del lado cónico de la car- casa de adaptador.
  • Seite 101 6 Limpieza Limpiar el adaptador con cuidado uti- lizando una piseta llena de un líquido de limpieza adecuado, como, por ejemplo, agua. A continuación, soplar y secar el adaptador. Introducir el nuevo filtro de membra- na, primero, en el adaptador, con la conexión más gruesa hacia abajo (parte cónica más delgada hacia arri- ba) y en la carcasa de adaptador.
  • Seite 102 6 Limpieza AVISO Nota sobre los filtros esterilizables en autoclave La eficacia de la esterilización en autoclave debe ser comprobada en ca- da caso por el usuario. ¡No todos los filtros de membrana son adecua- dos! Utilizar solo accesorios originales. >...
  • Seite 103: Qué Hacer En Caso De Averías

    7 ¿Qué hacer en caso de averías? 7 ¿Qué hacer en caso de averías? Avería Causa ¿Qué hacer? Capacidad de succión Reducción del número de revo- Aumentar el número de revoluciones afectada luciones del motor del motor, véase Ajuste del número de revoluciones del motor, p. 95 .
  • Seite 104: Datos Técnicos

    Marcado UKCA: United Kingdom Conformity Assessed Por medio de este símbolo, constatamos que el producto cumple con los requisitos establecidos en las UK Designated Standards. https://www.brand.de/es/ Información sobre patentes compliance/ip China RoHS (EFUP) El período de uso respetuoso con el medio ambiente (EFUP, por sus siglas en inglés) define el marco temporal en años, dentro del cual...
  • Seite 105: Información Para Pedidos

    9 Información para pedidos 9 Información para pedidos 9.1 Equipo Color de la parte superior de N.° de ref. N.° de ref. la carcasa (con fuente de alimentación (Sin fuente de alimentación universal y adaptador para universal y adaptador para países) países) Antracita...
  • Seite 106 9 Información para pedidos Paquete de baterías Datos técnicos de la batería, véase Datos técnicos, p. 104 . Descripción N.° de ref. Paquete de baterías NiMH 26630 Adaptador de silicona con válvula de retención Descripción N.° de ref. Adaptador de silicona 26508 Carcasa de adaptador Color...
  • Seite 107: Reparación

    El formulario se puede pedir al proveedor o al fabricante, o bien, se puede descargar en el sitio web www.brand.de/es. Dentro de EE. UU. y Canadá Contactar con BrandTech Scientific, Inc. para aclarar las condiciones de devolución del equipo antes de enviarlo al servicio técnico.
  • Seite 108: Direcciones De Contacto

    11 Responsabilidad por defectos Direcciones de contacto Alemania: EE. UU. y Canadá: ® BRAND GMBH + CO KG BrandTech Scientific, Inc. Otto-Schott-Straße 25 11 Bokum Road 97877 Wertheim (Germany) Essex, CT 06426-1506 (USA) Tel.: +49 9342 808 0 Tel.: +1-860-767 2562...
  • Seite 109: Eliminación

    12 Eliminación EE.UU. y Canadá: Encontrará informaciones sobre la garantía en el sitio www.brand- tech.com. 12 Eliminación El símbolo que puede verse al costado significa que las pilas/baterías y los equi- pos electrónicos deben desecharse por separado de los residuos domésticos (re- siduos municipales sin separar) al finali- zar su vida útil.
  • Seite 110 Istruzione 9974 18...
  • Seite 111 Indice Indice 1 Introduzione ................113 Contenuto della fornitura............113 Destinazione d'uso............... 113 2 Sicurezza ................114 Funzioni ..................115 Limiti di impiego ................115 Usi non previsti................116 Condizioni per lo stoccaggio ............116 3 Elementi di funzionamento e di comando ........117 4 Messa in funzione ..............
  • Seite 112 Indice 10 Riparazione................134 10.1 Invio al servizio riparazioni ............134 11 Garanzia ................. 135 12 Smaltimento ................136 Istruzione 9974 18...
  • Seite 113: Introduzione

    1 Introduzione 1.1 Contenuto della fornitura Pipettatore, Batteria al nichel-metallo idruro, Alimentatore, 2 Filtri a membrana sostitutivi 0,2 µm, Supporto a parete, Istruzioni per l’uso 1.2 Destinazione d'uso • Leggere attentamente le istruzioni per l'uso prima del primo utilizzo. • Le istruzioni per l'uso sono parte dello strumento e devono essere conservate in modo da essere facilmente accessibili.
  • Seite 114: Sicurezza

    2 Sicurezza 1.2.3 Rappresentazione Rappresenta- Significato Rappresenta- Significato zione zione 1. Task Indica un compito da espletare. > Indica un presupposto da rispettare. a., b., c. Indica singoli passaggi di un com- Indica un risultato. pito. 2 Sicurezza Leggere attentamente prima dell'uso! Lo strumento da laboratorio accu-jet®...
  • Seite 115: Funzioni

    2 Sicurezza 6. Operare sempre in modo che né l'utilizzatore né altre persone siano esposte a pericoli. Evitare spruzzi. Utilizzare soltanto recipienti adat- 7. Non applicare mai forza eccessiva sullo strumento. 8. Utilizzare solo accessori originali e pezzi di ricambio originali. Non apportare modifiche tecniche.
  • Seite 116: Usi Non Previsti

    2 Sicurezza • Tensione di vapore fino a max. 500 mbar. Sopra i 300 mbar aspirare lentamente, per evitare l‘ebollizione del liquido. • Densità fino a 9 g/cm 2.3 Usi non previsti Lo strumento non deve essere utilizzato con liquidi i cui vapori hanno ef- fetto corrosivo o aggrediscono i materiali silicone o la gomma EPDM (mo- nomero etilene-propilene diene).
  • Seite 117: Elementi Di Funzionamento E Di Comando

    3 Elementi di funzionamento e di comando 3 Elementi di funzionamento e di comando (oben | top) (unten | bottom) Pulsante di pipettaggio superiore (racco- Guscio di alloggiamento superiore gliere il liquido) Pulsante di pipettaggio inferiore (eroga- Rotella di regolazione per il numero di gi- re il liquido) ri del motore Superficie di appoggio del guscio di al-...
  • Seite 118: Messa In Funzione

    4 Messa in funzione Abbrev. Materiale Polipropilene PTFE Politetrafluoroetilene Silicone 4 Messa in funzione 4.1 Collegare la batteria Svitare l'alloggiamento dell'adattato- re. L’adattatore e il filtro rimangono nell’alloggiamento dell’adattatore. Rimuovere l’alloggiamento. ð Il vano della batteria diventa visibile. Mantenere il connettore della batte- ria dal cavo, orientarlo e inserirlo sal- damente nella presa, fino a quando non si innesta in posizione in modo...
  • Seite 119: Caricare La Batteria

    4 Messa in funzione Inserire l’alloggiamento. A tal propo- sito verificare che l’alloggiamento si innesti nelle fessure previste sopra la rotella di regolazione (1) e nel raccor- do a vite dell’alloggiamento dell’adattatore (2). Spingere la parte superiore dell’allog- giamento nei gusci dell’alloggiamen- to e avvitare l’alloggiamento dell’adattatore.
  • Seite 120 4 Messa in funzione AVVISO! Utilizzare esclusivamente l’alimentatore originale del produttore! L’impiego di un altro alimentatore può danneggiare lo strumento e la batteria. Innestare l’adattatore per paese sull’alimentatore. Collegare l’alimentatore allo stru- mento. Inserire l’alimentatore nella spina di rete. ð Lo strumento viene caricato. L’opera- zione di carica è...
  • Seite 121: Avvio Dello Strumento

    4 Messa in funzione AVVISO! > La carica di mantenimento impedisce il sovraccarico e riduce al mini- mo il cosiddetto lazy battery effect (effetto batteria pigra), simile all’effetto memoria. Questo effetto è il risultato di sovraccaricamenti ripetuti; il sintomo è che la batteria sembra essere completamente carica ma si scarica immediatamente dopo un brevissimo periodo di utilizzo.
  • Seite 122: Regolare Il Numero Di Giri Del Motore

    4 Messa in funzione 4.7 Regolare il numero di giri del motore Per la rotella di regolazione vedere Elementi di funzionamento e di co- mando, p. 117 Il numero di giri del motore può essere regolato in modo continuo, da un massimo (+) ad un minimo (-), ruotando la rotella di regolazione.
  • Seite 123: Aspirazione Con Pipetta

    5 Aspirazione con pipetta Premere saldamente il supporto a parete sulla superficie di fissaggio. 5 Aspirazione con pipetta 1. Innestare la pipetta AVVERTENZA! Assicurarsi della salda sede della pipetta. Non applicare mai forza eccessiva! Sussiste il pericolo di rottura del vetro, in par- ticolare in caso di pipette sottili! Pericolo di lesioni! Afferrare la pipetta il più...
  • Seite 124: Regolazione Del Volume

    5 Aspirazione con pipetta venga a trovare leggermente al di so- pra del segno di graduazione deside- rato. Se si premono entrambi i pulsanti di pipettaggio si può aspirare o erogare un liquido in modo molto sensibile. Questo risulta particolarmente utile quando si regola il menisco o si utiliz- zano pipette con piccoli volumi.
  • Seite 125 5 Aspirazione con pipetta 4. Svuotare la pipetta Premere lentamente il pulsante inferiore di pipettaggio. La velocità di pipettaggio dipende da quanto vengono premuti i pulsanti di pipet- taggio. Nella modalità operativa “Soffiaggio con l’ausilio del motore” la velocità dipende anche dal numero di giri del motore che è stato impostato 5.
  • Seite 126: Pulizia

    6 Pulizia 6 Pulizia AVVISO! accu-jet® S non è sterilizzabile in autoclave Pulire occasionalmente i componenti dell'alloggiamento con un panno umido. Con un utilizzo conforme, lo strumento non necessita di manuten- zione. 6.1 Controllare la tenuta Dopo la regolazione del menisco e senza azionare le valvole non deve fuoriuscire del liquido dalla pipetta.
  • Seite 127 6 Pulizia AVVISO! La sostituzione o la pulizia sono necessarie soltanto nel caso in cui una pipetta sia stata riempita troppo o se la potenza di aspirazione è com- promessa. Estrarre la pipetta. Svitare l'alloggiamento dell'adattato- Estrarre l’alloggiamento superiore. Spingere all’esterno l’adattatore e il filtro a membrana dal lato affusolato dell’alloggiamento dell’adattatore Rimuovere il filtro a membrana difet-...
  • Seite 128 6 Pulizia Per pulire l'adattatore, sciacquarlo accuratamente con l'aiuto di uno spruzzino riempito con un liquido de- tergente adatto, ad es. acqua. Suc- cessivamente soffiarlo con aria e asciugarlo. Inserire, premendo, il nuovo filtro a membrana con l’estremità più spessa rivolta in basso, prima nell'adattatore (il lato più...
  • Seite 129 6 Pulizia AVVISO! Indicazione sui filtri sterilizzabili in autoclave È responsabilità dell'utente controllare l'efficacia della sterilizzazione in autoclave. Non tutti i filtri a membrana sono adatti! Utilizzare solo acces- sori originali. > Lo strumento è equipaggiato di serie con un filtro a membrana da 0,2 µm ( codice colore rosso).
  • Seite 130: Problema - Cosa Fare

    7 Problema - Cosa fare? 7 Problema - Cosa fare? Problema Causa Cosa fare? Potenza di aspira- Il numero di giri del motore è Aumentare il numero di giri del motore, ve- zione ridotto dere Regolare il numero di giri del motore, compromessa p. 122 .
  • Seite 131: Dati Tecnici

    Regno Unito) Con questo marchio confermiamo che il prodotto soddisfa i requi- siti definiti dagli UK Designated Standards. www.brand.de/ip Informazioni sul brevetto L'etichetta EFUP (Environment Friendly Use Period - Periodo d'uso ecosostenibile) prevista dal regolamento cinese China RoHS (Re-...
  • Seite 132: Informazioni Ordinazione

    9 Informazioni ordinazione 9 Informazioni ordinazione 9.1 Strumento Colore della parte superiore N° ord. N° ord. dell’alloggiamento (con alimentatore universale (Senza alimentatore universa- e adattatore per paese) le e senza adattatore per pae- Antracite 26350 26360 Violaceo 26351 26361 Petrolio 26352 26362 Ametista...
  • Seite 133: Gruppo Batterie

    9 Informazioni ordinazione Gruppo batterie Per i dati tecnici relativi alla batteria, vedere Dati tecnici, p. 131 . Descrizione N° ord. Gruppo batterie NiMH 26630 Adattatore di silicone con valvola antiritorno Descrizione N° ord. Adattatore di silicone 26508 Alloggiamento dell'adattatore Colore N°...
  • Seite 134: Riparazione

    I moduli possono essere richiesti al distributore o al produttore, oppure si possono scaricare dal si- to www.brand.de. All'interno degli Stati Uniti e del Canada Si invita a chiarire i prerequisiti per la restituzione con BrandTech Scienti- fic, Inc.
  • Seite 135: Indirizzi Di Contatto

    11 Garanzia Indirizzi di contatto Germania: Stati Uniti e Canada: ® BRAND GMBH + CO KG BrandTech Scientific, Inc. Otto-Schott-Straße 25 11 Bokum Road 97877 Wertheim (Germania) Essex, CT 06426-1506 (USA) T +49 9342 808 0 T +1 -860 -767 2562...
  • Seite 136: Smaltimento

    12 Smaltimento Stati Uniti e Canada: Per informazioni sulla garanzia consultare il sito www.brandtech.com. 12 Smaltimento Il simbolo qui accanto significa che le batterie/batterie ricaricabili e i dispositivi elettronici devono essere smaltiti separa- tamente dai rifiuti domestici (rifiuti urba- ni non differenziati) alla fine della loro durata di utilizzo.
  • Seite 137 目录 1 引言 ............ 139 供货范围 ...........139 使用规定 ...........139 2 安全 ............ 140 功能 ..........141 使用限制条件 ........141 使用排除范围 ........141 储存条件 ...........141 3 功能和操作元件 .......... 142 4 调试 ............ 143 连接电池 ...........143 电池充电 ...........144 启动设备 ...........145 选择运行模式 ........145 吸液或放液 .........146 更改移液速度 ........146 调节电机转速...
  • Seite 138 目录 10 维修 ............ 157 10.1 送修 ..........157 11 缺陷责任 ..........159 12 废弃处理 ..........159 操作手册 9974 18...
  • Seite 139: 供货范围

    1 引言 1.1 供货范围 移液管助吸器、镍氢电池、电源、2 个 0.2µm, 备用滤膜、墙壁支 架、使用说明书 1.2 使用规定 • 在第一次使用前请认真阅读本使用说明书。 • 该使用说明书是此设备所包含的部分,必须妥善保存并且易于取 阅。 • 如果将本设备交予第三方,须随附本使用说明书。 1.2.1 危险等级 下列信号词提示可能存在的危险: 信号词 含义 危险 将导致重伤或死亡。 警告 可能导致重伤或死亡。 小心 可能导致轻伤或中度伤害。 提示 可能导致损失财物。 1.2.2 使用说明书的符号 图标 含义 图标 含义 危险位置 爆炸危险 戴护目镜 戴防护手套...
  • Seite 140 2 安全 2 安全 务必请仔细通读! 实验室设备 accu-jet® S 可与危险材料、工作过程和配件结合使用。本 使用说明书未展示可能出现的安全问题。用户有责任确保遵守安全法 规和健康法规,并在使用前确定存在的限制条件。 1. 所有使用者在使用本设备之前必须阅读和注意本使用说明书。 2. 遵守一般危险提示和安全法规,例如穿戴防护服、护目镜和防护 手套。 3. 请注意试剂供应商提供的说明。 4. 请勿在潜在爆炸性气体环境中使用设备,请勿对易燃介质进行移 液。 5. 仅将设备用于液体计量,并且仅在规定的使用限制内使用。注意 使用排除范围,参见使用排除范围, 页 141 !如有疑问,请联 系制造商或者经销商。 6. 请始终以对使用者及他人均安全的方式使用该设备。避免飞溅。 仅使用合适的容器。 7. 切勿使用暴力。 8. 仅使用原装配件和备件。不得进行任何技术更改。不得违背使用 说明书的说明进一步拆解设备! 9. 使用前请检查本设备的状态是否正常。如果有设备故障迹象,则 请立即停止移液并遵照章节 故障——如何处理? 进行操作。必 要时请联系制造商。...
  • Seite 141: 使用限制条件

    2 安全 2.1 功能 该设备用作容量范围在 0.1 ml 至 200 ml 之间且吸管外径小于 9.2 mm 的玻璃或塑料测量和容量移液器吸移液体的辅助工具。在正确处理 时,待计量的液体仅与移液器接触。 2.2 使用限制条件 设备用于在注意以下物理极限条件的情况下吸移液体: • +10 °C 至 +40 °C(从 50 °F 至 104 °F)之间(设备和试 剂) • 蒸汽压力最高 500 mbar。超过 300 mbar 时缓慢吸取,以避免液 体沸腾。 • 密度最大 9 g/cm 2.3 使用排除范围...
  • Seite 142: 功能和操作元件

    3 功能和操作元件 3 功能和操作元件 (oben | top) (unten | bottom) 外壳上壳 上移液按钮(吸取液体) 下移液按钮(放掉液体) 电机转速调节轮 运行模式选择开关 外壳上壳的支承面 电源 充电适配器 把手支承面 充电插口 适配器外壳 (PP) 适配器/止回阀(SI/PTFE) 滤膜 (PP/PTFE) 压力平衡孔 有关电压和耗电量的信息,参见 技术参数, 页 155 。 操作手册 9974 18...
  • Seite 143: 连接电池

    4 调试 缩写 材料 聚丙烯 PTFE 聚四氟乙烯 硅胶 4 调试 4.1 连接电池 拧下适配器外壳。适配器和过滤器 留在适配器外壳中。 拆下外壳。 ð 可以看见电池盒。 将电池插头固定在电缆上,对齐并 牢固地插入插口中,直到可听到卡 入声。放入电池。 9974 18 操作手册...
  • Seite 144: 电池充电

    4 调试 放入外壳。这时候要注意,外壳嵌 合到调节轮 (1) 上方指定凹槽中, 并且嵌合到适配器外壳 (2) 的螺纹 接头中。 将外壳上部压入外壳壳体中,并拧 上适配器外壳。 为电池充电,直到 LED 充电指示灯 闪烁绿色。充电时间约 4 小时,请 参见 电池充电。 4.2 电池充电 警告 损坏的电源或充电电缆 因触电导致的受伤危险。 不得使用损坏的电源。 > 如果充电电缆损坏,请勿使用电源。 > 操作手册 9974 18...
  • Seite 145: 启动设备

    4 调试 注意 仅使用制造商的原装电源! 使用不同的电源可能会损坏设备和电池。 将国家专用适配器插入电源。 将电源连接到设备上。 将电源插入电源插头中。 ð 设备正在充电。可通过外壳上部的 LED 充电指示灯来识别。有关运行 时长和充电时间,请参见 Technische Daten, 页 155 。 LED 充电指示灯 状态 如何处理? 绿: 电池正在充电。正在进行涓流 您可以使用该设备进行工作。 闪烁 充电。 设备已充满电。 绿: 电池充电中 也可以一边充电一边继续工 长亮 作。 红: 电池电量几乎为空。 中断使用该设备的工作。 闪烁 给电池充电。 也可以一边充电一边继续工 作。 红: 电池电量为空。...
  • Seite 146: 吸液或放液

    4 调试 4.5 吸液或放液 移液按钮,请参见 功能和操作元件, 页 142 按下上移液按钮移液器充液,按下下移液按钮移液器放液。 4.6 更改移液速度 速度受所设最大电机转速限制。上移液按钮或下移液按钮压入越深, 则吸液或排液的速度就越快。 4.7 调节电机转速 调节轮,请参见 功能和操作元件, 页 142 通过转动调节轮,可以在最大(+)到最小(-)范围内连续调节电机 转速。我们建议大容量移液器采用最大电机转速,小容量移液器采用 较小电机转速。 4.8 保管设备 4.8.1 台式搁架 accu-jet® S 可以在插有移液器的状态下 放在平坦表面上。 操作手册 9974 18...
  • Seite 147 4 调试 4.8.2 墙壁支架 使用适当的清洁剂(不得使用渗油 的家用洗涤剂)和无绒布清洁安装 表面并等待其干燥。 从胶带上撕下保护膜 将墙壁支架牢固地压在安装表面 上。 9974 18 操作手册...
  • Seite 148 5 吸移 5 吸移 1.插上移液器 警告 注意移液器位置是否固定。切勿使用暴力!尤其是薄壁移液 器,存在玻璃断裂危险!受伤危险! 始终尽可能密封地抓住移液器的上 部末端,并小心地推入到适配器 中,直到停止不动。 始终保持插有移液器的设备垂直, 吸头朝下。 2.填充移液器 将移液器吸头浸入液体中。 慢慢按下移液器顶部按钮并填充移 液器,使弯月面略高于所需的标 记。 如果按下两个移液按钮,则它们可 以非常灵敏地吸液或放液。这在调 整半月板或使用小容量移液器时特 别有用。 注意 不要过度填充移液器。 操作手册 9974 18...
  • Seite 149 5 吸移 3.调节体积 必要时用无纤维的毛巾擦拭移液器 吸头。 缓慢压入下移液按钮并放液,直到 弯月面正好被调节到所需标记位 置。 4.排空移液器 慢慢压入下移液按钮。移液速度取决于移液按钮被压入多深。“电 机辅助吹出”运行模式下,它还取决于电机转速。 5.吸移后 尽可能抓住移液器上部位置,然后将其从适配器中拉出。 9974 18 操作手册...
  • Seite 150: 检查密封性

    6 清洁 6 清洁 注意 accu-jet® S不可高压灭菌 时不时用沾湿的毛巾擦拭外壳部件。常规使用时设备无需维护。 6.1 检查密封性 调整弯月面之后,如果不致动阀,则不 得有液体从移液器中滴落。如果移液器 滴液,请参见 故障 - 如何处理?, 页 154 6.2 更换过滤器和清洁适配器 警告 污染和感染的风险 戴防护手套和护目镜。 注意 只有在移液器过度填充或者抽吸功能受不利影响时才必要更换过滤器 或进行清洁。 操作手册 9974 18...
  • Seite 151 6 清洁 抽出移液器。 拧下适配器外壳。 移除顶部外壳。 从适配器外壳的锥形侧推出适配器 和滤膜。 抽出有缺陷的滤膜。 9974 18 操作手册...
  • Seite 152 6 清洁 清洁适配器时,使用例如水等适当 的清洁液体小心地冲洗吸头瓶。之 后吹干并晾放。 首先将具有更厚接口的新滤膜向下 压入适配器中(更薄的锥形侧朝 上)并装入适配器外壳中。 将外壳上部压入外壳壳体中,并拧 上适配器外壳。 操作手册 9974 18...
  • Seite 153 6 清洁 注意 关于高压灭菌过滤器的提示 用户每次应自行对高压消毒处理的有效性进行仔细检查。并非每一个 滤膜都适合!仅使用原装配件。 > 该装置标配 0.2µm 滤膜(红色颜色代码)。 > 滤膜在 121 °C (250 °F) 条件下最多可以高温消毒五次。 > 使用 0.2µm 滤膜(用于细胞培养),可实现 B 类体积公差。 为了符合 A 类体积公差,需要使用 3µm 滤膜。由于孔径较大,这 > 些对移液器的自由流出时间的影响较小,请参见 备件。 9974 18 操作手册...
  • Seite 154: 故障--如何处理

    7 故障——如何处理? 7 故障——如何处理? 故障 原因 如何处理? 抽吸功率 电机转速降低 提高电机转速,请参见 调节电机转 受到影响 速, 页 146 。 将选择开关切换为吹出,并将下移液 止回阀已关闭 按钮按下,请参见 Betriebsart wählen, 页 145 移液器滴液 过滤器位置不正确 正确放入过滤器,参见 Filter austauschen und Adapter reinigen, 页 150 。 适配器或 正确放入适配器或移液器,参见 移液器损坏 Filter austauschen und Adapter reinigen, 页 150 。 移液器未固定在适配器...
  • Seite 155: 技术参数

    充电温度:+10 °C 至 +35 °C 8.1 产品上的标识 标志或编号 含义 XXZXXXXX 序列号 快速响应代码 包含序列号 我方通过此标志确认产品符合 EC 指令的要求,并且已 采用指定的检查方法。 UKCA: 英国合规性评估 我方通过此标志确认产品符合 UK Designated Standards 中指定的要求。 www.brand.de/ip 版权信息 中国 RoHS (EFUP) EFUP 确定了电气或电子设备中所含有的危险材料在正 常运行条件下不会泄露或者改变。在用户正常使用时, 此类电气和电子产品不会导致严重的环境污染、不会对 用户造成严重的人身伤害或者财物损失。 (此处:40 年) 不得将电气设备与生活垃圾一起清理。 9974 18 操作手册...
  • Seite 156: 订购信息

    9 订购信息 9 订购信息 9.1 设备 外壳上部的颜色 订购号 订购号 (带通用电源和国家适配 (不带通用电源和国家适配 器) 器) 无烟煤 26350 26360 浆果色 26351 26361 石油蓝 26352 26362 紫水晶色 26353 26363 供货范围,请参见 供货范围。请注意订单号,带或不带电源。 9.2 备件 备用滤膜 产品描述 包装单位 订购号 0.2µm,无菌(红色颜色代码) 每份吸塑包装 1 件 26530 0,2 µm PE 包装袋中...
  • Seite 157 10 维修 带止回阀的硅胶适配器 产品描述 订购号 硅胶适配器 26508 适配器外壳 颜色 订购号 白 26658 墙壁支架 颜色 订购号 白 26539 胶带 包装单位 订购号 3 套 26547 10 维修 10.1 送修 注意 法律明确禁止在未经许可的情况下运输有害材料。 彻底清洁仪器并清除污染物! • 寄回产品时,原则上须附上故障类型与所使用介质的准确描述。 如果缺失所使用介质的相关信息,仪器将不能得到维修。 • 仅发送不含蓄电池的仪器。 • 寄回仪器的风险和费用由寄件人承担。 9974 18 操作手册...
  • Seite 158 主页下载。 在美国和加拿大以内 在返修仪器之前,请联系 BrandTech Scientific, Inc. 确认寄回仪 器需满足的各项前提。 只接受已清洁并已去除污染物的仪器,将和返修授权码一同告知您地 址。将返修授权码标在包装外侧的显眼位置。 联系地址 德国: 美国和加拿大: BRAND GMBH + CO KG BrandTech ® Scientific, Inc. Otto-Schott-Straße 25 11 Bokum Road 97877 Wertheim (Germany) Essex, CT 06426-1506 (USA) 电话 +49 9342 808 0 电话 +1-860-767 2562 传真...
  • Seite 159 11 缺陷责任 11 缺陷责任 我们不承担由于不当拿取,使用,服务,操作或未授权的仪器维修产 生的 结果,我们同样不承担由于正常易损件如活塞,密封垫圈,阀门 的磨损或 者玻璃破损而产生的结果。我们也不承担由于不按照操作手 册/使用说明指 导的操作而产生的结果。我们不承担由于进行任何操 作手册未描述的拆卸 或由于非原装配件的使用而产生的结果。 美国和加拿大: 有关保修责任的 信息 请参见 www.brandtech.com。 12 废弃处理 相邻图标表示,必须在电池 / 蓄电池 和电子设备使用寿命结束时将其与生活 垃圾(未分类的城市垃圾)分开清理。 根据欧洲议会和理事会 2012.7.04 关于废弃电气和电子设备的 2012/09/EC 指令,必须按照国家废物处理法规专业处理废弃电子设 备。 蓄电池含有可能对环境和人类健康造成危害的物质。根据欧洲议会和 理事会 2006.9.6 关于电池和蓄电池的 2006/66/EC 指令,必须根据 国家废弃处理法专业处理废弃电池和蓄电池。废弃处理时必须将电池 和蓄电池完全放电。 9974 18 操作手册...
  • Seite 160 9974 18 | Printed in Germany | 05-0721-1...

Inhaltsverzeichnis