Pioneer SPH-DA120 Installationsanleitung
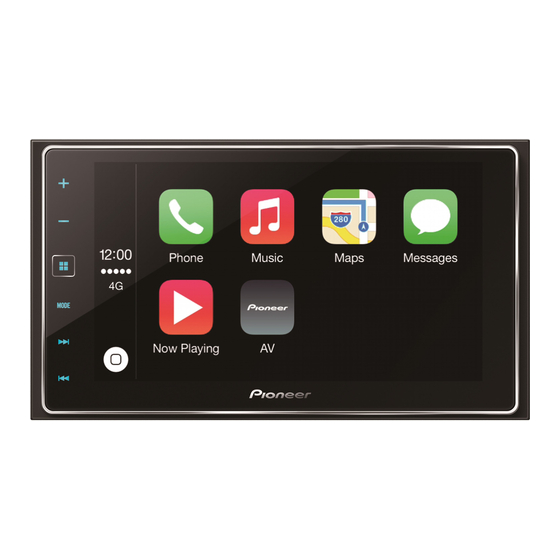
Smartphone-receiver
Vorschau ausblenden
Andere Handbücher für SPH-DA120:
- Bedienungsanleitung (140 Seiten) ,
- Kurzanleitung (2 Seiten)

Verwandte Anleitungen für Pioneer SPH-DA120


Inhaltszusammenfassung für Pioneer SPH-DA120
- Seite 122 Inhalt – Verwendung eines AV-Eingangs 139 Vorsichtsmaßnahmen – Verwenden des AUX-Eingangs 139 Ihr neues Produkt und diese Anleitung 123 Anschluss eines HDMI-Geräts 140 Wichtige Sicherheitshinweise 123 Anschluss des zusätzlichen Displays 141 – Bei Verwendung eines zusätzlichen Verbindung Vor dem Anschließen des Systems zu Displays, das an den hinteren beachten 125 Videoausgang angeschlossen ist 141...
-
Seite 123: Vorsichtsmaßnahmen
Wichtige Sicherheitshinweise diese Anleitung WARNUNG ! Dieses Produkt, Applikationen und die Pioneer empfiehlt, das Produkt nicht selbst Heckkameraoption (sofern erworben) dür- einzubauen. Dieses Produkt ist für den Ein- fen während der Fahrt nicht bedient wer- bau durch professionelle Fachkräfte ausge- den, da Ihre Aufmerksamkeit dem sicheren legt. - Seite 124 Abschnitt Vorsichtsmaßnahmen ! Beachten Sie bitte, beim Fahren stets den Sicherheitsgurt zu tragen. Nicht korrekt an- geschnallte Insassen sind bei einem Unfall einer wesentlich höheren Verletzungsge- fahr ausgesetzt. ! Gewisse nationale und behördliche Vor- schriften können den Einbau und die Be- nutzung dieses Produkts in Fahrzeugen einschränken.
-
Seite 125: Verbindung
Abschnitt Verbindung ! Die Kabel so verlegen, dass sie keinen Vor dem Anschließen des hohen Temperaturen ausgesetzt werden. Systems zu beachten Ein Erhitzen der Isolierung kann zu einer Beschädigung der Kabel führen und einen WARNUNG Kurzschluss, eine Fehlfunktion oder einen Vermeiden Sie jegliche Eingriffe zur Manipu- dauerhaften Schaden am Produkt verur- lation oder Deaktivierung des Handbremsen-... -
Seite 126: Zur Vermeidung Von Schäden
Abschnitt Verbindung ! Um Kurzschlüsse im elektrischen System Zur Vermeidung von Schäden zu verhindern, ist unbedingt vor dem Ein- bau das Minus-Batteriekabel (–) abzuklem- WARNUNG ! Verwenden Sie Lautsprecher mit mehr als men. 50 W (Belastbarkeit) und 4 W bis 8 W (Impe- danz). -
Seite 127: Anmerkung Zum Blau/Weißen Kabel
Abschnitt Verbindung ! Die Anschlussstecker auf die gleichfarbi- Mitgelieferte Teile gen Anschlüsse aufstecken (blauer Stecker auf blauen Anschluss, schwarz auf schwarz usw.) ! Einzelheiten zum Anschluss des Leistungs- verstärkers und anderer Geräte siehe Be- nutzerhandbuch. Die Anschlüsse entsprechend ausführen. Dieses Produkt Stromkabel ! Wegen des eingebauten BPTL-Schaltkrei- ses die *-Seite des Lautsprecherkabels... -
Seite 128: Stromkabel Anschließen (1)
Abschnitt Verbindung Stromkabel anschließen (1) Hinweis Hinweise Je nach Fahrzeugtyp unterscheidet sich · Wenn an dieses Produkt ein Subwoofer (*5) anstatt eventuell die Funktion von *2 und *4. eines Hecklautsprechers angeschlossen ist, dann Schließen Sie in diesem Fall *1 an 4* und *3 ändern Sie die Einstellung für den hinteren Ausgang in an *2 an, wie in der Abbildung dargestellt. - Seite 129 Abschnitt Verbindung Dieses Produkt Stromversorgung Sicherung (10 A) Stromkabel Gelb/Schwarz (MUTE) Schließen Sie ein Gerät mit Stummschaltungsfunktion an das Stummschaltungskabel an. Lassen Sie dieses Kabel anderenfalls unbenutzt. Hinweis Die Audioquelle wird stumm geschaltet oder gedämpft, während die folgenden Töne normal ausgegeben werden. Einzelheiten siehe Bedienungsanleitung.
-
Seite 130: Stromkabel Anschließen (2)
Verwendung einer Heckkamera. Anderenfalls vom Fahrzeugmodell ab. Einzelheiten können Sie nicht zum Heckkamerabild erfahren Sie bei Ihrem autorisierten umschalten. Pioneer-Händler oder einem Einbauspezialist. WARNUNG DAS HELLGRÜNE KABEL AM STROMANSCHLUSS IST DAFÜR AUSGELEGT, DEN FESTSTELLBREMSENSTATUS ZU ERMITTELN UND MUSS AN DIE STROMVERSORGUNGSSEITE DES FESTSTELLBREMSENSCHALTERS ANGESCHLOSSEN WERDEN. -
Seite 131: Anschluss Des Systems
Abschnitt Verbindung Anschluss des Systems Dieses Produkt Antennenbuchse Kabelfernbedienungseingang Entnehmen Sie Details der Bedienungsanleitung des Kabelfernbedienungs-Adapters (separat erhältlich). Fahrzeugantenne Mikrofon GPS-Antenne 3,55 m WARNUNG · Zur Vermeidung von Unfallgefahren und der möglichen Verletzung geltendenRechts sollte dieses Produkt außer zu Navigationszwecken nie während der Fahrtbenutzt werden. Zusätzliche Displays sollten so installiert sein, dass sie denFahrer nicht ablenken können. -
Seite 132: Anschluss An Den Separat Erhältlichen Leistungsverstärker
Abschnitt Verbindung Anschluss an den separat erhältlichen Leistungsverstärker Leistungsverstärker (separat erhältlich) Cinch-Kabels Heckausgänge (separat erhältlich) (REAR OUTPUT) Leistungsverstärker (separat erhältlich) 15 cm Leistungsverstärker (separat erhältlich) Vordere Ausgänge (FRONT OUTPUT) Dieses Produkt Stromversorgung Weiß, Rot (SWL, SWR) Stromkabel Blau/Weiß An den Systemsteuerungsanschluss des Leistungsverstärkers (max. -
Seite 133: Usb-Kabel Mit Kennzeichnungsetiketten Markieren
Abschnitt Verbindung USB-Kabel mit Kennzeich- Anschluss an ein iPhone nungsetiketten markieren mit Lightning Connector Bevor Sie dieses Produkt in einem Fahrzeug Hinweise einbauen, sollten Sie die USB-Kabel mit Kenn- ! Einzelheiten zum Anschluss an ein externes zeichnungsetiketten markieren. Gerät über ein separat erhältliches Kabel fin- Verbinden Sie die USB-Kabel mit den den Sie in der Bedienungsanleitung des Ka- USB-Anschlüssen 1 und 2 an der Rückseite... -
Seite 134: Anschluss Über Den Hdmi- Anschluss
Abschnitt Verbindung USB-Anschluss 1 Hinweis Dieses Produkt Schließen Sie das USB-Kabel bei der Verwen- dung von Apple CarPlay an den USB-Anschluss 1 an. Anschluss über den HDMI- Anschluss HDMI-Anschluss Die folgenden Kabel sind für einen Anschluss USB-Kabel 1,5 m iPhone mit erforderlich. -
Seite 135: Anschluss An Ein Iphone Mit 30-Poligem Anschluss
Abschnitt Verbindung Anschluss an ein iPhone Anschluss über den RGB-Eingang mit 30-poligem Anschluss Der Anschluss erfolgt über ein USB-Schnitts- tellenkabel für iPod / iPhone (CD-IU201S) (ge- Hinweise trennt erhältlich). ! Einzelheiten zum Anschluss an ein externes USB-Anschluss 1 Dieses Produkt Gerät über ein separat erhältliches Kabel fin- den Sie in der Bedienungsanleitung des Ka- bels. -
Seite 136: Anschluss Des Android™-Geräts
Abschnitt Verbindung ™ Anschluss des Android -Geräts Anschluss eines Android-Geräts über den MHL-Anschluss Der Anschluss erfolgt über das App Connecti- vity Kit (CD-AH200) (getrennt erhältlich). Dieses Produkt Hinweise ! Einzelheiten zum Anschluss an ein externes Gerät über ein separat erhältliches Kabel fin- den Sie in der Bedienungsanleitung des Ka- bels. -
Seite 137: Anschluss Des Mirrorlink - Geräts
Abschnitt Verbindung ™ Anschluss des MirrorLink Befestigen des High-Speed- ® Geräts HDMI -Kabels Der Anschluss erfolgt über ein USB-Schnitts- Verwenden Sie einen Kabelbinder, um das ™ ® tellenkabel zur Verwendung mit MirrorLink High-Speed-HDMI -Kabel sicher zu befesti- Geräten (CD-MU200) (getrennt erhältlich). gen, wenn ein externes Gerät über das High- ®... -
Seite 138: Anschluss Einer Heckkamera
Abschnitt Verbindung Anschluss einer Heckkamera Heckkamera (ND-BC6) Wenn dieses Produkt zusammen mit einer (separat erhältlich) Heckkamera verwendet wird, kann das System so eingestellt werden, dass automatisch auf Heckansicht umgeschaltet wird, wenn Sie den An den Videoausgang Schalthebel in die Position REVERSE (R) bringen. -
Seite 139: Anschluss Einer Externen Videokomponente
Abschnitt Verbindung Anschluss einer externen Verwenden des AUX-Eingangs Videokomponente Dieses Produkt Verwendung eines AV-Eingangs AUX-Eingang An dieses Produkt kann eine externe Video- komponente angeschlossen werden. Dieses Produkt Mini-Buchsen-AV Kabel (CD-RM10) (separat erhältlich) Rot, weiß Gelb 15 cm 23 cm Gelb Rot, weiß... -
Seite 140: Anschluss Eines Hdmi-Geräts
Abschnitt Verbindung Anschluss eines HDMI-Geräts VORSICHT Verwenden Sie unbedingt das spezielle Mini- Dieses Produkt Buchsen-AV-Kabel (CD-RM10) (separat erhältlich) für den Anschluss. Andere Kabel werden unter Umständen anders verlegt, was Bild- und Tonstö- rungen zur Folge haben kann. L : Audio links (weiß) R : Audio rechts (rot) V : Video (gelb) G : Masse... -
Seite 141: Anschluss Des Zusätzlichen Displays
Abschnitt Verbindung Anschluss des zusätzlichen Displays Dieses Produkt Gelb (V OUT) Hinterer Audioausgang Mini-Klinkenkabel (separat erhältlich) An die An den Audioeingänge Videoeingang Zusätzliches Display mit Cinch-Eingangsbuchsen (separat erhältlich) Bei Verwendung eines zusätzlichen Displays, das an den hinteren Videoausgang angeschlossen ist WARNUNG Installieren Sie das zusätzliche Display NIE- MALS so, dass der Fahrer während der Fahrt... -
Seite 142: Einbau
Abschnitt Einbau Vor der Installation zu lich. Dieses Produkt und seine Kabel sind so einzubauen, dass der sichere Betrieb beachten des Fahrzeugs nicht gestört oder behin- dert wird. VORSICHT ! Vergewissern Sie sich, dass sich die ! Dieses Produkt niemals so einbauen, Kabel nicht in der Tür oder im Sitzver- dass: stellmechanismus verfangen und dadurch... -
Seite 143: Zur Vermeidung Elektromagnetischen Rauschens
Abschnitt Einbau — Plätze, die Regen ausgesetzt sind, wie z. Zur Vermeidung B. in Türnähe oder auf dem Fahrzeugbo- elektromagnetischen den. Rauschens ! Bauen Sie dieses Produkt an einem Ort ein, der stabil genug ist, sein Gewicht zu Um Störeinflüsse zu vermeiden sind die fol- tragen. -
Seite 144: Mitgelieferte Teile
Abschnitt Einbau ! Damit die bei Betrieb dieses Geräts entwik- kelte Wärme richtig abgeleitet werden kann, sorgen Sie beim Einbau dafür, dass ausreichend Platz hinter der Rückwand bleibt, und wickeln Sie lockere Kabel so, dass diese keine Öffnungen blockieren Flachrundschraube Senkschraube können. -
Seite 145: Vor Dem Einbau Dieses Produkts
Abschnitt Einbau Vor dem Einbau dieses Produkts Befestigen Sie den Montagerahmen mithilfe eines Schraubendrehers: Die Me- Entfernen Sie den Abdeckring. tallklammern sind in eine sichere Position Ziehen Sie die obere und die untere Seite des (90°) zu biegen. Abdeckrings nach außen, um den Abdeckring zu entfernen. -
Seite 146: Installation Mit Hilfe Der Schraubenbohrungen An Der Seite
Abschnitt Einbau Bringen Sie den Abdeckring an. Wenn die Klinke bei der Installation im Weg ist, können Sie sie herabbiegen. 1 Abdeckring 2 Nut Befestigen Sie den Abdeckring mit nach unten zeigender Nut an der Seite. Installation mit Hilfe der Schraubenbohrungen an der Seite dieses Produkts 1 Vorinstallierter Radio-Montagebügel... -
Seite 147: Einbau Der Gps-Antenne
Abschnitt Einbau Einbau der GPS-Antenne Mitgelieferte Teile VORSICHT Das GPS-Antennenkabel darf nicht verkürzt oder verlängert werden. Veränderungen am Antennenkabel können zu einem Kurz- GPS-Antenne Metallblech schluss oder einer Funktionsstörung und dauerhaften Beschädigung dieses Produkts führen. Kabelklemme (3 Stück) Doppelseitiges Klebe- Hinweise zur Befestigung band ! Die Antenne ist auf einer ebenen Fläche zu... -
Seite 148: Einbau Der Antenne Im Fahrzeuginnenraum (Auf Dem Armaturenbrett Oder Der Hutablage)
Abschnitt Einbau Einbau der Antenne im Fahrzeuginnenraum (auf dem Armaturenbrett oder der Hutablage) WARNUNG Installieren Sie die GPS-Antenne nicht über Sensoren oder Öffnungen am Armaturen- brett des Fahrzeugs, da dies den sachgemä- ßen Betrieb dieser Sensoren oder Öffnungen und die dauerhafte Befestigung der beein- trächtigen könnte. -
Seite 149: Einbau Des Mikrofons
Abschnitt Einbau Einbau des Mikrofons Befestigen Sie den Mikrofon-Clip an der Sonnenblende. ! Bauen Sie das Mikrofon so ein, dass die Richtung und der Abstand zum Fahrer ideal sind, um die Stimme des Fahrers opti- mal zu empfangen. ! Schalten Sie unbedingt das Produkt aus (ACC OFF), bevor Sie das Mikrofon an- schließen. -
Seite 150: Befestigung Auf Der Lenksäule
Abschnitt Einbau Befestigung auf der Lenksäule Lösen Sie den Mikrofonsockel vom Mi- krofon-Clip, indem Sie auf die Zunge drük- ken und den Mikrofonsockel dabei herausschieben. 1 Doppelseitiges Klebeband 2 Kabelklemmen 1 Mikrofon Das Kabel je nach Bedarf mit getrennten 2 Zunge erhältlichen Kabelklemmen im Fahrzeugin- 3 Mikrofonsockel nenraum sichern. -
Seite 151: Nach Dem Einbau
Abschnitt Nach dem Einbau Nach dem Einbau dieses Produkts Schließen Sie den Minuspol (–) wieder an die Fahrzeugbatterie an. Vergewissern Sie sich, dass alle Anschlüsse in Ordnung sind und dieses Produkt korrekt ein- gebaut ist. Hiernach alle zuvor ausgebauten Fahrzeugteile wieder befestigen. Anschließend das Minus-Batteriekabel (–) wieder an den Mi- nuspol (–) der Fahrzeugbatterie anschließen.