Inhaltsverzeichnis
Werbung
Verfügbare Sprachen
Verfügbare Sprachen
Quicklinks
Before operating this product, please read the instructions carefully and save this manual for future use.
Bitte lesen Sie diese Bedienungsanleitung vor der Inbetriebnahme dieses Produkts aufmerksam durch, und bewahren Sie
sie für späteres Nachschlagen auf.
Avant d'utiliser l'appareil, lire attentivement ce mode d'emploi, et le conserver à des fins de référence ultérieure.
Prima di far funzionare questo prodotto, leggere attentamente le istruzioni e conservare questo manuale per riferimenti futuri.
Antes de utilizar este producto, lea cuidadosamente las instrucciones y guarde este manual por si tiene que utilizarlo en el futuro.
このたびは、パナソニック製品をお買い上げいただき、まことにありがとうございます。
●
取扱説明書をよくお読みのうえ、正しく安全にお使いください。
●
ご使用前に
「安全上のご注意」 (J-2 〜 J-5 ページ) を必ずお読みください。
●
保証書は 「お買い上げ日・販売店名」 などの記入を確かめ、取扱説明書とともに大切に保管してください。
保証書別添付
製造番号は、品質管理上重要なものです。製品本体と保証書の製造番号をお確かめください。
SE0809AT5062 -FJ
Printed in Japan
Operating Instructions/Bedienungsanleitung/Mode d'emploi
Istruzioni per l'uso/Instrucciones de funcionamiento/ 取扱説明書
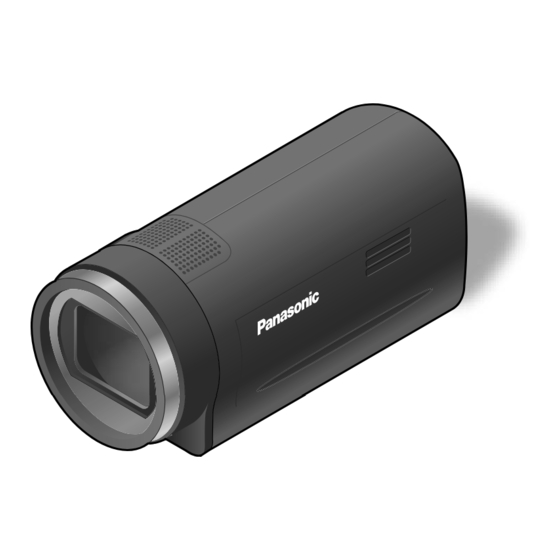
Compact Camera Head/Kompakter Kamerakopf
Tête de caméra compacte/Testa camera compatta
Cabezal de cámara compacto/ コンパクトカメラヘッド
AG-HCK10G
Model No.
VQT2H60-3
Werbung
Kapitel
Inhaltsverzeichnis

Verwandte Anleitungen für Panasonic POVCAM AG-HCK10


Inhaltszusammenfassung für Panasonic POVCAM AG-HCK10
- Seite 1 Operating Instructions/Bedienungsanleitung/Mode d’emploi Istruzioni per l’uso/Instrucciones de funcionamiento/ 取扱説明書 Compact Camera Head/Kompakter Kamerakopf Tête de caméra compacte/Testa camera compatta Cabezal de cámara compacto/ コンパクトカメラヘッド AG-HCK10G Model No. Before operating this product, please read the instructions carefully and save this manual for future use. Bitte lesen Sie diese Bedienungsanleitung vor der Inbetriebnahme dieses Produkts aufmerksam durch, und bewahren Sie sie für späteres Nachschlagen auf.
- Seite 19 Bitte lesen! ist die Sicherheitsinformation. WARNUNG: VORSICHT: • Zur Reduzierung der Gefahr eines Brands Nur das empfohlene Zubehör verwenden, um oder elektrischen Schlags dieses Gerät weder die Gefahr von Feuer und elektrischem Schlag Nässe noch Feuchtigkeit aussetzen. sowie Störungen auszuschalten. •...
- Seite 20 Bitte lesen! (Fortsetzung) VORSICHT: VORSICHT: Um eine ausreichende Belüftung zu Die Einheit bei längerem Gebrauch nicht direkt gewährleisten, dieses Gerät nicht in einem mit der Haut berühren. Bücherregal, Einbauschrank oder an einem Verbrennungen durch niedrige Temperaturen anderen engen Platz aufstellen. sind möglich, wenn die heißen Komponenten Um einen Brand oder elektrischen Schlag dieser Einheit für lange Zeit in direktem...
- Seite 21 EMV-HINWEIS FÜR DEN KÄUFER/ANWENDER DES GERÄTS 1. Anwendbare Standards und Betriebsumgebung Dieses Gerät entspricht: • Standards EN55103-1 und EN55103-2 1996,11. und • elektromagnetische Umgebungen, E1, E2, E3 und E4. 2. Erforderliche Bedingungen zur Einhaltung der oben genannten Standards <1> An das Gerät angeschlossene Geräte und spezielle Verbindungskabel •...
- Seite 22 Dieser Kamerakopf ist ausschließlich für den Betrieb mit dem tragbaren Speicherkarten-Recorder AG- HMR10 bestimmt. Er kann an kein anderes Gerät als das Modell AG-HMR10 angeschlossen werden. Hinweis zu den Abbildungen in dieser Anleitung • Die in dieser Bedienungsanleitung enthaltenen Abbildungen (z. B. von Kamerakopf und anderen Geräten) können geringfügig von der tatsächlichen Ausführung der betreffenden Geräte abweichen.
-
Seite 23: Vorsichtshinweise Zum Betrieb
Vorsichtshinweise zum Betrieb Der Kamerakopf erwärmt sich während des elektromagnetischen Wellen können sich Betriebs. Dies ist normal; es handelt es sich gegenseitig beeinflussen, so dass Bild- und dabei nicht um einen Defekt des Gerätes. Klangverzerrungen bei diesem Gerät auftreten. • Wenn der Kamerakopf so stark gestört wird, dass er Sorgen Sie bei Betrieb dieses Gerätes im Regen, nicht mehr einwandfrei funktioniert, entfernen Sie den Schnee oder an einem Strand unbedingt dafür, dass... -
Seite 24: Reinigung
Vorsichtshinweise zum Betrieb (Fortsetzung) Tragen Sie den Recorder bei angeschlossenem Schalten Sie den Recorder nach Ende des Betriebs aus, und Kamerakopf nicht ausschließlich am trennen Sie dann das Kamerakopf-Sonderzubehörkabel ab. Kamerakopf oder Kamerakabel. • Anderenfalls wird der Kamerakopf oder Richten Sie das Objektiv nicht direkt auf die Sonne. das Kamerakabel einer starken Belastung •... -
Seite 25: Mitgeliefertes Zubehör
Mitgeliefertes Zubehör Beschreibung der Teile • Objektivdeckel Lufteinlass (Seite G-10) (am Kamerakopf befestigt) Eingebautes Mikrofon • Gegenlichtblende (Seite G-10) (am Kamerakopf befestigt) Das Anbringen und Abnehmen der Objektiv Gegenlichtblende wird im Diagramm rechts gezeigt. Gegenlichtblende Sonderzubehör Abnehmen Anbringen • Kamerakopf-Sonderzubehörkabel AG-C20003G (3 m) AG-C20020G (20 m) Stativgewinde... -
Seite 26: Anschließen An Den Tragbaren Recorder Ag-Hmr10
Anschließen an den tragbaren Recorder AG-HMR10 ■ Anschließen des Kamerakopf-Sonderzubehörkabel Achten Sie unbedingt darauf, den Recorder AG-HMR10 auszuschalten, bevor Sie das Kamerakopf-Sonderzubehörkabel anschließen. Bringen Sie den Schlitz im Steckverbinder des Kamerakopf AG-HMR10 Kamerakopf-Sonderzubehörkabel mit der Führung Kamerakabelbuchse am Kamerakopf bzw. Recorder zur Deckung, und führen Sie den Steckverbinder in die Buchse ein. -
Seite 27: Kameraaufnahme
Kameraaufnahme TC 12 : 34 : 56 . 00 120 min Halten Sie die Taste [POWER] des AG-HMR10 mindestens 2 Sekunden – REC 112 min lang gedrückt, um die Stromzufuhr einzuschalten. Daraufhin erscheint die Aufnahmeanzeige auf dem LCD-Monitor des AG-HMR10. PH 1080 Drücken Sie die Taste [REC/PAUSE] des AG-HMR10, um die Aufzeichnung zu starten. - Seite 28 Kameraaufnahme (Fortsetzung) ■ Freihändige Kameraaufnahme Wenn der Kamerakopf zur Aufnahme freihändig gehalten wird, müssen Sie darauf achten, dass Ihre Hand den Lufteinlass, den Luftauslass oder das eingebaute Mikrofon nicht verdeckt. Eingebautes Mikrofon Lufteinlass Luftauslass ■ Befestigung an einem Stativ Befestigen Sie das Stativ am Stativgewinde des Kamerakopfes. Stativgewinde •...
- Seite 29 Wenn der Kamerakopf an einem anderen Gegenstand als einem Stativ befestigt werden soll, sind die folgenden Hinweise zu beachten. • Verwenden Sie das Stativgewinde, um den Kamerakopf sicher zu befestigen. • Achten Sie darauf, den Lufteinlass, den Luftauslass oder das eingebaute Mikrofon des Kamerakopfes nicht mit dem zur Befestigung verwendeten Material zu verdecken.
-
Seite 30: Störungsbeseitigung
Störungsbeseitigung Hochfahren Die Stromzufuhr wird nicht • Prüfen Sie nach, dass das Kamerakopf-Sonderzubehörkabel vorschriftsmäßig eingeschaltet. angeschlossen ist. Siehe die Anschlussbeschreibung auf Seite G-8. Ein ungewöhnliches • Beim Einschalten der Stromzufuhr, Umschalten des Betriebsmodus und Geräusch macht sich Zoomen können von Betriebsgeräuschen begleitet werden. Derartige bemerkbar. -
Seite 31: Technische Daten
Technische Daten [Allgemeine Daten] Objektiv Optisches Bildstabilisator-Objektiv, <Bei Anschluss an den AG-HMR10> Brennweite : f = 4,0 mm bis 48 mm Versorgungsspannung Blendenwert = F1,8 (Weitwinkel) bis F2,8 (Tele) 8 V-9 V Gleichstrom 35-mm-Kameraäquivalent: 40,8 mm bis 490 mm (Speisung über AG-HMR10) (16:9) Leistungsaufnahme 3,5 W Filterdurchmesser... - Seite 32 Technische Daten (Fortsetzung) Verstärkungseinstellungen Bei Einstellung des Eintrags [SYSTEM FREQ] 0 dB bis +34 dB (in 1-dB-Schritten variabel) auf [59.9Hz] Farbtemperatur-Einstellungen Voreinstellung ATW, voreinstellung 3200 K, Voreinstellung 60i/60P-Modus: 5600 K, W.set 1/60 (Standardeinstellung), 1/100, 1/120, Verschlusszeit-Einstellungen 1/250, 1/500, 1/1000, 1/2000 Sek. Bei Einstellung des Eintrags [SYSTEM FREQ] 30P-Modus: auf [50Hz]...
- Seite 33 Minimale Motivleuchtstärke HA-Modus: ca. 1 Lux (mit einer langsamen 1080/60i Belichtungsgeschwindigkeit von 1/2 Sek. und HG-Modus: einer Verstärkung von 34 dB) 1080/60i HE-Modus: 1080/60i [Videoausgang] Aufnahmeformat (Aufnahmemodus und -auflösung) (Aufnahme mit AG-HMR10.) [Recorder-Anschlussbuchse] Bei Einstellung des Eintrags [SYSTEM FREQ] 20-polige Spezial-Schnittstelle auf [50Hz] (für Anschluss an AG-HMR10) PH-Modus:...
- Seite 34 Benutzerinformationen zur Entsorgung von elektrischen und elektronischen Geräten (private Haushalte) Entsprechend der grundlegenden Firmengrundsätzen der Panasonic-Gruppe wurde ihr Produkt aus hochwertigen Materialien und Komponenten entwickelt und hergestellt, die recycelbar und wieder verwendbar sind. Dieses Symbol auf Produkten und/oder begleitenden Dokumenten bedeutet, dass elektrische und elektronische Produkte am Ende ihrer Lebensdauer vom Hausmüll...
- Seite 102 MEMO J-20...
- Seite 103 MEMO J-21...