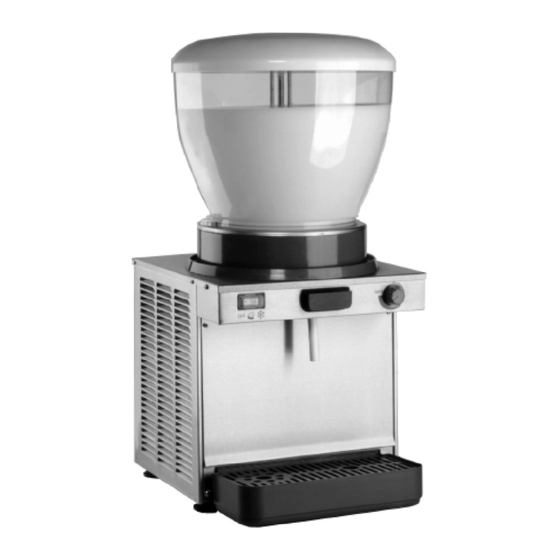
Herunterladen Inhalt Inhalt Diese Seite drucken
Vorschau ausblenden Andere Handbücher für A12:

Werbung

Verfügbare Sprachen
  • DE

Verfügbare Sprachen

All manuals and user guides at all-guides.com
A12 - A19
M A NU ALE D 'I S T RU Z I ON I
O P E R A T O R ' S M A N U A L
CARNE T D'INST RUCT IONS
G E B R A U C H S A N W E I S UN G
MA N UA L D E I NS T R U C C I ON E S

Werbung

Inhaltsverzeichnis
loading

Inhaltszusammenfassung für Ugolini A12

  • Seite 1 All manuals and user guides at all-guides.com A12 - A19 M A NU ALE D ’I S T RU Z I ON I O P E R A T O R ’ S M A N U A L CARNE T D’INST RUCT IONS...
  • Seite 2 In ottemperanza alle Direttive EC 73/23, EC 98/37, EC 89/336. EC DECLARATION OF CONFORMITY We Ugolini S.p.A. - Via dei Pioppi 33 - 20090 Opera Milano - Italy declare, under our responsability, that the products A12 - A19 230V 50Hz are in conformity with the following Standards:...
  • Seite 3: Garanzia

    All manuals and user guides at all-guides.com GARANZIA L’apparecchio è garantito per un periodo di le prescrizioni indicate nelle apposite “Istruzioni”, dodici mesi dalla data di acquisto. Tale data viene concernenti in particolare le avvertenze in tema di certificata dalla ricevuta e/o fattura fiscale e/o da installazione, uso e manutenzione dell’apparec- un documento di consegna rilasciato dal Rivendi- chio.
  • Seite 4: Caratteristiche Tecniche

    All manuals and user guides at all-guides.com A12 - A19 1 CARATTERISTICHE TECNICHE possibilità di errore da tutto il personale respon- sabile del distributore. A 12 A 19 3 INSTALLAZIONE Contenitori trasparenti smontabili Estrarre il distributore dall’imballo, che è con- Capacità...
  • Seite 5: Per Un Funzionamento Sicuro

    All manuals and user guides at all-guides.com 4 PER UN FUNZIONAMENTO distribuzione. Il dispositivo di agitazione conti- SICURO nuerà a funzionare. Per la buona conservazione del prodotto il Non usare il distributore prima di aver letto il distributore deve funzionare anche di notte. presente libretto d’istruzioni.
  • Seite 6 All manuals and user guides at all-guides.com A12 - A19 5. 3 PULIZIA Togliere il contenitore ruotandolo (1) in senso antiorario (vedere figura 2). Pulizia e lavaggio sono fondamentali per garanti- re la perfetta conservazione del gusto della be- vanda e la massima efficienza del vostro distributore.
  • Seite 7 All manuals and user guides at all-guides.com ATTENZIONE del gommino rubinetto fino ad assestarlo com- pletamente (vedere figura 3). Durante il lavaggio del distributore non usare eccessiva quantità di acqua in vici- nanza dei componenti elettrici; in caso con- trario è possibile causare shock elettrici o danneggiare il distributore.
  • Seite 8: Manutenzione

    All manuals and user guides at all-guides.com A12 - A19 6 MANUTENZIONE Ogni giorno: controllare il distributore e verifica- re che non ci siano perdite di prodotto dalle guar- nizioni. Se si notano perdite, controllare prima di tutto che il distributore sia correttamente montato,...
  • Seite 9: Technical Characteristics

    All manuals and user guides at all-guides.com 3 INSTALLATION 1 TECHNICAL CHARACTERISTICS Remove the corrugate container and packing A 12 A 19 materials and keep them for possible future use. Transparent removable Inspect the uncrated unit for any possible bowls damage.
  • Seite 10: Cleaning And Sanitizing Procedures

    All manuals and user guides at all-guides.com A12 - A19 5. 1 DESCRIPTION OF CONTROLS Do not use extension cords to connect the dispenser. Do not operate the dispenser unless all The dispenser is equipped with a power switch panels are restrained with screws.
  • Seite 11 All manuals and user guides at all-guides.com 5. 3. 1 DISASSEMBLY 5. 3. 2 CLEANING ATTENTION ATTENTION Before any disassembly and/or cleaning Before any disassembly and/or cleaning procedure make sure that the dispenser is procedure make sure that the dispenser is disconnected from its power source by disconnected from its power source by unplugging it or switching off the 2-pole...
  • Seite 12: Routine Maintenance

    All manuals and user guides at all-guides.com A12 - A19 minutes. Drain the solution out of the bowl(s). Place the parts in the sanitizing solution Use fresh product to chase any remaining following manifacture ‘s specifications (about five minutes). sanitizer from the bowl(s). Drain this solution. Do not rinse out the machine.
  • Seite 13: Caracteristiques Techniques

    All manuals and user guides at all-guides.com 1 CARACTERISTIQUES 3 INSTALLATION TECHNIQUES 1 Retirez le distributeur de l'emballage. Nous vous conseillons de conserver A 12 A 19 l'emballage, vous pourriez en avoir besoin Conteneurs transparents démontables n plus tard. 2 Assurez-vous que le distributeur n'a pas Capacité...
  • Seite 14: Pour Un Fonctionnement Sans Danger

    All manuals and user guides at all-guides.com A12 - A19 4 POUR UN FONCTIONNEMENT 6 Le distributeur doit toujours fonctionner SANS DANGER à c ou v er c le f er m é, a f in d' é v i t er u n e éventuelle contamination du produit.
  • Seite 15 All manuals and user guides at all-guides.com qu'aucune source de chaleur ne se trouve à bouchon de caoutchouc du robinet vers le proximité du distributeur, en particulier près bas (voir figure 1). des grilles. Vérifiez que la circulation d'air n'est pas gênée par la présence des murs, de boîtes ou autre.
  • Seite 16 All manuals and user guides at all-guides.com A12 - A19 5. 3. 2 LAVAGE 1 Avant de commencer les procédures décrites ci-après, lavez-vous les mains avec du savon antibactérien. 2 Dans une bassine, préparez environ ATTENTION huit litres d'eau chaude (45-60°C) et de produit désinfectant approuvé...
  • Seite 17: Entretien

    All manuals and user guides at all-guides.com 6. 1 ENTRETIEN (À EFFECTUER des conteneurs à l'aide d'une serviette de UNIQUEMENT PAR LE papier jetable. SERVICE D'ASSISTANCE) 5. 4 DESINFECTION DU Mensuel : enlevez la poussière accumulée dans DISTRIBUTEUR MONTE le condensateur. Avant de procéder à cette opération, débranchez le distributeur en retirant la fiche de la prise électrique ou en arrêtant le La désinfection de l'appareil monté...
  • Seite 18: Technische Daten

    All manuals and user guides at all-guides.com A12 - A19 3 INSTALLATION 1 TECHNISCHE DATEN 1 Entfernen Sie die Verpackung des A 12 A 19 D i s p e n s e r s , d i e f ü r e i n e e v e n t u e l l e Abnehmbare Klarsicht-Behälter...
  • Seite 19: Sicherheitsmaßnahmen

    All manuals and user guides at all-guides.com 7 Der Dispenser wird werkseitig nicht befolgen Sie hierbei die in Kapitel 5.3 vorgewaschen und desinfiziert. Vor seinem REINIGUNG enthaltenen Anweisungen. 2 Füllen Sie das gewünschte Produkt in G e b r a u c h m u s s g e m ä...
  • Seite 20: Nützliche Hinweise Wahrend Des Gebrauchs

    All manuals and user guides at all-guides.com A12 - A19 5. 3. 1 DEMONTAGE Geräts nach rechts, wenn Sie ein kühleres Getränk wünschen oder umgekehrt. 5. 2 NÜTZLICHE HINWEISE ACHTUNG WAHREND DES GEBRAUCHS Vor Beginn der Demontage von Komponen- ten muss das Gerät stets vom Stromnetz 1 Die für die Kühlung des Getränks...
  • Seite 21: Montage

    All manuals and user guides at all-guides.com 5. 3. 2 WASCHEN 1 Vor Beginn folgenden beschriebenen Schritte, waschen Sie sich die Hände mit einer bakteriziden Seife. 2 Füllen Sie circa acht Liter heißes ACHTUNG W a s s e r ( 4 5 - 6 0 ° C ) u n d e i n v o n d e n zuständigen Behörden Ihres Landes Vor allen Reinigungsmaßnahmen, muss zugelassenes in eine Wanne und befolgen...
  • Seite 22 All manuals and user guides at all-guides.com A12 - A19 6. 1 WARTUNG (NUR VOM Trocknen Sie den Innenraum des Behälters KUNDENDIENST mit einem Papiertuch ab. VORZUNEHMEN) 5. 4 DESINFEKTION DES Jeden Monat: Entfernen Sie den Staub, der sich MONTIERTEN DISPENSERS auf dem Kondensator abgesetzt hat.
  • Seite 23: Características Técnicas

    All manuals and user guides at all-guides.com 3 INSTALACIÓN 1 CARACTERÍSTICAS TÉCNICAS Quitar el distribuidor del embalaje: guardar este último por si hubiera cualquier eventualidad. A 12 A 19 Controlar que el distribuidor no haya sufrido Contenedores transparentes daños durante el transporte. De haberlos desmontables s u f r i d o s , r e c l a m a r i n m e d i a t a m e n t e a l Capacidad de cada contenedor,...
  • Seite 24: Instrucciones De Empleo

    All manuals and user guides at all-guides.com A12 - A19 utilizar cordones conectores para Para la buena conservación del producto, el e n c h uf a r e l di s t r i bu i d o r a l s u m i n i s tr o d e distribuidor deberá...
  • Seite 25 All manuals and user guides at all-guides.com 5. 3 LIMPIEZA Quitar el contenedor girándolo (1) en sentido antihorario (ver figura 2). La limpieza y el lavado son fundamentales para garantizar la perfecta conservación del gusto de la bebida y la máxima eficiencia de vuestro distribuidor.
  • Seite 26 All manuals and user guides at all-guides.com A12 - A19 Emplear un cepillo apropiado y lavar Empujar (1) el botón mando grifo e insertar minuciosamente con la solución detergente 2) el tubo de goma en su posición en el fondo del evaporador.
  • Seite 27 All manuals and user guides at all-guides.com Enjuagar con bebida fresca para eliminar del fondo de los contenedores todo residuo posible de solución para higienizar. Secar la parte interior de los contenedores con una servilleta de papel desechable. No efectuar más operaciones de enjuague. 6 MANUTENCIÓN Cada día: controlar el distribuidor y que no se verifiquen pérdidas de producto de las juntas.
  • Seite 28 All manuals and user guides at all-guides.com A12 - A19 ELENCO RICAMBI SPARE PARTS LIST LISTE DES PIECES DE RECHANGE ERSATZTEILLISTE DESCRIPCION PIEZAS DE REPUESTO 1 22800-25100 Coperchio contenitore A 19 Bowl cover A 19 Couvercle réservoir A 19 Deckel A 19...
  • Seite 29 All manuals and user guides at all-guides.com 2446_99 V 3.1 04L21 4 22800-25201 Contenitore A 12 Bowl A 12 Réservoir A 12 Behälter A 12 Contenedor A 12 5 22158-00000 Guarnizione di tenuta Bowl gasket Joint du réservoir Behälterdichtung Junta contenedor 6 10028-01900 Gommino rubinetto Pinch tube Tuyau du robinet...
  • Seite 30 All manuals and user guides at all-guides.com A12 - A19 NOTE - NOTES - NOTES - ANMERKUNGEN - NOTAS:...
  • Seite 31 All manuals and user guides at all-guides.com NOTE - NOTES- NOTES - ANMERKUNGEN - NOTAS:...
  • Seite 32 All manuals and user guides at all-guides.com Ugolini spa Via dei Pioppi, 33 - 20090 Opera - (MI) Tel. 02.530059.1 - Fax. 02.530059260 www.ugolinispa.com E-Mail: sales@ugolinispa.com 2446_99 R3.3 05A17...

Diese Anleitung auch für:

A19

Inhaltsverzeichnis