Herunterladen Inhalt Inhalt Diese Seite drucken
Inhaltsverzeichnis

Werbung

Verfügbare Sprachen
  • DE

Verfügbare Sprachen

  • DEUTSCH, seite 1
FROSTIK
Split-Klimaanlage
Split Air Conditioner
Aire acondicionado split
Climatiseur split
Condizionatore split
10029808
www.klarstein.com

Werbung

Inhaltsverzeichnis
loading

Inhaltszusammenfassung für Klarstein FROSTIK

  • Seite 1 FROSTIK Split-Klimaanlage Split Air Conditioner Aire acondicionado split Climatiseur split Condizionatore split 10029808 www.klarstein.com...
  • Seite 3: Inhaltsverzeichnis

    Sehr geehrter Kunde, wir gratulieren Ihnen zum Erwerb Ihres Gerätes. Lesen Sie die folgenden Hinweise sorgfältig durch und befolgen Sie diese, um möglichen Schäden vorzubeugen. Für Schäden, die durch Missachtung der Hinweise und unsachgemäßen Gebrauch entstehen, übernehmen wir keine Haftung. Scannen Sie den folgenden QR-Code, um Zugriff auf die aktuellste Bedienungsanleitung und weitere Informationen rund um das Produkt zu erhalten.
  • Seite 4: Hinweise Zum Kältemittel R32

    HINWEISE ZUM KÄLTEMITTEL R32 Warnhinweise • Die Klimaanlage muss aufrecht aufbewahrt und transportiert werden. Andernfalls können irreparable Kompressorschäden entstehen. Lassen Sie das Gerät im mindestens 24 Stunden stehen, bevor Sie es in Betrieb nehmen. • Schalten Sie den das Gerät vor der Reinigung aus und trennen Sie es von der Stromversorgung.
  • Seite 5: Sicherheitshinweise

    SICHERHEITSHINWEISE Allgemeine Hinweise • Dieses Gerät kann von Kindern über 8 Jahren und von Personen mit eingeschränkten physischen, sensorischen und mentalen Fähigkeiten und/ oder mangelnder Erfahrung und Wissen verwendet werden, wenn diese in das Gerät eingewiesen wurden, es sicher bedienen können und die damit einhergehenden Gefahren begreifen.
  • Seite 6 • Stellen Sie sich keinesfalls auf die obere Abdeckung des Geräts und legen Sie auch keine schweren Gegenstände darauf, da dies zu Sach- und/oder Personenschäden führen könnte. • Die Installation muss von hierfür qualifizierten Personen durchgeführt werden. Andernfalls kann es zu Sach- und/oder Personenschäden kommen. •...
  • Seite 7 • Falls die Länge des Netzstromkabels nicht ausreichen sollte, kontaktieren Sie den Kundendienst, um ein längeres Kabel zu erhalten. Versuchen Sie keinesfalls, das Kabel selbst zu verlängern. • Bei Klimaanlagen ohne Netzstromstecker muss in der Leitung ein Trennschutzschalter installiert werden. •...
  • Seite 8: Gerätebeschreibung

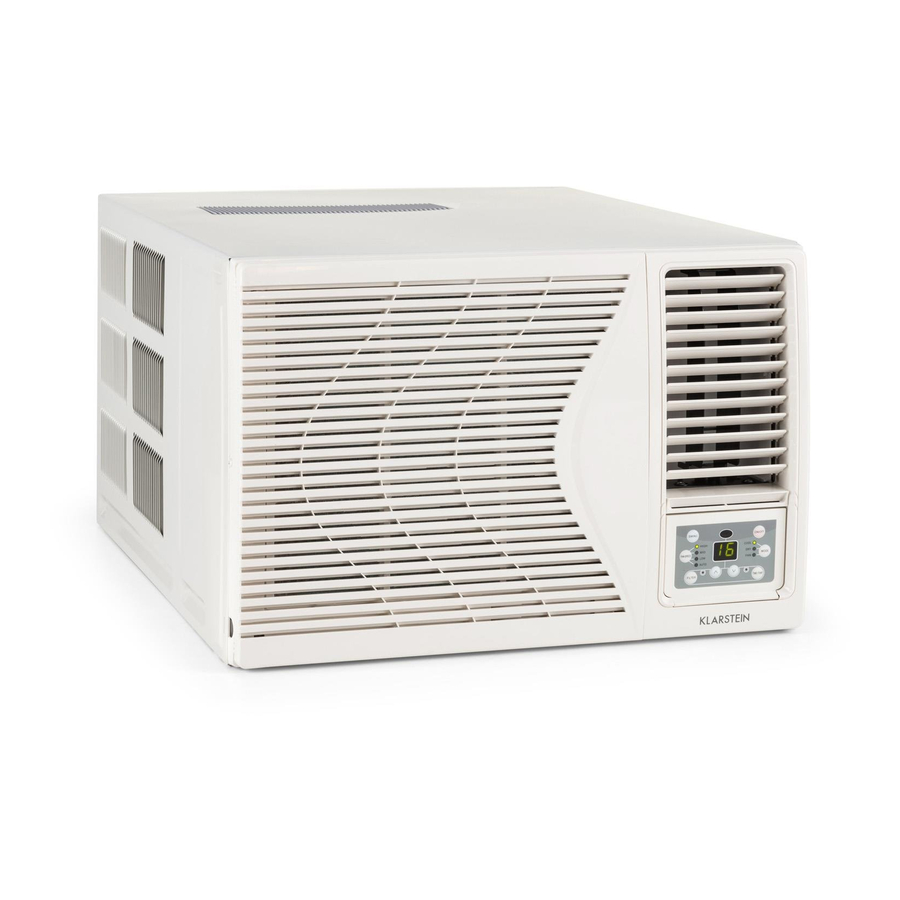
    GERÄTEBESCHREIBUNG Fensterklimageräte regulieren die Raumtemperatur und halten den Raum trocken. Sie sind angenehm für die Arbeit, das Studium und den Alltag. Das Gerät hat einen breiten Anwendungsbereich, beispielsweise in Wohnräumen, in Geschäften, in Hotels, im Büro und in Bibliotheken. Kühlen im Sommer Im heißen Sommer kann das Klimagerät die Lufttemperatur herunterkühlen.
  • Seite 9: Fernbedienung Und Bedienfeld

    FERNBEDIENUNG UND BEDIENFELD Ein/Aus Modus Plus Minus Ventilator Schwenkmodus Zeitautomatik Schlafmodus Zeitautomatik ein Zeitautomatik aus Auto-Modus Schwenkmodus Kühlen Schlafmodus Trocknen Verriegeln Ventilator Geschwindigkeit Heizen Zeiteinstellung Temperatureinstellung...
  • Seite 10: Die Tasten Der Fernbedienung

    Hinweise zur Fernbedienung • Hier handelt es sich um eine Universalfernbedienung für Klimaanlagen mit vielfachen Funktionen. Bei Tasten mit Funktionen, über die das Gerät nicht verfügt, bleibt das Gerät im gleichen Zustand, wenn Sie die Taste drücken. • Sie können das Klimagerät mit der Fernbedienung bedienen, wenn es sich im Standby-Modus befindet.
  • Seite 11 Tasten + und - • Wenn Sie + oder - drücken, erhöht oder senkt die eingestellte Temperatur um 1 °C (oder 1 °F). Halten Sie + oder - 2 Sekunden lang gedrückt, ändert sich die Anzeige der eingestellten Temperatur auf der Fernbedienung schnell. •...
  • Seite 12 Zeitautomatik (TIMER) Abschaltautomatik: Bei eingeschaltetem Gerät: Drücken Sie diese Taste, um die Abschaltautomatik einzustellen. Auf der Anzeige blinken „T-OFF“ und „H“. Drücken Sie innerhalb von 5 Sekunden die Tasten + und -. um die Zeit für die Abschaltung einzustellen. Durch Drücken von + und - erhöhen oder verringern Sie die Zeit um 1/2 Stunde.
  • Seite 13 Bedienung Nach dem Anschluss an die Stromversorgung drücken Sie die Taste ON/OFF auf der Fernbedienung, um das Gerät einzuschalten. Drücken Sie MODE, um den gewünschte Betriebsart zu wählen: AUTO, COOL, DRY, FAN. „+“ oder „-“ drücken, um die gewünschte Temperatur einzustellen. Die Temperatur kann im AUTO-Modus nicht eingestellt werden.
  • Seite 14: Bedienfeld Am Gerät

    BEDIENFELD AM GERÄT Wenn Sie die Fernbedienung nicht verfügbar ist, öffnen Sie das Bedienfeld am Gerät und nehmen manuelle Eingaben vor. Einstellung der Zeitautomatik: (Timer). Mit stellen Sie Ein/Aus: Beim Drücken dieser den Timer ein. Die Zeitautomatik Taste geht das Gerät in den können Sie in 30-Minuten- Betrieb und geht aus, wenn Sie Schritten in einem Bereich von 1...
  • Seite 15: Pflege Und Wartung

    PFLEGE UND WARTUNG Reinigung des Gerätes Schalten Sie das Klimagerät aus. Ziehen Sie den Netzstecker. Verwenden Sie ein feuchtes Tuch, um das Gehäuse zu reinigen. Wenn das Gehäuse sehr schmutzig ist, tauchen Sie das Tuch in warmes Wasser unter 40 °C. Wringen Sie das Tuch aus und wischen Sie den Schmutz ab. •...
  • Seite 16: Fehlerbehebung

    FEHLERBEHEBUNG Problem Überprüfen Klimaanlage funktioniert Gibt es einen Stromausfall? nicht. Ist der Stecker eingesteckt? Ist die Sicherung durchgebrannt? Ist die Spannung zu hoch oder zu niedrig? Die Kühl- und Heizleistung Ist der Luftein oder -auslass blockiert? ist nicht gut. Gibt es in dem Raum eine Wärme- bzw. Kältequelle? Sind die Luftfilter stark verunreinigt? Ist der Ventilator auf einer niedrigen Stufe?
  • Seite 17: Montageanleitung (Nur Für Den Installateur)

    MONTAGEANLEITUNG (NUR FÜR DEN INSTALLATEUR) Wichtige Hinweise zur Installation WARNUNG Verletzungsgefahr! Alle an der Installation der Klimaanlage beteiligten Personen MÜSSEN die gültige Zertifi zierung der zuständigen Behörde und die von dieser Branche anerkannte Qualifi kation für den Umgang mit der Kälteanlage vorweisen können.
  • Seite 18 Überlegungen zum Ort der Montage • Das Kondenswasser muss gut abgeführt werden können. • Montieren Sie das Klimagerät weit entfernt von Fernsehgeräten, Radios usw., um Bild- oder Tonstörungen zu vermeiden. • In maritimen Umgebungen mit salzhaltiger Luft, Orten mit Thermalquellen, die schwefelige Luft enthalten oder in anderen besonderen Umgebungen fragen Sie bitte den Kundendienst, bevor Sie das Gerät verwenden.
  • Seite 19 Montage Entfernen Sie den Aufkleber von der Frontblende. Setzen Sie das Gerät in das Montageloch. • Bei der Montage sollte das Gerät sich nach hinten hin nach unten neigen. • Der Montageort sollte fest genug sein, um ver- mehrte Geräusche und Vibrationen zu vermeiden.
  • Seite 20 Montagehilfen Mauer Sonnenschutz Holzrahmen Gummiplatte 6-10 mm Stütze Waagerechte Linie • Eisenstütze: Das Montageloch muss stabil genug sein, um das Klimagerät zu halten. Wenn es das nicht kann, muss außen eine Eisenstütze befestigt werden. • Sonnenschutz: Auf das Gerät darf nichts fallen und direkte Sonneneinstrahlung sollte vermieden werden.
  • Seite 21: Innenansicht

    Wasserablauf Die Ablaufwanne und der Ablaufschlauch müssen vor der Inbetriebnahme montiert werden. Der Ablauf- schlauch ist nicht im Lieferumfang enthalten. Sie können einen passenden Ablaufschlauch im Handel erwerben, der Ihren speziellen Bedürfnissen genügt. Gehen Sie zur Montage von Ablaufwanne und -schlauch in folgenden Schritten vor: Ziehen Sie das Gehäuse vor.
  • Seite 22: Installationshinweise

    INSTALLATIONSHINWEISE Demontage# Bevor Sie die Klimaanlage abmontieren, nehmen Sie Kontakt zu einem Fachmann auf. Der Abbau des Gerätes muss durch Fachleute erfolgen. Geräuschentwicklung • Das Gerät muss an einem Ort montiert sein, der fest genug ist, um einen erhöhte Lärmpegel und Vibrationen zu vermeiden. •...
  • Seite 23: Produktdatenblatt

    PRODUKTDATENBLATT Angaben nach Verordnung (EU) Nr. 626/2011 Warenzeichen des Lieferanten: Klarstein Modellkennung des Lieferanten: 10029808 Schallleistungspegel in lnnenräumen bei Norm-Nennbedingungen im Kühlbetrieb in 65 dB Der Austritt von Kältemittel (R32) trägt zum Klimawandel bei. Kältemit- tel mit geringerem Treibhauspotenzial tragen im Fall eines Austretens weniger zur Erderwärmung bei als solche mit höherem Treibhauspot-...
  • Seite 24 Angaben nach Verordnung (EU) Nr. 206/2012 Punkt Symbol Wert Einheit Auslegungsleistung: Kühlung Pdesignc Heizung/mittel Pdesignh Heizung/wärmer Pdesignh Heizung/kälter Pdesignh Arbeitszahl: Kühlung SEER Heizung/mittel SCOP/A Heizung/wärmer SCOP/W Heizung/kälter SCOP/C Angegebene Leistung* im Kühlbetrieb bei Raumlufttemperatur 27 (19) °C und Außenlufttemperatur Tj: Tj= 35°C Tj= 30°C Tj= 25°C...
  • Seite 25 Punkt Symbol Wert Einheit Angegebene Leistung* im Heizbetrieb/Heizperiode wärmer bei Raumluft- temperatur 20 °C und Außenlufttemperatur Tj: Tj= 2°C Tj= 7°C Tj= 12°C Tj = Bivalenztemperatur Tj = Betriebsgrenzwert Angegebene Leistung* im Heizbetrieb/Heizperiode kälter bei Raumluft- temperatur 20 °C und Außenlufttemperatur Tj: Tj= -7°C Tj= 2°C Tj= 7°C...
  • Seite 26 Punkt Symbol Wert Einheit Angegebene Leistungszahl*/Heizperiode wärmer bei Raumlufttemperatur 20°C und Außenlufttemperatur Tj: Tj= 2°C COPd Tj= 7°C COPd Tj= 12°C COPd Tj = Bivalenztemperatur COPd Tj = Betriebsgrenzwert COPd Angegebene Leistungszahl*/Heizperiode kälter bei Raumlufttemperatur 20 °C und Außenlufttemperatur Tj: Tj= -7°C COPd Tj= 2°C...
  • Seite 27 Punkt Symbol Wert Einheit Leistungszahl bei zyklischem Intervallbetrieb: im Kühlbetrieb EERcyc im Heizbetrieb COPcyc Minderungsfaktor im Kühlbetrieb** Elektrische Leistungsaufnahme in anderen Betriebszuständen als "Aktiv- Modus": Aus-Zustand Poff 0,000651 Bereitschaftszustand 0,000651 Temperaturregler aus 0,003246 Betriebszustand mit Kurbelwannenheizung Jahresstromverbrauch: Kühlung kWh/a Heizung/mittel kWh/a Heizung/wärmer kWh/a...
  • Seite 28: Hinweise Zur Entsorgung

    HINWEISE ZUR ENTSORGUNG Wenn es in Ihrem Land eine gesetzliche Regelung zur Entsorgung von elektrischen und elektronischen Geräten gibt, weist dieses Symbol auf dem Produkt oder auf der Verpackung darauf hin, dass dieses Produkt nicht im Hausmüll entsorgt werden darf. Stattdessen muss es zu einer Sammelstelle für das Recycling von elektrischen und elektronischen Geräten gebracht werden.
  • Seite 29: Technical Information

    Dear customer, Congratulations on the purchase of your appliance. Please read the following instructions carefully and follow them to prevent potential damage. We accept no liability for damage caused by disregarding the instructions and improper use. Please scan the QR code to access the latest operating instructions and further information about the product.
  • Seite 30: Instructions For Refrigerant R32

    INSTRUCTIONS FOR REFRIGERANT R32 Safety instructions • The air conditioner must be stored and transported in an upright position. Otherwise irreparable compressor damage may occur. Allow the unit to stand for at least 24 hours before operation. • Before cleaning, switch off the appliance and disconnect it from the power supply.
  • Seite 31: Safety Instructions

    SAFETY INSTRUCTIONS General instructions • This appliance can be used by children over the age of 8 and by persons with reduced physical, sensory or mental capabilities and/or lack of experience and knowledge if they have been given supervision or instruction concerning use of the appliance and understand the hazards involved.
  • Seite 32 • Never stand on the top cover of the appliance or place heavy objects on it, as this could cause damage to property and/or personal injury. • Installation must be carried out by persons qualified to do so. Damage to property and/or personal injury may occur if the installation is not carried out by qualified persons.
  • Seite 33 • If the power cord is not long enough, contact Customer Service to request a longer cord. Do not attempt to extend the cable yourself. • For air conditioners without a mains plug, a circuit breaker must be installed in the line. •...
  • Seite 34: Appliance Description

    APPLIANCE DESCRIPTION Window air conditioners regulate the room temperature and keep the room dry. They are comfortable for work, study and everyday life. The appliance has a wide range of applications, for example in living rooms, in shops, in hotels, in the office and in libraries.
  • Seite 35: Remote Control And Control Panel

    REMOTE CONTROL AND CONTROL PANEL On/Off Mode Plus Minus Swing mode Automatic timer Sleep mode Automatic timer on Automatic timer off Auto mode Swing mode Cooling Sleep mode Drying Locking Speed Heating Time setting Temperature setting...
  • Seite 36: Remote Control Buttons

    Instructions for the remote control • This is a universal remote control for air conditioners with multiple functions. For buttons with functions that the appliance does not have, the appliance remains in the same state when you press the button. •...
  • Seite 37 Buttons + and - • Pressing + or - increases or decreases the set temperature by 1 °C (or 1 °F). If you press and hold + or - for 2 seconds, the display of the set temperature on the remote control changes quickly. •...
  • Seite 38 Automatic timer (TIMER) Automatic switch-off: When the appliance is turned on: Press this button to set the automatic switch-off. T-OFF" and "H" flash on the display. Press the + and - buttons within 5 seconds to set the time for the switch-off. Press + and - to increase or decrease the time by 1/2 hour.
  • Seite 39 Operation After connecting to the power supply, press the ON/OFF button on the remote control to switch on the appliance. Press MODE to select the desired operating mode: AUTO, COOL, DRY, FAN. Press "+" or "-" to set the desired temperature. The temperature cannot be set in AUTO mode.
  • Seite 40: Control Panel On The Appliance

    CONTROL PANEL ON THE APPLIANCE If the remote control is not available, open the control panel on the unit and make manual entries. Setting the automatic timer: On/Off: When you press (timer). Press to set the this key, the unit goes into timer.
  • Seite 41: Care And Maintenance

    CARE AND MAINTENANCE Cleaning the appliance Switch off the air conditioner. Unplug the power cord. Use a damp cloth to clean the housing. If the casing is very dirty, dip the cloth in warm water below 40 °C. Squeeze out the cloth and wipe off the dirt. •...
  • Seite 42: Troubleshooting

    TROUBLESHOOTING Problem Check Air conditioner does not Is there a power failure? work. Is the plug connected? Has the fuse blown? Is the voltage too high or too low? Is the voltage too high or Is the air inlet or outlet blocked? too low? Is there a heat or cold source in the room? Are the air filters heavily contaminated?
  • Seite 43: Installation Instructions (For The Installer Only)

    INSTALLATION INSTRUCTIONS (FOR THE INSTALLER ONLY) Important instructions for installation WARNING Danger of injury! All persons involved in the installation of the air conditioner MUST have the valid certifi cation of the competent authority and the qualifi cation recognised by this industry for handling the refrigeration system •...
  • Seite 44 Considerations for the place of installation • It must be possible to drain the condensation water well. • Place the air conditioner far away from TV sets, radios, etc. to avoid picture or sound interference. • In maritime environments with salty air, places with thermal springs containing sulphurous air or in other special environments, please consult customer service before using the appliance.
  • Seite 45 Installation Remove the sticker from the front panel. Place the appliance in the installation hole. • When installing, the appliance should tilt downwards towards the rear. • The installation site should be firm enough to avoid increased noise and vibrations. Fill gaps towards the enclosure with foam or mounting foam.
  • Seite 46 Installation aids Wall Sun protection Wooden frame Rubber panel 6-10 mm Support Horizontal line • Iron support: The installation hole must be stable enough to hold the air conditioner. If it is unable to do so, an iron support must be fixed on the outside.
  • Seite 47: Interior View

    Water drain The drain pan and drain hose must be fitted before commissioning. The drain hose is not included in the scope of delivery. You can purchase a suitable drain hose in the trade to meet your specific needs. Follow the steps below to assemble the drain pan and drain hose: Pull the housing forward Screw the drain tray to the corners of the enclosure with 2 screws...
  • Seite 48: Installation Instructions

    INSTALLATION INSTRUCTIONS Disassembly# Before dismantling the air conditioner, contact a specialist. Before dismantling the air conditioner, contact a specialist. Noise level • The appliance must be installed in a place that is firm enough to avoid increased noise and vibrations. •...
  • Seite 49: Product Data Sheet

    PRODUCT DATA SHEET Information according to Regulation (EU) No. 626/2011 Trademark of the supplier: Klarstein Supplier's model identification: 10029808 Sound power level in indoor rooms at standard nominal conditions in cooling mode 65 dB in dB: The leakage of refrigerant (R32) contributes to climate change. Refrig-...
  • Seite 50 Data according to Regulation (EU) No. 206/2012 Point Symbol Value Unit Rated power: Cooling Pdesignc Heating/medium Pdesignh Heating/warmer Pdesignh Heating/cooler Pdesignh Operating figure: Cooling SEER Heating/medium SCOP/A Heating/warmer SCOP/W Heating/cooler SCOP/C Specified output* in cooling mode at room air temperature 27 (19) °C and outside air temperature Tj: Tj=35°C Tj=30°C...
  • Seite 51 Point Symbol Value Unit Specified output* in heating mode/heating period warmer at room air temperature 20 °C and outdoor air temperature Tj: Tj=2°C Tj= 7°C Tj=12°C Tj = bivalence temperature Tj = operating limit Specified output* in heating mode/heating period colder at room air tem- perature 20 °C and outdoor air temperature Tj: Tj=-7°C Tj=2°C...
  • Seite 52 Point Symbol Value Unit Specified coefficient of performance*/heating period warmer at room air temperature 20°C and outdoor air temperature Tj: Tj=2°C COPd Tj= 7°C COPd Tj=12°C COPd Tj = bivalence temperature COPd Tj = operating limit COPd Specified coefficient of performance*/heating period colder at room air temperature 20 °C and outdoor air temperature Tj: Tj=-7°C COPd...
  • Seite 53 Point Symbol Value Unit Performance figure for cyclic intermittent operation: in cooling mode EERcyc in heating mode COPcyc Reduction factor in cooling mode** Electrical power consumption in operating states other than "active mode": Off mode Poff 0.000651 Standby mode 0.000651 Temperature control off 0.003246 Operating condition with...
  • Seite 54: Disposal Instructions

    DISPOSAL INSTRUCTIONS If there is a legal regulation in your country regarding the disposal of electrical and electronic equipment, this symbol on the product or on the packaging indicates that this product must not be disposed of with household waste. Instead, it must be taken to a collection point for the recycling of electrical and electronic equipment.
  • Seite 55: Datos Técnicos

    Estimado cliente: Le felicitamos por la adquisición de este producto. Lea atentamente el siguiente manual y siga cuidadosamente las instrucciones de uso con el fin de evitar posibles daños. La empresa no se responsabiliza de los daños ocasionados por un uso indebido del producto o por haber desatendido las indicaciones de seguridad.
  • Seite 56: Indicaciones Sobre El Refrigerante R32

    INDICACIONES SOBRE EL REFRIGERANTE R32 Advertencias • Transporte y guarde el aparato en posición vertical. De lo contrario, podría dañar de forma irreparable el compresor. Deje reposar el aparato durante al menos 24 horas antes de ponerlo en funcionamiento. • Apague y desenchufe el aparato antes de limpiarlo.
  • Seite 57: Indicaciones De Seguridad

    INDICACIONES DE SEGURIDAD Indicaciones generales • Este aparato puede ser utilizado por niños a partir de 8 años y por personas con capacidades físicas, sensoriales o mentales reducidas y/o con falta de experiencia y conocimientos si han recibido supervisión o instrucciones sobre el uso del aparato y comprenden los peligros que conlleva.
  • Seite 58 • No se pare sobre la tapa superior del aparato ni coloque objetos pesados sobre ella, ya que podría causar daños materiales y/o personales. • La instalación debe ser realizada por personas cualificadas para ello. Si no lo hace, puede provocar daños materiales y/o personales. •...
  • Seite 59 • Si la longitud del cable de alimentación de red es insufi ciente, póngase en contacto con el servicio de atención al cliente para obtener un cable más largo. No intente extender el cable usted mismo. • En el caso de los acondicionadores de aire sin enchufe, debe instalarse un disyuntor en la línea.
  • Seite 60: Descripción De La Unidad

    DESCRIPCIÓN DE LA UNIDAD Los aires acondicionados de ventana regulan la temperatura de la habitación y la mantienen seca. Son cómodos para el trabajo, el estudio y la vida cotidiana. El dispositivo tiene una amplia gama de aplicaciones, por ejemplo, en salones, en tiendas, en hoteles, en la oficina y en bibliotecas.
  • Seite 61: Panel De Control Y Mando A Distancia

    PANEL DE CONTROL Y MANDO A DISTANCIA Encender/ apagar Modo Más Menos Ventilador Modo de giro Tiempo automático Modo sueño Tiempo automático encendido Tiempo automático apagado Modo auto Modo de giro Enfríar Modo sueño Secar Bloqueo Ventilador Velocidad Calentar Configurar el tiempo Ajuste de temperatura...
  • Seite 62: Los Botones Del Mando A Distancia

    Notas sobre el mando a distancia • Se trata de un mando a distancia universal para aires acondicionados con múltiples funciones. En el caso de los botones con funciones que no tiene la unidad, ésta permanece en el mismo estado cuando se pulsa el botón. •...
  • Seite 63 Teclas + y - • Pulsando + o - se aumenta o disminuye la temperatura ajustada en 1 °C (o 1 °F). Si mantiene pulsado + o - durante 2 segundos, la visualización de la temperatura ajustada en el mando a distancia cambia rápidamente. •...
  • Seite 64 Temporizador automático (TIMER) Apagado automático: Con la alimentación encendida: Presione este botón para ajustar la función de apagado automático. T-OFF" y "H" parpadean en la pantalla. Pulse los botones + y -. en un plazo de 5 segundos para ajustar el tiempo de desconexión. Pulse + y - para aumentar o disminuir el tiempo en 1/2 hora.
  • Seite 65 Funcionamiento Una vez conectado a la red eléctrica, pulse el botón ON/OFF del mando a distancia para encender el aparato. Pulse MODE para seleccionar el modo de funcionamiento deseado: AUTO, FRESCO, SECO, VENTILADOR. Pulse "+" o "-" para ajustar la temperatura deseada. La temperatura no puede ajustarse en el modo AUTO.
  • Seite 66: Panel De Control De La Unidad

    PANEL DE CONTROL DE LA UNIDAD Si el mando a distancia no está disponible, abra el panel de control de la unidad y realice las entradas manuales. Ajuste de la prioridad de apertura: (Temporizador). Encendido/Apagado: Cuando Pulse para ajustar el se pulsa este botón, la unidad temporizador.
  • Seite 67: Cuidado Y Mantenimiento

    CUIDADO Y MANTENIMIENTO Limpieza del dispositivo Apague el aparato. Desconecte el enchufe. Utilice un paño húmedo para limpiar la carcasa. Si la carcasa está muy sucia, sumerja el paño en agua tibia a menos de 40 ºC Escurra el paño y limpie la suciedad.
  • Seite 68: Reparación De Anomalías

    REPARACIÓN DE ANOMALÍAS Problema Comprobaciones El aire acondicionado no ¿Se ha producido un corte de luz? funciona ¿Está correctamente enchufado? ¿Se ha fundido el fusible? ¿Es la tensión muy alta o muy baja? El rendimiento de ¿Está bloqueada la entrada o salida de aire? refrigeración y calefacción ¿Hay una fuente de calor o frío en la habitación? no es bueno.
  • Seite 69: Instrucciones De Montaje (Solo Para El Instalador)

    INSTRUCCIONES DE MONTAJE (SOLO PARA EL INSTALADOR) Notas importantes sobre la instalación ADVERTENCIA ¡Riesgo de lesiones! Todas las personas involucradas en la instalación del sistema de aire acondicionado DEBEN tener la certifi cación válida de la autoridad competente y la califi cación reconocida por esta industria para el manejo del sistema de refrigeración.
  • Seite 70 Consideraciones sobre el lugar de instalación • El agua de condensación debe poder drenarse bien. • Monte el acondicionador de aire lejos de televisores, radios, etc. para evitar interferencias de imagen o sonido. • En entornos marinos con aire salino, lugares con fuentes termales que contengan aire sulfuroso u otros entornos especiales, consulte al servicio de atención al cliente antes de utilizar la unidad.
  • Seite 71 Montaje Retire la pegatina del panel frontal. Coloque el dispositivo en el orificio de montaje. • Durante el montaje, la unidad debe inclinarse hacia abajo, hacia la parte trasera. • El lugar de montaje debe ser lo suficientemente firme como para evitar el aumento del ruido y las vibraciones.
  • Seite 72 Ayudas para el montaje Pared Parasol Marco de madera Bandeja de goma 6-10 mm Protector Línea horizontal • Soporte de hierro: el agujero de montaje debe ser lo suficientemente fuerte como para sostener el acondicionador de aire. Si no puede, hay que fijar un soporte de hierro en el exterior.
  • Seite 73 Desagüe La bandeja de drenaje y la manguera de drenaje deben instalarse antes de la puesta en marcha. La manguera de desagüe no está incluida en el volumen de suministro. Puede adquirir en el comercio una manguera de desagüe adecuada a sus necesidades específicas.
  • Seite 74: Instrucciones De Instalación

    INSTRUCCIONES DE INSTALACIÓN Desmontaje Antes de desmontar el acondicionador de aire, póngase en contacto con un profesional. El desmontaje de la unidad debe ser realizado por especialistas. Generación de ruido • La unidad debe montarse en un lugar lo suficientemente firme como para evitar el aumento del ruido y las vibraciones.
  • Seite 75: Ficha Técnica Del Producto

    FICHA TÉCNICA DEL PRODUCTO Información de conformidad con el reglamento (UE) Núm. 626/2011 Marca comercial del proveedor: Klarstein Identificador del modelo del proveedor: 10029808 Nivel de potencia acústica interior en condiciones nominales estándar, en el modo 65 dB de refrigeración en dB: Las fugas de refrigerante (R32) contribuyen al cambio climático.
  • Seite 76 Información de conformidad con el reglamento (UE) Núm. 206/2012 Punto Símbolo Valor Unidad Rendimiento del diseño: Enfriamiento Pdesignc Calefacción/medio Pdesignh Calefacción/más calor Pdesignh Calefacción/más fríos Pdesignh Cifra operativa Enfriamiento SEER Calefacción/medio SCOP/A Calefacción/más calor SCOP/W Calefacción/más frío SCOP/C Capacidad especificada* en modo refrigeración a una temperatura del aire ambiente de 27 (19) °C y una temperatura del aire exterior T: T= 35°C T= 30°C...
  • Seite 77 Punto Símbolo Valor Unidad Capacidad especificada* en modo calefacción a una temperatura del aire ambiente de 20 °C y una temperatura del aire exterior T: T= 2°C T= 7°C T= 12°C T=bivalente T=Valor límite de funcionamiento Capacidad especificada* en modo calefacción a una temperatura del aire ambiente de 20 °C y una temperatura del aire exterior T: T= 7°C T= 2°C...
  • Seite 78 Punto Símbolo Valor Unidad Capacidad especificada* en modo calefacción a una temperatura del aire ambiente de 20 °C y una temperatura del aire exterior T: T= 2°C COPd T= 7°C COPd T= 12°C COPd T=bivalente COPd T=Valor límite de funcionamiento COPd Capacidad especificada* en modo calefacción a una temperatura del aire ambiente de 20 °C y una temperatura del aire exterior T:...
  • Seite 79 Punto Símbolo Valor Unidad Potencia en funcionamiento de intervalo cíclico: en modo de refrigeración EERcyc en modo de calefacción COPcyc Factor de reducción en modo de refrigeración** Consumo de energía eléctrica en estados de funcionamiento distintos del "modo activo": Modo apagado Poff 0,000651 Modo de espera...
  • Seite 80: Indicaciones Sobre La Retirada Del Aparato

    INDICACIONES SOBRE LA RETIRADA DEL APARATO Si en su país existe una disposición legal relativa a la eliminación de aparatos eléctricos y electrónicos, este símbolo estampado en el producto o en el embalaje advierte que no debe eliminarse como residuo doméstico. Debe depositarse en un punto de recogida de reciclaje de aparatos eléctricos y electrónicos.
  • Seite 81: Fiche Technique

    Cher client, chère cliente, Toutes nos félicitations pour l’acquisition de ce nouvel appareil. Lisez attentivement les indications suivantes et suivez-les pour éviter d'éventuels dommages. Nous ne saurions être tenus pour responsables des dommages dus au non-respect des consignes et à la mauvaise utilisation de l’appareil.
  • Seite 82: Remarques Sur Le Réfrigérant R32

    REMARQUES SUR LE RÉFRIGÉRANT R32 Mises en garde • Le climatiseur doit être stocké et transporté debout. Dans le cas contraire, le compresseur pourrait être endommagé de façon irréversible. Laissez l'appareil reposer 24 heures au moins avant de le mettre en service. •...
  • Seite 83: Consignes De Sécurité

    CONSIGNES DE SÉCURITÉ Consignes générales • Cet appareil peut être utilisé par des enfants de plus de 8 ans et par des personnes ayant des capacités physiques, sensorielles et mentales limitées et/ou dénuées d'expérience et de connaissances si elles ont été formées à...
  • Seite 84 • Ne vous tenez jamais debout sur le capot supérieur de l'appareil et ne placez jamais d'objets lourds dessus, car cela pourrait entraîner des dommages matériels et/ou des blessures corporelles. • L'installation doit être effectuée par une personne qualifiée. Sinon, vous risquez des dommages matériels et/ou des blessures corporelles.
  • Seite 85 • Si le cordon d'alimentation n'est pas assez long, contactez le service client pour en obtenir un plus long. Ne rallongez jamais vous-même le câble d'alimentation. • Un disjoncteur doit être installé dans la ligne pour les systèmes de climatisation sans prise de courant. •...
  • Seite 86: Description De L'appareil

    DESCRIPTION DE L'APPAREIL Les climatiseurs de fenêtre régulent la température ambiante et maintiennent la pièce au sec. Ils sont agréables pour le travail, les études et la vie quotidienne. L'appareil a une large gamme d'applications, par exemple dans un salon, un magasin, un hôtel, au bureau ou dans une bibliothèque.
  • Seite 87: Télécommande Et Panneau De Commande

    TÉLÉCOMMANDE ET PANNEAU DE COMMANDE Marche/arrêt Mode Plus Moins Ventilateur Mode oscillation minuterie Mode nuit automatique minuterie automatique activée minuterie automatique désactivée Mode auto Mode oscillation Climatisation Mode nuit Déshumidification Verrouillage Ventilateur Vitesse Chauffage Réglage de la durée Réglage de la température...
  • Seite 88: Touches De La Télécommande

    Remarques sur la télécommande • Il s'agit d'une télécommande universelle pour les climatiseurs avec de multiples fonctions. Les touches correspondant à des fonctions que l'appareil ne possède pas sont sans effet. • Vous pouvez contrôler le climatiseur avec la télécommande lorsqu'il est en mode veille.
  • Seite 89 Touches + et - • Appuyez sur + ou - pour augmenter ou diminuer la température réglée de 1 °C (ou 1 °F). Maintenez + ou - pendant 2 secondes, l'affichage de la température réglée sur la télécommande change rapidement. •...
  • Seite 90 minuterie automatique (TIMER) Arrêt automatique : Avec l'appareil allumé : appuyez sur cette touche pour régler l'arrêt automatique. "T-OFF" et "H" clignotent sur l'écran. Appuyez sur les touches + et - dans les 5 secondes. pour régler l'heure d'arrêt. Appuyez sur + et - pour augmenter ou diminuer la durée de 1/2 heure.
  • Seite 91 Utilisation Après avoir branché l'alimentation, appuyez sur la touche ON / OFF de la télécommande pour allumer l'appareil. Appuyez sur MODE pour sélectionner le mode de fonctionnement souhaité : AUTO, COOL, DRY, FAN.. Appuyez sur "+" ou "-" pour régler la température souhaitée. La température ne peut pas être réglée en mode AUTO.
  • Seite 92: Panneau De Commande Sur L'appareil

    PANNEAU DE COMMANDE SUR L'APPAREIL Si la télécommande n'est pas disponible, ouvrez le panneau de commande sur l'appareil et effectuez des saisies manuelles. Réglage de la minuterie automatique : (Timer) Utilisez pour régler la minuterie. Marche / arrêt : appuyez sur Vous pouvez régler la minuterie cette touche pour démarrer ou automatique par intervalles de...
  • Seite 93: Entretien Et Maintenance

    ENTRETIEN ET MAINTENANCE Nettoyage de l'appareil Éteignez d'abord l'appareil. Débranchez la fiche. Utilisez un chiffon humide pour nettoyer le boîtier. Si le boîtier est très sale, trempez le chiffon dans de l'eau tiède en dessous de 40 °C. Essorez le chiffon et essuyez la poussière.
  • Seite 94: Résolution Des Problèmes

    RÉSOLUTION DES PROBLÈMES Problème Vérification Le climatiseur ne fonctionne Panne de courant ? pas. La fiche est-elle branchée ? Le fusible est-il hors service ? La tension est-elle trop élevée ou trop basse ? Climatisation ou chauffage L'entrée ou la sortie d'air est-elle obstruée ? inefficace.
  • Seite 95: Notice De Montage (Pour L'installateur Uniquement)

    NOTICE DE MONTAGE (POUR L'INSTALLATEUR UNIQUEMENT) Importants conseils d'installation MISE EN GARDE Risque de blessure ! Toutes les personnes qui participent à l'installation du climatiseur DOIVENT avoir la certifi cation valide de l'autorité compétente et la qualifi cation reconnue par cette branche pour manipuler le système de réfrigération.
  • Seite 96 Choix du lieu de montage • Vous devez pouvoir évacuer correctement l'eau de condensation. • Installez le climatiseur loin des téléviseurs, radios, etc. pour éviter les interférences avec l'image ou le son. • Dans les environnements marins avec de l'air salé, les emplacements proches de sources thermales contenant de l'air sulfureux ou dans d'autres environnements spéciaux, veuillez demander au service client avant d'utiliser l'appareil.
  • Seite 97 Montage Retirez l'autocollant du panneau avant. Placez l'appareil dans le trou de montage. • Lors du montage, l'appareil doit s'incliner vers l'arrière et vers le bas. • L'emplacement d'installation doit être suffisamment ferme pour éviter une augmentation du bruit et des vibrations. Comblez les interstices vers le boîtier avec de la mousse ou de la mousse de montage.
  • Seite 98 Aides au montage Protection solaire Cadre en bois Plaque de caoutchouc 6-10 mm Supports Ligne horizontale • Support de fer : Le trou de montage doit être suffisamment solide pour contenir le climatiseur. Si ce n'est pas le cas, un support en fer doit être fixé à l'extérieur.
  • Seite 99 Évacuation d'eau Le bac de récupération et le tuyau de vidange doivent être installés avant la mise en service. Le tuyau de vidange n'est pas fourni. Vous pouvez acheter un tuyau de vidange répondant à vos besoins spécifiques auprès d'un détaillant. Pour assembler le bac de récupération et le tuyau, procédez comme suit : Retirez le boîtier.
  • Seite 100: Consignes D'installation

    CONSIGNES D'INSTALLATION Démontage Avant de démonter le climatiseur, contactez un spécialiste. Le démontage de l'appareil doit être effectué par des spécialistes. Bruit • L'appareil doit être monté dans un endroit suffisamment solide pour éviter une augmentation des niveaux de bruit et des vibrations. •...
  • Seite 101: Fiche De Données Produit

    FICHE DE DONNÉES PRODUIT Informations selon le règlement (UE) n ° 626/2011 Marque du fournisseur : Klarstein Identifiant du modèle du fournisseur : 10029808 Niveau sonore dans les pièces intérieures dans des conditions nominales standard en 65 dB mode climatisation en dB : Les fuites de réfrigérant (R32) contribuent au changement climatique.
  • Seite 102 Informations selon le règlement (UE) n ° 206/2012 Point Symbole Valeur Unité Puissance produite Climatisation Charge frigorifique déclarée Chauffage/moyen charge calorifique déclarée Chauffage / plus chaud charge calorifique déclarée Chauffage / plus froid charge calorifique déclarée Coefficient de performance : Climatisation SEER Chauffage/moyen...
  • Seite 103 Point Symbole Valeur Unité Puissance spécifiée * en mode / période de chauffage à température am- biante 20 °C et température d'air extérieur Tj : Tj= 2°C Tj = 7°C Tj= 12°C Tj = température d'équilibre Tj = limite de fonctionnement Puissance spécifiée * en mode / période de chauffage à...
  • Seite 104 Point Symbole Valeur Unité Puissance spécifiée * en mode / période de chauffage à température am- biante 20 °C et température d'air extérieur Tj : Tj= 2°C COPd Tj = 7°C COPd Tj= 12°C COPd Tj = température d'équilibre COPd Tj = limite de fonctionnement COPd Puissance spécifiée * en mode / période de chauffage à...
  • Seite 105 Point Symbole Valeur Unité Performances avec fonctionnement à intervalles cycliques : en mode climatisation EERcyc en mode chauffage COPcyc Facteur de réduction en mode climatisation** Consommation électrique en état de fonctionnement autre que "mode actif" : À l'arrêt Poff 0,000651 En veille 0,000651 Régulateur de température à...
  • Seite 106: Informations Sur Le Recyclage

    INFORMATIONS SUR LE RECYCLAGE Si l'élimination des appareils électriques et électroniques est réglementée dans votre pays, ce symbole sur le produit ou sur l'emballage indique qu'il ne doit pas être jeté avec les ordures ménagères. Vous devez l'acheminer vers un point de collecte pour le recyclage des équipements électriques et électroniques.
  • Seite 107 Gentile Cliente, La ringraziamo per aver acquistato il dispositivo. La preghiamo di leggere attentamente le seguenti istruzioni per l’uso e di seguirle per evitare possibili danni. Non ci assumiamo alcuna responsabilità per danni scaturiti da una mancata osservanza delle avvertenze di sicurezza e da un uso improprio del dispositivo.
  • Seite 108: Note Sul Refrigerante R32

    NOTE SUL REFRIGERANTE R32 Avvertenze • Il climatizzatore deve essere conservato e trasportato in posizione verticale. Altrimenti possono risultare danni irreparabili al compressore. Lasciare il dispositivo in posizione verticale per almeno 24 ore prima di metterlo in funzione. • Prima della pulizia, spegnere il dispositivo e scollegarlo dall'alimentazione. •...
  • Seite 109: Avvertenze Di Sicurezza

    AVVERTENZE DI SICUREZZA Avvertenze generiche • Questo dispositivo può essere utilizzato dai bambini maggiori di 8 anni e dalle persone con capacità fisiche, sensoriali e mentali ridotte o con mancanza di esperienza e conoscenze a condizione che siano state fornite istruzioni e supervisione in merito a un uso sicuro del dispositivo, accertandosi del fatto che siano stati compresi i rischi associati all'uso del dispositivo stesso.
  • Seite 110 • Non collocare oggetti pesanti sopra al dispositivo e non salirci assolutamente, poiché potrebbe provocare lesioni personali e/o danni alle cose. • Il montaggio va eseguito da personale qualificato, altrimenti potrebbero verificarsi danni alle cose e/o lesioni personali. • Si prega di rispettare le norme di sicurezza elettrica durante l'installazione del dispositivo.
  • Seite 111 • Se il cavo d'alimentazione non è abbastanza lungo, bisogna contattare il servizio d'assistenza per ottenere un cavo più lungo. Non provare ad allungare il cavo autonomamente. • Nei condizionatori sprovvisti di spine bisogna montare un sezionare nella conduttura. • Una persona qualifi cata deve eseguire lo smontaggio e il montaggio del condizionatore, se lo si vuole utilizzare in un altro luogo.
  • Seite 112: Descrizione Del Prodotto

    DESCRIZIONE DEL PRODOTTO I climatizzatori da finestra regolano la temperatura ambiente e tengono il locale asciutto. Sono comodi sul lavoro, nello studio e nella vita quotidiana. Il dispositivo ha un ampio campo di applicazione, può essere usato ad esempio in spazi abitativi, negozi, hotel, uffici e biblioteche.
  • Seite 113: Telecomando E Pannello Di Controllo

    TELECOMANDO E PANNELLO DI CONTROLLO On/Off Modalità Più Meno Ventola Oscillazione Timer Modalità notturna Timer on Timer off Modalità auto Oscillazione Raffreddare Modalità notturna Deumidificare Bloccare Ventola Velocità Riscaldare Impostazione dell'ora Impostazione della temperatura...
  • Seite 114: I Tasti Del Telecomando

    Indicazioni inerenti il telecomando • Il telecomando è universale per i climatizzatori con funzioni molteplici. Se si premono dei tasti con funzioni di cui non dispone il dispositivo, il climatizzatore resta nella stessa modalità. • E' possibile controllare il climatizzatore con il telecomando se si trova in modalità...
  • Seite 115 Tasti + e - • Quando si preme + o - la temperatura impostata aumenta o si abbassa di 1 °C (oppure 1 °F). Quando si tiene premuto per 2 secondi + o -, l'avviso della temperatura impostata si modifica subito sul telecomando. •...
  • Seite 116 Timer (TIMER) Timer di spegnimento: Quando il dispositivo è acceso: premere questo tasto per impostare il timer di spegnimento. Sullo schermo lampeggiano "T-OFF" e "H". Premere nel giro di 5 secondi i tasti + e - per impostare l'ora di spegnimento. Premendo + e - si aumenta o si riduce il tempo di mezz'ora.
  • Seite 117 Utilizzo Dopo aver collegato il dispositivo alla rete elettrica, premere ON/OFF sul telecomando per accenderlo. Premere MODE per impostare la modalità desiderata: AUTO, COOL, DRY, FAN. Premere i tasti "+" o "-" per impostare la temperatura desiderata. In modalita AUTO non è possibile impostare la temperatura. Premere FAN per impostare il livello di ventilazione desiderato: AUTO, LOW (basso), MEDIUM (medio) e HIGH (alto).
  • Seite 118: Pannello Di Controllo Sul Dispositivo

    PANNELLO DI CONTROLLO SUL DISPOSITIVO Se il telecomando non è disponibile, aprire il pannello di controllo sul dispositivo ed eseguire l'immissione manuale. Impostazione del timer: impostare il timer con . E' On/Off: premendo questo possibile impostarlo in passaggi tasto il dispositivo si accende, di 30 minuti in un intervallo tra mentre si spegne premendolo 1 e 10 ore o in passaggi di 1 ora...
  • Seite 119: Cura E Manutenzione

    CURA E MANUTENZIONE Pulire il dispositivo Spegnere il climatizzatore e staccare la spina. Usare un panno umido per pulire l'alloggiamento. Se è molto sporco, immergere il panno in acqua calda sotto i 40 °C. Strizzarlo e togliere lo sporco. • Non utilizzare benzina, benzolo, solventi ecc.
  • Seite 120: Correzione Degli Errori

    CORREZIONE DEGLI ERRORI Problema Verificare Il climatizzatore non C'è un black out? funziona. La spina è inserita? Il fusibile si è bruciato? La tensione è troppo alta o troppo bassa? La potenza di Il condotto di aspirazione o di scarico sono raffreddamento e di bloccati? riscaldamento non va bene.
  • Seite 121: Istruzioni Per Il Montaggio (Solo Per L'installatore)

    ISTRUZIONI PER IL MONTAGGIO (SOLO PER L'INSTALLATORE) Note importanti per l´installazione AVVERTIMENTO Pericolo di lesione! Tutte le persone coinvolte nel montaggio del climatizzatore DEVONO esibire la certifi cazione rilasciata dall'ente competente, che permette loro di lavorare sull'impianto di raff reddamento. •...
  • Seite 122 Avvertenze inerenti il luogo di montaggio • La condensa deve poter essere deviata facilmente. • Montare il climatizzatore lontano da televisori, radio ecc. per evitare guasti all'immagine e al suono. • In zone marittime con aria salata, luoghi con fonti termali nei quali l'aria contiene zolfo o in altre zone particolari, informarsi presso il servizio di assistenza prima di montare il dispositivo.
  • Seite 123 Montaggio Rimuovere l'adesivo dal pannello frontale. Inserire il dispositivo nel foro di montaggio. • Durante il montaggio il dispositivo va inclinato verso il retro e in basso. • Il luogo di montaggio deve essere abbastanza resistente da evitare rumori e vibrazioni.
  • Seite 124 Ausili di montaggio Muro Tettuccio parasole Telaio di legno Lastra di gomma 6-10 mm Staffa di sostegno Linea orizzontale • Sostegno di ferro: il foro di montaggio deve essere abbastanza stabile da sostenere il climatizzatore. Se non ne è in grado bisogna montare esternamente un sostegno di ferro.
  • Seite 125 Condotto di drenaggio dell'acqua La vasca e il tubo di scarico vanno montati prima della messa in funzione. Il tubo di scarico non fa parte del volume di consegna e bisogna reperirne uno in commercio che soddisfi le proprie esigenze. Seguire i seguenti passaggi per montare la vasca e il tubo di scarico: Tirare in avanti l'alloggiamento.
  • Seite 126: Avvertenze Per L'installazione

    AVVERTENZE PER L'INSTALLAZIONE Smontaggio# Prima di smontare il climatizzatore contattare un tecnico specializzato che deve eseguire il lavoro. Rumori • Il dispositivo va montato in un luogo abbastanza resistente da evitare vibrazioni ed elevate emissioni sonore. • Non posizionare nulla davanti al condotto di scarico. Così si evitano elevate emissioni sonore.
  • Seite 127: Scheda Informativa Del Prodotto

    SCHEDA INFORMATIVA DEL PRODOTTO Informazioni secondo il regolamento (UE) N. 626/2011 Marchio del fornitore: Klarstein Contrassegno del modello del fornitore: 10029808 Livello di potenza sonora in dB in locali interni in condizioni nominali standard in modalità di 65 dB raffreddamento: La fuoriuscita di refrigerante (R32) contribuisce al cambiamento cli- matico.
  • Seite 128 Informazioni secondo il regolamento (UE) N. 206/2012 Punto Simbolo Valore Unità Capacità calcolata: Raffreddamento Pdesignc Riscaldamento/medio Pdesignh Riscaldamento/più caldo Pdesignh Riscaldamento/più freddo Pdesignh Coefficiente di prestazione stagionale: Raffreddamento SEER Riscaldamento/medio SCOP/A Riscaldamento/più caldo SCOP/W Riscaldamento/più freddo SCOP/C Potenza indicata per il raffreddamento a temperatura ambiente 27 (19) °C e a temperatura esterna Tj: Tj= 35°C Tj= 30°C...
  • Seite 129 Punto Simbolo Valore Unità Potenza indicata per il riscaldamento/la stagione di riscaldamento più calda a temperatura ambiente 20 °C e a temperatura esterna Tj: Tj= 2°C Tj = -7°C Tj= 12°C Tj = temperatura bivalente Tj = valore limite di esercizio Potenza indicata per il riscaldamento/la stagione di riscaldamento più...
  • Seite 130 Punto Simbolo Valore Unità Coefficiente di rendimento indicato/stagione di riscaldamento più calda a temperatura ambiente 20 °C e a temperatura esterna Tj: Tj= 2°C COPd Tj = -7°C COPd Tj= 12°C COPd Tj = temperatura bivalente COPd Tj = valore limite di esercizio COPd Coefficiente di rendimento indicato/stagione di riscaldamento più...
  • Seite 131 Punto Simbolo Valore Unità Efficienza della ciclicità degli intervalli: in modalità di raffreddamento EERcyc in modalità di riscaldamento COPcyc Coefficiente di degradazione in modalità di raffreddamento** Potenza elettrica assorbita in altre modalità rispetto alla "modalità attiva": Modalità off Poff 0,000651 Modalità...
  • Seite 132: Avviso Di Smaltimento

    AVVISO DI SMALTIMENTO Se nel vostro Paese sono vigenti regolamenti legislativi relativi allo smaltimento di dispositivi elettrici ed elettronici, questo simbolo sul prodotto o sull'imballaggio indica che non è consentito smaltire questo prodotto nei rifiuti casalinghi. Il dispositivo deve invece essere portato in un centro di raccolta per il riciclaggio di dispositivi elettrici ed elettronici.

Inhaltsverzeichnis