Ten-Haaft Oyster Connect Bedienungs- Und Montageanleitung
Vorschau ausblenden
Andere Handbücher für Oyster Connect:
- Bedienungsanleitung (68 Seiten) ,
- Montageanleitung (28 Seiten) ,
- Erweiterte bedienhinweise (23 Seiten)

Verwandte Anleitungen für Ten-Haaft Oyster Connect


Inhaltszusammenfassung für Ten-Haaft Oyster Connect
- Seite 1 CONNECT BEDIENUNGS- UND MONTAGEANLEITUNG OPERATING MANUAL AND INSTALLATION INSTRUCTIONS INSTRUCTIONS D’UTILISATION ET DE MONTAGE www.ten-haaft.com...
-
Seite 2: Inhaltsverzeichnis
INHALTSVERZEICHNIS 1. ALLGEMEINES 1. Allgemeines 1.1 Bestimmungsgemäße Verwendung 1.1 Bestimmungsgemäße Verwendung Die bestimmungsgemäße Verwendung dieses Produktes ist die Festmontage auf Wohnmobilen, Wohnanhängern 1.2 Sicherheitshinweise (Caravans) oder Kraftfahrzeugen ähnlicher Art, mit einer zulässigen Höchstgeschwindigkeit von nicht mehr als 1.3 Lieferumfang 175 km/h. Weiterhin möglich ist die Verwendung auf Wasserfahrzeugen. -
Seite 3: Allgemeines
Notez la hauteur de BEDIENUNGS- UND MONTAGEANLEITUNG OPERATING MANUAL AND INSTALLATION INSTRUCTIONS INSTRUCTIONS D’UTILISATION ET DE MONTAGE montage de 12 cm ! www.ten-haaft.com Nach StVO muss sich der Führer des Kraftfahrzeuges vor Beginn jeder Fahrt von der Verkehrstüchtigkeit seines KFZs überzeugen. -
Seite 4: Montage
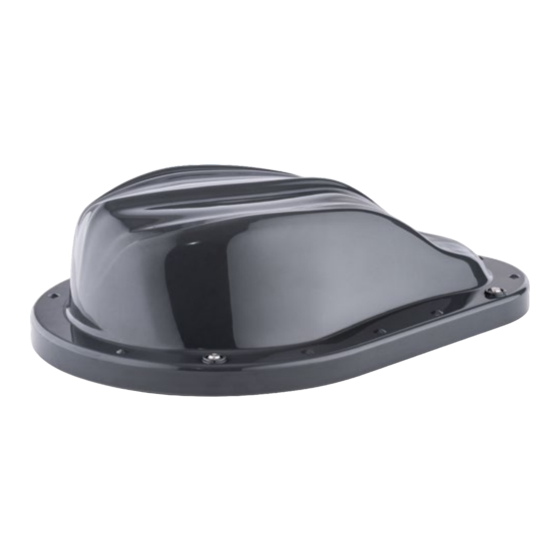
2. MONTAGE 2. MONTAGE 2.2 SIM Karte 2.1 Platzbedarf der Oyster® Connect Zum Einsetzen der SIM Karte muss die Outdoor Unit von der Montageplatte genommen werden. Hierzu müssen die 4 Schrauben (siehe Abbildung) gelöst werden. Nach dem Einsetzen der SIM Karte ist die Outdoor Unit wieder 252,4 auf der Montageplatte mittels den vier Schrauben zu befestigen. -
Seite 5: Spannungsversorgung
2. MONTAGE 2. MONTAGE 2.3 Spannungsversorgung 2.5 Anschlussplan 1. Sorgen Sie für eine ausreichende Spannungsversorgung des Systems Fahrtrichtung a) Die Anlage benötigt den Anschluss an 12 V oder 24 V Bordspannung. - Die Spannung darf 9 V nicht unterschreiten - Die Spannung darf 32 V keinesfalls überschreiten - Die benötigte Stromstärke ist <1A b) Zum Anschluss an die Bordspannung darf der Kabelquerschnitt 0,75 mm²... -
Seite 6: Bedienelemente
3. BEDIENELEMENTE 3. BEDIENELEMENTE 3.1 Indoor Unit (Vorderseite) 3.2 Indoor Unit (Rückseite) LED 1 LED 2 LED 3 LED 4 LED 5 Bedientasten Anschlüsse 1. EIN / AUS Taste Einschalten des Gerätes (LED 3 grün) 1. + 2. Spannungsversorgung 1. Hohlstecker 2,1 mm 12V oder 24 V 2. -
Seite 7: Anhang
4. ANHANG NOTIZEN 4.1 Hinweise zum Umweltschutz Altfahrzeugverordnung - ELV Das Antennen-System ist als Zubehör zur Verwendung auf Kraftfahrzeugen zertifiziert und vorgesehen. Die Entsorgung kann demgemäß im Rahmen der Altfahrzeug-Verordnung (Europäische Altfahrzeugrichtlinie ELV, 2000/53/EG; für Deutschland: AltfahrzeugV) zusammen mit dem Kraftfahrzeug erfolgen. Das Antennen-System enthält keine der gemäß... - Seite 8 CONTENTS 1. GENERAL INFORMATION 1. General Information 1.1 Intended use 1.1 Intended use This product has been designed for permanent installation on mobile homes or camper trailers or motor vehicles 1.2 Safety precautions of a similar type with a permissible maximum speed of 175 km/h. 1.3 Scope of supply Furthermore possible is the usage on watercrafts.
-
Seite 9: General Information
CONNECT Notez la hauteur de BEDIENUNGS- UND MONTAGEANLEITUNG OPERATING MANUAL AND INSTALLATION INSTRUCTIONS INSTRUCTIONS D’UTILISATION ET DE MONTAGE montage de 12 cm ! www.ten-haaft.com Road traffic regulations stipulate that the vehicle operator must verify the vehicle‘s roadworthiness before each use. -
Seite 10: Installation
2. INSTALLATION 2. INSTALLATION 2.2 SIM card 2.1 Installation space required for the Oyster® Connect To insert the SIM card, the Outdoor Unit must be removed from the mounting plate. Therefor you have to loosen the 4 screws (see illustration). After inserting the SIM card, the Outdoor Unit has to be fixed to the mounting 252,4 plate using the four screws. -
Seite 11: Power Supply
2. INSTALLATION 2. INSTALLATION 2.3 Power Supply 2.5 Connections 1. A sufficient power supply of the system must be ensured Direction of travel a) The system must be connected to the 12/24-V onboard electric system. - The voltage must be at least 9 V - The voltage must never exceed 32 V - The needed amperage is <1A b) The minimum cross-section of the wires connecting the satellite system to the power supply is 0,75 mm². -
Seite 12: Control Elements
3. CONTROL ELEMENTS 3. CONTROL ELEMENTS 3.1 Indoor Unit (Front) 3.2 Indoor Unit (Back) LED 1 LED 2 LED 3 LED 4 LED 5 Operating keys Inputs/Outputs 1. ON / Off Button This button switches the system on and off. (LED 3 green) 1. -
Seite 13: Appendix
4. APPENDIX NOTES 4.1 Notes on the protection of the environment EC End-of-Life Vehicle Directive The antenna system is certified and intended for use as an accessory of a motor vehicle. The system may be disposed of together with the vehicle in accordance with the End-of-Life Vehicle Directive ELV, 2000/53/EC. The antenna system does not contain any materials rated as hazardous to the environment according to the directive. - Seite 14 TABLE DES MATIÈRES 1. GÉNÉRALITÉS 1. Généralités 1.1 Utilisation conforme à la destination 1.1 Utilisation conforme à la destination Ce produit est conçu pour être monté sur un camping-car, une caravane ou les véhicules automobiles similaires 1.2 Consignes de sécurité dont la vitesse ne doit dépasser 175 km/h.
-
Seite 15: Généralités
12 cm ! CONNECT BEDIENUNGS- UND MONTAGEANLEITUNG OPERATING MANUAL AND INSTALLATION INSTRUCTIONS INSTRUCTIONS D’UTILISATION ET DE MONTAGE En vertu du code de la route, le conducteur doit s’assurer avant tout trajet du bon état de marche de son www.ten-haaft.com véhicule. -
Seite 16: Montage
2. MONTAGE 2. MONTAGE 2.1 Espace nécessaire pour l‘ Oyster® Connect 2.2 Carte SIM Pour insérer la carte SIM, l‘unité extérieure doit être retirée de la plaque de montage. Pour ce faire, les 4 vis (voir illustration) doivent être desserrées. Après avoir inséré la carte SIM, fixer à nouveau l‘unité extérieure à la plaque 252,4 de montage à... -
Seite 17: Alimentation Électrique
2. MONTAGE 2. MONTAGE 2.3 Alimentation électrique 2.5 Schéma de câblage 1. Assurez-vous que le système est suffisamment alimenté Sens de déplacement a) Le système doit être relié à une tension de bord 12 V / 24 V. - la tension ne doit pas descendre en dessous de 9 V - la tension ne doit jamais dépasser 32 V - l‘ampérage requis est <1A b) Pour le raccordement au réseau de bord, la section du câble utilisé... -
Seite 18: Éléments De Commande
3. ÉLÉMENTS DE COMMANDE 3. ÉLÉMENTS DE COMMANDE 3.1 Unité Intérieure (Vue de face) 3.2 Unité Intérieure (Vue arrière) LED 1 LED 2 LED 3 LED 4 LED 5 Boutons de commande Raccordements 1. Touche Marche/Arrêt Allumer le système (LED 3 vert) 1. -
Seite 19: Annexe
4. ANNEXE NOTES 4.1 Consignes concernant la protection de l’environnement Directive européenne relative aux véhicules hors d’usage Le système d‘antenne a été homologué et conçu pour être monté en tant qu’accessoire dans des véhicules à moteur. Sa mise au rebut peut par conséquent s‘effectuer en même temps que le véhicule conformément à la directive européenne 2000/53/CE relative aux véhicules hors d’usage. - Seite 20 NOTES NOTES...
- Seite 21 +49 (0) 7231 / 58588-0 Fax: +49 (0) 7231 / 58588-119 Monday – Friday 08:00 a.m. – 12:00 a.m. E-Mail: service@ten-haaft.de 12:30 p.m. – 04:30 p.m. Heures d'ouverture Lundi – Vendredi 08 h 00 – 12 h 00 12 h 30 – 16 h 30 www.ten-haaft.com...