Inhaltsverzeichnis
Werbung
Verfügbare Sprachen
Verfügbare Sprachen
Quicklinks
Werbung
Kapitel
Inhaltsverzeichnis

Verwandte Anleitungen für De Dietrich DTI 1127 X


Inhaltszusammenfassung für De Dietrich DTI 1127 X
- Seite 1 FR GUIDE D'INSTALLATION ET D’UTILISATION EN GUIDE FOR INSTALLATION AND USE ES MANUAL DE INSTALACIÓN Y UTILIZACIÓN PT GUIA DE INSTALAÇÃO E DE UTILIZAÇÃO DE EINBAU- UND GEBRAUCHSANWEISUNG Table de cuisson Cooking Hob Placa de cocción Placa de cozinha Kochfeld...
- Seite 2 ; l’authentique est privilégié. En associant la technologie la plus évoluée aux matériaux nobles, De Dietrich s’assure la réalisation de produits de haute facture au service de l’art culinaire, une passion partagée par tous les amoureux de la cuisine.
-
Seite 3: Inhaltsverzeichnis
SOMMAIRE 1/ A L’ATTENTION DE L’UTILISATEUR • Consigne de sécurité ..........04 •... - Seite 4 1 1 / / A L’ATTENTION DE L’UTILISATEUR Important — — En branchant des appareils électriques sur une prise de courant située à proximité, Conservez cette notice d'utilisation assurez-vous que le câble d’alimentation ne avec votre appareil. Si l'appareil devait être soit pas en contact avec les zones chaudes.
-
Seite 5: 1/ A L'attention De L'utilisateur
1 1 / / A L’ATTENTION DE L’UTILISATEUR • CONSIGNES DE SÉCURITÉ • RESPECT DE L’ENVIRONNEMENT — Les matériaux d’emballage de cet appareil Attention sont recyclables. Participez à leur recyclage — — Votre table est livrée pré-réglée pour et contribuez ainsi à la protection de le gaz naturel. -
Seite 6: Description De Votre Table
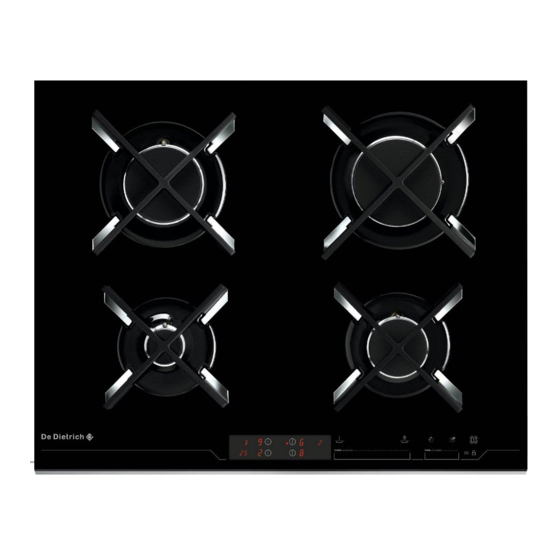
1 1 / / A L’ATTENTION DE L’UTILISATEUR • DESCRIPTION DE VOTRE TABLE MODÈLE 4 BRÛLEURS GAZ “ “ D D T T G G 1 1 1 1 2 2 7 7 ” ” MODÈLE 2 BRÛLEURS GAZ ET 2 FOYERS INDUCTION “... -
Seite 7: Comment Se Présente Votre Clavier De Commande
1 1 / / A L’ATTENTION DE L’UTILISATEUR • COMMENT SE PRESENTE VOTRE CLAVIER DE COMMANDE OYANTS DE LA ZONE SÉLECTIONNÉE FOYERS ARRIÈRE GAUCHE ET ARRIÈRE DROIT ONCTION “ LAPSED IME” INUTERIE ÉLECTION DE PUISSANCES “PRÉCO” PRÉRÉGLÉES OUCHE DE OUCHE DE SÉLECTION DU SÉLECTION DU OUCHE... -
Seite 8: Conseils D'encastrement
2 2 / / INSTALLATION DE VOTRE APPAREIL • CONSEILS D’ENCASTREMENT Modèle Largeur Profondeur Epaisseur Suivant meuble Découpe meuble 56 cm 49 cm Dimensions hors tout au-dessus du plan de 65 cm 51,8 cm 5 cm travail Dimensions hors tout au-dessous du plan 55 cm 47 cm... - Seite 9 2 2 / / INSTALLATION DE VOTRE APPAREIL La table de cuisson doit être encastrée dans le plateau d'un meuble support de 3 cm d'épaisseur minimum, fait en matière qui résiste à la chaleur, ou bien revêtu d'une telle matière. Pour ne pas gêner la manoeuvre des ustensiles de cuisson, il ne doit y avoir à...
- Seite 10 2 2 / / INSTALLATION DE VOTRE APPAREIL Pour assurer l'étanchéité entre le caisson et le plan de travail, collez le joint mousse sur le pourtour extérieur du cadre. Collez le joint fourni dans la pochette avant l’installation de la table : 1- Retirez les grilles support casserole, les Joint chapeaux de brûleur et les têtes de brûleurs...
-
Seite 11: Raccordement Électrique
2 2 / / INSTALLATION DE VOTRE APPAREIL • RACCORDEMENT ELECTRIQUE Cette table de cuisson doit être raccordée ECTION DU CÂBLE À UTILISER sur le réseau 220-240 V ~ monophasé par l’intermédiaire d’une prise de courant Modèle Modèle 2 pôles + terre normalisée CEI 60083 ou d’un DTG1127* DTI1127* dispositif... -
Seite 12: Raccordement Gaz
2 2 / / INSTALLATION DE VOTRE APPAREIL RACCORDEMENT GAZ • • Remarques préliminaires Si votre table de cuisson est installée au-dessus d'un four ou si la proximité d'autres éléments chauffants risque de provoquer un échauffement du raccordement, il est impératif de réaliser celui-ci en tube rigide. - Seite 13 2 2 / / INSTALLATION DE VOTRE APPAREIL Gaz distribué par bouteille ou — Raccordement avec un tuyau flexible • réservoir (gaz butane/propane) caoutchouc renforcé à embouts mécaniques vissables (conforme à la norme XP D 36-112) Pour votre sécurité, vous devez choisir dont la durée de vie est de 10 ans (Fig.
-
Seite 14: Changement De Gaz
2 2 / / INSTALLATION DE VOTRE APPAREIL • CHANGEMENT DE GAZ Attention Grille Votre appareil est livré pré-réglé pour le gaz naturel. Les injecteurs nécessaires à l’adaptation au Chapeau butane/propane sont dans la pochette contenant ce guide. Tête A chaque changement de gaz, vous devrez Termocouple successivement : Fig. - Seite 15 2 2 / / INSTALLATION DE VOTRE APPAREIL • Branchement électrique : — Branchez le cordon électrique de la table sur votre réseau (220-240 V ) monophasé. Reportez-vous paragraphe “ Raccordement électrique ”. • Validez le type de gaz — Sélectionnez la touche .
- Seite 16 2 2 / / INSTALLATION DE VOTRE APPAREIL •Caractéristiques gaz FR-CH FR-CH FR-CH ES-IT ES-IT ES-IT PT-CY EE - PL Appareil destiné à être installé en : Butane Propane FR .......cat : II2E+3+ Naturel Naturel CH - ES - IT - PT ..cat : II2H3+ CY - EE - PL ....cat : II2H3B/P LT .......cat : I2H Débit horaire ci-dessous :...
- Seite 17 2 2 / / INSTALLATION DE VOTRE APPAREIL • Repérage des injecteurs Exemple : Le tableau ci-contre indique les implantations repère injecteur 62 des injecteurs sur votre appareil en fonction du gaz utilisé. Chaque numéro est marqué sur l’injecteur. Gaz Naturel Gaz butane/Propane Gaz Naturel Gaz butane/Propane...
-
Seite 18: Description De Votre Dessus
3 3 / / UTILISATION DE VOTRE APPAREIL • DESCRIPTION DE VOTRE DESSUS MODÈLE 4 BRÛLEURS GAZ “ “ D D T T G G 1 1 1 1 2 2 7 7 ” ” MODÈLE 2 BRÛLEURS GAZ ET 2 FOYERS INDUCTION “... -
Seite 19: Utilisation D'une Zone De Cuisson
3 3 / / UTILISATION DE VOTRE APPAREIL UTILISATION D’UNE ZONE DE CUISSON • — Placez votre récipient sur le foyer de Voyant cuisson. — Appuyez sur la touche marche/arrêt du foyer de cuisson correspondant. Un signal sonore et l’indication clignotant confirment votre sélection (Fig. - Seite 20 3 3 / / UTILISATION DE VOTRE APPAREIL • Arrêt d’une zone de cuisson : — Faire un appui long sur la touche de sélection du foyer de cuisson concerné (Fig. 06) . Fig. 06 — Indicateur de chaleur résiduelle : Après une utilisation, la zone de cuisson peut rester chaude quelques minutes.
-
Seite 21: Utilisation De La Minuterie Pendant La Cuisson
3 3 / / UTILISATION DE VOTRE APPAREIL UTILISATION DE LA MINUTERIE PENDANT LA CUISSON • La minuterie sera effective sur le foyer Voyant sélectionné (voyant allumé) (Fig. 01). Fig. 01 — Réglez la minuterie en glissant votre doigt sur le slider de minuterie de la gauche vers la droite pour augmenter (Fig. -
Seite 22: Utilisation De La Minuterie Indépendante
3 3 / / UTILISATION DE VOTRE APPAREIL UTILISATION DE LA MINUTERIE INDEPENDANTE • Voyant Cette fonction permet de chronométrer un évènement sans réaliser de cuisson. — Sélectionnez une zone de cuisson non utilisée . Le s’affiche ainsi que le témoin de la zone sélectionnée (Fig. -
Seite 23: Utilisation De La Fonction "Elapsed Time
3 3 / / UTILISATION DE VOTRE APPAREIL UTILISATION DE LA FONCTION “ELAPSED TIME” • Cette fonction permet d’afficher le temps écoulé depuis la dernière modification de puissance sur le foyer. — Pour utiliser cette fonction, faites un appui (Fig. 01) . sur la touche Fig. - Seite 24 3 3 / / UTILISATION DE VOTRE APPAREIL REGLAGE DES PRESELECTIONS DE PUISSANCE • Cette fonction permet d’afficher et de modifier les niveaux de puissance définis dans les présélections. — Eteignez les foyers votre table . — Sélectionnez la touche à...
-
Seite 25: Sécurité Enfants
3 3 / / UTILISATION DE VOTRE APPAREIL SECURITE ENFANTS • Cette fonction permet de verrouiller votre table en position éteinte ou en cours de cuisson. • Pour verrouiller : — Faites un appui long sur ( Fig. 01). Un signal sonore est émis et le voyant Fig. -
Seite 26: Sécurité En Fonctionnement
3 3 / / UTILISATION DE VOTRE APPAREIL • SECURITE EN FONCTIONNEMENT • • RRÊT GÉNÉRAL UTO-STOP SYSTEM — Vous pouvez arrêter le ou les foyers gaz en — En cas d’oubli d’une cuisson en cours et fonctionnment en utilisant la touche selon un temps prédéfini, cette fonction de Cette action annule le verrouillage si sécurité... -
Seite 27: Récipients Adaptés Pour Les Brûleurs Gaz
3 3 / / UTILISATION DE VOTRE APPAREIL RECIPIENTS ADAPTES POUR LES BRULEURS GAZ • • Quel brûleur utiliser en fonction de votre récipient ? Diamètre du récipient Diamètre du récipient Usage 18 à 28 cm Grand rapide Fritures - Ebullition 16 à... -
Seite 28: Choix De La Casserolerie - Sécurité Induction
3 3 / / UTILISATION DE VOTRE APPAREIL • CHOIX DE LA CASSEROLERIE - • Quels sont matériaux incompatibles ? SECURITE INDUCTION ES RÉCIPIENTS EN VERRE EN CÉRAMIQUE OU EN • Quels sont les récipients les TERRE EN ALUMINIUM SANS FOND SPÉCIAL OU EN mieux adaptés ? CUIVRE CERTAINS INOX NON MAGNÉTIQUES... -
Seite 29: Précautions D'utilisation
3 3 / / UTILISATION DE VOTRE APPAREIL • CHOIX DE LA CASSEROLERIE - Attention SECURITE INDUCTION (suite) La table ne doit pas servir à entreposer quoi que ce soit. Précautions d’utilisation • Pour la cuisson, n’utilisez jamais de feuille de papier d’aluminium, ou ne placez jamais —... -
Seite 30: 4/ Entretien Courant De Votre Appareil
4 4 / / ENTRETIEN COURANT DE VOTRE APPAREIL L’entretien de votre table de cuisson est facilité si vous l’effectuez avant son refroidissement complet. Cependant, ne nettoyez jamais votre appareil pendant son fonctionnement. Mettez à zéro toutes les commandes. PRODUITS ET COMMENT ACCESSOIRES À... -
Seite 31: 5/ Petites Pannes Et Anomalies
5 5 / / PETITES PANNES ET ANOMALIES Vous avez un doute sur le bon fonctionnement de votre table ..ceci ne signifie pas forcément qu'il y a une panne. Dans tous les cas, vérifiez les points suivants : Conseil L’affichage d’un code erreur bloque automatiquement l’utilisation de la minuterie... - Seite 32 5 5 / / PETITES PANNES ET ANOMALIES Vous avez un doute sur le bon fonctionnement de votre table ..ceci ne signifie pas forcément qu'il y a une panne. Dans tous les cas, vérifiez les points suivants :...
- Seite 33 5 5 / / PETITES PANNES ET ANOMALIES Vous avez un doute sur le bon fonctionnement de votre table ..ceci ne signifie pas forcément qu'il y a une panne. Dans tous les cas, vérifiez les points suivants :...
-
Seite 34: 6/ Tableau De Cuisson Gaz
6 6 / / TABLEAU DE CUISSON GAZ... -
Seite 35: 7/ Tableau De Cuisson Des Foyers Induction
7 7 / / TABLEAU DE CUISSON DES FOYERS INDUCTION Les puissances maximale sont réservées aux fritures et montées rapides à ébullition. -
Seite 36: Relations Consommateurs
> Vous pouvez nous écrire : Service Consommateurs DE DIETRICH BP 9526 95069 CERGY PONTOISE CEDEX DTI702 Fig. 01 > ou nous téléphoner au : PIÈCES D’ORIGINE Lors d’une intervention d’entretien, demandez l'utilisation exclusive de pièces détachées certifiées d’origine. - Seite 38 By combining the most advanced technologies with the best materials, De Dietrich makes products of the highest quality for the benefit of all those who love cooking. We hope you are extremely satisfied with this new appliance and will be happy to receive your suggestions and to answer your questions.
- Seite 39 CONTENTS 1/ USER NOTICES • Safety instructions ..........40 •...
-
Seite 40: Safety Guidelines
1 1 / / USER NOTICES Important — — The CE mark is affixed to these hobs. Keep this user guide with your — — Installation should only be undertaken by appliance. If the appliance is ever sold or qualified fitters and technicians. transferred to another person, ensure that —... -
Seite 41: Caring For The Environment
1 1 / / USER NOTICES • SAFETY GUIDELINES • CARING FOR THE ENVIRONMENT — This appliance’s packing materials are Note recyclable. Recycle them and help to protect — — The default settings on your hob are the environment by disposing of them in the for natural gas. -
Seite 42: Description Of The Hob
1 1 / / USER NOTICES • DESCRIPTION OF THE HOB MODEL WITH 4 GAS BURNERS “ “ D D T T G G 1 1 1 1 2 2 7 7 ” ” MODEL WITH 2 GAS BURNERS AND 2 INDUCTION ZONES “... -
Seite 43: Layout Of The Control Panel
1 1 / / USER NOTICES • LAYOUT OF THE CONTROL PANEL NDICATOR LIGHTS SHOWING THE ZONE SELECTED BACK LEFT AND BACK RIGHT ZONES “E LAPSED IME” UNCTION “R ECOMMENDED” ELECTING POWER TIMER PRESETS EAR RIGHT EAR LEFT ZONE VERALL ZONE SELECTION SELECTION STOP... -
Seite 44: 2/ Installing Your Appliance
2 2 / / INSTALLING YOUR APPLIANCE • TIPS FOR FLUSH MOUNTING Model Width Depth Thickness Depending on cabinet Cabinet cut-out 56 cm 49 cm Overall dimensions 65 cm 51.8 cm 5 cm above the work top Overall dimensions 55 cm 47 cm 5. - Seite 45 2 2 / / INSTALLING YOUR APPLIANCE Your hob should be built into the top of a supporting cabinet. The worktop should be at least 3 cm thick, and made of a heat-resistant material or a material with a heat-resistant coating.
- Seite 46 2 2 / / INSTALLING YOUR APPLIANCE To ensure leaktightness between the frame and the worktop, stick the foam seal around the edge of the frame. Stick on the seal supplied in the plastic bag before installing the hob: 1- Remove the pan supports, the burner Seal covers and burner heads, noting their positions.
-
Seite 47: Electrical Connection
2 2 / / INSTALLING YOUR APPLIANCE • ELECTRICAL CONNECTION Your hob must be connected to a ROSS-SECTION OF CABLE TO BE USED 220-240 V ~ single phase mains supply via a standard IEC 60083 2 pole + earth electrical Model Model plug or an all-pole isolator, in compliance... -
Seite 48: Gas Connection
2 2 / / INSTALLING YOUR APPLIANCE • GAS CONNECTION • Preliminary remarks If your hob is installed above an oven or if there is a risk of the gas supply line overheating due to the proximity of other heating elements, a rigid pipe should be used for the gas supply. If a flexible hose or tube is used (as is the case with bottled butane), it must not come into contact with any moving parts or be positioned where it might become snagged. - Seite 49 2 2 / / INSTALLING YOUR APPLIANCE Gas supplied by tank or — Use a reinforced rubber hose with screw- • cylinder (butane/propane) on mechanical connectors (compliant with the NF D 36-112 standard) with a 10-year For your safety, you must choose from the guarantee (Fig.
-
Seite 50: Changing The Gas Supply
2 2 / / INSTALLING YOUR APPLIANCE CHANGING THE GAS SUPPLY • Note Grid The default settings on your hob are for natural gas. The injectors required for adapting the hob Burner cover to a butane/propane supply can be found in the same plastic pocket as this guide. - Seite 51 2 2 / / INSTALLING YOUR APPLIANCE • Electrical connection: — Connect the power cable from your hob to your single-phase mains supply (220-240 V Refer to the section “ Connecting to the electricity supply ”. • Check the type of gas supplied —...
-
Seite 52: Gas Settings
2 2 / / INSTALLING YOUR APPLIANCE •Gas settings FR-CH FR-CH FR-CH ES-IT ES-IT ES-IT PT-CY EE - PL Appliance intended to be installed in: Butane Propane Natural Natural FR ......cat: II2E+3+ CH - ES - IT - PT ..cat: II2H3+ CY - EE - PL ....cat: II2H3B/P LT .......cat: I2H Hourly flow rate below:... - Seite 53 2 2 / / INSTALLING YOUR APPLIANCE • Identifying the injectors Example: The adjacent table shows where the injectors injector marking 62 are positioned on your appliance according to the type of gas used. The number is marked on each injector. Natural Gas Butane/Propane Gas Natural Gas...
-
Seite 54: 3/ Using Your Appliance
3 3 / / USING YOUR APPLIANCE • DESCRIPTION OF YOUR HOB MODEL WITH 4 GAS BURNERS “ “ D D T T G G 1 1 1 1 2 2 7 7 ” ” MODEL WITH 2 GAS BURNERS AND 2 INDUCTION ZONES “... -
Seite 55: Using A Cooking Zone
3 3 / / USING YOUR APPLIANCE USING A COOKING ZONE • — Place your cookware on the cooking zone. Indicator light — Press the start/stop touch control for the cooking zone concerned. You selection is confirmed by a beep and a indication (Fig. - Seite 56 3 3 / / USING YOUR APPLIANCE • Switching off a cooking zone: — Press and hold the selection touch control for the cooking zone concerned (Fig. 06) . Fig. 06 — Residual heat indicator: After use, the cooking zone may remain hot for a few minutes.
- Seite 57 3 3 / / USING YOUR APPLIANCE USING THE TIMER DURING COOKING • The timer applies to the zone selected Indicator light (indicator lit) (Fig. 01). Fig. 01 — You increase the time by sliding your finger on the timer slider from left to right (Fig. 02) . To increase Fig.
- Seite 58 3 3 / / USING YOUR APPLIANCE • USING THE INDEPENDENT TIMER Indicator light This function allows you to time an event, without cooking. — Select an unused cooking zone . and the indicator for the selected zone are displayed (Fig.
-
Seite 59: Using The "Elapsed Time" Function
3 3 / / USING YOUR APPLIANCE USING THE “ELAPSED TIME” FUNCTION • This function displays the time elapsed since the last time the power setting was adjusted on a given burner. — To use this function, press the button (Fig. - Seite 60 3 3 / / USING YOUR APPLIANCE • ADJUSTING THE POWER PRESETS This function allows you to display and change the power levels defined in the presets. — Turn off the cooking zones on your hob . — Select the touch control to be changed by pressing and holding ( Fig.
-
Seite 61: Child Safety
3 3 / / USING YOUR APPLIANCE CHILD SAFETY • This function allows you to lock your hob when it is shut off or when it is cooking. • To lock: — Press and hold ( Fig. 01). A beep sounds and the indicator lights up. The indicator will go out automatically after a few Fig. -
Seite 62: Operating Safety
3 3 / / USING YOUR APPLIANCE • OPERATING SAFETY • • ENERAL STOP UTO-STOP SYSTEM — You can stop any gas burners currently — Should you forget that cooking is in operating by pressing touch control . This progress, this safety function... - Seite 63 3 3 / / USING YOUR APPLIANCE COOKWARE SUITABLE FOR GAS BURNERS • • Which burner should you use for your pans? Pan diameter Pan diameter 18 to 28 cm Super fast Frying - Boiling 16 to 22 cm High-speed Searing foods 12 to 20 cm Semi-fast...
-
Seite 64: Induction-Safe Cookware
3 3 / / USING YOUR APPLIANCE • INDUCTION-SAFE COOKWARE • What type of pans can I use? LASS CERAMIC EARTHENWARE ALUMINIUM • Which cookware is the most WITHOUT A SPECIAL BASE COPPER AND CERTAIN suitable? MAGNETIC STAINLESS STEEL COOKWARE You probably already have pans that are •... -
Seite 65: Precautions For Use
3 3 / / USING YOUR APPLIANCE • INDUCTION-SAFE COOKWARE Note (continued) Objects not intended for cooking should never be placed on the hob. Precautions for use • When cooking, never use aluminium foil and never place products wrapped in aluminium —... -
Seite 66: 4/ Daily Care Of Your Appliance
4 4 / / DAILY CARE OF YOUR APPLIANCE It will be easier to maintain your hob if you clean it before it has completely cooled down. However, never clean your appliance while it is in operation. Set all the controls to zero. PRODUCTS/ACCESS WHAT TO DO? ORIES TO USE... - Seite 67 5 5 / / SMALL FAULTS AND PROBLEMS You have a doubt about whether your hob is working properly ..this does not necessarily mean there is a problem with your hob. In all cases, check the following: The display of an error code automatically blocks the use of the timer...
-
Seite 68: 5/ Small Faults And Problems
5 5 / / SMALL FAULTS AND PROBLEMS You have a doubt about whether your hob is working properly ..this does not necessarily mean there is a problem with your hob. In all cases, check the following:... - Seite 69 5 5 / / SMALL FAULTS AND PROBLEMS You have a doubt about whether your hob is working properly ..this does not necessarily mean there is a problem with your hob. In all cases, check the following:...
-
Seite 70: 6/ Cooking Chart For Gas Burners
6 6 / / COOKING CHART FOR GAS BURNERS... -
Seite 71: 7/ Cooking Chart For Induction Zones
7 7 / / COOKING CHART FOR INDUCTION ZONES The maximum power levels should be used only for frying and bringing rapidly to the boil. -
Seite 72: Service Calls
8 8 / / AFTER-SALES SERVICE DEPARTMENT AND CUSTOMER RELATIONS • SERVICE CALLS Any repairs to your appliance must be carried out by a qualified professional authorised to work on this brand. When you call, state your appliance’s complete reference information (model, type, serial number). - Seite 74 De Dietrich Conozca todas las informaciones de la marca en www.de-dietrich.com Visite La Galería De Dietrich, 6 rue de la Pépinière en Paris VIII Abierto de martes a sábado, de 10:00 a 19:00. Atención al Cliente 0892 02 88 04.
- Seite 75 ÍNDICE 1 / A LA ATENCIÓN DEL USUARIO • Consejo de seguridad ..........76 •...
-
Seite 76: Consignas De Seguridad
1 1 / / A LA ATENCIÓN DEL USUARIO Importante — — Cuando conecte aparatos eléctricos en una toma de corriente situada cerca de la Conserve este manual con el aparato. placa, asegúrese de que el cable de Si debe vender o ceder el aparato a otra alimentación no esté... -
Seite 77: A La Atención Del Usuario
1 1 / / A LA ATENCIÓN DEL USUARIO • CONSIGNAS DE SEGURIDAD • RESPETO DEL MEDIO AMBIENTE — Los materiales utilizados para el embalaje Atención de este aparato son reciclables. Participe en — — aparato suministra su reciclaje y contribuya a proteger el medio preajustado para ser utilizado con gas ambiente llevándolo a los contenedores natural. -
Seite 78: Descripción De La Placa
1 1 / / A LA ATENCIÓN DEL USUARIO • DESCRIPCIÓN DE LA PLACA MODELO 4 QUEMADORES DE GAS “ “ D D T T G G 1 1 1 1 2 2 7 7 ” ” MODELO 2 QUEMADORES DE GAS Y 2 FOCOS DE INDUCCIÓN “... -
Seite 79: Cómo Se Presenta El Panel De Mandos
1 1 / / A LA ATENCIÓN DEL USUARIO • CÓMO SE PRESENTA EL PANEL DE MANDOS NDICADORES DE LA ZONA SELECCIONADA FOCO TRASERO IZQUIERDO Y FOCO TRASERO DERECHO UNCIÓN “ LAPSED IME” INUTERO ELECCIÓN DE POTENCIAS “PRÉCO” PRERREGULADAS ANDO DE ANDO DE SELECCIÓN DEL SELECCIÓN DEL... -
Seite 80: Instalación Del Aparato
2 2 / / INSTALACIÓN DEL APARATO • CONSEJOS DE EMPOTRAMIENTO Modelo Anchura Profundidad Grosor Según mueble Corte del mueble 56 cm 49 cm Dimensiones totales encima de la 65 cm 51,8 cm 5 cm encimera Dimensiones totales debajo de la 55 cm 47 cm 5, 1 cm... - Seite 81 2 2 / / INSTALACIÓN DEL APARATO El aparato debe estar encastrado en la parte superior de un mueble soporte con un grosor mínimo de 3 cm, construido con un material resistente al calor o bien recubierto de un material que cumpla esta condición. Para no entorpecer la manipulación de los utensilios de cocina, deberá...
- Seite 82 2 2 / / INSTALACIÓN DEL APARATO Para asegurarse de que el cajón y la encimera queden herméticos, pegue la junta de espuma por todo el perímetro exterior del marco. Pegue la junta incluida en la bolsa antes de colocar la placa: Junta 1- Retire las parrillas de soporte de las cacerolas, las tapas y los quemadores y...
-
Seite 83: Conexión Eléctrica
2 2 / / INSTALACIÓN DEL APARATO • CONEXIÓN ELÉCTRICA Esta placa de cocción debe estar conectada ECCIÓN DEL CABLE QUE SE DEBE UTILIZAR a la red de 220-240 V ~ monofásica por medio de una toma de corriente con 2 polos Modelo Modelo + tierra normalizada CEI 60083 o de un... -
Seite 84: Conexión Gas
2 2 / / INSTALACIÓN DEL APARATO • CONEXIÓN GAS • Observaciones preliminares Si la placa de cocción se encuentra instalada encima de un horno o si existe el riesgo de que, debido a la proximidad de otros elementos calientes, se produzca un calentamiento de la conexión, esta se deberá... - Seite 85 2 2 / / INSTALACIÓN DEL APARATO Gas distribuido por bombona o — Conexión con un tubo flexible de goma • depósito (gas butano / propano) reforzado extremos mecánicos enroscables (de acuerdo con la norma NF Para su seguridad, debe elegir únicamente D 36-112) cuyo tiempo de vida es de 10 años alguna de las 3 conexiones siguientes: (Fig.
-
Seite 86: Cambio De Gas
2 2 / / INSTALACIÓN DEL APARATO CAMBIO DE GAS • Atención Parrilla Su aparato se suministra preajustado para ser utilizado con gas natural. Los inyectores necesarios para la adapta- Tapa ción al butano / propano se encuentran en la bolsa que contiene este manual. Quemador Cada vez que cambie de gas, deberá... - Seite 87 2 2 / / INSTALACIÓN DEL APARATO • Conexión eléctrica: — Conecte el cable eléctrico de la placa a la red eléctrica (220-240 V ) monofásica. Consulte el apartado “ Conexión eléctrica ”. • Valide el tipo de gas — Seleccione el mando Manteniendo pulsado este mando, pulse (Fig.
- Seite 88 2 2 / / INSTALACIÓN DEL APARATO •Características del gas FR-CH FR-CH FR-CH ES-IT ES-IT ES-IT PT-CY EE - PL Aparato destinado a ser instalado en: Butano Propano FR ......cat : II2E+3+ Natural Natural CH - ES - IT - PT ..cat: II2H3+ CY - EE - PL ....cat: II2H3B/P LT .......cat: I2H Gasto horario:...
- Seite 89 2 2 / / INSTALACIÓN DEL APARATO • Señalización de los inyectores Ejemplo: El cuadro siguiente indica las implantaciones indicación inyector 62 de los inyectores en su placa en función del gas utilizado. Cada número está marcado en el inyector. Gas Natural Gas butano / Propano Gas Natural...
-
Seite 90: Descripción De La Encimera
3 3 / / UTILIZACIÓN DEL APARATO • DESCRIPCIÓN DE LA ENCIMERA MODELO 4 QUEMADORES DE GAS “ “ D D T T G G 1 1 1 1 2 2 7 7 ” ” MODELO 2 QUEMADORES DE GAS Y 2 FOCOS DE INDUCCIÓN “... -
Seite 91: Utilización Del Aparato
3 3 / / UTILIZACIÓN DEL APARATO UTILIZACIÓN DE UNA ZONA DE COCCIÓN • — Coloque su recipiente sobre el foco de Indicador cocción. — Pulse el mando de marcha/parada del foco correspondiente. Una señal sonora y la indicación parpadearán confirmando selección (Fig. - Seite 92 3 3 / / UTILIZACIÓN DEL APARATO • Detención de una zona de cocción: — Mantener pulsado un momento el mando de selección foco cocción correspondiente (Fig. 06) . Fig. 06 — Indicador de calor residual: Después de una cocción, la zona de cocción puede continuar caliente durante varios minutos.
-
Seite 93: Utilización Del Minutero Durante La Cocción
3 3 / / UTILIZACIÓN DEL APARATO UTILIZACIÓN DEL MINUTERO DURANTE LA COCCIÓN • El minutero funcionará con en el foco Indicador seleccionado (indicador encendido) (Fig. 01). Fig. 01 — Regule el minutero deslizando el dedo por la barra de deslizamiento del minutero, de izquierda a derecha para aumentar (Fig. -
Seite 94: Utilización Del Minutero Independiente
3 3 / / UTILIZACIÓN DEL APARATO • UTILIZACIÓN DEL MINUTERO INDEPENDIENTE Indicador Esta función permite cronometrar un evento sin realizar una cocción. — Seleccione una zona de cocción no utilizada . Aparece en la pantalla y se enciende el indicador de la zona seleccionada Fig. -
Seite 95: Utilización De La Función "Elapsed Time
3 3 / / UTILIZACIÓN DEL APARATO UTILIZACIÓN DE LA FUNCIÓN “ELAPSED TIME” • Esta función permite mostrar el tiempo transcurrido desde el último cambio de potencia en el foco de cocción. — Para utilizar esta función, pulse el mando (Fig. -
Seite 96: Utilización De Las Preselecciones De Potencia
3 3 / / UTILIZACIÓN DEL APARATO • REGULACIÓN DE LAS PRESELECCIONES DE POTENCIA Esta función permite ver y modificar los niveles de potencia definidos en las preselecciones. — Apague los focos de la placa . — Seleccione el mando que desea modificar manteniendo pulsado un momento Fig. -
Seite 97: Seguridad Para Niños
3 3 / / UTILIZACIÓN DEL APARATO SEGURIDAD PARA NIÑOS • Esta función permite bloquear la placa en posición apagada o en curso de cocción. • Para bloquear: — Mantenga pulsado un momento ( Fig. 01). Se escucha una señal sonora y se enciende el Fig. -
Seite 98: Seguridad En Funcionamiento
3 3 / / UTILIZACIÓN DEL APARATO • SEGURIDADES EN FUNCIONAMIENTO • • ARADA GENERAL UTO-STOP SYSTEM — Puede detener el o los fuegos de gas que — Si se olvida de una cocción, según un estén funcionando utilizando el mando tiempo predefinido, esta función de seguridad Esta acción anula el bloqueo, si es que está... -
Seite 99: Recipientes Adecuados Para Los Quemadores De Gas
3 3 / / UTILIZACIÓN DEL APARATO RECIPIENTES ADECUADOS PARA LOS QUEMADORES DE GAS • • ¿Qué quemador emplear según el recipiente utilizado? Diámetro del recipiente Diámetro del recipiente de 18 a 28 cm Grande rápido Freír - Hervir de 16 a 22 cm Rápido Alimentos a saltear de 12 a 20 cm... -
Seite 100: Elección De Los Recipientes - Seguridad Inducción
3 3 / / UTILIZACIÓN DEL APARATO • ELECCIÓN DE LAS CACEROLAS - • ¿Cuáles son los materiales incompatibles? SEGURIDAD INDUCCIÓN OS RECIPIENTES DE VIDRIO CERÁMICA O BARRO • ¿Cuáles son los recipientes más ALUMINIO SIN FONDO ESPECIAL O COBRE Y ALGUNOS adecuados? ACEROS INOXIDABLES NO MAGNÉTICOS Sin duda, usted ya posee recipientes... -
Seite 101: Precauciones De Uso
3 3 / / UTILIZACIÓN DEL APARATO • ELECCIÓN DE LAS CACEROLAS - Atención SEGURIDAD INDUCCIÓN La placa no se debe utilizar para (continuación) guardar nada. No utilice nunca una hoja de papel de Precauciones de uso • aluminio para cocinar, ni coloque directamente sobre la placa de inducción —... -
Seite 102: Mantenimiento Habitual Del Aparato
4 4 / / MANTENIMIENTO HABITUAL DEL APARATO La limpieza de la placa es más fácil si se efectúa antes de que se haya enfriado totalmente. Ahora bien, no limpie nunca la placa mientras esté funcionando. Ponga en cero todos los man- dos. -
Seite 103: Pequeñas Averías Y Anomalías
5 5 / / PEQUEÑAS AVERÍAS Y ANOMALÍAS Si tiene dudas sobre el correcto funcionamiento de su placa..no significa forzosamente que haya una avería. En todo caso, compruebe los siguientes puntos: Consejo La aparición de un código de error en la pantalla bloquea automáticamente la utilización del minutero... - Seite 104 5 5 / / PEQUEÑAS AVERÍAS Y ANOMALÍAS Si tiene dudas sobre el correcto funcionamiento de su placa..no significa forzosamente que haya una avería. En todo caso, compruebe los siguientes puntos:...
- Seite 105 5 5 / / PEQUEÑAS AVERÍAS Y ANOMALÍAS Si tiene dudas sobre el correcto funcionamiento de su placa..no significa forzosamente que haya una avería. En todo caso, compruebe los siguientes puntos:...
-
Seite 106: Cuadro De Cocción Gas
6 6 / / CUADRO DE COCCIÓN GAS... -
Seite 107: Cuadro De Cocción De Los Focos De Inducción
7 7 / / CUADRO DE COCCIÓN DE LOS FOCOS DE INDUCCIÓN Las potencias máximas están reservadas para los fritos y para hacer hervir rápidamente. -
Seite 108: Intervenciones
8 8 / / SERVICIO TÉCNICO Y RELACIÓN CON EL CONSUMIDOR •INTERVENCIONES Si se debe realizar alguna intervención en su aparato, la deberá ralizar un profesional cualificado autorizado por la marca. Al llamar al servicio técnico, mencione la referencia completa del aparato (modelo, tipo y número de serie). - Seite 110 A seguir, vem a vontade irresistível de tocar. O design De Dietrich tem como trunfos os materiais robustos e prestigiantes. Privilegia-se o autêntico.
- Seite 111 ÍNDICE 1/ INFORMAÇÕES DESTINADAS AO UTILIZADOR • Instruções de segurança ......... 112 •...
-
Seite 112: Normas De Segurança
1 1 / / INFORMAÇÕES DESTINADAS AO UTILIZADOR Importante — — Por questões de segurança, depois de cada utilização, não se esqueça de fechar a Guarde este guia de utilização válvula de comando geral do gás canalizado juntamente com o aparelho. Se o aparelho válvula botija gás... -
Seite 113: 1/ Informações Destinadas Ao Utilizador
1 1 / / INFORMAÇÕES DESTINADAS AO UTILIZADOR • NORMAS DE SEGURANÇA • RESPEITO PELO AMBIENTE —Os materiais de embalamento deste Atenção aparelho são recicláveis. Participe na — — O seu aparelho vem regulado de reciclagem e contribua para a protecção do fábrica para o gás natural. -
Seite 114: Descrição Da Sua Placa
1 1 / / INFORMAÇÕES DESTINADAS AO UTILIZADOR • DESCRIÇÃO DA SUA PLACA MODELO DE 4 BICOS DE GÁS “ “ D D T T G G 1 1 1 1 2 2 7 7 ” ” MODELO DE 2 BICOS DE GÁS E 2 FOCOS POR INDUÇÃO “... -
Seite 115: Como É Apresentado O Painel De Comando
1 1 / / INFORMAÇÕES DESTINADAS AO UTILIZADOR • COMO SE APRESENTA O SEU PAINEL DE COMANDOS INDICADORES LUMINOSOS DA ZONA SELECCIONADA FOCO TRASEIRO ESQUERDO E TRASEIRO DIREITO UNÇÃO “ LAPSED IME” (tempo decorrido) EMPORIZADOR ELECÇÃO DE POTÊNCIAS ACONSELHADO PRÉ-REGULADAS OTÃO DE OTÃO DE SELECÇÃO DO... -
Seite 116: Conselhos Para O Encastramento
2 2 / / INSTALAÇÃO DO SEU APARELHO • CONSELHOS DE ENCASTRAMENTO Modelo Largura Profundidade Espessura Consoante o armário Corte do armário 56 cm 49 cm Dimensões totais por cima da bancada de 65 cm 51,8 cm 5 cm trabalho Dimensões totais por baixo da bancada de 55 cm... -
Seite 117: 2/ Instalação Do Seu Aparelho
2 2 / / INSTALAÇÃO DO SEU APARELHO A placa de cozinha deve ser encastrada no tampo de um móvel de suporte com uma espessura mínima de 3 cm, fabricado com materiais resistentes ao calor, ou então revestido com materiais que possuam esse tipo de características. - Seite 118 2 2 / / INSTALAÇÃO DO SEU APARELHO Para garantir a impermeabilidade entre a caixa e a bancada de trabalho, cole a junta de espuma no contorno exterior do quadro. Cole a junta fornecida na bolsa antes da instalação da placa: 1- Retire as grelhas de suporte dos Junta acessórios, as tampas e as cabeças dos...
-
Seite 119: Ligação Eléctrica
2 2 / / INSTALAÇÃO DO SEU APARELHO • LIGAÇÃO ELÉCTRICA Esta placa tem de ser ligada à rede 220- ECÇÃO DO FIO A UTILIZAR 240 V ~ monofásica através de uma ficha de corrente de 2 pólos + terra normalizada Modelo Modelo CEI 60083, ou um dispositivo de corte... -
Seite 120: Ligação Do Gás
2 2 / / INSTALAÇÃO DO SEU APARELHO LIGAÇÃO DO GÁS • • Notas preliminares Se a sua placa de cozinha estiver instalada por cima de um forno ou se a proximidade com outros aparelhos produtores de calor puder provocar o aquecimento da ligação, então esta deve ser obrigatoriamente realizada com tubos rígidos. - Seite 121 2 2 / / INSTALAÇÃO DO SEU APARELHO Gás distribuído por garrafa ou — Ligação com tubo flexível de borracha • botija (gás butano/propano) encaixes mecânicos reforçada aparafusáveis (de acordo com a norma XP D Para sua segurança, deverá escolher 36-112) cuja duração de vida é...
-
Seite 122: Mudança De Gás
2 2 / / INSTALAÇÃO DO SEU APARELHO • MUDANÇA DE GÁS Atenção Grelha O seu aparelho vem regulado de fábrica para o gás natural. Os injectores necessários para a adaptação aos gases butano/propano encontram-se na Tampa bolsa que contém este guia. Cabeça cada mudança... - Seite 123 2 2 / / INSTALAÇÃO DO SEU APARELHO • Ligação eléctrica: — Ligue o fio eléctrico da placa na sua rede (220-240 monofásica. Consulte parágrafo “ Ligação eléctrica ”. • Valide o tipo de gás — Seleccione o botão . Mantendo este botão premido, prima...
- Seite 124 2 2 / / INSTALAÇÃO DO SEU APARELHO •Características do gás FR-CH FR-CH FR-CH ES-IT ES-IT ES-IT PT-CY EE - PL Aparelho a ser instalado em: Butano Propano Gás Gás FR .......cat: II2E+3+ Natural Natural CH - ES - IT - PT ..cat: II2H3+ CY - EE - PL ....cat: II2H3B/P LT .......cat: I2H Débito horário abaixo:...
- Seite 125 2 2 / / INSTALAÇÃO DO SEU APARELHO • Marcação dos injectores Exemplo: A tabela apresentada ao lado indica as Indicação do injector 62 implantações dos injectores na sua placa de cozinha, de acordo com o gás utilizado. Cada número encontra-se marcado no injector.
-
Seite 126: Descrição Da Parte Superior
3 3 / / UTILIZAÇÃO DO SEU APARELHO • DESCRIÇÃO DA PARTE SUPERIOR MODELO DE 4 BICOS DE GÁS “ “ D D T T G G 1 1 1 1 2 2 7 7 ” ” MODELO DE 2 BICOS DE GÁS E 2 FOCOS POR INDUÇÃO “... -
Seite 127: Utilização De Uma Zona De Aquecimento
3 3 / / UTILIZAÇÃO DO SEU APARELHO UTILIZAÇÃO DE UMA ZONA DE AQUECIMENTO • — Coloque o seu recipiente no foco de Sinal luminoso aquecimento. — Prima o botão de ligar/desligar do foco de aquecimento correspondente. Um sinal sonoro e a indicação a piscar confirmam a sua escolha (Imagem 01). - Seite 128 3 3 / / UTILIZAÇÃO DO SEU APARELHO • Paragem de uma zona de aquecimento : — Mantenha premido o botão de selecção do respectivo foco de aquecimento (Imagem 06) . Imagem 06 — Indicador de calor residual: Após uma utilização, a zona de aquecimento pode permanecer quente durante alguns minutos.
-
Seite 129: Utilização Do Temporizador Durante A Cozedura
3 3 / / UTILIZAÇÃO DO SEU APARELHO UTILIZAÇÃO DO TEMPORIZADOR DURANTE A COZEDURA • O temporizador será efectivo no foco Sinal luminoso seleccionado (indicador luminoso ligado) (Imagem 01). Imagem 01 — Regule o temporizador, fazendo deslizar o dedo botão deslizante temporizador da esquerda para a direita para aumentar (Imagem 02) . -
Seite 130: Utilização Do Temporizador Independente
3 3 / / UTILIZAÇÃO DO SEU APARELHO • UTILIZAÇÃO DO TEMPORIZADOR INDEPENDENTE Indicador luminoso Esta função permite cronometrar um evento sem realizar uma cozedura. — Seleccione uma zona de cozedura não utilizada . O aparece, bem como o indicador luminoso da zona seleccionada Imagem 01 (Imagem 01) . -
Seite 131: Utilização Da Função "Elapsed Time
3 3 / / UTILIZAÇÃO DO SEU APARELHO UTILIZAÇÃO DA FUNÇÃO “ELAPSED TIME” • Esta função permite apresentar o tempo decorrido desde a última modificação de potência de um foco. — Para utilizar esta função, prima o botão (Imagem 01) . Imagem 01 O tempo decorrido pisca no visor do temporizador. -
Seite 132: Utilização Das Pré-Selecções Da Potência
3 3 / / UTILIZAÇÃO DO SEU APARELHO • REGULAÇÃO DAS PRÉ-SELECÇÕES DE POTÊNCIA Esta função permite visualizar e modificar os níveis de potência definidos nas pré- selecções. — Desligue os focos da sua placa . — Seleccione o botão para modificar mantendo premido ( Imagem 01). -
Seite 133: Sistema De Segurança Para Crianças
3 3 / / UTILIZAÇÃO DO SEU APARELHO SISTEMA DE SEGURANÇA PARA CRIANÇAS • Esta função permite bloquear a placa na posição desligada ou durante o aquecimento. • Para bloquear: — Mantenha premido ( Imagem 01). É emitido um som e o indicador luminoso acende. -
Seite 134: Segurança Em Funcionamento
3 3 / / UTILIZAÇÃO DO SEU APARELHO • SEGURANÇA DURANTE O FUNCIONAMENTO • • ARAGEM GERAL UTO-STOP SYSTEM — Pode parar bicos gás — Caso se esqueça da placa ligada com um funcionamento, utilizando o botão . Esta tempo predefinido, esta função de segurança acção anula o bloqueio, caso este corta automaticamente a alimentação da sua tenha sido activado. -
Seite 135: Recipientes Adaptados Aos Bicos De Gás
3 3 / / UTILIZAÇÃO DO SEU APARELHO RECIPIENTES ADAPTADOS AOS BICOS DO GÁS • • Qual o bico a utilizar de acordo com o seu recipiente? Diâmetro do recipiente Diâmetro do recipiente 18 a 28 cm Grande rápido Fritos - Fervura 16 a 22 cm Rápido Alimentos a fritar rapidamente... -
Seite 136: Escolha Dos Acessórios - Segurança Na Indução
3 3 / / UTILIZAÇÃO DO SEU APARELHO • ESCOLHA DOS ACESSÓRIOS - • Quais são materiais incompatíveis? INDUÇÃO DE SEGURANÇA S RECIPIENTES DE VIDRO CERÂMICA OU BARRO • Quais são os recipientes mais ALUMÍNIO SEM FUNDO ESPECIAL OU EM COBRE bem adaptados? ALGUNS INOX QUE NÃO SÃO MAGNÉTICOS Já... -
Seite 137: Sistema De Segurança
3 3 / / UTILIZAÇÃO DO SEU APARELHO • ESCOLHA DOS ACESSÓRIOS - Atenção INDUÇÃO SEGURANÇA A placa não deve servir para (continuação) armazenar o que quer que seja. Para a cozedura, nunca utilize folhas de Precauções de utilização • papel de alumínio, nem coloque directamente na placa de indução produtos —... -
Seite 138: 4/ Manutenção Normal Do Seu Aparelho
4 4 / / MANUTENÇÃO HABITUAL DO SEU APARELHO A limpeza da placa torna-se mais fácil se for feita antes do arrefecimento total da mesma. Contudo, nunca limpe a placa enquanto esta estiver a funcionar. Coloque todos os comandos em zero. PRODUTOS E COMO PROCEDER? ACESSÓRIOS A... -
Seite 139: 5/ Pequenas Avarias E Anomalias
5 5 / / PEQUENAS AVARIAS E ANOMALIAS Se tiver uma dúvida acerca do bom funcionamento da sua placa..isso não significa obrigatoriamente que exista uma avaria. Em todo caso, verifique os seguintes pontos: Conselho A apresentação de um código de erro bloqueia automaticamente a utilização do temporizador... - Seite 140 5 5 / / PEQUENAS AVARIAS E ANOMALIAS Se tiver uma dúvida acerca do bom funcionamento da sua placa..isso não significa obrigatoriamente que exista uma avaria. Em todo caso, verifique os seguintes pontos:...
- Seite 141 5 5 / / PEQUENAS AVARIAS E ANOMALIAS Se tiver uma dúvida acerca do bom funcionamento da sua placa..isso não significa obrigatoriamente que exista uma avaria. Em todo caso, verifique os seguintes pontos:...
-
Seite 142: 6/ Tabela De Cozedura A Gás
6 6 / / TABELA DE COZEDURA A GÁS... -
Seite 143: 7/ Tabela De Cozedura Dos Focos Por Indução
7 7 / / TABELA DE COZEDURA DOS FOCOS POR INDUÇÃO A potência máxima é para os fritos e para ebulições rápidas. -
Seite 144: Intervenções
8 8 / / SERVIÇO PÓS-VENDA E RELAÇÕES COM O CONSUMIDOR • INTERVENÇÕES As eventuais intervenções no seu aparelho devem ser efectuadas por um profissional qualificado que trabalhe para a marca. Durante o seu telefonema, indique a referência completa do seu aparelho (modelo, tipo, número de série). - Seite 146 Wir danken Ihnen für Ihr Vertrauen. De Dietrich Sämtliche Informationen Marke finden unter www.de-dietrich.com Besuchen Sie die Ausstellung De Dietrich, 6 rue de la Pépinière in Paris, VIII. Arrondissement Geöffnet von Dienstag bis Samstag, von 10:00 bis 19:00 Uhr. Verbraucherservice 0892 02 88 04.
- Seite 147 INHALT 1/ FÜR DEN BENUTZER • Sicherheitshinweis ..........04 •...
- Seite 148 1/ FÜR DEN BENUTZER Wichtig — Beim Anschluss elektrischer Geräte an eine Steckdose in Herdnähe sicher stellen, Diese Gebrauchsanleitung beim Gerät dass das Stromkabel nicht mit warmen aufbewahren. Sollte das Gerät an eine Kochzonen in Berührung kommen kann. andere Person verkauft oder überlassen werden, sicher gehen,...
-
Seite 149: 1/ Für Den Benutzer
1/ FÜR DEN BENUTZER • SICHERHEITSHINWEISE • UMWELTSCHUTZ —Die Verpackung Gerätes kann Achtung wiederverwertet werden. Führen Sie sie der — Ihr Kochfeld wird für Erdgas einge- Wiederverwertung zu und leisten Sie einen stellt geliefert. Beitrag zum Umweltschutz, indem Sie die —... -
Seite 150: Beschreibung Des Kochfelds
1/ FÜR DEN BENUTZER • BESCHREIBUNG DES KOCHFELDS MODELL MIT 4 GASBRENNERN „DTG1127“ MODELL MIT 2 GASBRENNERN UND 2 INDUKTIONSZONEN „DTI1127“* Brennerkappe Zündkerze Brennerkopf Thermoelement Düse... -
Seite 151: Bedienfeld
1/ FÜR DEN BENUTZER • BEDIENFELD NZEIGEN DER AUSGEWÄHLTEN ZONE KOCHZONEN HINTEN LINKS UND HINTEN RECHTS UNKTION „ LAPSED IME“ OREINGESTELLTE USWAHL DER VORGEGE- EITSCHALTUHR BENEN LEISTUNGEN AHLTASTE AHLTASTE DER DER ZONE HIN- ZONE HINTEN TEN RECHTS LINKS TASTE CHIEBEREGLER LEISTUNG CHIEBEREGLER ZEITSCHALTUHR AHLTASTE... -
Seite 152: Einbau Des Geräts
2 / EINBAU DES GERÄTS • EINBAUHINWEISE Modell Breite Tiefe Stärke Vom Möbelstück Möbelausschnitt 56 cm 49 cm abhängig Maße über alles oberhalb der 65 cm 51,8 cm 5 cm Arbeitsplatte Maße über alles unterhalb der 55 cm 47 cm 5, 1 cm Arbeitsplatte Die Installation darf nur von qualifizierten... - Seite 153 2 / EINBAU DES GERÄTS Das Kochfeld muss in eine mindestens 3 cm dicke, hitzebeständige oder mit einem hitze- beständigen Material beschichteten Platte eines Einbaumöbels eingebaut werden. Um die Handhabung der Kochutensilien nicht zu behindern, muss links und rechts ein Abstand von 30 cm zwischen Kochfeld und Möbel oder Wand eingehalten werden.
- Seite 154 2 / EINBAU DES GERÄTS Die Schaumdichtung außen um den Rand kle- ben, um die Dichtigkeit zwischen Gehäuse und Arbeitsplatte zu gewährleisten. Die in der Tüte mitgelieferte Dichtung vor der Installation des Kochfelds ankleben: 1- Die Topfauflageroste, die Brennerkappen Dichtung und Brennerköpfe entfernen und sich mer- ken, wohin sie gehören.
-
Seite 155: Elektrischer Anschluss
2 / EINBAU DES GERÄTS • ELEKTRISCHER ANSCHLUSS U VERWENDENDER KABELQUERSCHNITT Das Kochfeld muss an das einphasige 220- 240 V~ Netz über eine Steckdose mit Modell Modell 2 Polen + Erdung nach IEC Norm 60083 DTG1127* DTI1127* oder über eine omnipolare Abschalt- vorrichtung nach den geltenden Einbau- vorschriften angeschlossen werden. -
Seite 156: Gasanschluss
2 / EINBAU DES GERÄTS • GASANSCHLUSS • Vorbemerkungen Wenn das Kochfeld über einem Backofen installiert wird oder die Nähe anderer heizender Teile zur Erhitzung des Anschlusses führen könnte, muss der Anschluss unbedingt über ein festes Rohr erfolgen. Wird ein Schlauch oder ein flexibles Rohr (bei Butangas) verwendet, darf es nicht mit einem beweglichen Teil des Möbels in Berührung kommen oder durch eine Stelle geführt werden, die hinterher schwer zugänglich ist. - Seite 157 2 / EINBAU DES GERÄTS Gas aus der Flasche oder aus — Anschluss mit einem Schlauch aus ver- • einem Tank (Butan-/Propangas) stärktem Gummi Anschlussver- schraubungen (gemäß der Norm NF D 36- Aus Sicherheitsgründen sind nur die folgen- 103) dessen Lebensdauer 10 Jahre beträgt den 3 Anschlussarten möglich: (Abb.
-
Seite 158: Umstellung Auf Eine Andere Gasart
2 / EINBAU DES GERÄTS UMSTELLUNG EINE • ANDERE GASART Rost Achtung Ihr Gerät ist bei Lieferung auf Erdgas voreingestellt. Brennerkappe Die für eine Umstellung auf Butan/Propan erforderlichen Düsen befinden sich im sel- Brennerkopf ben Beutel wie die Bedienungsanleitung. Thermo- element Bei jedem Wechsel der Gasart nacheinander Abb. -
Seite 159: Für Butane/Propane
2 / EINBAU DES GERÄTS • Elektrischer Anschluss: — Das Stromkabel des Kochfelds an das ein- phasige Stromnetz anschließen (220-240 V Siehe Paragraph „ Gasanschluss “. • Bestätigung der Gasart — Mit der Taste auswählen . Bei gedrückt gehaltener Taste ebenfalls auf die Taste drü- cken (Abb. - Seite 160 2 / EINBAU DES GERÄTS • Gaskenndaten FR-CH FR-CH FR-CH ES-IT ES-IT ES-IT PT-CY EE - PL Gerät für Betrieb mit: Butan Propan Erd- Erd- FR ......Kat.: II2E+3+ CH - ES - IT - PT ..Kat.: II2H3+ CY - EE - PL ....Kat.: II2H3B/P LT .......Kat.: I2H Stündliche Leistung nachstehend: 28-30 mbar...
-
Seite 161: Kennzeichnung Der Düsen
2 / EINBAU DES GERÄTS • Kennzeichnung der Düsen Beispiel: nachstehenden Tabelle sind Kennzeichnung Düse 62 Einbauorte der Gasdüsen in Abhängigkeit der verwendeten Gasart zu entnehmen. Die entsprechenden Ziffern stehen auf der Düse. Erdgas Butan-/Propangas Erdgas Butan-/Propangas STROMVERSORGUNG - Stromanschluss: 220-240 V~ - 50 Hz 3100 W (1) - Aufgenommene Gesamtleistung:... -
Seite 162: 3/ Beschreibung Des Geräts
3 / BESCHREIBUNG DES GERÄTS • BESCHREIBUNG DER OBERSEITE MODELL MIT 4 GASBRENNERN „DTG1127“ MODELL MIT 2 GASBRENNERN UND 2 INDUKTIONSZONEN „DTI1127“* Durchmesser Durchmesser Brenner vorne links ....Hilfsbrenner 0,85 kW* Brenner vorne rechts ..... Mittelschneller Brenner 1,50 kW* Brenner hinten links ....Schnellbrenner 2,25 kW* Brenner hinten rechts .... -
Seite 163: Nutzung Einer Kochzone
3 / BESCHREIBUNG DES GERÄTS NUTZUNG EINER KOCHZONE • — Das Kochgeschirr auf die Kochzone stellen. Anzeige — Die Ein-/Aus-Taste der entsprechenden Kochzone drücken. Ein akustisches Signal und die blinkende bestätigen die Auswahl (Abb. 01). Anzeige Die Anzeige der ausgewählten Zone leuchtet auf. - Seite 164 3 / BESCHREIBUNG DES GERÄTS • Abschalten einer Kochzone: — Lange auf die Auswahltaste des entspre- chenden Kochfelds drücken (Abb. 06) . Abb. 06 — Restwärmeanzeige: Nach der Nutzung kann die Kochzone noch einige Minuten warm sein. Während dieser Zeit wird ein „ H “ angezeigt. Die entsprechenden Zonen nicht berühren.
-
Seite 165: Verwendung Der Zeitschaltuhr Während Des Garens
3 / BESCHREIBUNG DES GERÄTS VERWENDUNG DER ZEITSCHALTUHR WÄHREND DES GARENS • Die Zeitschaltuhr ist für die ausgewählte Zone Anzeige nutzbar (Anzeige leuchtet) (Abb. 01). Abb. 01 — Die Zeitschaltuhr über den Schieberegler einstellen, indem mit dem Finger zur Verlängerung der Dauer von links nach rechts gefahren wird (Abb. -
Seite 166: Nutzung Der Zeitschaltuhr Unabhängig Von Einem Garvorgang
3 / BESCHREIBUNG DES GERÄTS • NUTZUNG DER ZEITSCHALTUHR UNABHÄNGIG VON EINEM GARVORGANG Mit dieser Funktion die Zeitschaltuhr verwen- Anzeige det werden, ohne dass gekocht wird. — Eine nicht verwendete Kochzone auswäh- len . Es wird eine angezeigt und die Anzeige der ausgewählten Zone leuchtet Abb. -
Seite 167: Nutzung Der Funktion „Elapsed Time
3 / BESCHREIBUNG DES GERÄTS NUTZUNG DER FUNKTION „ELAPSED TIME“ • Mit dieser Funktion kann die seit der letzten Leistungsänderung an einer Kochzone abge- laufene Zeit angezeigt werden. — Zur Nutzung dieser Funktion die Taste (Abb. 01) drücken. Abb. 01 Die abgelaufene Zeit erscheint in der Anzeige der Zeitschaltuhr. -
Seite 168: Einstellung Der Voreingestellten Leistungsstufen
3 / BESCHREIBUNG DES GERÄTS • EINSTELLUNG DER VOREINGESTELLTEN LEISTUNGSSTUFEN Mit dieser Funktion können die voreingestell- ten Leistungsstufen angezeigt und verändert oder werden. — Die Kochzonen des Kochfelds einschalten . — Die durch langes Drücken die zu ändernden Tasten oder auswählen ( Abb. -
Seite 169: Kindersicherung
3 / BESCHREIBUNG DES GERÄTS KINDERSICHERUNG • Mit dieser Funktion kann das Kochfeld im aus- geschalteten Zustand oder während des Kochens verriegelt werden. • Verriegeln: — Lange auf drücken ( Abb. 01). Abb. 01 Es ertönt ein Signalton und die Anzeige leuch- tet auf. -
Seite 170: Sicherheit Während Des Betriebs
3 / BESCHREIBUNG DES GERÄTS • SICHERHEIT WÄHREND DES BETRIEBS • • LLGEMEINE AUSSCHALTUNG UTO-STOPP SYSTEM — Durch Betätigung der Taste können die — Falls ein laufender Garvorgang vergessen in Betrieb befindlichen Gaszonen ausgeschal- wird und eine vorgegebene Zeit abgelaufen tet werden. -
Seite 171: Für Gasbrenner Geeignete Kochgefässe
3 / BESCHREIBUNG DES GERÄTS FÜR GASBRENNER GEEIGNETE KOCHGEFÄSSE • • Welcher Brenner für welches Kochgeschirr? Durchmesser des Geschirrs Durchmesser des Geschirrs Verwendung 18 bis 28 cm Hochschnell Frittieren - Aufkochen 16 bis 22 cm Schnell Anzubratende Nahrungsmittel 12 bis 20 cm Mittelschnell Saucen - Aufwärmen 8 bis 14 cm... -
Seite 172: Auswahl Der Kochtöpfe - Induktionssicherung
3 / BESCHREIBUNG DES GERÄTS • AUSWAHL DER KOCHTÖPFE - • Welche Materialien sind ungeeig- net? INDUKTIONSSICHERUNG OCHGESCHIRR AUS ERAMIK ODER • Welche Kochtöpfe sind am besten LUMINIUM OHNE BESONDEREN ODEN ODER geeignet? UPFER EINIGE NICHT MAGNETISCHE Sie haben sicherlich bereits geeignete DELSTAHLTÖPFE Gefäße. -
Seite 173: Auswahl Der Kochtöpfe
3 / BESCHREIBUNG DES GERÄTS • AUSWAHL DER KOCHTÖPFE - Achtung I N D U K T I O N S S I C H E R U N G Das Kochfeld darf auf keinen Fall als (Fortsetzung) Ablagefläche benutzt werden. Niemals Alu-Folie zum Kochen verwenden Nutzungshinweise •... -
Seite 174: 4/ Laufende Pflege Des Geräts
4 / LAUFENDE PFLEGE DES GERÄTS Ihr Kochfeld ist leichter zu pflegen, wenn Sie die Reinigung vor dem völligen Erkalten durch- führen. Reinigen Sie Ihr Gerät jedoch nie, während es in Betrieb ist. Alle Bedienelemente auf Null drehen. ZU VERWENDENDE VORGEHENSWEISE PRODUKTE UND ZUBEHÖR... -
Seite 175: 5/ Kleine Fehler Und Störungen
5 / KLEINE FEHLER UND STÖRUNGEN Wenn Sie Zweifel an dem einwandfreien Betrieb Ihres Kochfelds haben ..bedeutet dies nicht unbedingt, dass eine Störung vorliegt. Überprüfen Sie zunächst die folgenden Punkte: Empfehlung Die Anzeige eines Fehlercodes blockiert automatisch die Nutzung der Zeitschaltuhr... - Seite 176 5 / KLEINE FEHLER UND STÖRUNGEN Wenn Sie Zweifel an dem einwandfreien Betrieb Ihres Kochfelds haben ..bedeutet dies nicht unbedingt, dass eine Störung vorliegt. Überprüfen Sie zunächst die folgenden Punkte:...
- Seite 177 5 / KLEINE FEHLER UND STÖRUNGEN Wenn Sie Zweifel an dem einwandfreien Betrieb Ihres Kochfelds haben ..bedeutet dies nicht unbedingt, dass eine Störung vorliegt. Überprüfen Sie zunächst die folgenden Punkte:...
-
Seite 178: 6/ Gartabelle Für Gas
6 / GARTABELLE FÜR GAS... -
Seite 179: 7/ Gartabelle Für Die Induktionszonen
7 / GARTABELLE FÜR DIE INDUKTIONSZONEN Die maximalen Heizstufen sollten nur zum Frittieren und schnellen Aufkochen eingeschaltet werden. -
Seite 180: Reparaturarbeiten
8 / KUNDENDIENST UND KUNDENKONTAKT •REPARATURARBEITEN Eventuelle Reparaturarbeiten an dem Gerät müssen von qualifiziertem Fachpersonal des Händlers vorgenommen werden. Benachrichtigung des Kundendienstes die vollständigen Geräteangaben (Modell, Typ und Seriennummer) angeben. Diese Angaben finden Sie auf dem Typenschild (Abb. 01). DTI702 Abb.