Herunterladen Inhalt Inhalt Diese Seite drucken

Werbung

Verfügbare Sprachen
  • DE

Verfügbare Sprachen

  • DEUTSCH, seite 4
INSTRUCTIONS FOR INSTALLATION AND USE
MONTAGE- UND GEBRAUCHSANWEISUNG
INSTRUCTIONS POUR L'INSTALLATION ET L'UTILISATION
ISTRUZIONI PER L'INSTALLAZIONE E L'USO
INSTRUCCIONES PARA INSTALACIÓN Y USO
INSTRUÇÕES DE INSTALAÇÃO Y UTILIZAÇÃO
AANWIJZING VOOR GEBRUIK EN INSTALLATIE

Werbung

Inhaltsverzeichnis
loading

Inhaltszusammenfassung für Candy CMD 97 X

  • Seite 1 INSTRUCTIONS FOR INSTALLATION AND USE MONTAGE- UND GEBRAUCHSANWEISUNG INSTRUCTIONS POUR L'INSTALLATION ET L’UTILISATION ISTRUZIONI PER L'INSTALLAZIONE E L’USO INSTRUCCIONES PARA INSTALACIÓN Y USO INSTRUÇÕES DE INSTALAÇÃO Y UTILIZAÇÃO AANWIJZING VOOR GEBRUIK EN INSTALLATIE...
  • Seite 2: Installation

    ENGLISH DESCRIPTION The hood may be installed in the filtering version, in the ducting version or in the version with an external motor. Filtering version (Fig. 1): The hood aspirates the kitchen air saturated with fumes and odours, purifies it through the grease filters and charcoal filters and returns clean air into the room.
  • Seite 3: Operation

    INSTALLATION IN FILTERING VERSION: Prepare the power supply within the telescopic flue (for the electrical connection, follow all the other instructions on the “Warnings” sheet). Fixing to the wall: for fixing to the wall refer to the instructions for the ducting version (see point 2, 3), then continue with the instructions below.
  • Seite 4 pilot lamp comes on); when pressing the button a second time (while the pilot lamp is on) , the TIMER is activated and thus the motor stops after 5’ (the pilot lamp flashes). Pay special attention to the grease filters: If the model purchased has the commands shown in Figure 19: the grease filter must be cleaned periodically: exactly how often depends on use (at least once every other month).
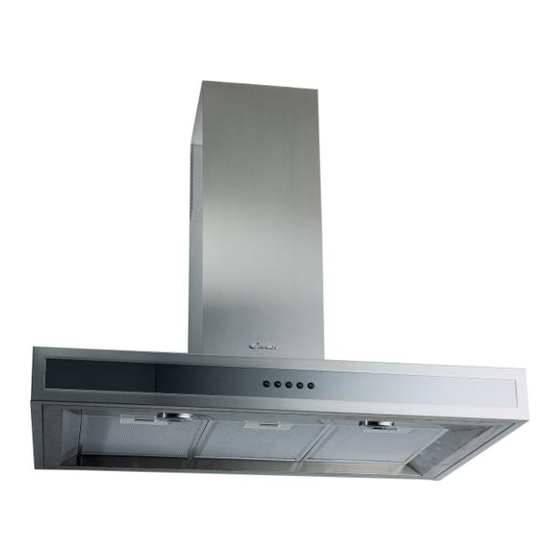
  • Seite 5 zu achten, daß der Abstand zwischen dem unteren Rand der Haube und der Kochfläche mindestens 650 mm beträgt. Bevor die Dunstabzugshaube aufgehängt wird ist zu überprüfen, ob die Schrauben zur Befestigung der Bügel (A) so eingeschraubt sind, dass die Haube aufgehängt werden kann. Die Metallbügel (A) mit Hilfe von Schrauben und Dübeln an der Wand befestigen (Bügel, Schrauben und Dübel sind mitgeliefert).
  • Seite 6: Funktionsweise

    unten aufgeführten Anweisungen fortfahren. Befestigung der Teleskoprohre: Zunächst wird die Position des Kaminbefestigungsteiles festgelegt. Dieses kann sowohl an der Decke, als auch an der Wand festgeschraubt werden (Abb. 7). Nun werden die beiden Kaminteile entsprechend der Geräteversion vorbereitet - Abb. 8 – (das obere Rohr umdrehen, so dass sich die Gitter zum Ablassen der Luft unten befinden).
  • Seite 7 la circulation de l’air dans la pièce (Fig. 1A). Afin que votre hotte soit efficace d’une façon constante, il est nécessaire de remplacer les filtres à charbon périodiquement. Les filtres à charbon ne sont pas fournis. Version aspirante (Fig. 2) : votre hotte aspire l’air de la cuisine imprégnée de fumée et d’odeurs, en le faisant passer à...
  • Seite 8 tuyau télescopique au plafond et/ou au mur, de manière à ce qu’il soit aligné avec votre hotte (Fig. 7). Préparez les tuyaux sans oublier que leur position finale devra être identique à celle de la Fig. 12 (les grilles d’évacuation de l’air doivent être positionnées dans la partie haute).
  • Seite 9: Installazione

    s’arrête (le témoin lumineux clignote). Touche E : actionne le moteur à la 4ème vitesse (le témoin lumineux correspondant s’allume); en appuyant une seconde fois (tandis que le témoin lumineux est allumé), le TIMER est activé, par conséquent, 5’ après le moteur s’arrête (le témoin lumineux clignote). Prêter une attention particulière aux filtres à...
  • Seite 10 stessa. Come già specificato nel capitolo "Avvertenze", tenere presente che la distanza tra il bordo inferiore della cappa ed il piano cottura deve essere min 650 mm. Prima di agganciare la cappa assicurarsi che le viti di fissaggio delle staffe (A) siano svitate in modo tale da consentire l’aggancio della cappa. Fissare le staffe metalliche (A) alla parete tramite le viti e i tasselli (staffe, viti e tasselli sono in dotazione).
  • Seite 11: Funzionamento

    il tubo superiore in modo che le griglie di evacuazione aria siano in basso). Collegare il condotto per lo scarico dell’aria con la bocca uscita aria della cappa; utilizzare un tubo flessibile e bloccarlo alla bocca uscita aria della cappa con una fascetta metallica - Fig.
  • Seite 12: Instalación

    expele al exterior. Si quiere instalar la campana en esta versión, debe adquirirla ya preparada, es decir, sin el grupo motor dentro; además debe adquirir también una centralita aspirante (Usen sólo las centralitas aspirantes propuestas en el catálogo original). En esta versión no es necesario utilizar el filtro al carbón. Decida desde el principio el tipo de instalación (filtrante, aspirante o en versión con motor exterior).
  • Seite 13 evantar el tubo inferior hacia arriba y bloquearlo momentáneamente con cinta adhesiva, a fin de acceder al tubo flexible para conectarlo a la boca de salida del aire (Fig.14). Efectuar la conexión eléctrica. Quitar la cinta adhesiva y volver a bajar el tubo inferior, apoyándolo delicadamente y sujételo con 4 tornillos desde el interior de la campana (Fig.
  • Seite 14 lo menos cada dos meses). Para quitar el filtro: a nivel de la manilla, empujen el retén hacia el interior y tiren el filtro hacia abajo. Laven los filtros con detergente neutro. Si el modelo que tienen ustedes tiene los mandos que están representados en la Figura 20: los filtros antigrasa deben ser limpiados aproximadamente cada 30 horas de funcionamiento (cuando se enciende el piloto del botón luces - Fig.
  • Seite 15 suportes, os parafusos e as buchas são fornecidos com o aparelho). Enganche então o exaustor com os ganchos retangulares apropriados que estão colocados na parte posterior do aparelho. Regular a horizontalidade do exaustor de acordo com o alinhamento dos armários de cozinha, deslocando-o para a direita ou para a esquerda. Se houver necessidade de regular também a altura do exaustor, mexer nos parafusos de regulação específicos (B) (fornecidos com o aparelho).
  • Seite 16 a presilha superior de apoio do tubo telescópico, fazendo de modo que seja em eixo com o seu pano dos tubos telescópicos (Fig. 7). Prepare os tubos telescópicos levando em consideração que a posição final dos mesmos deverá ser aquela ilustrada na Fig. 8 (embocar ao tubo superior de maneira que as grelhas de evacuação do ar estão em baixo).
  • Seite 17 het bovenste gedeelte van de pijp geplaatst moet worden, zodat de lucht weer in het vertrek kan stromen (afb. 1A). Om ervoor te zorgen dat de werking voortdurend doeltreffend is moeten er koolstoffilters regelmatig vervangen worden. De koolstoffilters zijn niet bijgeleverd. Afzuigversie (afb.
  • Seite 18 Bevestiging aan de muur: zie de aanwijzingen voor de afzuigversie om de kap aan de muur te bevestigen (zie punt 2, 3), en ga vervolgens verder met onderstaande aanwijzingen. Bevestiging van de telescopische pijp: Door middel van de bijgeleverde pluggen en de schroeven, bevestig aan het plafond e/o de wand de bovenste steun-beugel van de uitschuifbare buis, en wel zò...
  • Seite 19 geactiveerd, zodat de motor na 5’ stopt (het corresponderende lampje knippert). Toets C: schakelt de motor in op de 2 snelheid (het corresponderende lampje gaat branden); door nogmaals op de toets te drukken (terwijl het lampje brandt) wordt de TIMER geactiveerd, zodat de motor na 5’ stopt (het corresponderende lampje knippert). Toets D: schakelt de motor in op de 3 snelheid (het corresponderende lampje gaat branden);...
  • Seite 24 04306663/2 - K34el/K34ce s.n.

Inhaltsverzeichnis