Parkside PLSA 40-Li B1 Originalbetriebsanleitung
Akku-laubsauger/-bläser
Verfügbare Sprachen
Verfügbare Sprachen
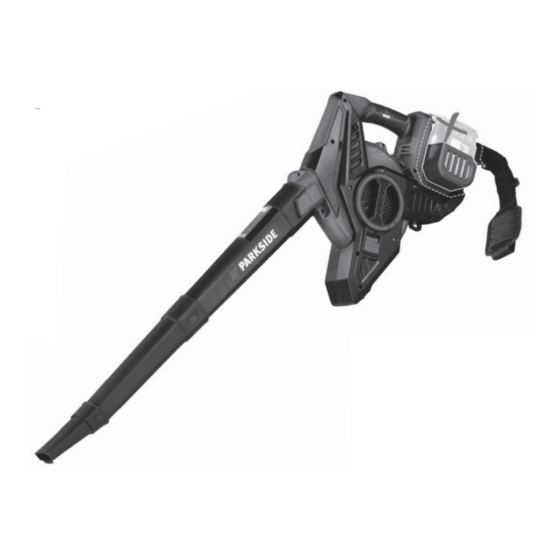
Akku-Laubsauger/-Bläser / Cordless Leaf Blower/
Vacuum / Aspirateur souffl eur/broyeur électrique
sans fi l PLSA 40-Li B1
Akku-Laubsauger/-Bläser
Originalbetriebsanleitung
Aspirateur souffl eur/broyeur
électrique sans fi l
Traduction des instructions d'origine
Akumulatorowy odkurzacz/dmucha-
wa do liści
Tłumaczenie oryginalnej instrukcji obsługi
Aku vysávač/fúkač lístia
Preklad originálneho návodu na obsluhu
IAN 339929_1910
Cordless Leaf Blower/Vacuum
Translation of the original instructions
Accu-bladzuiger/-blazer
Vertaling van de originele gebruiksaanwijzing
Aku vysavač/foukač listí
Překlad originálního provozního návodu
Kapitel
Fehlerbehebung

Verwandte Anleitungen für Parkside PLSA 40-Li B1


Inhaltszusammenfassung für Parkside PLSA 40-Li B1
- Seite 1 Akku-Laubsauger/-Bläser / Cordless Leaf Blower/ Vacuum / Aspirateur souffl eur/broyeur électrique sans fi l PLSA 40-Li B1 Akku-Laubsauger/-Bläser Cordless Leaf Blower/Vacuum Originalbetriebsanleitung Translation of the original instructions Aspirateur souffl eur/broyeur Accu-bladzuiger/-blazer Vertaling van de originele gebruiksaanwijzing électrique sans fi l Traduction des instructions d‘origine...
- Seite 2 Klappen Sie vor dem Lesen die Seite mit den Abbildungen aus und machen Sie sich anschließend mit allen Funktionen des Gerätes vertraut. Before reading, unfold the page containing the illustrations and familiarise yourself with all functions of the device. Avant de lire le mode d‘emploi, ouvrez la page contenant les illustrations et familiarisez-vous ensuite avec toutes les fonctions de l‘appareil.
-
Seite 4: Inhaltsverzeichnis
Inhalt Einleitung Einleitung ........4 Herzlichen Glückwunsch zum Kauf Ihres Bestimmungsgemäße neuen Gerätes. Sie haben sich damit für Verwendung ........ 4 ein hochwertiges Gerät entschieden. Allgemeine Beschreibung ..... 5 Dieses Gerät wurde während der Produkti- Lieferumfang........5 on auf Qualität geprüft und einer Endkon- Funktionsbeschreibung ...... -
Seite 5: Allgemeine Beschreibung
Schäden, die durch das Verpackungsmaterial ordnungsgemäß. bestimmungswidrigen Gebrauch oder fal- sche Bedienung verursacht wurden. Akku-Laubsauger/-bläser Das Gerät ist Teil der Serie Parkside Blasrohr (dreiteilig) X 20 V TEAM und kann mit Akkus der Saugrohr (dreiteilig) X 20 V TEAM Serie betrieben werden. -
Seite 6: Übersicht
Technische Daten gleich eines Elektrowerkzeugs mit einem anderen verwendet werden. Akku- Der angegebene Schwingungsemissionswert Laubsauger/-bläser ... PLSA 40-Li B1 kann auch zu einer einleitenden Einschät- Motorspannung ... 40 V (2x 20 V) zung der Aussetzung verwendet werden. Stromstärke ........16 A Nennleistung ......max. -
Seite 7: Sicherheitshinweise
Verletzungsgefahr durch Versuchen Sie, die Belastung durch weggeschleuderte Teile! Vibrationen so gering wie möglich Umstehende Personen aus zu halten. Beispielhafte Maßnah- dem Gefahrenbereich men zur Verringerung der Vibrati- fernhalten. onsbelastung sind das Tragen von Handschuhen beim Gebrauch des Achtung! Werkzeugs und die Begrenzung Rotierendes Flügelrad der Arbeitszeit. -
Seite 8: Allgemeine Sicherheitshinweise
Achtung! Beim Gebrauch Elektrogeräte gehören nicht von Geräten sind zum Schutz in den Hausmüll. gegen elektrischen Schlag, Verletzungs- und Brandge- Das Gerät ist Teil fahr folgende grundsätzliche der Serie Parkside Sicherheitsmaßnahmen zu X 20 V TEAM. beachten: Verriegelung Unterweisung: Ansaugöffnung Machen Sie sich mit allen Symbole in der Geräteteilen und der richti-... - Seite 9 • Verwenden Sie alle Teile des chern den reibungslosen Betrieb des Gerätes: Blasrohres, damit der Luftstrom - Tragen Sie geeignete Arbeits- nah am Boden arbeiten kann. • Befeuchten Sie bei sehr trocke- kleidung wie festes Schuhwerk nen Bedingungen die Oberflä- mit rutschfester Sohle, eine robuste, lange Hose, Hand- che leicht oder verwenden Sie...
-
Seite 10: Betrieb
bei denen das ausgeworfene das Gleichgewicht zu verlieren. • Halten Sie Finger und Füße von Material Verletzungen verursa- chen könnte. der Ansaugrohröffnung und dem • Führen Sie vor der Benutzung im- Flügelrad fern. Es besteht Verlet- mer eine visuelle Inspektion durch, zungsgefahr. - Seite 11 - nach dem Kontakt mit Fremd- Material in die Maschine extrem körpern oder bei abnormaler sorgfältig, dass keine Metallstü- Vibration. cke, Steine, Flaschen, Büchsen • Benutzen Sie das Gerät nicht in oder andere Fremdobjekte ein- geschlossenen oder schlecht be- geführt werden. •...
-
Seite 12: Bei Auftreten Eines Un
- beschädigte Teile ersetzen halb der Reichweite von Kindern oder reparieren; auf. • Behandeln Sie Ihr Gerät mit - auf lose Teile überprüfen und diese festziehen; Sorgfalt. Reinigen Sie regel- • Achten Sie darauf, keine sich mäßig die Lüftungsschlitze und bewegenden, gefährlichen Teile befolgen Sie die Wartungsvor- zu berühren, bevor die Maschine... -
Seite 13: Zusätzliche Sicherheitshinweise
Betriebsan- ein elektromagnetisches Feld. leitung Ihrer Akkus und Dieses Feld kann unter be- Ladegeräte der Serie stimmten Umständen aktive Parkside X 20 V Team oder passive medizinische gegeben sind. Eine de- Implantate beeinträchtigen. taillierte Beschreibung Um die Gefahr von ernsthaf- zum Ladevorgang und ten oder tödlichen Verletzun-... -
Seite 14: Inbetriebnahme
Inbetriebnahme Lassen Sie einen erwärmten Akku vor dem Laden abkühlen. Bevor Sie das Gerät in Betrieb nehmen, müssen Sie Setzen Sie den Akku nicht über beide Akkus einsetzen, längere Zeit starker Sonnenein- die Blas- oder Saugrohre montieren, strahlung aus und legen Sie ihn zum Laubsaugen den Fangsack nicht auf Heizkörpern ab montieren,... -
Seite 15: Dreiteiliges Saugrohr Montieren/Demontieren
Achten Sie auf die korrekte Montage 1. Öffnen Sie die Schutzabdeckung (7) der Schutzabdeckung (7), sonst lässt der Ansaugöffnung, indem Sie die sich der Laubbläser nicht starten. Verriegelung der Ansaugöffnung (8) in Richtung der Ansaugöffnung drücken 1. Stecken Sie das dreiteilige Blasrohr (9) und die Schutzabdeckung herauszie- wie abgebildet zusammen. -
Seite 16: Tragegurt Anlegen
Der Laubsauger/-bläser kann nur gelöst werden. Zum Öffnen des mit zwei eingesetzten Akkus der Steckverschlusses drücken Sie die Serie Parkside X 20 V Team betrie- beiden Klammern zusammen. ben werden. 1. Legen Sie den Tragegurt (13) über eine Achten Sie vor dem Einschalten Schulter. -
Seite 17: Turbo-Modus
cher Stufe sich die Saug-/Blasleistung dient das Gerät auch als befindet. Häcksler. 3. Zum Ausschalten drücken Sie einmal Die trockenen Blätter wer- kurz auf den Ein-/Ausschalter (4). den zerkleinert, ihr Volu- men verringert und für eine Turbo-Modus eventuelle Kompostierung vorbereitet. Die Intensität der 1. -
Seite 18: Reinigung/Wartung
• Beginnen Sie die Arbeit mit der höchs- Das Gerät ist erst nach vollständiger ten Blasleistung, um die herumliegen- Abkühlung wieder betriebsbereit. den Blätter rasch zu sammeln. Eine niedrigere Blasleistung wählen Sie, um Fangsack entleeren: den zuvor zusammengetragenen Laub- haufen zu verdichten. Bei vollem Fangsack vermindert sich das •... -
Seite 19: Reinigung
• Überprüfen Sie Abdeckungen und Schalten Sie das Gerät aus und neh- men Sie vor allen Arbeiten und zum Schutzeinrichtungen auf Beschädigun- Transport den Akku aus dem Gerät. gen und korrekten Sitz. Tauschen Sie diese gegebenenfalls aus. Lassen Sie Instandsetzungsarbeiten Verstopfungen und Wartungsarbeiten, die nicht in dieser Betriebsanleitung beschrie-... -
Seite 20: Lagerung
Lagerung Gesundheit schaden, wenn giftige Dämpfe oder Flüssigkeiten austre- • Zur Aufbewahrung können Sie das ten. Blasrohr ( 9) bzw. das Saugrohr • Geben Sie das Gerät an einer Verwer- 16) und den Fangsack ( wieder vom Motorgehäuse ( 1) ab- tungsstelle ab. -
Seite 21: Fehlersuche
Fehlersuche Problem Mögliche Ursache Fehlerbehebung Akku aufladen Akku ( 5) entladen (Siehe „Akku aufladen“) Akku einsetzen (Siehe „Akku ent- Akku ( 5) nicht eingesetzt nehmen/einsetzen“) Gerät startet Ein-/Ausschalter ( 4) defekt nicht Reparatur durch Service-Center Motor defekt Saugrohre ( 16) und Fangsack 15) bzw. -
Seite 22: Garantie
Garantie Garantieumfang Das Gerät wurde nach strengen Qualitäts- Sehr geehrte Kundin, sehr geehrter Kunde, richtlinien sorgfältig produziert und vor Sie erhalten auf dieses Gerät 3 Jahre Ga- Anlieferung gewissenhaft geprüft. rantie ab Kaufdatum. Im Falle von Mängeln dieses Gerätes Die Garantieleistung gilt für Material- oder stehen Ihnen gegen den Verkäufer des Fabrikationsfehler. -
Seite 23: Reparatur-Service
Serviceabteilung telefonisch oder per Service-Center e-mail. Sie erhalten dann weitere In- formationen über die Abwicklung Ihrer Service Deutschland Reklamation. Tel.: 0800 54 35 111 • Ein als defekt erfasstes Gerät können E-Mail: grizzly@lidl.de iAn 339929_1910 Sie, nach Rücksprache mit unserem Kundenservice, unter Beifügung des Kaufbelegs (Kassenbons) und der Service Österreich Angabe, worin der Mangel besteht... -
Seite 145: Original-Eg-Konformitätserklärung
Original-EG-Konformitätserklärung Hiermit bestätigen wir, dass der Akku-Laubsauger/-bläser Modell PLSA 40-Li B1 Seriennummern: 202004000001 - 202004027340 folgenden einschlägigen EU-Richtlinien in ihrer jeweils gültigen Fassung entspricht: 2006/42/EG • 2014/30/EU • 2000/14/EG • 2011/65/EU* Um die Übereinstimmung zu gewährleisten, wurden folgende harmonisierte Normen sowie nationale Normen und Bestimmungen angewendet: EN ISO 12100:2010 • EN 60335-1:2012/A13:2017 • EN 50636-2-100:2014 EN 62233:2008 • EN 55014-1:2017 • EN 55014-2:2015 • EN 62321-3-1:2014 Zusätzlich wird entsprechend der Geräuschemissionsrichtlinie 2000/14/EG bestätigt: Schallleistungspegel: Garantiert: 96 dB(A) Gemessen: 94 dB(A) -
Seite 146: Translation Of The Original Ec Declaration Of Conformity
Translation of the original EC declaration of conformity We hereby confirm that the Cordless leaf blower/vacuum model PLSA 40-Li B1 serial number 202004000001 - 202004027340 conforms with the following applicable relevant version of the EU guidelines: 2006/42/EC • 2014/30/EU • 2000/14/EC • 2011/65/EU* In order to guarantee consistency, the following harmonised standards as well as na- tional standards and stipulations have been applied: EN ISO 12100:2010 • EN 60335-1:2012/A13:2017 • EN 50636-2-100:2014 EN 62233:2008 • EN 55014-1:2017 • EN 55014-2:2015 • EN 62321-3-1:2014... -
Seite 147: Traduction De La Déclaration De Conformité Ce Originale
Traduction de la déclaration de conformité CE originale Nous certifions par la présente que l’ Aspirateur souffleur broyeur sans fil de construction PLSA 40-Li B1 Numéro de série 202004000001 - 202004027340 est conforme aux directives UE actuellement en vigueur : 2006/42/EC • 2014/30/EU • 2000/14/EC • 2011/65/EU* En vue de garantir la conformité les normes harmonisées ainsi que les normes et déci- sions nationales suivantes ont été... -
Seite 148: Vertaling Van De Originele Ce-Conformiteitsverklaring
Vertaling van de originele CE-conformiteitsverklaring Hiermede bevestigen wij dat de Accu-bladzuiger/blazer bouwserie PLSA 40-Li B1 Serienummer 202004000001 - 202004027340 is overeenkomstig met de hierna volgende, van toepassing zijnde EU-richtlijnen: 2006/42/EC • 2014/30/EU • 2000/14/EC • 2011/65/EU* Om de overeenstemming te waarborgen, werden de hierna volgende, in overeenstem- ming gebrachte normen en nationale normen en bepalingen toegepast: EN ISO 12100:2010 • EN 60335-1:2012/A13:2017 • EN 50636-2-100:2014 EN 62233:2008 • EN 55014-1:2017 • EN 55014-2:2015 • EN 62321-3-1:2014 Bovendien wordt in overeenstemming met de geluidsemissierichtlijn 2000/14/EC... -
Seite 150: Překlad Originálního Prohlášení O Shodě Ce
Překlad originálního prohlášení o shodě CE Potvrzujeme tímto, že konstrukce Aku vysavač/foukač listí konstrukční řady PLSA 40-Li B1 Pořadové číslo 202004000001 - 202004027340 odpovídá následujícím příslušným směrnicím EÚ v jejich právě platném znění: 2006/42/EC • 2014/30/EU • 2000/14/EC • 2011/65/EU* Aby byl zaručen souhlas, byly použity následující harmonizované normy, národní nor- my a ustanovení: EN ISO 12100:2010 • EN 60335-1:2012/A13:2017 • EN 50636-2-100:2014 EN 62233:2008 • EN 55014-1:2017 • EN 55014-2:2015 • EN 62321-3-1:2014 Navíc se v souhlase se směrnicí... -
Seite 151: Preklad Originálneho Prehlásenia O Zhode Ce
Preklad originálneho prehlásenia o zhode CE Potvrdzujeme týmto, že tento Akumulátorový vysávač/fúkač lístia konštrukčnej série PLSA 40-Li B1 Poradové číslo 202004000001 - 202004027340 zodpovedá nasledujúcim príslušným smerniciam EÚ v ich práve platnom znení: 2006/42/EC • 2014/30/EU • 2000/14/EC • 2011/65/EU* Aby bola zaručená zhoda, boli použité nasledovné harmonizované normy ako i národ- né... - Seite 154 17 11...
- Seite 156 GRIZZLY TOOLS GMBH & CO. KG Stockstädter Straße 20 DE-63762 Großostheim GERMANY Stand der Informationen · Last Information Update · Version des informations · Stand van de informatie · Stan informacji · Stav informací · Stav informácií: 04/2020 Ident.-No.: 72040695042020-8 IAN 339929_1910...