Herunterladen Inhalt Inhalt Diese Seite drucken
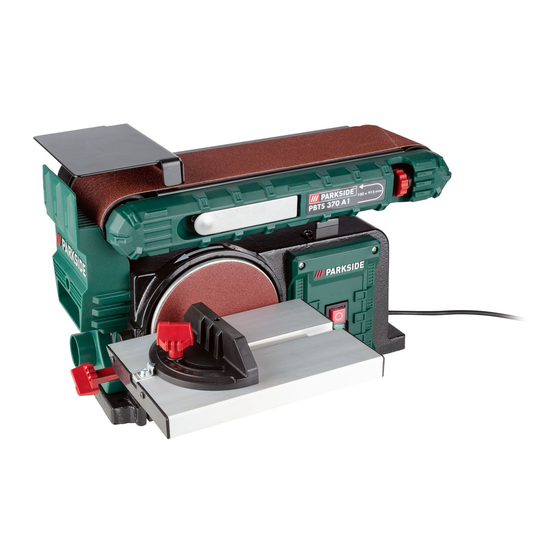
Parkside PBTS 370 A1 Bedienungs- Und Sicherheitshinweise Originalbetriebsanleitung

Parkside PBTS 370 A1 Bedienungs- Und Sicherheitshinweise Originalbetriebsanleitung

Band- und tellerschleifer
Vorschau ausblenden Andere Handbücher für PBTS 370 A1:
Inhaltsverzeichnis

Werbung

Verfügbare Sprachen
  • DE

Verfügbare Sprachen

  • DEUTSCH, seite 1
BAND- UND TELLERSCHLEIFER PBTS 370 A1
BELT & DISC SANDER PBTS 370 A1
PONCEUSE À BANDE/DISQUES PBTS 370 A1
DE
AT
CH
BAND- UND TELLERSCHLEIFER
Bedienungs- und Sicherheitshinweise
Originalbetriebsanleitung
FR
BE
PONCEUSE À BANDE/DISQUES
Consignes d'utilisation et de sécurité
Traduction des instructions d'origine
PL
SZLIFIERKA TAŚMOWA I TALERZOWA
Wskazówki dotyczące obsługi i bezpieczeństwa
Tłumaczenie oryginalnej instrukcji obsługi
SK
PÁSOVÁ A TANIEROVÁ BRÚSKA
Pokyny pre obsluhu a bezpečnostné pokyny
Preklad originálneho návodu na obsluhu
IAN 339368_2004
GB
IE
BELT & DISC SANDER
Operating and Safety Instructions
Translation of Original Operating Manual
NL
BE
BAND- EN SCHIJFSCHUURMACHINES
Bedienings- en veiligheidsinstructies
Vertaling van de originele handleiding
CZ
PÁSOVÁ A TALÍŘOVÁ BRUSKA
Pokyny pro obsluhu a bezpečnostní pokyny
Překlad originálního provozního návodu
8

Werbung

Inhaltsverzeichnis
loading

Inhaltszusammenfassung für Parkside PBTS 370 A1

  • Seite 1 BAND- UND TELLERSCHLEIFER PBTS 370 A1 BELT & DISC SANDER PBTS 370 A1 PONCEUSE À BANDE/DISQUES PBTS 370 A1 BAND- UND TELLERSCHLEIFER BELT & DISC SANDER Bedienungs- und Sicherheitshinweise Operating and Safety Instructions Originalbetriebsanleitung Translation of Original Operating Manual PONCEUSE À BANDE/DISQUES BAND- EN SCHIJFSCHUURMACHINES Consignes d‘utilisation et de sécurité...
  • Seite 2 Klappen Sie vor dem Lesen die Seite mit den Abbildungen aus und machen Sie sich anschließend mit allen Funktionen des Gerätes vertraut. Before reading, unfold the page containing the illustrations and familiarise yourself with all functions of the device. Avant de lire le mode d‘emploi, ouvrez la page contenant les illustrations et familiarisez-vous ensuite avec toutes les fonctions de l‘appareil. Vouw vóór het lezen de pagina met de afbeeldingen open en maak u vertrouwd met alle functies van het apparaat.
  • Seite 5 max. 1,6 mm...
  • Seite 6: Inhaltsverzeichnis

    Inhalt: Seite: Erklärung der Symbole auf dem Gerät................................2 Einleitung ..........................................3 Gerätebeschreibung (Abb. 1−19) ..................................3 Lieferumfang ........................................3 Bestimmungsgemäße Verwendung ..................................3 Sicherheitshinweise ......................................4 Technische Daten ........................................ 6 Vor Inbetriebnahme ......................................6 Aufbau und Bedienung ....................................... 7 Transport ..........................................8 Arbeitshinweise ........................................8 Reinigung und Wartung .....................................
  • Seite 7: Erklärung Der Symbole Auf Dem Gerät

    1. Erklärung der Symbole auf dem Gerät WARNUNG! Nichteinhaltung Lebensgefahr, Verletzungsgefahr oder Beschädigung des Werkzeugs möglich! Vor Inbetriebnahme Bedienungsanleitung und Sicherheitshinweise lesen und beachten! Tragen Sie eine Schutzbrille. Tragen Sie einen Gehörschutz. Tragen Sie bei Staubentwicklung einen Atemschutz! Laufrichtung des Schleifbands WARNUNG! Verletzungsgefahr! Nicht in die laufende Schleifscheibe greifen! Laufrichtung der Schleifscheibe DE/AT/CH...
  • Seite 8: Einleitung

    2. Einleitung 3. Gerätebeschreibung (Abb. 1−19) Hersteller: Rändelschraube für Schleifbandeinstellung scheppach Stützfuß Fabrikation von Holzbearbeitungsmaschinen GmbH Schleifbandspanner Günzburger Straße 69 Schleifteller D-89335 Ichenhausen Ein-/Ausschalter Queranschlag Verehrter Kunde, Schleiftisch Wir wünschen Ihnen viel Freude und Erfolg beim Arbeiten mit Feststellschraube für Schleiftisch Ihrem neuen Gerät.
  • Seite 9: Sicherheitshinweise

    6. Sicherheitshinweise e) Wenn Sie mit einem Elektrowerkzeug im Freien arbeiten, verwenden Sie nur Verlängerungslei- Allgemeine Sicherheitshinweise für Elektrowerk- tungen, die auch für den Außenbereich geeig- zeuge net sind. Die Anwendung einer für den Außenbereich ge- eigneten Verlängerungsleitung verringert das Risiko eines m WARNUNG! Lesen Sie alle Sicherheitshinwei- elektrischen Schlages.
  • Seite 10: Verwendung Und Behandlung Des Elektrowerkzeuges

    5. Service h) Wiegen Sie sich nicht in falscher Sicherheit und setzen Sie sich nicht über die Sicherheitsregeln für Elektrowerkzeuge hinweg, auch wenn Sie a) Lassen Sie Ihr Elektrowerkzeug nur von qualifi- nach vielfachem Gebrauch mit dem Elektro- ziertem Fachpersonal und nur mit Original- Er- werkzeug vertraut sind.
  • Seite 11: Restrisiken

    7. Technische Daten • Tragen Sie keine Handschuhe und halten Sie das Werkstück nicht mit einem Lappen, wenn Sie das Werkstück schleifen. • Schleifen Sie mit der Korngröße des Holzes. Motor ............230−240 V∼/50 Hz • Schleifen Sie niemals Werkstücke, die zu klein für eine si- Aufnahmeleistung .............
  • Seite 12: Aufbau Und Bedienung

    9.4 Schleifposition des Schleifbands verstellen • Überprüfen Sie, ob der Lieferumfang vollständig ist. • Kontrollieren Sie das Gerät und die Zubehörteile auf Trans- (Abb. 9−11) portschäden. • Die Inbusschraube (12) lockern. • Bewahren Sie die Verpackung nach Möglichkeit bis zum •...
  • Seite 13: Transport

    9.9 Schleifen • Zur Werkstückauflage kann in dieser Position der Schleif- • Halten Sie das Werkstück während des Schleifens immer gut tisch (7) eingesetzt werden, hierzu müssen zuerst die beiden fest. Inbusschrauben (17) lösen und danach die Anschlagschie- • Üben Sie keinen großen Druck aus. ne (14) entfernen.
  • Seite 14: Serviceinformationen

    12.2 Allgemeine Wartungshinweise • Schnittstellen durch Überfahren der Anschlussleitung. Nach jedem Einsatz muss die Schleifmaschine sorgfältig gerei- • Isolationsschäden durch Herausreißen aus der Wandsteck- nigt werden. Alle beweglichen Teile regelmäßig ölen. dose. • Risse durch Alterung der Isolation. 12.3 Reinigung In der Band- und Teller-Schleifmaschine kann sich Staub sam- Solch schadhafte Elektro-Anschlussleitungen dürfen nicht ver- meln.
  • Seite 15: Störungsabhilfe

    Altgeräte dürfen nicht in den Hausmüll! Dieses Symbol weist darauf hin, dass dieses Produkt gemäß Richtlinie über Elektro- und Elektronik-Altgeräte (2012/19/EU) und natio- nalen Gesetzen nicht über den Hausmüll entsorgt werden darf. Dieses Produkt muss bei einer dafür vorgesehenen Sammelstelle abge- geben werden.
  • Seite 16: Garantieurkunde

    17. Garantieurkunde unsere Produkte unterliegen einer strengen Qualitätskontrolle. Sollte dieses Gerät dennoch einmal nicht einwandfrei funktionieren, bedau- ern wir dies sehr und bitten Sie, sich an unseren Servicedienst unter der auf dieser Garantiekarte angegebenen Adresse zu wenden. Gern stehen wir Ihnen auch telefonisch über die unten angegebene Servicerufnummer zur Verfügung. Für die Geltendmachung von Garantiean- sprüchen gilt Folgendes: •...
  • Seite 17 Table of contents: Page: Explanation of the symbols on the device ...............................13 Introduction ........................................14 Device description (fig. 1−19) ..................................14 Scope of delivery ......................................14 Proper use ..........................................14 Safety information ......................................15 Technical data ........................................16 Before commissioning .......................................17 Attachment and operation ....................................17 Transport ..........................................18 Working instructions......................................18 Cleaning and maintenance ....................................19 Storage ..........................................19...
  • Seite 18: Explanation Of The Symbols On The Device

    1. Explanation of the symbols on the device WARNING! Disregard results in a risk of death or injury, or damage to the tool! Read the operating and safety instructions before start-up and follow them! Wear eye protection. Wear hearing protection. If dust builds up, wear respiratory protection! Running direction of the sanding belt WARNING! Danger of injury! Do not reach into sanding disc while it is running!
  • Seite 19: Introduction

    2. Introduction 3. Device description (fig. 1−19) Manufacturer: Knurled screw for sanding belt adjustment scheppach Support foot Fabrikation von Holzbearbeitungsmaschinen GmbH Sanding belt tensioner Günzburger Straße 69 Sanding disc D-89335 Ichenhausen On/off switch Transverse stop Dear Customer, Sanding table We hope your new tool brings you much enjoyment and suc- Locking screw for sanding table cess.
  • Seite 20: Safety Information

    6. Safety information b) Use personal protective equipment. Always wear eye protection. Protective equipment such as General power tool safety warnings a dust mask, non-skid safety shoes, hard hat or hearing protection used for appropriate conditions will reduce per- m WARNING! Read all safety warnings, instruc- sonal injuries.
  • Seite 21: Residual Risks

    g) Use the power tool, accessories and tool bits • Do not wear gloves. Do not hold the workpiece with a cloth etc. in accordance with these instructions, tak- during sanding. ing into account the working conditions and the • Use sanding belt or disc of the correct grit corresponding work to be performed.
  • Seite 22: Before Commissioning

    Sound pressure level L • It must be possible for the sanding belt (13) and sanding Unloaded ..............80,4 dB(A) disc (4) to run freely. Loaded ............... 82,2 dB(A) • In case of previously machined wood, be aware of any for- Uncertainty K ..............3 dB eign bodies, such as nails or screws, etc.
  • Seite 23: Transport

    11. Working instructions 9.6 Use as a stationary tool If your machine is to be used in a permanent location, it is rec- ommended you secure it to a workbench. 11.1 Bevel sanding (fig. 14) • To do so, mark the holes to be drilled: Place the sander The worktable can be infinitely adjusted from 0 °...
  • Seite 24: Cleaning And Maintenance

    13. Storage 11.6 Sanding outside (convex) curves (fig. 19) Always sand convex curves using the sanding disc by guiding the workpiece (W) from the left side to the centre of the sand- Store the device and its accessories in a dark, dry and frost- ing disc.
  • Seite 25: Disposal And Recycling

    Please provide the following information in the event of any The packaging is wholly composed of environ- enquiries: mentally-friendly materials that can be disposed • Type of current for the motor of at a local recycling centre. • Data of machine type plate •...
  • Seite 26: Warranty Certificate

    17. Warranty certificate Dear Customer, All of our products undergo strict quality checks to ensure that they reach you in perfect condition. In the unlikely event that your device develops a fault, please contact our service department at the address shown on this guarantee card. Of course, if you would prefer to call us then we are also happy to offer our assistance under the service number printed below.
  • Seite 27 Table des matières: Page: Explication des symboles figurant sur l’appareil .............................23 Introduction ........................................24 Description de l‘appareil (fig. 1−19) ................................24 Ensemble de livraison .......................................24 Utilisation conforme ......................................24 Consignes de sécurité .......................................25 Caractéristiques techniques .....................................27 Avant la mise en service ....................................27 Configuration et utilisation ....................................28 Transport ..........................................28 Consignes de travail ......................................29 Nettoyage et maintenance ....................................29...
  • Seite 28: Explication Des Symboles Figurant Sur L'appareil

    1. Explication des symboles figurant sur l’appareil AVERTISSEMENT ! Danger de mort et risque de blessures et d‘endommagement de la machine en cas de non respect des instructions. Avant la mise en service, lisez le mode d’emploi et les consignes de sécurité et respec- tez-les ! Portez des lunettes de protection.
  • Seite 29: Introduction

    2. Introduction 3. Description de l‘appareil (fig. 1−19) Fabricant: Vis moletée pour réglage de bande abrasive scheppach Pied d‘appui Fabrikation von Holzbearbeitungsmaschinen GmbH Dispositif tendeur bande abrasive Günzburger Straße 69 Plateau de ponçage D-89335 Ichenhausen Interrupteur marche/arrêt Butée transversale Cher client, Table de ponçage Nous espérons que votre nouvelle machine vous apportera de Vis de fixation pour table de ponçage...
  • Seite 30: Consignes De Sécurité

    e) Si l’outil électrique est utilisé à l’extérieur, se Veillez au fait que nos appareils, conformément au règlement, n’ont pas été conçus pour être utilisés dans un environnement servir d’une rallonge autorisée pour l’exté- professionnel, industriel ou artisanal. Nous déclinons toute rieur.
  • Seite 31: Utilisation Et Manipulation De L'outil Électrique

    m AVERTISSEMENT ! Pendant son fonctionnement, cet outil 4. Utilisation et manipulation de l’outil électrique électrique génère un champ électromagnétique. Ce champ a) Ne pas surcharger l’outil électrique. Utiliser peut dans certaines circonstances nuire aux implants médicaux l’outil électrique qui convient au travail à réa- actifs ou passifs.
  • Seite 32: Caractéristiques Techniques

    • Ne poncez jamais une pièce non maintenue correctement, Niveau acoustique L veillez à maintenir la pièce à l’aide de la butée ou du non chargé ..............88,7 dB(A) guide d’angle, la seule exception étant le ponçage des chargé ................ 89,4 dB(A) pièces courbes.
  • Seite 33: Configuration Et Utilisation

    9.6 Montage de la ponceuse à bande/disque sur • Dans le cas de bois ayant déjà été travaillés, veillez aux corps étrangers, comme par ex. les clous ou vis, etc. un établi • Avant d‘actionner l‘interrupteur marche/arrêt (5), assurez- Si la ponceuse à bande/disque doit être utilisée dans un en- vous que le papier abrasif est correctement monté...
  • Seite 34: Consignes De Travail

    11. Consignes de travail • Guidez la pièce usinée de manière uniforme sur la bande abrasive (13). Attention : Soyez particulièrement prudent si 11.1 Ponçage d’une arête ou d’un chant (Fig. 14) vous poncez des matériaux très longs ou très fins. Il est possible d’incliner la table de travail entre 0°...
  • Seite 35: Stockage

    14.2 Moteur à courant alternatif • Kit de meulage, 12 pièces − référence : 7903302601 comprend : • La tension du réseau doit être de 230−240 V∼. 3 x papier de verre, granulométrie 80/120/180 • Les conducteurs des rallonges d‘une longueur maxi. de 25 1 x bande abrasive granulométrie 80/120/180 m doivent présenter une section de 1,5 mm •...
  • Seite 36: Dépannage

    16. Dépannage Panne Causes possible Remède Le moteur ne tourne pas. Interrupteur marche/arrêt endom- Remplacez toutes les pièces endommagés avant d’utiliser la pon- magé ceuse. Contactez votre centre de service local ou votre station de service Câble de l’interrupteur marche/arrêt autorisée dans ce domaine.
  • Seite 37: Certificat De Garantie

    17. Certificat de garantie Chère Cliente, Cher Client, Nos produits sont soumis à un contrôle de qualité très strict. Si cet appareil devait toutefois ne pas fonctionner impeccablement, nous en serions désolés. Dans un tel cas, nous vous prions de bien vouloir prendre contact avec notre service après-vente à l‘adresse indiquée sur le bulletin de garantie ou vous adresser au marché...
  • Seite 38 Inhoudsopgave: Pagina: Verklaring van de symbolen op het apparaat ..............................34 Inleiding ..........................................35 Beschrijving van het apparaat (afb. 1−19)...........................................35 Inhoud van de levering .....................................35 Gebruik conform de voorschriften ...................................35 Veiligheidswaarschuwingen .....................................36 Technische gegevens ......................................38 Voor het eerste gebruik ....................................38 Montage en bediening .....................................39 Vervoer ..........................................40 Gebruiksvoorschriften .......................................40 Reiniging en onderhoud ....................................40...
  • Seite 39: Verklaring Van De Symbolen Op Het Apparaat

    1. Verklaring van de symbolen op het apparaat WAARSCHUWING! Bij het niet in acht nemen, bestaat levensgevaar, gevaar op letsel of beschadiging aan het werktuig! Lees voorafgaand aan de inbedrijfstelling de gebruikshandleiding en de veiligheids- voorschriften! Draag een veiligheidsbril! Draag gehoorbescherming! Bescherm de ademhalingswegen bij stofontwikkeling! Looprichting van de schuurband Let op! Gevaar voor letsel! Raak de draaiende onderdelen niet aan!
  • Seite 40: Inleiding

    2. Inleiding 3. Beschrijving van het apparaat (afb. 1−19) Fabrikant: scheppach Kartelschroef voor schuurbandinstelling Fabrikation von Holzbearbeitungsmaschinen GmbH Steunvoet Günzburger Straße 69 Schuurbandklem D-89335 Ichenhausen Schuurplaat Aan/uit-schakelaar Geachte klant, Verstekmal Wij wensen u veel plezier en succes bij het werken met uw Schuurtafel nieuwe apparaat.
  • Seite 41: Veiligheidswaarschuwingen

    d) Gebruik het snoer niet om het elektrische ge- Let erop dat onze apparaten volgens het beoogd gebruik niet voor bedrijfsmatige, ambachtelijke of industriële toepassingen zijn reedschap te dragen, aan op te hangen of om ontworpen. Wij aanvaarden geen aansprakelijkheid wanneer het de stekker uit het stopcontact te trekken.
  • Seite 42 m WAARSCHUWING! Dit elektrisch apparaat genereert h) Voorkom een vals gevoel van zekerheid en houd u altijd aan de veiligheidsvoorschriften voor elek- een elektromagnetisch veld als het is ingeschakeld. Dit veld trische apparaten, ook als u ervaren bent met het kan onder bepaalde omstandigheden interfereren met actieve elektrisch apparaat.
  • Seite 43: Technische Gegevens

    • Slijp nooit een niet ondersteund werkstuk. Leg het werkstuk Geluidsprestatieniveau L op de slijptafel, resp. leg dit vast tegen de slijpaanslag. onbelast ..............88,7 dB(A) Gekromde werkstukken bij het slijpen op de slijpschotel belast ................89,4 dB(A) veilig op de tafel leggen. Onzekerheid K ..............3 dB •...
  • Seite 44: Montage En Bediening

    9.6 Inzet als stationaire machine • Let bij al bewerkt hout op vreemde voorwerpen, zoals bijv. spijkers of schroeven enz. Voor de continue inzet is de montage op een werkbank aan • Controleer, voordat u op de aan/uit-schakelaar (5) drukt, of te bevelen.
  • Seite 45: Vervoer

    10. Vervoer • Houd het werkstuk vast. Pas goed op uw vingers! Kans op verwondingen! Om het elektrisch gereedschap te transporteren koppel het ap- • Geleid het werkstuk gelijkmatig over de slijpband (13). Let paraat eerst los van het stopcontact en zet het vervolgens op op: Bijzondere voorzichtigheid is geboden bij het slijpen in het bijzonder van dunne of lange materiaal.
  • Seite 46: Opslag

    • Schuur set 12-delig − Artikelnummer: 7903302601 Aansluitingen en reparaties van de elektrische uitrusting mo- bestaande uit: gen uitsluitend door een elektromonteur worden uitgevoerd. per 3 x schuurpapier korrelgrootte 80/120/180 per 1 x schuurband korrelgrootte 80/120/180 Vermeld in geval van vragen de volgende gegevens: •...
  • Seite 47: Oplossing Van Storingen

    16. Oplossing van storingen Storing Mogelijke oorzaak Remedie Motor start niet Beschadigde Aan-/Uit-schakelaar Vervang alle beschadigde onderdelen voordat u de slijpmachine gebruikt. Beschadigde Aan-/Uit-schakelkabel Neem contact op met uw plaatselijk service-centrum of een gekwa- lificeerd service-station. Iedere poging tot reparatie kan tot gevaren Beschadigd Aan-/Uit-schakelrelais leiden, wanneer dit niet door een gekwalificeerd vakman uitgevoerd wordt.
  • Seite 48: Garantiebewijs

    17. Garantiebewijs Geachte klant, onze producten zijn aan een strenge kwaliteitscontrole onderhevig. Mocht dit apparaat echter ooit niet naar behoren functioneren, spijt het ons ten zeerste en vragen u zich tot onze servicedienst onder het adres vermeld op dit garantiebewijs te wenden. Wij staan ook graag telefo- nisch tot uw dienst via het hieronder vermelde servicetelefoonnummer.
  • Seite 49 Spis treści: Strona: Objaśnienie symboli na urządzeniu ................................45 Wprowadzenie .........................................46 Opis urządzenia (rys. 1−19) ...................................46 Zakres dostawy .........................................46 Użytkowanie zgodne z przeznaczeniem ................................46 Wskazówki dotyczące bezpieczeństwa .................................47 Dane techniczne........................................49 Przed uruchomieniem ......................................49 Montaż i obsługa ......................................50 Transport ..........................................51 Wskazówki dotyczące pracy ...................................51 Czyszczenie i konserwacja ....................................51 Przechowywanie .......................................52 Przyłącze elektryczne .......................................52...
  • Seite 50: Objaśnienie Symboli Na Urządzeniu

    1. Objaśnienie symboli na urządzeniu OSTRZEŻENIE! W przypadku nieprzestrzegania występuje zagrożenie życia, niebezpieczeństwo odniesienia obrażeń lub uszkodzenia narzędzia! Przed uruchomieniem należy przeczytać niniejszą instrukcję obsługi i przestrzegać wskazówek dotyczących bezpieczeństwa! Stosować okulary ochronne. Nosić nauszniki ochronne. W razie powstania pyłu należy nosić ochronę dróg oddechowych! Kierunek biegu taśmy szlifierskiej OSTRZEŻENIE! Niebezpieczeństwo odniesienia obrażeń! Nie należy sięgać...
  • Seite 51: Wprowadzenie

    2. Wprowadzenie 3. Opis urządzenia (rys. 1−19) Producent: Śruba radełkowa do ustawiania taśmy szlifierskiej scheppach Podpórka Fabrikation von Holzbearbeitungsmaschinen GmbH Napinacz taśmy szlifierskiej Günzburger Straße 69 dysk szlifierski D-89335 Ichenhausen Włącznik/wyłącznik Ogranicznik poprzeczny Szanowny Kliencie, stół szlifierski Życzymy dużo satysfakcji i powodzenia podczas pracy z no- Śruba ustalająca dla stołu szlifierskiego wym urządzeniem.
  • Seite 52: Wskazówki Dotyczące Bezpieczeństwa

    d) Nie wykorzystywać przewodu przyłączenio- Należy pamiętać, że zgodnie z przeznaczeniem nasze urzą- dzenia nie zostały skonstruowane do użytku komercyjnego, wego niezgodnie z przeznaczeniem w celu rzemieślniczego lub przemysłowego. Nie ponosimy odpowie- przenoszenia, zawieszania narzędzia elek- dzialności w przypadku, gdy urządzenie jest stosowane w za- trycznego lub w celu wyjęcia wtyczki z gniaz- kładach komercyjnych, rzemieślniczych i przemysłowych oraz da.
  • Seite 53 5. Serwis g) Jeżeli istnieje możliwość zamontowania urzą- dzeń odsysających i odpylających, należy je podłączyć i prawidłowo używać. Zastosowanie a) Naprawę urządzenia może wykonywać wy- odsysania pyłu może zmniejszyć zagrożenia spowodowa- łącznie wykwalifikowany personel i tylko przy ne przez pył. użyciu oryginalnych części zamiennych.
  • Seite 54: Ryzyka Szczątkowe

    7. Dane techniczne • Szlifować zgodnie z wielkością usłojenia drewna. • Nigdy nie szlifować przedmiotów, które są zbyt małe, aby można je było bezpiecznie obsługiwać. Silnik ............230−240 V∼/50 Hz • Unikać nieodpowiednich ruchów rąk, wskutek których mo- pobór mocy ..............370 W głoby dojść...
  • Seite 55: Montaż I Obsługa

    9.4 Przestawienie pozycji szlifowania taśmy szli- • W miarę możliwości zachować opakowanie do zakończe- nia okresu gwarancyjnego. fierskiej (rys. 9−11) • Poluzować śrubę imbusową (12). NIEBEZPIECZEŃSTWO • Przesunąć taśmę szlifierską (13) w górę do żądanej po- zycji. Urządzenie i materiały opakowaniowe nie mogą służyć jako zabawka dla dzieci! Dzieciom nie wolno bawić...
  • Seite 56: Transport

    9.9 Szlifowanie • Ponownie dokręcić śrubę imbusową (12) w celu ustalenia • Zawsze mocno przytrzymywać obrabiany przedmiot pod- tej pozycji. czas szlifowania. • W tej pozycji można wykorzystać stół szlifierski (7) do pod- • Nie naciskać go mocno. parcia przedmiotu obrabianego. W tym celu należy naj- •...
  • Seite 57: Informacje Serwisowe

    12.2 Ogólne wskazówki dotyczące konserwacji 14.1 Uszkodzony elektryczny przewód przyłącze- Po każdym użyciu szlifierkę należy dokładnie oczyścić. Wszyst- niowy kie ruchome części należy regularnie smarować. Na przewodach elektrycznych powstają często uszkodzenia izolacji. 12.3 Czyszczenie Przyczyną może być: W szlifierce taśmowej i tarczowej może zbierać się kurz. Re- •...
  • Seite 58: Utylizacja I Ponowne Wykorzystanie

    15. Utylizacja i ponowne wykorzystanie Zużytego sprzętu nie wolno wyrzucać wraz z od- padami domowymi! Urządzenie znajduje się w opakowaniu chroniącym przed Symbol ten oznacza, że zgodnie z dyrektywą w spra- uszkodzeniami transportowymi. Opakowanie jest materiałem wie zużytego sprzętu elektrycznego i elektronicznego surowcowym, który nadaje się...
  • Seite 59: Gwarancja

    17. Gwarancja Drodzy Klienci, Wszystkie nasze produkty przechodzą przez rygorystyczną kontrolę jakości, aby zapewnić, że dotrą do Państwa w idealnym stanie. W mało prawdopodobnej sytuacji wystąpienia usterki w Państwa urządzeniu, proszę skontaktować się z naszym działem serwisu pod adresem podanym w niniejszej karcie gwarancyjnej. Oczywiście, jeśli wolelibyście Państwo do nas zadzwonić, jesteśmy również gotowi zaoferować pomoc pod numerem telefonu serwisu wydrukowanym poniżej.
  • Seite 60 Obsah: Strana: Vysvětlení symbolů na přístroji ..................................56 Úvod ..........................................57 Popis přístroje (obr. 1−19) ....................................57 Rozsah dodávky........................................57 Použití v souladu s určením....................................57 Bezpečnostní pokyny ......................................58 Technické údaje ........................................60 Před uvedením do provozu ....................................60 Montáž a obsluha ......................................60 Přeprava ..........................................61 Pracovní pokyny ........................................61 Čištění...
  • Seite 61: Vysvětlení Symbolů Na Přístroji

    1. Vysvětlení symbolů na přístroji VÝSTRAHA! Při nedodržení možné nebezpečí ohrožení života, nebezpečí zranění nebo poškození nástroje! Před uvedením do provozu si přečtěte a dodržujte návod k obsluze a bezpečnostní pokyny! Používejte ochranné brýle. Používejte ochranu sluchu. V případě tvorby prachu noste ochranu dýchacích cest! Směr chodu brusného pásu VÝSTRAHA! Nebezpečí...
  • Seite 62: Úvod

    2. Úvod 3. Popis přístroje (obr. 1−19) Výrobce: Rýhovaný šroub pro nastavení brusného pásu scheppach Podpěrná noha Fabrikation von Holzbearbeitungsmaschinen GmbH Napínač brusného pásu Günzburger Straße 69 Brusný talíř D-89335 Ichenhausen Spínač / vypínač Příčný doraz Vážený zákazníku, Brousicí stůl přejeme vám mnoho radosti a úspěchu při práci s novým za- Zajišťovací...
  • Seite 63: Bezpečnostní Pokyny

    6. Bezpečnostní pokyny f) Pokud není možno zabránit provozu elektric- kého nástroje ve vlhkém prostředí, používejte Obecné bezpečnostní pokyny pro elektrické proudový chránič. Použití vložky pro proudový chránič nástroje zmírňuje riziko zasažení elektrickým proudem. m VÝSTRAHA! Přečtěte si všechny bezpečnost- 3.
  • Seite 64: Zbytková Rizika

    c) Než budete provádět nastavení nástroje, měnit • Má-li stroj sklon, se během provozu, hlavně při broušení díly vložného nástroje nebo elektrický nástroj dlouhých nebo těžkých obrobků převracet nebo pohybovat, odložíte, vytáhněte zástrčku ze zásuvky a/ musí se dobře spojit s nosným povrchem. nebo vyjměte vyjímatelný...
  • Seite 65: Technické Údaje

    7. Technické údaje RIZIKO Zařízení a obalové materiály nejsou hračka! S plastovými sáč- Motor ............230−240 V∼/50 Hz ky, fóliemi a drobným díly si nesmějí hrát děti! Hrozí nebezpečí Příkon ................370 W spolknutí těchto věcí a udušení! Konstrukční rozměry d x š x v ....460 x 360 x 280 mm 8.2 Obecná...
  • Seite 66: Přeprava

    10. Přeprava • V této poloze lze jako opěru pro obrobek použít brousicí stůl (7), k tomu je zapotřebí nejprve povolit oba inbusové šrouby (17), a poté odstranit dorazovou lištu (14). Brousicí Pro přepravu elektrického nástroje odpojte přístroj od elektric- stůl (7) lze nyní...
  • Seite 67: Čištění A Údržba

    • Obrobek pevně držte. Dávejte pozor na prsty! Nebezpečí • Brusná sada 12ti dílná − Číslo výrobku: 7903302601 zranění! skládá se z: • Obrobek veďte rovnoměrně přes brusný pás (13). Pozor: Při po 3 brusných papírech, zrnitost 80/120/180 broušení zvláště tenkých nebo dlouhých materiálů je nutná po 1 brusném pásu, zrnitost 80/120/180 zvláštní...
  • Seite 68: Likvidace A Recyklace

    Při zpětných dotazech uvádějte prosím tyto údaje: O možnostech likvidace vysloužilého přístroje • Typ proudu napájejícího motor vám podá informace správa vaší obce nebo vaše- • Údaje z typového štítku stroje ho města. • Údaje z typového štítku motoru Odpadní zařízení nesmějí být likvidována spolu s domácím odpadem! 15.
  • Seite 69: Záruční List

    17. Záruční list Važena zakaznice, važeny zakazniku, naše výrobky podléhají přísné kontrole kvality. Pokud i přesto tento přístroj bezvadně nefunguje, velice toho litujeme a prosíme Vás, abyste se obrátili na náš zákaznický servis, jehož adresa je uvedena na tomto záručním listu. Rádi Vám budeme k dispozici také telefonicky na níže uvedeném servisním čísle.
  • Seite 70 Obsah: Strana: Vysvetlenie symbolov na prístroji ..................................66 Úvod ..........................................67 Popis prístroja (obr. 1−19) ....................................67 Rozsah dodávky........................................67 Použitie v súlade s určením ....................................67 Bezpečnostné upozornenia ....................................68 Technické údaje ........................................70 Pred uvedením do prevádzky ..................................70 Zloženie a obsluha ......................................70 Preprava ..........................................71 Pracovné pokyny .......................................71 Čistenie a údržba ......................................72 Skladovanie ........................................72 Elektrická...
  • Seite 71: Vysvetlenie Symbolov Na Prístroji

    1. Vysvetlenie symbolov na prístroji VAROVANIE! Pri nedodržaní je možné nebezpečenstvo ohrozenia života, nebezpečenstvo poranenia alebo poškodenie nástroja! Pred uvedením do prevádzky si prečítajte návod na obsluhu a bezpečnostné upozornenia a dodržiavajte ich! Noste ochranné okuliare. Noste ochranu sluchu. V prípade tvorby prachu noste ochranu dýchacích ciest! Smer chodu brúsneho pásu VAROVANIE! Nebezpečenstvo poranenia! Nesiahajte do ...
  • Seite 72: Úvod

    2. Úvod 3. Popis prístroja (obr. 1−19) Výrobca: Ryhovaná skrutka pre nastavenie brúsneho pásu scheppach Podperná noha Fabrikation von Holzbearbeitungsmaschinen GmbH Napínač brúsneho pásu Günzburger Straße 69 Brúsny tanier D-89335 Ichenhausen Vypínač zap/vyp Priečny doraz Vážený zákazník, Brúsny stôl Želáme Vám veľa zábavy a úspechov pri práci s Vaším novým Fixačná...
  • Seite 73: Bezpečnostné Upozornenia

    6. Bezpečnostné upozornenia f) Ak sa nedá vyhnúť prevádzke elektrického ná- radia vo vlhkom prostredí, používajte ochran- Všeobecné bezpečnostné upozornenia pre elek- ný vypínač proti chybnému prúdu. Používanie trické náradia ochranného vypínača proti chybnému prúdu znižuje riziko zásahu elektrickým prúdom. m VÝSTRAHA! Prečítajte si všetky bezpečnostné...
  • Seite 74: Zvyškové Riziká

    c) Skôr ako vykonáte nastavenia prístroja, vyme- • Vždy používajte ochranné okuliare. níte časti vloženého nástroja alebo elektrické • Tento stroj sa smie používať iba na práce v interiéri. náradia odložíte, vytiahnite zástrčku zo zásuv- • Dôležité: Brúsku montujte a používajte iba na vodorovnej ky a/alebo odoberte odnímateľný...
  • Seite 75: Technické Údaje

    • Napriek všetkým prijatým opatreniam môžu pretrvávať zvy- • Skontrolujte, či je rozsah dodávky kompletný. škové riziká, ktoré nie sú očividné. • Prístroj a diely príslušenstva skontrolujte ohľadom poškodení • Zostatkové riziká je možné minimalizovať, ak sa dodržiava- spôsobených prepravou. jú...
  • Seite 76: Preprava

    9.10 Prípojka odsávania prachu 9.4 Prestavenie brúsneho pásu (obr. 9−11) • Uvoľnite inbusovú skrutku (12). Stroj je vybavený odsávacím hrdlom (10). • Posuňte brúsny pás (13) nahor do požadovanej polohy. • Znova utiahnite inbusovú skrutku (12), aby ste ju upevnili Zatvorte odsávanie prachu pri spracovaní...
  • Seite 77: Čistenie A Údržba

    11.5 Brúsenie vypuklých zaoblení (obr. 18) • Ø brúsneho papiera 150 mm, 10 kusov: Varovanie: Čelné plochy rovných obrobkov nebrúste na unáša- K 80 − číslo artikla: 88000208 com hriadeli (R)! Obrobok (W) sa môže pritom vymrštiť. Ne- K 120 − číslo artikla: 88000209 bezpečenstvo poranenia! K 180 −...
  • Seite 78: Likvidácia A Opätovné Zhodnotenie

    14.2 Motor na striedavý prúd Obal je z ekologického materiálu, ktorý môžete • Sieťové napätie musí byť 230 – 240 V∼. zlikvidovať v miestnych recyklačných centrách. • Predlžovacie vedenia do dĺžky 25 m musia vykazovať prie- rez 1,5 mm². O možnostiach likvidácie opotrebovaného prístro- ja sa informujte na vašej samospráve alebo štát- nej správe.
  • Seite 79: Záručný List

    17. Záručný list Vážená zákazníčka, vážený zákazník, naše výrobky podliehajú prísnej kontrole kvality. V prípade, že nebude prístroj napriek tomu bezchybne fungovať, je nám to veľmi ľúto a prosíme Vás, aby ste sa obrátili na našu servisnú službu na adrese uvedenej na tomto záručnom liste. Radi Vám budeme k dispozícii taktiež telefonicky na uvedenom servisnom telefónnom čísle.
  • Seite 81: Original-Konformitätserklärung

    Marke / Brand / Marque: Parkside Art.-Bezeichnung: BAND- UND TELLERSCHLEIFER - PBTS 370 A1 BELT & DISC SANDER - PBTS 370 A1 Article name: PONCEUSE À BANDE/DISQUES - PBTS 370 A1 Nom d’article: Art.-Nr. / Art. no. / Numéro d’article: 39033069915 Ident.-Nr.
  • Seite 84 SCHEPPACH FABRIKATION VON HOLZBEARBEITUNGSMASCHINEN GMBH Günzburger Str. 69 D-89335 Ichenhausen C 151396 C 151396 C 151396 ® ® ® Stand der Informationen · Last Information Update · Version des informations · Stand van de informatie · Stan informacji · Stav informací · Stav informácií Update: 05 / 2020 ·...

Inhaltsverzeichnis