Inhaltsverzeichnis
Werbung
Verfügbare Sprachen
Verfügbare Sprachen
Quicklinks
Werbung
Inhaltsverzeichnis

Verwandte Anleitungen für QSC AcousticDesign AD-C52 Serie


Inhaltszusammenfassung für QSC AcousticDesign AD-C52 Serie
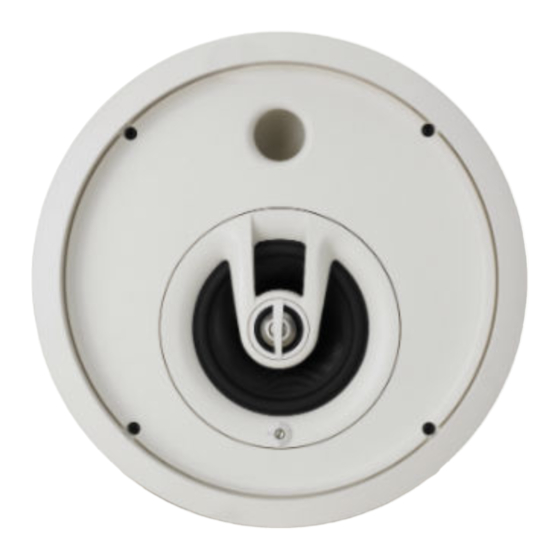
- Seite 1 AcousticDesign In-ceiling Loudspeakers AD-C52 series 127 mm (5”) two-way Covering AD-C52, AD-C52T, AD-C52S, and AD-C52ST models User Manual Manual del Usario Manuel de l’utilisateur Bedienhandbuch 用户手册 *TD-000130-00* TD-000130-00 rev.C...
-
Seite 2: Warranty
(USA only; other countries, see your dealer or distributor) Disclaimer QSC Audio Products, Inc. is not liable for any damage to amplifiers, or any other equipment that is caused by negligence or improper installation and/or use of this loudspeaker product. -
Seite 3: What's Included
Introduction Congratulations and thank you for your ceiling loudspeaker purchase. The AD-C52 and AD-C52S models offer excellent acoustic performance in an easy-to-install and attrac- tive package. Please review these instructions carefully and follow the recommenda- tions. Consult a licensed installation professional if you are uncertain about any mounting issues. - Seite 4 Grill Safety Clip The cabinet and the grill both have a small loop of plas- Use the Secondary Support Tab! tic line. The grill’s loop has a clip attached. Using the Loudspeakers can potentially generate substantial vibration. In grill clip, attach the grill to the cabinet’s loop. This will addition to ensuring all hardware is properly installed and secured, help prevent the grill from falling should it become you must use the secondary support tab on the enclosure to secure...
-
Seite 5: Installation Procedure
Installation Procedure 1- Using the included C-ring or the dimensions provided, trace a cutout pattern onto the ceiling surface. 2- Cut the mounting hole. Use a sharp tool to avoid stressing or cracking the mount- ing surface. 3- Pull the wires through the hole. 4- Pass the two suspended ceiling support brackets trough the hole and place as shown in the illustration. -
Seite 6: Specifications
3- Maximum input power tested in accordance with IEC recommendations; 50 Hz to 20 kHz band limiting, 6 dB signal crest factor. Specifications are subject to change without notice. For detailed information, visit QSC’s web site at http://www.qscaudio.com or call us at 1-800-854-4079 (toll-free USA only) - Seite 7 AD-C52 and AD-C52T Dimensions CUTOUT HOLE DIAMETER = 191 mm (7.50") USE C-RING FOR TEMPLATE MATERIAL THICKNESS RANGE FOR CLAMP MOUNTING = 5.6 - 19.0 mm (0.22" - 0.75") AD-C52S and AD-C52ST Dimensions HOLE CUTOUT DIAMETER = 297 mm (11.70") USE C-RING FOR TEMPLATE MATERIAL THICKNESS RANGE FOR CLAMP MOUNTING = 5.6 - 19.0 mm (0.22"...
- Seite 8 Garantía (sólo EE.UU.; consulte a su concesionario o distribuidor si desea información para otros países) Liberación de responsabilidad QSC Audio Products, Inc. no es responsable por ningún daño a los amplificadores, o a cualquier otro equipo, que sea causado por negligencia o por insta- lación y/o uso inadecuado de este altavoz.
- Seite 9 Introducción Le felicitamos y agradecemos la compra de su altavoz de cielo raso. Los modelos AD-C52 y AD-C52S ofrecen un exce- lente rendimiento acústico en un paquete atractivo y fácil de instalar. Por favor revise detenidamente estas instrucciones y siga las recomendaciones. Consulte a un instalador profesional licenciado si no está seguro sobre algún paso del montaje.
- Seite 10 Sujetador de seguridad de la rejilla ¡Use la lengüeta de apoyo secundaria! Tanto el gabinete como la rejilla tienen un pequeño bucle de cable de plástico. El bucle de la rejilla tiene Los altavoces pueden generar una vibración significativa. conectado un sujetador. Con el sujetador de la rejilla, Además de asegurarse de que todo el herraje esté...
-
Seite 11: Procedimiento De Instalación
Procedimiento de instalación 1- Con el anillo en C que se incluye o las dimensiones que se indican, trace el patrón de corte en la superficie del cielo raso. 2- Haga el orificio de montaje. Use una herramienta filosa para evitar aplicar tensión o agrietar la superficie de montaje. - Seite 12 QSC Audio Products - Garantie limitée de 3 ans QSC Audio Products, Inc. (" QSC ") garantit que ses produits sont dépourvus de tout vice de fabrication et /ou de matériel pendant une période de trois (3) ans à partir de la date de vente, et remplacera les pièces défectueuses et réparera les produits qui fonctionnent mal dans le cadre de cette garantie si le défaut survient dans des conditions normales d'installation et d'utilisation - à...
- Seite 13 Introduction Félicitations et merci d'avoir acheté le haut-parleur de plafond. Les modèles AD-C52 et AD-C52S offrent une excellente performance acoustique dans un produit attrayant et facile à installer. Lire attentivement ces instructions et suivre les recommandations. En cas de doute sur certains points d'installation, consulter un professionnel d'installation qualifié.
- Seite 14 Clip de sécurité de la grille Utiliser la patte de soutien secondaire ! L'armoire et la grille ont toutes deux une petite boucle formée par un cordon en plastique. Un clip est attaché Les haut-parleurs peuvent provoquer des vibrations importantes. à...
-
Seite 15: Procédure D'installation
Procédure d'installation 1- À l'aide du support en C fourni ou des dimensions fournies, tracer le contour de la découpe sur la surface du plafond. 2- Découper le trou. Utiliser un outil pointu pour éviter d'affaiblir ou de fissurer la surface de fixation. 3- Tirer les fils à... -
Seite 16: Haftungsausschluss
Beschränkte Dreijahresgarantie durch QSC Audio Products QSC Audio Products, Inc. ("QSC") gewährleistet, dass ihre Produkte für einen Zeitraum von drei (3) Jahren ab dem Kaufdatum keine Material- und/oder Herstellungsfehler aufweisen werden, und QSC verpflichtet sich zum Ersatz defekter Teile und zur Reparatur nicht ordnungsgemäß... -
Seite 17: Terminologie Der Befestigungsteile
Einführung Wir freuen uns, dass Sie sich für diesen Deckenlautsprecher entschieden haben. Herzlichen Glückwunsch! Die Modelle AD-C52 und AD-C52S bieten eine ausgezeichnete akustische Leistung in einem einfach zu installierenden und attraktiven Paket. Bitte lesen Sie diese Anleitung sorgfältig durch und beachten Sie alle Empfehlungen. Wenden Sie sich an einen lizenzierten Installationsfachmann, wenn Sie sich bzgl. -
Seite 18: Gitter-Halteclip
Gitter-Halteclip Benutzen Sie die sekundäre Haltelasche! An Gehäuse und Gitter befindet sich eine kleine, aus einer Plastikleine bestehende Schlaufe. An der Gitterschlaufe ist Lautsprecher können potenziell erhebliche Vibrationen verursachen. ein Halteclip angebracht. Mithilfe dieses Halteclips wird Sie müssen nicht nur sicherstellen, dass alle Befestigungsteile ord- das Gitter an der am Gehäuse angebrachten Schlaufe nungsgemäß... - Seite 19 Montageverfahren 1- Verwenden Sie den inbegriffenen C-Ring als Schablone oder die vorgegebenen Abmessungen, um das Muster des Ausschnitts auf die Deckenoberfläche zu übertragen. 2- Schneiden Sie das Montageloch aus. Verwenden Sie dazu ein scharfes Werkzeug, um die Montagefläche nicht zu stark zu belasten und evtl. Sprünge zu verhindern. 3.
- Seite 20 2- 保存这些规定。 3- 注意所有警告。 4- 遵守这些规定。 5- 只能用用干布擦拭。 6- 按照 QSC Audio Product 的说明并在授权的专业工程师的指导下安装。 7- 不要在热源附近安装,热源指可产生热量的设备,如散热器、热中央处理注 册器、炉子或者其他设备 (包括放大器) 。 8- 只使用 QSC Audio Products, Inc. 的配件。 9- 只使用标明为 QSC Audio Products 生产的托架。 10- 由合格人员进行维护。设备如果受到损坏,就需要进行维修。 等边三角形内带箭头的闪电符号警告用户该产品外壳内的非绝缘 “危险”电压 会对人身产生电击危险。 等边三角形内的惊叹号提示用户本手册中重要的操作和维护说明。 警告!在放置、安装、装配或者悬置任何扬声器产品前,请检查所有的硬件、 吊具、机壳、传感器、支架和相关设备是否有损坏。任何丢失、腐蚀、变形或...
- Seite 21 简介 祝贺并感谢您购买吸项式扩音器。 AD-C52 和 AD-C52S 型扩音器具有卓越的声音性能并且易于安装,同 时,其外观也极富魅力。请仔细阅读这些说明并按以下建议进行操作。如果您有任何无法确定的安装问 题,请咨询授权的专业安装人员。 在封闭的音箱内, AD-C52 拥有一个 5” 低频 (LF) 驱动器和一个 1” 球顶高频 (HF) 驱动器。在直径更大并配 有端口的浅音箱内, AD-C52S 具有相同的驱动器。 AD-C52T 和 AD-C52ST 两种型号均配备了一个音频转换 器 ( 适用于 70V 和 100V 分布式系统 ) 以及一个分段选择器开关。 包装箱内容 吸顶式扩音器包装箱内包括以下内容:- 扩音器机壳 - 防护栅格组件 - 两个用于吊顶安装的支架...
- Seite 22 使用辅支撑扣! 栅格安全夹 扩音器可能会产生相当大的振动。除了确保所有 机壳和栅格均有一个小塑料绳扣环。栅格的 金属构件的正确安装外,您还必须在扩音器音箱 扣环上附有一个夹具。使用栅格夹,将栅格 上使用辅支撑扣以确保扩音器有适当的结构性支 连接在机壳的扣环上。这将有助于防止栅格 撑。这在主安装发生故障时,可将扩音器从天花 在拆下时脱落。 板坠落的机率降至最低。任何用作辅支撑线的缆 绳或金属线必须有足够的强度可以支撑数倍于扩 音器的重量。不要在辅支撑系统中使用绳索、细 绳 ,、麻绳或其他纺织线,因为这些线容易被切 断或着火。辅支撑附着点和任何内建的扣件也必 须有足够的强度以支撑数倍于扩音器的重量。 aaaaaaaaa aaaaaaaaa aaaaaaaaa aaaaaaaaa aaaaaaaaa aaaaaaaaa aaaaaaaaa aaaaaaaaa aaaaaaaaa aaaaaaaaa 安装夹具 aaaaaaaaa 安装夹具是简易使用 装置的一部分。在夹 具紧固并进行调整之 前不要安装栅格。 在将机壳插入安装截 断面之前,请确认夹 具对准机壳合拢,见 右 1。 机壳置入安装截断层 后,用 #2 十字螺丝刀 紧固每个夹具的螺丝,...
- Seite 23 安装程序 1- 使用内附的 C 型环或提供的尺寸,在天花板表面描出截断 面的图型。 2- 挖出安装孔。使用尖利的工具以免压迫安装表面或使安装 表面破碎。 3- 将电线从安装孔中拉出。 4- 按说明放置两个吊顶支架槽在安装孔旁。确认部分紧贴天 花板的平直支架对准该孔。如果是非吊顶安装,则不需要这 些支架。 5- 将 C 型环支架穿入安装孔。首先将截断槽滑入安装孔,然 后旋转支架以使它通过安装孔。确认电线穿过环。 6- 放置支架,用提供的螺丝刀将 C 型环支架紧固在每个支架 上。如果是非吊顶安装,跳过该步骤。 7- 松开连接盖板的固定螺丝以打开盖板。将合适的非金属护 套电缆连接器安装进盖板孔。 8- 临时支撑扩音器音箱,这样,就有足够的空隙使电线穿过 扩音器音箱的顶部进行布线和收尾。 9- 找到扩音器内藏的接线盒连接器。完全松开电线固定螺 丝。 10- 将电线的端头剥去约 5 mm (0.2” ) 并将之插入适当的连接 器位置。连接器接脚的说明在右面。完全紧固电线固定螺...
- Seite 24 (714) 754-6174 Customer Service FAX (714) 754-6173 World Wide Web: www.qscaudio.com E-mail:info@qscaudio.com service@qscaudio.com QSC Audio Products, Inc. 1675 MacArthur Boulevard Costa Mesa, California 92626 USA ©2003, 2004 “QSC” and the QSC logo are registered with the U.S. Patent and Trademark Office.