Herunterladen Inhalt Inhalt Diese Seite drucken

Werbung

Verfügbare Sprachen
  • DE

Verfügbare Sprachen

  • DEUTSCH, seite 1
Heat Guru Plus In&Out
Heizstrahler
Patio Heater
Radiador
Radiateur
Radiatore
10035095 10035096

Werbung

Inhaltsverzeichnis
loading

Inhaltszusammenfassung für Blumfeldt Heat Guru Plus In&Out

  • Seite 1 Heat Guru Plus In&Out Heizstrahler Patio Heater Radiador Radiateur Radiatore 10035095 10035096...
  • Seite 3: Inhaltsverzeichnis

    Sehr geehrter Kunde, wir gratulieren Ihnen zum Erwerb Ihres Gerätes. Lesen Sie die folgenden Hinweise sorgfältig durch und befolgen Sie diese, um möglichen Schäden vorzubeugen. Für Schäden, die durch Missachtung der Hinweise und unsachgemäßen Gebrauch entstehen, übernehmen wir keine Haftung. Scannen Sie den folgenden QR-Code, um Zugriff auf die aktuellste Bedienungsanleitung und weitere Informationen rund um das Produkt zu erhalten: INHALTSVERZEICHNIS...
  • Seite 4: Sicherheitshinweise

    SICHERHEITSHINWEISE • Lesen Sie alle Anweisungen, bevor Sie dieses Gerät benutzen. • Lassen Sie das Gerät nicht unbeaufsichtigt, wenn es in Betrieb ist. • Diese Heizung wird während der Benutzung heiß. Berühren Sie nicht die heißen Oberfl ächen. VORSICHT Verbrennungsgefahr! Einige Teile dieses Produktes können sehr heiß...
  • Seite 5 • Fassen Sie das Heizelement nicht mit bloßen Händen an. Wenn es versehentlich berührt wird, entfernen Sie Fingerabdrücke mit einem weichen Tuch, da sich diese sonst in das Element einbrennen und einen vorzeitigen Ausfall der Heizung verursachen. • Ersetzen Sie das Heizelement nicht oder versuchen Sie nicht, es zu entfernen.
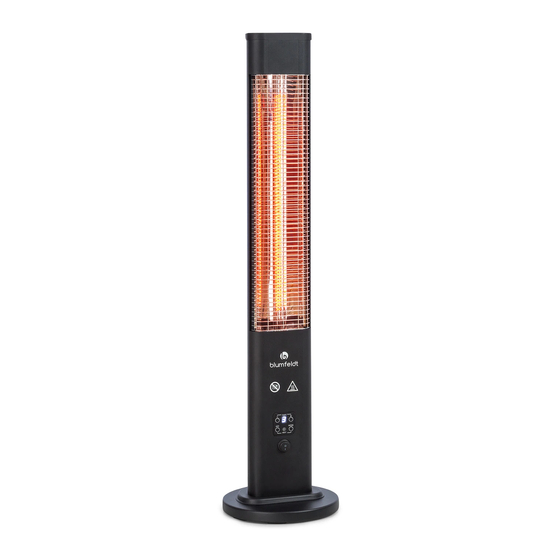
  • Seite 6: Geräteübersicht

    GERÄTEÜBERSICHT Heizkörper Fernbedienung Abdeckung der Basis Bedienfeld Basis Ein/Aus-Schalter Schraube M6*30 Netzstecker INSTALLATION Hinweis: Für die Installation benötigen Sie einen Kreuzschlitzschraubenzieher. Nehmen Sie den Heizkörper, die Basis und die zugehörige Abdeckung aus dem Karton. Befestigen Sie die Basis und die zugehörige Abdeckung mit Hilfe der Schrauben M6*30 am Heizkörper.
  • Seite 7: Bedienung

    BEDIENUNG Stecken Sie den Stecker in die Steckdose. Stellen Sie den Ein/Aus-Schalter auf die Position ON. Das Zeichen [-] im Display beginnt zu blinken und das Gerät befindet sich im Standby-Modus. Drücken Sie mehrmals die Taste MODE am Bedienfeld oder der Fernbedienung, um die Leistung des Heizstrahlers in der folgenden Reihenfolge zu erhöhen: Stufe 1 >...
  • Seite 8: Hinweise Zur Entsorgung

    HINWEISE ZUR ENTSORGUNG Befindet sich die linke Abbildung (durchgestrichene Mülltonne auf Rädern) auf dem Produkt, gilt die Europäische Richtlinie 2012/19/EU. Diese Produkte dürfen nicht mit dem normalen Hausmüll entsorgt werden. Informieren Sie sich über die örtlichen Regelungen zur getrennten Sammlung elektrischer und elektronischer Gerätschaften.
  • Seite 9 Dear Customer, Congratulations on purchasing this device. Please read the following instructions carefully and follow them to prevent possible damages. We assume no liability for damage caused by disregard of the instructions and improper use. Scan the QR code to get access to the latest user manual and more product information.
  • Seite 10: Safety Instructions

    SAFETY INSTRUCTIONS • Read all instructions before using this unit. • Do not leave this unit unattended when in use. • This heater will get hot when in use. Do not touch hot surfaces. CAUTION Risk of burns! Some parts of this product can become very hot and cause burns.
  • Seite 11 • Do not handle the element with bare hands. If it is inadvertently touched, remove finger marks with a soft cloth and methylated spirits or alcohol, otherwise the marks will burn into the element causing premature heater failure. • Do not replace or attempt to replace the element in this product. •...
  • Seite 12: Product Overview

    PRODUCT OVERVIEW Main body Remote control Covering the base Control panel Basis on/off switch Screw M6*30 Power plug INSTALLATION Note: You will need a Phillips screwdriver for the installation. Remove the main body, base and associated cover from the box. Attach the base and cover to the main body using the M6*30 screws.
  • Seite 13: Operation

    OPERATION Insert the plug into the socket. Set the power switch to the ON position. The [-] symbol in the display starts blinking and the unit is in standby mode. Press the MODE button on the control panel or the remote control several times to increase the radiant heater output in the following sequence: Level 1 >...
  • Seite 14: Hints On Disposal

    HINTS ON DISPOSAL According to the European waste regulation 2012/19/EU this symbol on the product or on its packaging indicates that this product may not be treated as household waste. Instead it should be taken to the appropriate collection point for the recycling of electrical and electronic equipment.
  • Seite 15: Fiche Technique

    Chère cliente, cher client, Toutes nos félicitations pour l’acquisition de ce nouvel appareil. Veuillez lire attentivement et respecter les instructions de ce mode d’emploi afin d’éviter d’éventuels dommages. Nous ne saurions être tenus pour responsables des dommages dus au non-respect des consignes et à...
  • Seite 16: Instructions De Sécurité

    INSTRUCTIONS DE SÉCURITÉ • Lisez toutes les instructions avant d‘utiliser cet appareil. • Ne laissez pas l‘unité sans surveillance lorsqu‘elle est en fonctionnement. • Ce radiateur devient chaud pendant l‘utilisation. Ne touchez pas les surfaces chaudes. ATTENTION Danger de brûlures ! Certaines parties de ce produit peuvent devenir très chaudes et provoquer des brûlures.
  • Seite 17 • Ne touchez pas l‘élément chauffant à mains nues. En cas de contact accidentel, enlevez les empreintes digitales avec un chiffon doux, sinon elles brûleront dans l‘élément et provoqueront une défaillance prématurée du radiateur. • Ne pas remplacer ou tenter de retirer l‘élément chauffant. •...
  • Seite 18: Aperçu De L'appareil

    APERÇU DE L‘APPAREIL Corps de radiateur Télécommande Cache de la base Panneau de commande Base Bouton de marche/arrêt Vis M6*30 Bloc d'alimentation INSTALLATION Remarque : Vous aurez besoin d‘un tournevis cruciforme pour l‘installation. Prenez le radiateur, la base et le couvercle de la boîte. Fixez la base et le couvercle associé...
  • Seite 19: Utilisation

    UTILISATION Branchez la fiche dans la prise. Placez l‘interrupteur marche / arrêt sur ON. Le symbole [-] se met à clignoter à l‘écran et l‘appareil est en mode veille. Appuyez plusieurs fois sur la touche MODE du panneau de commande ou de la télécommande pour augmenter la puissance du radiateur dans l‘ordre suivant : Niveau 1 >...
  • Seite 20: Informations Sur Le Recyclage

    INFORMATIONS SUR LE RECYCLAGE Vous trouverez sur le produit l’image ci-contre (une poubelle sur roues, barrée d‘une croix), ce qui indique que le produit se trouve soumis à la directive européenne 2012/19/UE. Renseignez-vous sur les dispositions en vigueur dans votre région concernant la collecte séparée des appareils électriques et électroniques.
  • Seite 21 Estimado cliente: Le felicitamos por la adquisición de este producto. Lea atentamente el siguiente manual y siga cuidadosamente las instrucciones de uso con el fin de evitar posibles daños. La empresa no se responsabiliza de los daños ocasionados por un uso indebido del producto o por haber desatendido las indicaciones de seguridad.
  • Seite 22: Instrucciones De Seguridad

    INSTRUCCIONES DE SEGURIDAD • Lea todas las instrucciones antes de usar este dispositivo. • No deje la unidad desatendida cuando esté en funcionamiento. • Este radiador se calienta durante el uso. No toque las superfi cies calientes. ATENCIÓN ¡Peligro de quemaduras! Algunas partes de este producto pueden calentarse mucho y causar quemaduras.
  • Seite 23 • No toque el elemento calefactor con las manos desnudas. Si se toca accidentalmente, elimine las huellas digitales con un paño suave, de lo contrario se quemarán en el elemento y causarán un fallo prematuro del radiador. • No reemplace o intente retirar el elemento calefactor. •...
  • Seite 24: Descripción Del Producto

    DESCRIPCIÓN DEL PRODUCTO Radiador Mando a distancia Cubierta de la base Panel de control Interruptor de encendido/ Base apagado Tornillo M6*30 Enchufe de alimentación INSTALACIÓN Nota: Necesitará un destornillador Phillips para la instalación. Retire el radiador, la base y la cubierta de la caja. Fije la base y la cubierta correspondiente al radiador con los tornillos M6*30.
  • Seite 25: Funcionamiento

    FUNCIONAMIENTO Introduzca el enchufe en la toma de corriente. Ponga el interruptor de encendido en la posición ON. El signo [-] en la pantalla comienza a parpadear y el dispositivo está en modo de espera. Presione el botón MODE en el panel de control o en el mando a distancia para aumentar la potencia del calentador en el siguiente orden: Nivel 1 >...
  • Seite 26: Retirada Del Aparato

    RETIRADA DEL APARATO Si el aparato lleva adherida la ilustración de la izquierda (el contenedor de basura tachado) entonces rige la normativa europea, directiva 2012/19/UE. Estos productos no pueden depositarse en los contenedores destinados a la basura común. Infórmese sobre las leyes territoriales que regulan la recogida separada de aparatos eléctricos y electrónicos.
  • Seite 27 Gentile Cliente, La ringraziamo per aver acquistato il dispositivo. La preghiamo di leggere attentamente le seguenti istruzioni per l’uso e di seguirle per evitare possibili danni tecnici. Non ci assumiamo alcuna responsabilità per danni scaturiti da una mancata osservazione delle avvertenze di sicurezza e da un uso improprio del dispositivo.
  • Seite 28: Avvertenze Di Sicurezza

    AVVERTENZE DI SICUREZZA • Leggere tutte le istruzioni prima di utilizzare questo dispositivo. • Non lasciare l‘unità incustodita quando è in funzione. • Questo radiatore diventa caldo durante l‘uso. Non toccare le superfi ci calde. ATTENZIONE Pericolo di ustioni! Alcune parti di questo prodotto possono diventare molto calde e causare ustioni.
  • Seite 29 • Non toccare l‘elemento riscaldante a mani nude. Se viene toccato accidentalmente, rimuovere le impronte digitali con un panno morbido, altrimenti si bruceranno nell‘elemento riscaldante e causeranno un guasto prematuro del radiatore. • Non sostituire o tentare di rimuovere l‘elemento riscaldante. •...
  • Seite 30: Descrizione Del Prodotto

    DESCRIZIONE DEL PRODOTTO Radiatore Telecomando Copertura della base Pannello di controllo Base Interruttore on/off Vite M6*30 Spina INSTALLAZIONE Nota: Per eseguire l’installazione è necessario avere a portata di mano un cacciavite a croce. Estrarre dal cartone il radiatore, la base e la relativa copertura. Avvitare la base e la copertura al radiatore utilizzando le viti M6*30.
  • Seite 31: Utilizzo

    UTILIZZO Inserire la spina nella presa. Posizionare l’interruttore su ON. Sul display inizia a lampeggiare il simbolo [-] e il dispositivo si trova in modalità standby. Premere ripetutamente il tasto MODE sul pannello di controllo o sul telecomando per aumentare la potenza del radiatore nel modo seguente: livello 1 >...
  • Seite 32: Smaltimento

    SMALTIMENTO Se sul prodotto è presente la figura a sinistra (il bidone dei rifiuti con le ruote), si applica la direttiva europea 2012/19/UE. Questi prodotti non possono essere smaltiti con i rifiuti normali. Informarsi sulle disposizioni vigenti per la raccolta di dispositivi elettrici ed elettronici.

Diese Anleitung auch für:

1003509510035096

Inhaltsverzeichnis