Inhaltsverzeichnis
Werbung
Verfügbare Sprachen
Verfügbare Sprachen
Quicklinks
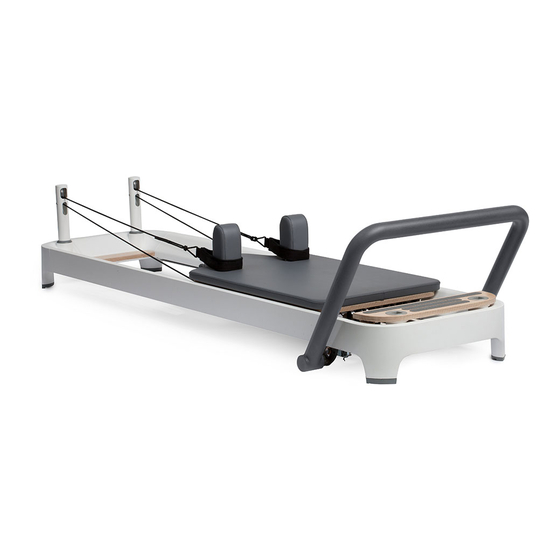
Assembling the Allegro® 2
Reformer from Balanced Body®
Set-Up Videos are Available at www.pilates.com/instructions. Please watch before assembly.
Instructions in document subject to change. Please see instructions online for most current version.
Visit pilates.com/patent for complete and current information on Balanced Body product patents.
Balanced Body, Inc
Sacramento, CA
001-916-388-2838
Werbung
Inhaltsverzeichnis

Verwandte Anleitungen für Balanced Body Allegro 2 Reformer


Inhaltszusammenfassung für Balanced Body Allegro 2 Reformer
- Seite 1 Set-Up Videos are Available at www.pilates.com/instructions. Please watch before assembly. Instructions in document subject to change. Please see instructions online for most current version. Visit pilates.com/patent for complete and current information on Balanced Body product patents. Balanced Body, Inc Sacramento, CA...
-
Seite 3: Safety First
If the hook shows a lot of wear, discontinue using the spring to the quality of the equipment. This guide was created to help immediately and call Balanced Body to replace spring or snap. you use and maintain your equipment for optimum safety. Please See Figure 2. - Seite 4 Disconnect the springs and clean the entire length of the tracks and exercises. The sliders on the with a soft cloth and Balanced Body Cleaner, mild soap with tubes allow for this vertical water or a mild commercial cleaner such as, Fantastik® or 409®.
- Seite 5 (they are reddish-brown in color). different position. Release the knobs before the next hole and Figure 8. If your chair is a Balanced Body continue to slide the system into position. Once over a hole the Split-step Pedal Chair (Combo Chair), pin of the knob will automatically drop into the opening.
-
Seite 6: Replacement Parts
EQUIPMENT INSPECTION AND MAINTENANCE LOG REPLACEMENT PARTS We suggest that you keep a maintenance log for each piece of To order replacement parts, or if you have any questions, equipment. The log should include: please call: 1. A description of the machine including the serial number, the U.S. -
Seite 7: Parts List
Assembling the Allegro 2 Reformer from Balanced Body ® ® PARTS LIST Description Part Qty. Number Allegro 2 Reformer with carriage and ropes Allegro 2 Footbar 617-070 Shoulder rest (1 pair) 950-168 Riser * 950-165 Soft Touch double loops (1 pair) 101-034... - Seite 8 I. ASSEMBLING THE ALLEGRO 2 REFORMER A. OPENING THE BOX: C. INSTALL SHOULDER RESTS NOTE: For transport reasons there is a bungee cord attached 1. Insert the rods at the to the footbar mechanisms within the frame. This MUST BE bottom of each shoulder REMOVED before installing the footbar.
- Seite 9 plates so they face away from the Reformer as shown in NOTE: it is possible that the footbar may “catch” inside the rails Figure D. as you are moving forward. Shifting the footbar from side to side (not up and down) will free it. Figure G shows a cut-away view with the side of the footbar and Reformer rail removed so you can see what’s actually going on inside the frame rail during this step.
- Seite 10 Balanced Body springs come pre-installed. To install spring The bolt will thread in easily until it is completely installed. collars disconnect the spring from the foot-end of the Reformer.
- Seite 11 II. USING THE F. ATTACH COTTON LOOPS TO ROPES EASYSET FOOTBAR The ropes on the Allegro 2 come pre-installed. To install loops on the ropes simply feed the rope through the padded loop ring, around the big padded loop and pull tight as shown in Figure L. ADJUSTING FOOTBAR AND FOOTBAR POSITION For detailed information on how to use the Allegro 2’s SoftTouch To adjust between footbar positions, disengage the footbar by...
-
Seite 12: Headrest Adjustment
III. ADJUSTING THE IV. STORAGE SOFTTOUCH ROPE SYSTEM STACKING AND HEADRESTS Two people are recommended for stacking. The Allegro 2 must be stacked one on top of the other alternating foot-end and ROPE ADJUSTMENT: head-ends as shown in Figure P. The feet of the Reformer lock onto the standing platform on the foot end and the end casting Refer to Arrow A in Figure O. -
Seite 13: Safety & Maintenance
» Contact Balanced Body for other upholstery and re-upholstery » Keep children under the age of 12 and pets away from the options. Replacement upholstery is available from Balanced Allegro 2 at all times. - Seite 15 Instructions for Allegro® 2 Reformer Options and Accessories INCLUDES INSTRUCTIONS FOR ALLEGRO 2: II. INSTALLING THE ALLEGRO 2 FOOT STRAP Feed the loops of the footstrap between the frame and standing » Foot Plate (jumpboard) Page 15 platform, through the footman’s loops, and then around the hook plates on the underside of the standing platform as shown in »...
- Seite 16 III. INSTALLING THE EXTENDED LEGS AND POSTS A. INSTALL LEGS IMPORTANT: INSTALL THE FOOTBAR FIRST! PARTS LIST 1. Move the footbar into the vertical position (for stability). Insert Description Part number Qty. footbar locking pins. 5/8” screws GEN9942 2. If you have a hard floor put a Pilates mat on the floor next to Extended Legs 617-007 the Reformer to protect the finish.
- Seite 17 IV. INSTALLING THE WHEEL KITS 5/8” Alignment Screws Kit includes wheel brackets for right and left legs and Allen wrench for assembly purposes. Extended Transport wheel kits are available for the Allegro 2 in both 3/8 Flat washer standard and extended leg configurations but they are not interchangeable.
- Seite 18 Tower installed. Figure J SECURITY STRAP For additional safety, Balanced Body offers a Vertical Storage Strap (part# 101-000), which fastens the Allegro 2 (without Tower) to a wall when in standing position with wheels.
- Seite 19 VI. ALLEGRO 2 EXERCISES HUNDRED, ALL LEVELS Sets: 10 Springs: 1 – 3 Bar: None Loops: Regular Headrest: Up Focus » Percussive breathing - in for 5, out for 5 » Stable pelvis – imprinted or neutral » Hollow abdominals »...
- Seite 20 FEET IN STRAPS, LEVEL 1 » Reps: 6 Set up: 2 springs Bar: Any Loops: Regular Focus » Breath - exhale out/inhale in or inhale out/exhale in Starting Positions - Leg Lowers 1 » Spine to mat or neutral spine »...
- Seite 21 ARM WORK, LEVEL 1 - 2 Reps: 4 - 10 Springs: 1-2 Biceps Serve a tray Box: long, short or none Loops: very short, short or regular Focus » Breath – inhale pull/exhale release » Biceps, triceps, pectoralis and deltoid strengthening »...
- Seite 22 FOOTWORK, ALL LEVELS Reps: 10 Springs: 2—4 springs Bar: Middle or High Head rest: Up Focus » Breathing – exhale out/inhale in, or inhale out/exhale in Heels Toes » Neutral spine » Pelvic stability » Hip, leg and ankle alignment »...
- Seite 23 Installing the Tower on the Allegro® 2 PARTS LIST » Repeat on other side. Description Part Number Qty. » Grab a riser and a leg Tower frame 617-061 casting and pull the head- Tower receiver brackets (1 pair) 950-171 end off the frame as shown Lower spring mounts (1 pair) 950-170 In Figure B.
- Seite 24 5. INSTALL LOWER SPRING MOUNT Loosely re-install the four nuts removed in step 1. Receivers should look as shown in Figure D. If required, remove existing risers. Insert the lower spring mount into the riser socket as shown in Figure G. Make sure the knobs underneath the Reformer have engaged with the spring mount and then hand tighten the knobs.
- Seite 25 » Repair any tears in the upholstery with an upholstery repair kit available at auto parts stores, or have the repair done locally. 9. OPTIONAL MAT CONVERSION » Call Balanced Body for other upholstery and re-upholstery options. To install the mat on the frame disengage the springs and move the carriage all the way to the head end of the Reformer.
- Seite 27 Allegro Tower Exercises DEFINITION OF EXERCISE SET-UP TERMS » Level: The level of expertise needed to undertake exercise. » Precautions: Physical conditions that may limit or exclude a participant. Exercises may need to be modified for people with » Reps: How many times the exercise is performed. these conditions.
- Seite 28 FEET IN STRAPS, LEVEL 1 Springs: Long springs from middle or high position Reps: 6-10 Loops around arches Focus » Breath - exhale out/inhale in or inhale out/exhale in » Neutral spine Leg Lowers » Hollow abdominals » Pelvic stability »...
-
Seite 29: Starting Position
FEET IN STRAPS SIDELYING – ADDUCTOR PULL, LEVEL 1-3 Springs: Long springs from middle position Loops: Around arches Reps: 10 Focus » Breath - exhale down/inhale up Adductor Pull » Correct side-lying position (waist up, hips and shoulders in line) »... - Seite 30 FOOT AND LEGWORK, LEVEL 1 Springs: 2 long purple springs from the bottom on Push-through Bar Reps: 10 Safety Strap: On Focus » Breath – inhale push, exhale return Plies » Spine to mat or neutral spine » Leg, ankle and foot alignment »...
- Seite 31 CAT, LEVEL 3 Springs: 2 short springs from above on Push-through Bar Reps: 4 Focus » Breath – exhale roll down, inhale to extend out, exhale pull back, inhale uncurl. » Spinal flexibility » Scapula stability/mobility » Abdominal hollowing and lift »...
- Seite 33 Cómo montar el Allegro ® Reformer de Balanced Body ® Los videos de configuración están disponibles en www.pilates.com/instructions. Por favor, mire antes del montaje. Las instrucciones en el documento están sujetas a cambios. Para obtener la versión más actualizada, consulte las instrucciones en línea.
- Seite 35 Una guía para el mantenimiento adecuado y el uso seguro de su equipo de Pilates. Por más de 35 años, Balanced Body ha venido introduciendo Broches innovaciones de seguridad para los equipos de Pilates. Muchas de Revise (mensualmente) los broches para detectar desgastes.
- Seite 36 Asegure el armazón. Cuando no Para todas las barras de pies de Balanced Body con soportes de use su Reformer, verifi que que por lo menos fi jación para barras de pies, verifi que que el tornillo de pivote que dos tensores abrochan el armazón a la barra de tensión.
- Seite 37 Se recomienda utilizar el cuarto lado de la barra de empuje junto cerciorarse. Si observa que los pasadores de los deslizadores están con la correa de seguridad para evitar lesiones. desgastados, llame a Balanced Body para reemplazarlos, pues las personas que utilicen la barra de empuje en esta condición podrían SILLAS sufrir lesiones.
-
Seite 38: Programa De Mantenimiento
Los pasadores de los deslizadores no En otros lugares: +1 916-388-2838 deben salirse de los agujeros y, en caso de que esto ocurra, será necesario reemplazar las perillas retráctiles; llame a Balanced Body Fax: 916-379-9277 para solicitar repuestos. -
Seite 39: Lista De Piezas
® ® LISTA DE PIEZAS Descripción Número Cant. de pieza Allegro 2 Reformer con carro y cuerdas Barra para los pies del Allegro 2 617-070 Apoyo para los hombros (1 par) 950-168 Elevadores * 950-165 Bucles dobles SoftTouch (1 par) - Seite 40 I. PARA MONTAR EL ALLEGRO 2 REFORMER A. ABRIR LA CAJA: afuera por la ventana superior. Use el acollador para ayudar a tirar de la cuerda a través del elevador; luego desate o AVISO: Para fines de transporte, hay una cuerda elástica sujeta corte el acollador.
- Seite 41 2. Desconecte los resortes y mueva el carro hacia el extremo de armazón. Muévala cuidadosamente hacia el extremo de la la cabecera del Reformer. cabecera del Reformer hasta que llegue al primer borde de las cintas adhesivas marcadoras (consulte la Figura F). 3.
- Seite 42 E. INSTALE LOS COLLARINES DE RESORTE (consulte la Figura I para ver la orientación correcta Los resortes de Balanced Body vienen preinstalados. Para instalar de los pernos). los collarines de resorte, desconecte el resorte de los pies del Reformer. Deslice la ranura del collarín sobre el cuello del resorte 9.
- Seite 43 II. USO DE LA BARRA PARA F. FIJE LOS BUCLES DE ALGODÓN A LAS CUERDAS LOS PIES EASYSET Las cuerdas del Allegro 2 vienen preinstaladas. Para instalar los bucles en las cuerdas, simplemente introduzca la cuerda por el aro del bucle acolchado alrededor del bucle grande acolchado y AJUSTE DE LA BARRA PARA LOS PIES Y LA POSICIÓN tire firmemente, como se muestra en la Figura L.
- Seite 44 III. AJUSTE DEL SISTEMA IV. ALMACENAMIENTO DE CUERDAS SOFTTOUCH PARA APILARLO Y LOS REPOSACABEZAS Para apilarlo, se recomienda que lo hagan entre dos personas. Los Allegro 2 se deben apilar uno sobre otro alternando los AJUSTE DE LAS CUERDAS: pies con las cabeceras tal como se muestra en la Figura O. Los pies del Reformer se acoplan a la plataforma para ponerse Revise la Flecha A en la Figura N.
-
Seite 45: Seguridad Ymantenimiento
A2, COMO LA BARRA DE PIES, EL SOPORTE, LAS RUEDAS O LOS RIELES. Si tiene algún problema o pregunta, póngase en contacto con el servicio de soporte técnico de Balanced Body. Si lubrica o engrasa estos componentes, es posible que no se bloqueen correctamente y se vuelvan inseguros. - Seite 46 IEN, TODOS LOS NIVELES 10 grupos Resortes: 1 – 3 Barra: Ninguna Bucles: Regulares Reposacabeza: Arriba Foco » Respiración percusiva - inhalar durante 5, exhalar durante 5 » Pelvis estable – fija o neutra » Abdominales hundidos » Fuerza abdominal »...
- Seite 47 PIES EN LAS CORREAS, NIVEL 1 6 repeticiones Preparación: 2 resortes Barra: Cualquiera Bucles: Regulares Foco » Respiración - exhalar hacia afuera/inhalar hacia adentro o inhalar hacia afuera/exhalar hacia adentro » Columna sobre la estera o columna neutra » Abdominales hundidos »...
- Seite 48 EJERCICIOS DE BRAZOS, NIVEL 1 - 2 » 4 - 10 repeticiones Resortes: 1-2 Caja: larga, corta o ninguna Bucles: muy cortos, cortos o regulares Foco » Respiración – inhalar al empujar/exhalar al aflojar Biceps » Fortalecimiento de bíceps, tríceps, pectorales y deltoides »...
- Seite 49 EJERCICIOS DE PIES, TODOS LOS NIVELES Correr en el lugar Bola del pie sobre la barra, un talón en dorsiflexión, la otra rodilla 10 repeticiones flexionada, alternar las piernas 20 a 50 veces Resortes: 2 – 4 resortes Barra: Media o alta Reposacabeza: Arriba FOCO »...
- Seite 51 Cómo instalar la torre en el Allegro® 2 LISTA DE PIEZAS » Repita los pasos en el otro lado. Número Descripción de pieza Cant. » Agarre un elevador y un Armazón de la torre 617-061 molde de pata y quite la Abrazaderas de recepción de la torre (1 par) 950-171 cabecera del armazón Montajes para los resortes inferiores (1 par) 950-170...
- Seite 52 Vuelva a instalar sin ajustar las cuatro tuercas que quitó en el 5. INSTALE EL MONTAJE PARA LOS paso 1. Los receptores deberán estar tal como se muestra en la RESORTES INFERIORES Figura D. De ser necesario, quite los elevadores existentes. Introduzca el montaje para los resortes inferiores en el receptáculo del elevador tal como se muestra en la Figura G.
- Seite 53 9. CONVERSIÓN OPCIONAL DE COLCHONETA » Llame a Balanced Body para otras opciones de tapicería y Para instalar la colchoneta en el armazón, desacople los resortes nuevo tapizado.
- Seite 54 Ejercicios en el Allegro Tower DEFINICIÓN DE LOS TÉRMINOS DE PREPARACIÓN PARA EL EJERCICIO RODAR HACIA ATRÁS, NIVEL 1 » Nivel: El nivel de experiencia necesario para realizar el ejercicio. 6-10 Repeticiones Resortes: 2 resortes amarillos largos o 2 amarillos cortos desde la »...
- Seite 55 Rodar hacia atrás Ski acuático...
-
Seite 56: Posición Inicial
PIES EN LAS CORREAS, NIVEL 1 6-10 repeticiones Resortes: Resortes largos desde la posición media, alta o superior Bucles o Velcro alrededor del tobillo o el empeine Foco Caminando » Respiración: exhalar hacia afuera/inhalar hacia adentro o » Con ambas piernas en los bucles, baje alternativamente una inhalar hacia afuera/exhalar hacia adentro pierna hacia la mesa y luego la otra, manteniendo la pelvis estable.. - Seite 57 PIES EN LAS CORREAS Y ACOSTADO DE LADO – TIRO ADUCTOR, NIVEL 1-3 6-10 repeticiones Resortes: Resortes largos desde la posición media Bucles alrededor de los arcos Parte inferior de la pierna debajo de la correa de la Mesa Trapecio Foco »...
- Seite 58 EJERCICIOS DE PIES Y PIERNAS, NIVEL 1 Flexión plantar » Recostado en posición supina con la Barra de Empuje en 10 repeticiones línea con el pliegue anterior de la cadera, piernas estiradas, Resortes: 2 resortes morados largos desde la parte metatarsos o dedos de los pies sobre la barra, realizar inferior en la Barra de Empuje flexiones plantares y dorsiflexiones con los tobillos.
-
Seite 59: Requisitos Previos
GATO, NIVEL 3 4 repeticiones Resortes: 2 resortes cortos desde arriba de la Barra de Empuje Foco » Respiración: exhalar al rodar hacia abajo, inhalar para extender, exhalar al empujar hacia atrás, inhalar para desencorvar. » Flexibilidad de la columna »... - Seite 61 Instrucciones para el Allegro® 2 Reformer Opciones y accesorios INCLUYE INSTRUCCIONES PARA EL ALLEGRO 2: II. CÓMO INSTALAR LA CORREA DE PIES EN EL ALLEGRO 2 » Plataforma para los pies (tabla de saltos) Página 40 Introduzca los bucles de la correa para los pies entre el armazón y la tabla de saltos, a través los bucles del estribo, y luego »...
- Seite 62 III. CÓMO INSTALAR LAS PIERNAS EXTENDIDAS Y LOS POSTES Tornillos de alineamiento de 5/8” Pierna extendida LISTA DE PIEZAS Arandela plana de 3/8 Descripción Número de pieza Cant. Tornillos de 5/8" GEN9942 Arandela de bloqueo de 3/8” Piernas extendidas 617-007 Perno de 5”...
- Seite 63 IV. CÓMO INSTALAR LOS KITS DE RUEDAS B. CÓMO COLOCAR EL ALLEGRO 2 EN POSICIÓN VERTICAL (DE PIE) CON LOS KITS DE RUEDAS El kit incluye soportes de rueda para las piernas derecha e izquierda y una llave Allen para hacer el montaje. Los kits de ruedas de transporte están disponibles para el Allegro 2 tanto para la conFiguración estándar como para la de Posición...
- Seite 64 V. CORREA DE SEGURIDAD PARA FIJAR EL ALLEGRO A LA PARED Para seguridad adicional, Balanced Body ofrece una Cuerda de almacenamiento vertical (pieza# 101-000), que sujeta el Allegro 2 (sin la Torre) a una pared cuando está en posición vertical (de pie) con las ruedas instaladas.
- Seite 67 Assemblaggio del Reformer Allegro ® di Balanced Body ® I video di installazione sono disponibili su www.pilates.com/instructions. Si prega di guardare prima del montaggio. Le istruzioni in questo documento sono soggette a modifiche. Per le istruzioni più recenti vai online.
-
Seite 69: La Sicurezza Prima Di Tutto
Pilates. Da oltre 35 anni, Balanced Body crea innovazioni per gli attrezzi Chiusure a scatto Pilates legate alla sicurezza. Molti dei miglioramenti da noi introdotti Controllare che i moschettoni non siano usurati (ogni mese). - Seite 70 Se notate usura in quanto attraggono lo sporco. Non spruzzare mai il silicone in sui perni dei pomelli, contattate Balanced Body per la sostituzione. prossimità o all’interno delle ruote, in quanto esso può rimuovere il L’utilizzo della PTB in queste condizioni può provocare infortuni.
- Seite 71 Se invece i perni non restano posizionati Tenere sotto stretto controllo gli utenti rende più sicuri gli esercizi. nei fori del tubo, i pomelli devono essere sostituiti. Contattare Balanced Body per le parti di ricambio. Supporti molle a clessidra. Se la vostra Chair ha supporti molle...
-
Seite 72: Programma Di Manutenzione
PTB. I perni dei cursori non devono fuoriuscire dai fori. Se invece i perni non restano posizionati nei fori del tubo, i Reformer pomelli devono essere sostituiti. Contattare Balanced Body per le Pulire ruote e guide ... -
Seite 73: Elenco Delle Parti
Assemblaggio del Reformer Allegro 2 di Balanced Body ® ® ELENCO DELLE PARTI Descrizione Codice Q.tà articolo Reformer Allegro 2 con carrello e corde Poggiapiedi Allegro 2 617-070 Poggiaspalla (1 coppia) 950-168 Montante * 950-165 Doppi anelli Soft Touch (1 coppia) - Seite 74 I. ASSEMBLAGGIO DEL REFORMER ALLEGRO 2 A. APERTURA DEL CONTENITORE: passare il cordino che si trova all’estremità della corda nella fessura inferiore del montante e farlo uscire da quella NOTA: per motivi di trasporto, una corda elastica è attaccata ai superiore.
- Seite 75 utilizzati per la conservazione in posizione verticale con il kit metallo si infilino nelle guide della struttura. Spostarlo con cura ruote opzionale Allegro 2. verso il lato testa del Reformer finché non raggiunge il primo margine delle etichette adesive (fare riferimento alla Figura F). 2.
- Seite 76 Le molle Balanced Body sono preinstallate. Per installare i collari bloccaggio. a molla, scollegare la molla dal lato piedi del Reformer. Far scorrere la scanalatura del collare sulla lunghezza della molla, 10.
- Seite 77 II. UTILIZZO DEL POGGIAPIEDI F. COLLEGAMENTO DEGLI ANELLI DI COTONE ALLE CORDE EASYSET Le corde di Allegro 2 sono preinstallate. Per installare gli anelli sulle corde, far passare semplicemente la corda attraverso REGOLAZIONE DELLA POSIZIONE DEL POGGIAPIEDI l’anello imbottito, intorno all’anello grande imbottito e tirare energicamente, come mostrato nella Figura L.
-
Seite 78: Regolazione Del Poggiatesta
III. REGOLAZIONE DEI IV. CONSERVAZIONE POGGIATESTA E DEL SISTEMA IMPILAMENTO DI CORDE SOFT TOUCH È consigliabile che il processo di impilamento sia effettuato da due persone. I Reformer Allegro 2 devono essere impilati uno REGOLAZIONE DELLE CORDE: sull’altro, alternando il lato piedi al lato testa, come mostrato nella Figura O. -
Seite 79: Sicurezza Emanutenzione
» Tenere i bambini con età inferiore a 12 anni e gli animali » Contattare Balanced Body per altre opzioni relative ai sempre lontani dall’Allegro 2. rivestimenti e alle riparazioni. È disponibile un rivestimento »... - Seite 80 Esercizi per Il Reformer DEFINIZIONE DEI TERMINI D’IMPOSTAZIONE DEGLI ESERCIZI » Livello: il livello di esperienza richiesto per affrontare l’esercizio. » Ripetizioni: quante volte viene eseguito l’esercizio. » Molle: quante molle si dovrebbero attaccare per l’esercizio. » Barra: posizionamento corretto della barra poggiapiedi per l’esercizio.* »...
- Seite 81 CENTO, TUTTI I LIVELLI 10 set Molle: 1 – 3 Barra: nessuna Anelli: regolari Poggiatesta: in su Concentrazione » Respirazione di percussione- in 5 volte e fuori 5 volte » Bacino stabile- appiattito o neutrale » Addominali cavi » Forza addominale »...
- Seite 82 PIEDI NELLE CINGHIE, LIVELLO 1 6 ripetizioni Preparazione: 2 molle Barra: una qualsiasi Anelli: regolari Concentrazione » Respirazione: espirazione in distensione/inspirazione in contrazione o viceversa » Colonna vertebrale al mat o in posizione neutra » Addominali cavi » Forza addominali »...
- Seite 83 ESERCIZI PER LE BRACCIA, LIVELLO 1 - 2 Bicipiti Porgere il vassoio 4 – 10 ripetizioni Molle: 1-2 Box: lungo, corto o senza Anelli: molto corti, corti o regolari Concentrazione » Respirazione: inspirazione in trazione/espirazione in distensione » Rafforzamento bicipiti, tricipiti, pettorali e deltoidi »...
- Seite 84 ESERCIZIO PER LE GAMBE, TUTTI I LIVELLI 10 ripetizioni Molle: da 2 – 4 molle Barra: in mezzo o in alto Poggiatesta: in su Concentrazione » Respirazione: espirazione in distensione/inspirazione in contrazione o viceversa » Colonna vertebrale neutrale » Stabilità pelvica Calcagni Dita dei piedi »...
- Seite 85 Installazione del Tower sull’Allegro® 2 ELENCO DELLE PARTI » Afferrare un montante e una gamba, quindi estrarre Descrizione Numero parte Q.tà l’estremità superiore Struttura del Tower 617-061 della struttura, come Staffe dei ricevitori del Tower (1 coppia) 950-171 mostrato nella Figura B. Supporti molle inferiori (1 coppia) 950-170 SUGGERIMENTO: poiché...
- Seite 86 Reinstallare in modo allentato i quattro dadi rimossi nel passaggio 5. INSTALLAZIONE DEL SUPPORTO 1. I ricevitori dovrebbero risultare come mostrato nella Figura D. INFERIORE DELLE MOLLE Se necessario, rimuovere i montanti. Inserire il supporto inferiore delle molle nella cavità dei montanti, come mostrato nella Figura G.
- Seite 87 9. TAPPETINO DI CONVERSIONE OPZIONALE auto oppure effettuare la riparazione in loco. Per installare il tappetino sulla struttura, sganciare le molle » Contattare Balanced Body per altre opzioni relative ai e spostare il carrello fino in fondo all’estremità superiore del rivestimenti e alle riparazioni.
- Seite 88 Esercizi con Allegro Tower DEFINIZIONE DEI TERMINI FLESSIONI INDIETRO, LIVELLO 1 D’IMPOSTAZIONE DEGLI ESERCIZI 6 -10 ripetizioni Molle: 2 molle lunghe gialle, oppure 2 molle corte gialle » Livello: il livello di pratica richiesto per affrontare l’esercizio. agganciate in posizione alta Barra Rollback o impugnature. »...
- Seite 89 Flessioni indietro Sci acquatico...
- Seite 90 PIEDI NELLE CINGHIE, LIVELLO 1 6 – 10 ripetizioni Molle: molle lunghe dalla posizione intermedia o alta Anelli attorno alle caviglie o archi Concentrazione » Respirazione: espirazione in distensione/inspirazione in contrazione o viceversa » Colonna vertebrale neutrale » Addominali cavi »...
- Seite 91 PIEDI NELLE CINGHIE, DISTESI SU UN FIANCO. POTENZIAMENTO DEGLI ADDUTTORI, LIVELLO 1-3 6 -10 ripetizioni Molle: 2 molle lunghe agganciate in posizione intermedia Anelli intorno agli archi Concentrazione » Respirazione: espirare in giù/inspirare in su » Posizione corretta distesi sul fianco (vita in su, anche e spalle in linea) »...
- Seite 92 ESERCIZI PER PIEDI E GAMBE, LIVELLO 1 10 ripetizioni Molle: 2 molle lunghe viola, agganciate in posizione bassa sulla barra Push-through, Cinghia di sicurezza indossata Concentrazione » Respirazione: inspirazione in spinta, espirazione in ritorno » Colonna vertebrale al mat o in posizione neutra »...
- Seite 93 GATTO, LIVELLO 3 4 ripetizioni Molle: 2 molle dal disopra della barra Push-Through Concentrazione » Respirazione: espirare abbassandosi, inspirare estendendosi all’infuori, espirare tirandosi indietro, ispirare rialzandosi. » Flessibilità della colonna vertebrale » Stabilità/mobilità scapolare » Depressione e sollevamento addominali » Coordinazione della respirazione con il completo movimento della spina dorsale Precauzioni Lesioni alla schiena, lesioni alle spalle, lesioni alle ginocchia e...
- Seite 95 Istruzioni per Allegro® 2 Reformer Opzioni e accessori INCLUDE ISTRUZIONI PER ALLEGRO 2: II. INSTALLAZIONE DELLA CINGHIA PER I PIEDI ALLEGRO 2 » Piastra poggiapiedi (base di salto) Pagina 68 Inserire le asole della cinghia per i piedi fra il telaio e la piattaforma verticale, attraverso le asole di assistenza, »...
- Seite 96 III. INSTALLAZIONE DELLE GAMBE ESTESE E DEI SOSTEGNI Viti di allineamento da 5/8” Gamba estesa ELENCO DELLE PARTI Rondella piatta da 3/8 Descrizione Numero della parte Qtà. Viti da 5/8” GEN9942 Rondella di blocco da 3/8” Gambe estese 617-007 Bullone da 5” Rondelle piatte da 3/8 GEN9963 Rondelle di blocco da 3/8...
-
Seite 97: Installazione Delle Ruote
IV. INSTALLAZIONE DEI KIT DI RUOTE B. POSIZIONAMENTO VERTICALE DI ALLEGRO 2 CON I KIT DI RUOTE Il kit include supporti per le ruote per le gambe di destra e di sinistra e una chiave a brugola a fini di montaggio. I kit di ruote per il trasporto sono disponibili per Allegro 2 nelle configurazioni standard e con gambe estese, ma non sono Numero 3... - Seite 98 V. CINGHIA DI SICUREZZA PER L’ANCORAGGIO A PARETE Per maggiore sicurezza, Balanced Body offre una cinghia di conservazione verticale (n. parte 101-000), che fissa Allegro 2 (senza Tower) a una parete in posizione verticale con ruote. VI. QUARTO LATO PER BARRA DI SPINTA TOWER (PTB) È...
- Seite 101 Montage de l’ A llegro ® Reformer de Balanced Body ® Des vidéos de montage sont disponibles sur www.pilates.com/instructions. S’il vous plaît regarder avant l’assemblage. Les instructions de ce document sont sujettes à modification. Veuillez consulter les instructions en ligne pour la version la plus récente.
-
Seite 103: La Sécurité Avant Tout
Guide d’un entretien adéquat et d’une utilisation sûre de l’équipement Pilates. Boutons-Pression Pendant plus de 35 ans, Balanced Body a enrichi le matériel Pilates Inspectez les encliquetages pour en détecter l’usure d’innovations de sécurité. Nombreuses sont nos améliorations (chaque mois). - Seite 104 Supports de la barre de pieds (tous les trimestres). Vérifi ez toutes Reformer n’est pas utilisé, les barre de pieds Balanced Body avec leurs pattes de soutien pour assurez-vous qu’au moins deux déterminer si la vis d’articulation fi xant la patte de soutien à la ressorts fi xent le chariot à...
- Seite 105 à L’utilisation du 4ème côté de la PTB, avec la ceinture de sécurité est Balanced Body de les remplacer. L’utilisation de PTB dans cet état fortement recommandé afi n d’éviter les blessures.
- Seite 106 COMMENT INSPECTER ET SERRER LES ECROUS ET PROGRAMME D’ENTRETIEN LES BOULONS Tous les équipements Jour Sem. Mois Tri. Utilisez vos doigts pour vérifi er le serrage Vérifi er les ressorts pour les des écrous et des boulons. Si vous pouvez lacunes et les plis tourner l’écrou ou le boulon avec vos doigts, c’est que celui-ci est mal serré...
-
Seite 107: Liste Des Pièces
2 Reformer de Balanced Body ® ® LISTE DES PIÈCES Description Nº de Qté référence Allegro 2 Reformer avec chariot et cordes Barre de pieds Allegro 2 617-070 Supports d'épaules (1 paire) 950-168 Extenseur * 950-165 Deux boucles souples (1 paire) - Seite 108 I. MONTAGE DE L’ALLEGRO 2 REFORMER A. OUVERTURE DE LA BOÎTE D’EMBALLAGE : de la corde dans la fenêtre inférieure de l’extenseur et faites-la sortir par le haut. Utilisez la lanière pour permettre de tirer la REMARQUE : Pour des raisons de transport, un tendeur est corde à...
- Seite 109 2. Débranchez les ressorts et déplacez le chariot côté tête du le côté tête du Reformer jusqu’à ce qu’elle atteigne le premier Reformer. bord des marqueurs adhésifs (voir Figure F). 3. Assurez-vous que la languette indicatrice est à la même Déplacez la barre de pieds jusqu’au position de chaque côté...
- Seite 110 E. INSTALLATION DES COLLIERS À RESSORT 9. Il est important de poser Les ressorts du Balanced Body sont préinstallés. Pour installer le boulon sur le côté de la les colliers à ressort, débranchez le ressort côté pied du Reformer.
- Seite 111 II. UTILISATION DE LA BARRE F. FIXATION DES BOUCLES EN COTON AUX CORDES DE PIEDS EASYSET Les cordes de l’Allegro 2 sont pré-installées. Pour installer des boucles sur les cordes, il suffit de faire passer la corde par l’anneau de la boucle rembourrée, autour de la grosse boucle RÉGLAGE ET POSITION DE LA BARRE DE PIEDS rembourrée et de tirer pour resserrer comme indiqué...
- Seite 112 III. RÉGLAGE DU SYSTÈME IV. ENTREPOSAGE DES CORDES SOFTTOUCH EMPILAGE ET DU REPOSE-TÊTE Il est conseillé que l’empilage soit effectué par deux personnes. L’Allegro 2 doit être empilé par dessus un autre, en alternant RÉGLAGE DES CORDES : côté pied et côté tête comme indiqué Figure O. Les pieds du Reformer se bloquent sur la plateforme de travail sur le côté...
-
Seite 113: Sécurité Et Entretien
ROUES OU DES RAILS. Si vous avez des problèmes ou des questions, veuillez contacter le service de soutien technique de Balanced Body. En ajoutant du lubrifiant ou de la graisse, les composants peuvent ne pas s’enclencher correctement et rendre la machine dangereuse. - Seite 115 Instructions d’utilisation de l’Allegro® 2 Reformer Options et accessoires COMPREND LES INSTRUCTIONS D’UTILISATION II. INSTALLATION DE LA SANGLE DE PIED DE L’ALLEGRO 2 : DE L’ALLEGRO 2 Faites passer les boucles de la sangle de pied entre le châssis » Repose-pieds (jumpboard) Page 102 et la plate-forme stationnaire, à...
-
Seite 116: Liste Des Pieces
III. INSTALLATION DES PIEDS D’EXTENSION ET DES MONTANTS Vis d’alignement de 5/8 po Pied d’extension LISTE DES PIECES Rondelle plate de 3/8 Description Numéro de la pièce Quantité Vis de 5/8 po GEN9942 Rondelle de blocage de 3/8 po Pieds d’extension 617-007 Boulon de 5 po Rondelles plates de 3/8 GEN9963... -
Seite 117: Installation Des Roues
IV. INSTALLATION DES KITS DE ROUES B. METTRE L’ALLEGRO 2 DEBOUT AVEC LES KITS DE ROUES Le kit comprend les supports de roues des pieds droits et gauches et une clé Allen pour le montage. Des kits de roues de transport sont disponibles pour l’Allegro 2 dans les deux configurations de pieds standards et prolongés, Position mais ils ne sont pas interchangeables. - Seite 118 V. SANGLE MURALE DE SECURITE Pour plus de sécurité, Balanced Body offre une sangle de stockage vertical (article no 101-000), qui fixe l’Allegro 2 (sans tour) à un mur, en position debout avec des roues. VI. BARRE DE POUSSEE « PUSH-THROUGH » (PTB) POUR UN 4E COTE DE LA TOUR Un quatrième côté...
- Seite 119 LE HUNDRED – TOUS NIVEAUX 10 séries Ressorts : 1 à 3 Barre : aucune Boucles : normales Appui-tête : position haute Concentration » Respiration par à-coups : cinq à-coups d’inspiration et cinq d’expiration » Pelvis stable, en position neutre »...
- Seite 120 PIEDS DANS LES SANGLES – NIVEAU 1 Cercles Hanches stables. Cuisses jointes au départ. Abaisser les jambes 6 répétitions et décrire des cercles ou des D avec les pieds. Changer de Ressorts : 2 direction. Barre : n’importe laquelle Boucles : normales Variantes : jambes parallèles ;...
- Seite 121 TRAVAIL DES BRAS – NIVEAUX 1 ET 2 4 à 10 répétitions Ressorts : 1 ou 2 Coffre : long, court ou sans Boucles : ultra courtes, courtes ou normales Concentration » Respiration : inspirer en tirant, expirer en relâchant »...
- Seite 122 TRAVAIL DES PIEDS – TOUS NIVEAUX Fléchir-pointer Avant-pieds parallèles et posés sur la barre, jambes droites, 10 répétitions flexion plantaire de la cheville, flexion dorsale de la cheville, Ressorts : 2 à 4 plier les genoux, repousser jusqu’à la position de départ Barre : position médiane ou haute Appui-tête : position haute 2e position...
- Seite 123 Installation de la Tower sur l’Allegro® 2 LISTE DES PIÈCES » Répétez ce processus de l’autre côté. Description Nº de référence Qté » Saisissez un extenseur et Châssis de la Tower 617-061 Supports des récepteurs de une entretoise de pied et la Tower (1 paire) 950-171 sortez l’extrémité...
- Seite 124 Réinstallez sans serrer les quatre écrous retirés à l’étape 1. 5. INSTALLATION DU MONTAGE DE Les récepteurs doivent se présenter comme ceux de Figure D. RESSORT INFÉRIEUR Au besoin, retirez les extenseurs en place. Insérez le montage de ressort dans l’encoche de l’extenseur comme indiqué Figure G. Assurez-vous que les boutons situés sous le Reformer sont engagés avec le montage de ressort, puis serrez les boutons à...
- Seite 125 SKY que l’on peut trouver dans les magasins d’accessoires automobiles ou faites exécuter la réparation localement. 9. CONVERSION DU MATELAS EN OPTION » Appelez Balanced Body pour d’autres options possibles pour Pour installer le matelas sur le châssis, désengagez les ressorts le SKY et sa rénovation.
- Seite 126 Exercices avec l’Allegro Tower DÉFINITION DES TERMES DE PRÉPARATION AUX DÉROULÉS ARRIÈRE – NIVEAU 1 EXERCICES 6 à 10 répétitions Ressorts : 2 ressorts jaunes longs ou courts à partir de la position haute » Niveau : Le niveau de compétence requis pour entreprendre Barre Rollback ou poignées l’exercice.
- Seite 127 Déroulés arrière...
- Seite 128 PIEDS DANS LES SANGLES – NIVEAU 1 Marche » Avec les deux pieds dans les boucles ou sangles à fermeture 6 à 10 répétitions velcro, abaisser et remonter chaque jambe vers le banc en Ressorts : ressorts longs accrochés à la position médiane, haute alternance tout en maintenant la stabilité...
- Seite 129 COUCHÉ LATÉRAL – TRACTION DES ADDUCTEURS – NIVEAUX 1 À 3 6 à 10 répétitions Ressorts : Ressorts longs depuis la position intermédiaire Boucles autour des arceaux Concentration » Respiration : expirer en descendant, inspirer en montant » Correction du couché latéral (taille droite, hanches et épaules alignées) »...
- Seite 130 TRAVAIL DES PIEDS ET DES JAMBES – NIVEAU 1 10 répétitions Ressorts : 2 ressorts violets longs depuis le bas sur la barre Push-through sangle de sécurité en place Concentration » Respiration : inspirer en poussant, expirer au retour » Colonne vertébrale sur le tapis ou en position neutre »...
- Seite 131 CHAT – NIVEAU 3 4 répétitions Ressorts : 2 courts accrochés au-dessus de la barre articulée Concentration » Respiration : expirer en enroulant vers le bas, inspirer en poussant vers l’avant, expirer en tirant, inspirer en déroulant. » Souplesse de la colonne vertébrale »...
-
Seite 133: Zusammenbau Des Allegro Reformer Von Balanced Body
Zusammenbau des Allegro ® Reformer von Balanced Body ® Einrichtungsvideos finden Sie unter www.pilates.com/instructions. Bitte vor der Montage beachten. Anleitung im Dokument freibleibend. Die aktuellste Version finden Sie in der Online-Anleitung. Balanced Body, Inc Sacramento, CA 001-916-388-2838... -
Seite 135: Sicherheit Zuerst
Wenn der Haken große Abnutzung aufweist, müssen Sie die Feder Diese Anleitung wurde erstellt, um die Verwendung und Wartung sofort entfernen und Balanced Body anrufen, um die Feder oder Ihres Geräts mit optimaler Sicherheit zu ermöglichen. Bitte lesen Schnappverbindung zu ersetzen. Siehe Abb. 2. -
Seite 136: Wartung Der Reformer-Rollen Und -Schienen
(die kleinen Plastikstücke, die die Standplattform vor der Fußstange ziehen), bevor mit der Übung schützen) gebrochen oder beschädigt sind, wenden Sie sich zwecks begonnen wird. Siehe Abb. 4. Ersatz bitte telefonisch an Balanced Body. WARTUNG DER REFORMER-ROLLEN UND -SCHIENEN TRAPEZ-TISCH (CADILLAC) & TÜRME Reinigung der Schienen und Rollen (wöchentlich). -
Seite 137: Reinigung & Und Wartung Der Polsterung
Wenn Sie Verschleiß an den Schiebeknopfstiften bemerken, Die Verwendung der 4. Seite der PTS zusammen mit dem wenden Sie sich für Ersatz bitte an Balanced Body. Die Verwendung Sicherheitsgurt ist sehr empfehlenswert, um Verletzungen der PTS in diesem Zustand kann zu Verletzungen führen. -
Seite 138: Überprüfen Und Festziehen Von Muttern Und Schrauben
Schieber dürfen nicht aus den Löchern fallen. Wenn die Stifte U.S. und Canada: 1-800-PILATES (1-800-745-2837) nicht in den Rohrbohrungen bleiben, müssen die Zugknöpfe ersetzt United Kingdom: 0800 014 8207 werden; Wenden Sie sich für Ersatzteile an Balanced Body. Andere Orte: +1 916-388-2838 Fax: 916-379-9277 E-Mail: info@pilates.com INSPEKTION DER AUSRÜSTUNG UND... -
Seite 139: Zusammenbau Des Allegro
Zusammenbau des Allegro 2 Reformer von Balanced Body ® ® TEILELISTE Beschreibung Teilenr. Stk. Allegro 2 Reformer mit Schlitten und Seilen Allegro 2 Fußstange 617-070 Schulterstützen (1 Paar) 950-168 Ständer * 950-165 SoftTouch-Doppelschlaufen (1 Paar) 101-034 Rote Feder SPR9070 Blaue Feder... -
Seite 140: Zusammenbau Des Allegro 2 Reformer
I. ZUSAMMENBAU DES ALLEGRO 2 REFORMER A. SCHACHTEL ÖFFNEN: 3. Suchen Sie die Seile, die aus der Vorderseite des Schlittens ragen. Schieben Sie den Lanyard am Ende des Seils in das HINWEIS: Zu Transportzwecken ist am Fußstangenmechanismus untere Fenster des Ständers und durch das obere Fenster im Rahmen ein Gummiseil befestigt. -
Seite 141: Anbringen Der Fussstange
D. ANBRINGEN DER FUSSSTANGE Den Reformer nicht auf die Seite legen, bevor die Fußstange installiert ist. Tipps zum Anfangen: Im Großen und Ganzen ist der Allegro 2 einfach zusammenzubauen, aber dies ist der komplizierteste Teil und muss richtig ausgeführt werden. Sie können die Anbringung der Fußstange auch im Podcast auf der FAQ &... - Seite 142 Abb. G zeigt ein Schnittbild mit entfernter Fußstange und einfacher, wenn der Reformer 5-36 cm auf ein festes Objekt Reformer-Schiene, damit Sie genau sehen können, was während angehoben wird. dieses Schritts im Inneren der Rahmenschiene passiert. Wenn Sie die Klebemarkierung erreicht haben, senken Sie die Fußstange 8.
-
Seite 143: Anbringen Der Federteller
Die Fußstange ist nun verwendungsbereit. Seilsystems des Allegro 2 finden Sie auf der Website. E. ANBRINGEN DER FEDERTELLER Balanced Body-Federn sind werksseitig installiert. Um die Federteller anzubringen, die Feder vom Fußende des Reformer abnehmen. Schieben Sie den Schlitz des Federtellers auf den Hals der Feder (siehe Abb. - Seite 144 II. VERWENDUNG DER SEILANPASSUNG: EASYSET FUSSSTANGE Siehe Pfeil A in Abb. N. Ziehen Sie den Hebel weg von der Kopfstütze (nicht nach unten drücken). Die Seile werden automatisch in den Schlitten zurückgezogen (kürzer) oder EINSTELLEN DER FUSSSTANGE UND DER sie können durch Herausziehen verlängert werden. Wenn die FUSSSTANGENPOSITION gewünschte Länge erreicht ist, lassen Sie den Hebel los und die Seile rasten ein.
-
Seite 145: Sicherheit & Wartung
Training abbrechen. unsicher werden. » Nicht auf die Fußstange stellen. Fragen? Sie erreichen den technischen Kundendienst von Balanced Body unter der Nummer 1-800-PILATES » Konsultieren Sie Ihren Arzt vor Beginn eines (in den USA) oder +1-916-388-2838 (international) oder Trainingsprogramms. -
Seite 146: Definition Der Begriffe Für Den Übungsaufbau
Allegro® Reformer ÜBUNGEN DEFINITION DER BEGRIFFE FÜR DEN „HUNDRED“, ALLE STUFEN ÜBUNGSAUFBAU 10 Sätze Federn: 1 – 3 Fußbügel: kein / Schlaufen: normal / Kopfstütze: oben » Stufe: Zur Durchführung der Übungen benötigtes Fachwissen. » Wiederholungen: Gibt an, wie oft ein bestimmter »... -
Seite 147: Füsse In Den Riemen, Stufe
FÜSSE IN DEN RIEMEN, STUFE 1 6 Wiederholungen Einstellung: 2 Federn Fußbügel: beliebig / Schlaufen: normal Schwerpunkt der Übung »Atmung: Ausatmen beim Strecken / Einatmen beim Beugen, oder Einatmen beim Strecken / Ausatmen beim Beugen Starting Positions - Leg Lowers 1 »Wirbelsäule ist auf der Matte oder in neutraler Position »Eingezogene Bauchmuskulatur »Stärkung der Bauchmuskulatur... -
Seite 148: Armübungen, Stufe
ARMÜBUNGEN, STUFE 1 - 2 4 – 10 Wiederholungen Federn: 1-2 Box: längs, quer oder keine Schlaufen: sehr kurz, kurz oder normal Schwerpunkt der Übung » Atmung: beim Heranziehen einatmen, beim Entspannen ausatmen » Stärkung des Bizeps, Trizeps, Pektoralis und Deltamuskels »... -
Seite 149: Fussübungen, Alle Stufen
FUSSÜBUNGEN, ALLE STUFEN 10 Wiederholungen Federn: 2 – 4 Federn Fußbügel: mittig oder hoch / Kopfstütze: oben Schwerpunkt der Übung Auf-der-Stelle-Laufen » Atmung: Ausatmen beim Strecken / Einatmen beim Beugen, Die Fußballen sind auf dem Fußbügel. Eine Ferse nach hinten oder Einatmen beim Strecken / Ausatmen beim Beugen in ziehen, das andere Knie beugen. -
Seite 151: Einbau Des Towers In Den Allegro
Einbau des Towers in den Allegro® 2 TEILELISTE » Auf der anderen Seite wiederholen. Beschreibung Teilenummer Stk. Tower-Rahmen 617-061 » Nehmen Sie einen Ständer Tower-Halterungen (1 Paar) 950-171 und ein Beinendstück in Untere Federhalterungen (1 Paar) 950-170 die Hände und ziehen Push-Through-Stange 617-064 Sie das Kopfende aus... -
Seite 152: Untere Federhalterung Anbringen
Die in Schritt 1 entfernten Muttern wieder locker anschrauben. 5. UNTERE FEDERHALTERUNG ANBRINGEN Die Halterungen sollten wie in Abb. D dargestellt aussehen. Entfernen Sie, falls notwendig, alle vorhandenen Ständer. Setzen Sie die untere Federhalterung in die Ständerfassung (siehe Abb. G). Stellen Sie sicher, dass die Knöpfe unter dem Reformer mit den Federhalterungen eingerastet sind und ziehen Sie die Knöpfe fingerfest an. -
Seite 153: Optionale Vierte Seite Der Pts
Sie den Schlitten bis zum Kopfende des Reformer. Legen Sie die Matte (mit der gepolsterten Seite nach oben) in » Ersatzpolsterung erhalten Sie bei Balanced Body. den Rahmen und schieben Sie die hölzerne Zunge unter die Standplattform am Fußende des Rahmens. -
Seite 154: Umfasst Die Anleitung Für Den Allegro
Anleitung für den Allegro® 2 Reformer Optionen und Zubehör UMFASST DIE ANLEITUNG FÜR DEN ALLEGRO 2: II. INSTALLIEREN DES ALLEGRO 2-FUSSRIEMENS Führen Sie die Laschen des Fußriemens zwischen dem Rahmen » Fußplatte (Springbrett) Seite 132 und der Basisplattform durch die Fußlaschen und dann rund um die Haken auf der Unterseite der Basisplattform wie in »... -
Seite 155: Liste Der Teile
III. INSTALLIEREN DER FUSSVERLÄNGERUNG UND STÜTZSTANGEN 5/8 Zoll Richtschrauben LISTE DER TEILE Fußverlängerung Beschreibung Teilnummer Anzahl 3/8 Zoll U-Scheibe 5/8 Zoll Schrauben GEN9942 3/8 Zoll Schraubensicherung Fußverlängerungen 617-007 3/8 Zoll U-Scheiben GEN9963 5 Zoll Bolzen 3/8 Zoll Schraubensicherung GEN9962 5 Zoll Bolzen GEN9961 Fußsockel für die Fußverlängerung... -
Seite 156: Installieren Der Rollen
Rollen oder mit installiertem Turm aufstellen. Gummifuß V. WANDHALTERUNGSRIEMEN Bolzen und U-Scheiben Für zusätzliche Sicherheit bietet Balanced Body einen Riemen für Abb. G vertikale Lagerung (Teil# 1001-000), der den Allegro 2 (ohne Turm) in seiner stehenden Position mit Rollen an einer Wand befestigt. -
Seite 157: Anbringen Der Matte
Matte (mit der gepolsterten Seite nach oben) am Rahmen an und führen Sie die hölzerne Zunge der Matte unter der Basisplattform am Fußende des Rahmens ein. FRAGEN? Kontaktieren Sie den technischen Kundendienst von Balanced Body unter 1-800-PILATES oder +1-916-388-2838... -
Seite 158: Allegro Tower Übungen
Allegro Tower ÜBUNGEN DEFINITION DER BEGRIFFE FÜR DEN ÜBUNGSAUFBAU » Stufe: Zur Durchführung der Übungen benötigtes Fachwissen: » Ausgangsposition: gibt an, wo und wie eine Übung am » Wiederholungen: gibt an, wie oft ein bestimmter » Vorgaben: Spezielle Übungen, die vor Durchführung einer Bewegungsablauf durchgeführt wird. - Seite 159 Roll Backs Wasserski fahren...
- Seite 160 FÜSSE IN DEN RIEMEN, STUFE 1 6 – 10 Wiederholungen Federn: Lange Federn an der mittleren, oberen oder Über-Kopf- Befestigungsposition Schlaufen oder Klettverschluss um die Fußgelenke oder Fußsohlenbögen Schwerpunkt der Übung Gehen » Atmung: Ausatmen beim Strecken / Einatmen beim Beugen, »...
-
Seite 161: Füsse In Den Gurten, Seitenlage - Adduktor-Zugübung, Stufe
FÜSSE IN DEN GURTEN, SEITENLAGE – ADDUKTOR-ZUGÜBUNG, STUFE 1-3 6 – 10 Wiederholungen Federn: Lange Federn sind aus einer mittleren Position angebracht. Fußgewölbe in den Schlaufen Das untere Bein befindet sich unterhalb des Trapeze Table Riemens Schwerpunkt der Übung » Atmung: ausatmen/ Bein absenken, einatmen/ Bein abspreizen »... -
Seite 162: Fuss- Und Beinübungen, Stufe
FUSS- UND BEINÜBUNGEN, STUFE 1 10 Wiederholungen Federn: 2 lange violette Federn sind von der Unterseite her an der Push-Through-Stange angebracht. Schwerpunkt der Übung » Atmung: beim Wegdrücken einatmen, beim Heranziehen ausatmen » Wirbelsäule ist auf der Matte oder in neutraler Position »... - Seite 163 KATZE, STUFE 3 4 Wiederholungen Federn: 2, von oben mit der Durchdrückstange verbundene, kurze Federn Schwerpunkt der Übung » Atmung: ausatmen/vorbeugen, einatmen/wegdrücken, » ausatmen/zurückziehen, einatmen/aufrichten » Beweglichkeit der Wirbelsäule » Stabilität/Beweglichkeit der Schulterblätter » Einziehen/ Anheben der Bauchmuskulatur » Koordination der Atmung bei völliger Beweglichkeit der Wirbelsäule Vorsicht bei: »...
- Seite 164 Contact Us 1-800-PILATES | +1-916-388-2838 pilates.com | info@pilates.com 10828 | 02.27.20...