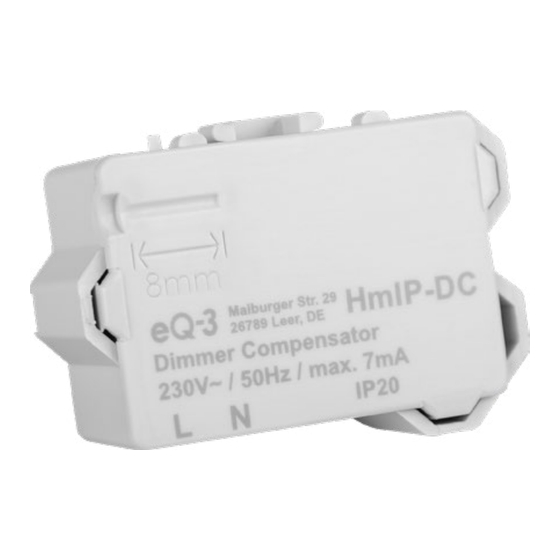
Inhaltszusammenfassung für HomeMatic IP HmIP-DC
- Seite 1 Installationsanleitung Installation instruction Dimmerkompensator S. 2 Dimming Compensator p. 20 HmIP-DC...
-
Seite 2: Lieferumfang
Lieferumfang Anzahl Bezeichnung Homematic IP Dimmerkompensator Bedienungsanleitung Dokumentation © 2020 eQ-3 AG, Deutschland Alle Rechte vorbehalten. Ohne schriftliche Zustimmung des Herausgebers darf diese Anleitung auch nicht auszugsweise in irgendeiner Form reproduziert werden oder unter Verwendung elektronischer, mechanischer oder chemischer Verfahren verviel- fältigt oder verarbeitet werden. - Seite 3 8 mm...
-
Seite 8: Inhaltsverzeichnis
Inhaltsverzeichnis Hinweise zur Anleitung ...........9 Gefahrenhinweise ............9 Funktion und Geräteübersicht ........12 Allgemeine Systeminformationen ......12 Inbetriebnahme .............. 13 Installationshinweise ............13 Installation ................15 5.2.1 Installation in einer Unter- oder Aufputzdose ..15 5.2.2 Installation auf einer Hutschiene ......16 Wartung und Reinigung ..........17 Technische Daten ............18... -
Seite 9: Hinweise Zur Anleitung
Hinweise zur Anleitung Hinweise zur Anleitung Lesen Sie diese Anleitung sorgfältig, bevor Sie Ihr Home- matic IP Gerät in Betrieb nehmen. Bewahren Sie die An- leitung zum späteren Nachschlagen auf! Wenn Sie das Gerät anderen Personen zur Nutzung über- lassen, übergeben Sie auch diese Anleitung. Benutzte Symbole: Achtung! Hier wird auf eine Gefahr hingewiesen. - Seite 10 Gefahrenhinweise Aus Sicherheits- und Zulassungsgründen (CE) ist das eigenmächtige Umbauen und/oder Verän- dern des Geräts nicht gestattet. Verwenden Sie das Gerät nicht, wenn es von au- ßen erkennbare Schäden, z. B. am Gehäuse oder an den Anschlussbuchsen ausweist. Lassen Sie das Gerät im Zweifelsfall von einer Fachkraft prüfen.
- Seite 11 Gefahrenhinweise Das Gerät ist Teil der Gebäudeinstallation. Bei der Planung und Errichtung sind die einschlägigen Normen und Richtlinien des Landes zu beachten. Der Betrieb des Geräts ist ausschließlich am 230 V/50 Hz-Wechselspannungsnetz zulässig. Arbeiten am 230-V-Netz dürfen nur von einer Elektrofachkraft (nach VDE 0100) erfolgen.
-
Seite 12: Funktion Und Geräteübersicht
Anschlussklemme für N (Neutralleiter) Optional: Fixierungslasche für Kabelbinder bei Verdrahtung mit flexiblen Leitungen Allgemeine Systeminformationen Dieses Gerät ist Teil des Homematic IP Systems und kann mit allen Phasenabschnittsdimmern von Homematic IP und anderen Herstellern kombiniert werden. Alle technischen Dokumente und Updates finden Sie... -
Seite 13: Inbetriebnahme
Inbetriebnahme Inbetriebnahme Installationshinweise Bitte lesen Sie diesen Abschnitt erst vollständig, bevor Sie mit der Installation beginnen. Hinweis! Installation nur durch Personen mit einschlägigen elektrotechnischen Kenntnissen und Erfahrungen!* Durch eine unsachgemäße Installation gefährden Sie • Ihr eigenes Leben; • das Leben der Nutzer der elektrischen Anlage. Mit einer unsachgemäßen Installation riskieren Sie schwere Sachschäden, z. - Seite 14 Inbetriebnahme • IP-Schutzarten; • Einbau des Elektroinstallationsmaterials; • Art des Versorgungsnetzes (TN-System, IT-System, TT-System) und die daraus folgenden Anschlussbedin- gungen (klassische Nullung, Schutzerdung, erforderliche Zusatzmaßnahmen etc.). Die Installation darf nur in handelsüblichen Schal- terdosen (Gerätedosen) gemäß DIN 49073-1 oder Aufputzdosen gemäß DIN 60670-1 (z. B. Abox 025 oder Abox 040) erfolgen.
-
Seite 15: Installation
Inbetriebnahme Zugelassene Leitungsquerschnitte zum Anschluss an den Dimmerkompensator sind: Starre Leitung [mm Flexible Leitung ohne Aderendhülse [mm 0,2-1,50 0,2-1,50 Zum Anschließen und auch zum Lösen der Leiter ist der weiße Betätigungshebel oben auf den Klemmen zu drücken. Isolieren Sie die Anschlussleitungen auf eine Län- ge von 8 mm ab (s. -
Seite 16: Installation Auf Einer Hutschiene
Inbetriebnahme der Anschlusszeichnung an (s. Abbildung 4). • Setzen Sie das Gerät in eine geeignete Unter- putzdose (s. Abbildung 5+6) oder alternativ in eine Aufputzdose (z. B. Abox 025 oder Abox 040) (s. Abbildung 7+8). • Schließen Sie die Unter- bzw. Aufputzdose mit einer geeigneten Abdeckung. -
Seite 17: Wartung Und Reinigung
Wartung und Reinigung fest auf der Schiene sitzt. • Schließen Sie den Dimmerkompensator gemäß der Anschlusszeichnung an (s. Abbildung 4). • Setzen Sie die Abdeckung des Stromkreisvertei- lers wieder auf. • Schalten Sie die Sicherung wieder ein. Wartung und Reinigung Das Gerät ist wartungsfrei. -
Seite 18: Technische Daten
Technische Daten Technische Daten Geräte-Kurzbezeichnung: HmIP-DC Versorgungsspannung: 230 V/50 Hz Stromaufnahme: 7 mA max. Leitungsart und -querschnitt: starre und flexible Leitung, 0,2-1,5 mm² Installation: nur in Schalterdosen (Gerätedosen) gemäß DIN 49073-1, Verbindungsdosen (Aufputzdosen) gemäß DIN 60670-1 oder auf Tragschiene (Hutschiene, DIN-Rail) gemäß... - Seite 19 Technische Daten Entsorgungshinweis Gerät nicht im Hausmüll entsorgen! Elektroni- sche Geräte sind entsprechend der Richtlinie über Elektro- und Elektronik-Altgeräte über die örtlichen Sammelstellen für Elektronik-Altgeräte zu entsorgen. Konformitätshinweis Das CE-Zeichen ist ein Freiverkehrszeichen, das sich ausschließlich an die Behörden wendet und keine Zusicherung von Eigenschaften beinhaltet.
- Seite 33 Kostenloser Download der Homematic IP App! Free download of the Homematic IP app! Bevollmächtigter des Herstellers: Manufacturer’s authorised representative: eQ-3 AG Maiburger Straße 29 26789 Leer / GERMANY www.eQ-3.de...


