Herunterladen Inhalt Inhalt Diese Seite drucken

Werbung

Verfügbare Sprachen
  • DE

Verfügbare Sprachen

  • DEUTSCH, seite 9
Instructions for Use
UNLOADER
CUSTOM
®

Werbung

Inhaltsverzeichnis
loading

Inhaltszusammenfassung für Ossur UNLOADER CUSTOM

  • Seite 1 Instructions for Use UNLOADER CUSTOM ®...
  • Seite 2 EN | Instructions for Use DE | Gebrauchsanweisung Notice d’utilisation Instrucciones para el uso NL | Gebruiksaanwijzing...
  • Seite 5: List Of Parts

    H. Quick Fit Buckle I. Alligator clip J. SmartDosing dial ® LIST OF PARTS Unloader Custom with Standard DFS (Figure 2) A. Dynamic Force Strap (DFS) B. Thigh strap C. Upper calf strap D. Lower calf strap E. Hinge F. Thigh shell G.
  • Seite 6 BRACE APPLICATION (FOR SMARTDOSING OPTION) ® 1. Place the brace on patient's leg. Align the center of hinge at mid patella and midline of A/P 2. Wrap the upper calf strap around the back of your leg above the calf muscle, thread it through the D-ring and secure (Figure 3).
  • Seite 7 -10 degrees hyperextension Remove ROM Stop. Insert ROM Stop Screw in the distal stop hole. POLI-AXIAL ADJ™ HINGE Things to know before adjusting the brace: To treat either the medial or lateral compartment osteoarthritis, the brace has a user-friendly adj™ hinge mechanism, which can be adjusted to optimize the unloading effect in either the medial or lateral compartment of the knee.
  • Seite 8 • Do not place in dryer HINGE • For safety reasons, hinge should only be disassembled by a healthcare professional. • Check regularly for foreign materials in hinge (i. e. dirt or grass). • Clean dirt from hinge using tap water and/or compressed air. Note: If brace is used in salt water or chlorinated water, rinse well with fresh tap water and air dry brace.
  • Seite 9: Haftungsausschluss

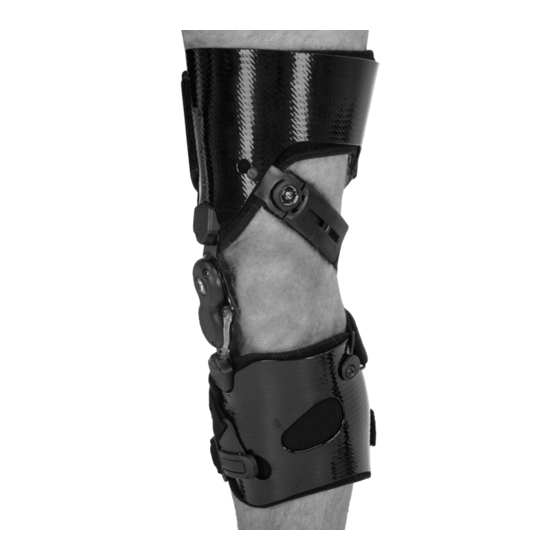
    Anatomie, dem Aktivitätsgrad und der gewünschten Konfiguration des Patienten passt. Aufgrund der Individualität der Orthese können die Bilder in der Gebrauchsanleitung sich von dem Produkt, das der Patient erhalten hat, unterscheiden. TEILELISTE Unloader Custom with SmartDosing (Abbildung 1) ® A. Dynamic Force Strap (DFS) B. Oberschenkelriemen C.
  • Seite 10: Anlegen Der Orthese (Für Standard Dfs-Option)

    Streckanschlag sowie an der Schalenkontur dürfen ausschließlich durch Orthopädietechniker vorgenommen werden. Der Orthopädietechniker muss den Patienten in die Verwendung des Dynamic Force Control-Systems einweisen. ANLEGEN DER ORTHESE (SMARTDOSING -OPTION) ® 1. Legen Sie die Orthese auf das Bein des Patienten. Richten Sie die Gelenkmitte auf die Kniemitte und Mittellinie A-P aus.
  • Seite 11 im distalen Anschlagloch. ROM Stop Screw in distal stop hole. 5 Grad Flexionsanschlag entfernen. Richten Sie den Flexionsanschlag mit dem langen Ende nach oben aus. Befestigen Sie die ROM-Anschlagschraube im distalen Anschlagloch. 10 Grad Flexionsanschlag entfernen. Befestigen Sie die ROM-Anschlagschraube im nahe gelegenen Anschlagloch.
  • Seite 12: Pflege Der Orthese

    5. Verwenden Sie eine Gewindesicherung für die Verriegelungsschraube. 6. Ziehen Sie die Feststellschraube am Gelenk an. Ziehen Sie die Schraube nicht zu fest an, dies kann zu vorzeitigem Gelenkversagen führen. 7. Wiederholen Sie die Einstellung für den anderen ADJ-Mechanismus. 8. Wenn Sie fertig sind, ersetzen Sie die ADJ-Abdeckungen. 9.
  • Seite 13: Clause De Non-Responsabilité

    H. Boucle d’attache rapide I. Pince crocodile J. Cadran SmartDosing ® LISTE DES PIÈCES Unloader Custom à la norme DFS (Figure 2) A. Sangle système de force dynamique (DFS) B. Sangle de cuisse C. Sangle de mollet supérieure D. Sangle de mollet inférieure E.
  • Seite 14 coque. Il incombe au professionnel de santé de guider le patient quant à l’utilisation du système de contrôle de force dynamique. POSE DE L’ORTHÈSE (POUR OPTION SMARTDOSING ® 1. Placez l’orthèse sur la jambe du patient. Alignez le centre de l’articulation avec le milieu de la rotule et du positionnement A/P 2.
  • Seite 15 5 degrés Retirez la butée d’amplitude de mouvement. Orientez la butée avec la longue extrêmité vers le haut. Insérez la vis d’amplitude de mouvement dans le trou de butée distale. 10 degrés Retirez la butée d’amplitude de mouvement. Insérez la vis d’amplitude de mouvement dans le trou de butée proximale.
  • Seite 16 7. Répétez la procédure de réglage pour l’autre mécanisme adj™. 8. Une fois l’opération terminée, replacez les caches adj™. 9. Remettez correctement l’orthèse de la jambe du patient et évaluez l’ajustement. Assurez-vous que la sangle DFS™ est appliquée avec une tension suffisante pour augmenter les effets de déchargement de l’articulation ADJ™.
  • Seite 17: Cláusula De Exención De Responsabilidad

    Por lo tanto, las imágenes en las instrucciones de uso pueden tener un aspecto diferente al del producto que el paciente haya recibido. LISTA DE PIEZAS Unloader Custom con SmartDosing (Figura 1) ® A. Sistema de correa Dynamic Force Strap (DFS) B.
  • Seite 18 un profesional de la salud. El profesional de la salud es el responsable de asesorar a los pacientes sobre el uso del sistema de control de fuerza dinámica(Dynamic Force Control System). COLOCACIÓN DEL SOPORTE (PARA LA OPCIÓN CON SMARTDOSING ® 1. Coloque el soporte sobre la pierna del paciente. Alinee el centro de la articulación con el centro de la rótula y la línea media A/P.
  • Seite 19 0 grados Retire el tope del ROM. Oriente el tope del ROM con extremo largo hacia abajo. Introduzca el tornillo del ROM en el agujero de tope distal. ROM Stop Screw in distal stop hole. 5 grados Retire el tope del ROM. Oriente el tope del ROM con el extremo largo hacia arriba.
  • Seite 20: Mantenimiento Del Soporte

    6. Vuelva a apretar el tornillo de bloqueo para ajustarlo a la articulación. No lo ajuste en exceso ya que esto puede provocar fallos prematuros en la articulación. 7. Repita el procedimiento de ajuste para el otro mecanismo de la adj™. 8.
  • Seite 21 F. Dijbeenschaal G. Kuitschaal H. Snelsluitknop I. Alligatorclip J. SmartDosing doseerknop ® ONDERDELENLIJST Unloader Custom met Standard DFS (Figuur 2) A. Dynamic Force Strap (DFS) B. Dijbeenband C. Bovenste kuitband D. Onderste kuitband E. Scharnier F. Dijbeenschaal G. Kuitschaal INDICATIES VOOR GEBRUIK •...
  • Seite 22: Interne Uni-Centrische Adj

    is verantwoordelijk voor het inlichten en adviseren van de patient over het gebruik van het Dynamic Force Control Systeem. AANTREKKEN VAN DE BRACE (VOOR SMARTDOSING -OPTIE) ® 1. Plaats de brace op het been van de patiënt. Lijn het midden van het scharnier uit op het midden van de knieschijf en middellijn van A / P.
  • Seite 23 10 graden Verwijder de ROM Stop. Plaats de ROM Stopschroef in de proximale stopopening. 20 graden Verwijder de ROM Stop. Richt de ROM Stop met het lange uiteinde naar beneden. Plaats de ROM Stopschroef in de proximale stopopening. -10 Graden hyperextensie Verwijder de ROM Stop.
  • Seite 24 ACCESSOIRES BRACE Össur biedt accessoires aan die voldoen aan de specifieke eisen van de Unloader Custom . De volgende accessoires zijn verkrijgbaar via de ® leverancier van uw brace of via de afdeling klantenservice van Össur.
  • Seite 25 EN – Caution: This product has been designed and tested based on single patient usage and is not recommended for multiple patient use. If any problems occur with the use of this product, immediately contact your medical professional. This Product Contains Natural Rubber Latex Which May Cause Allergic Reactions DE –...
  • Seite 26 Foothill Ranch, CA 92610, USA Miniparc III Tel: +1 (949) 382 3883 Edificio E, Despacho M18 Tel: +1 800 233 6263 28109 El Soto de la Moraleja, ossurusa@ossur.com Alcobendas Madrid – España Össur Canada Tel: 00 800 3539 3668 2150 – 6900 Graybar Road orders.spain@ossur.com...

Inhaltsverzeichnis