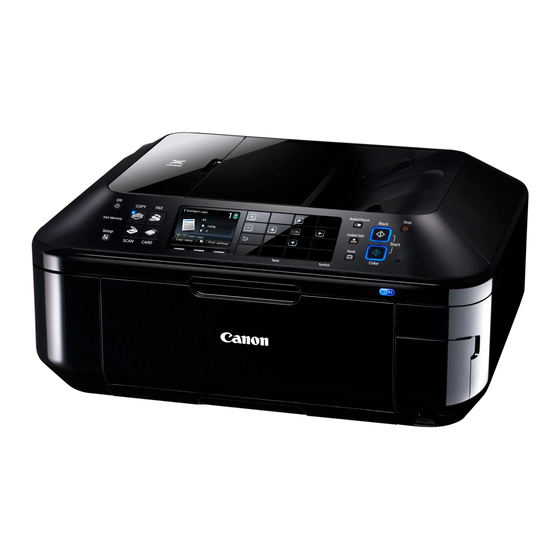
Canon MX885 Handbuch
Inhaltsverzeichnis
Getting Started
Démarrage
Inbetriebnahme
Guida Rapida
Make sure to read this manual before using the machine. Please keep it in hand for future reference.
Veillez à lire ce manuel avant d'utiliser la machine. Conservez-le à portée de main afin de pouvoir vous y reporter ultérieurement.
Bitte lesen Sie dieses Handbuch vor der Verwendung des Geräts. Bewahren Sie es so auf, dass Sie es bei Bedarf zur Hand haben.
Leggere questo manuale prima di utilizzare la stampante. Tenerlo a portato di mano per consultarlo all'occorrenza.
ENGLISH
FRANÇAIS
DEUTSCH
ITALIANO
Inhaltsverzeichnis

Verwandte Anleitungen für Canon MX885


Inhaltszusammenfassung für Canon MX885
- Seite 1 ENGLISH FRANÇAIS DEUTSCH ITALIANO Getting Started Démarrage Inbetriebnahme Guida Rapida Make sure to read this manual before using the machine. Please keep it in hand for future reference. Veillez à lire ce manuel avant d’utiliser la machine. Conservez-le à portée de main afin de pouvoir vous y reporter ultérieurement. Bitte lesen Sie dieses Handbuch vor der Verwendung des Geräts.
-
Seite 2: Symbols Used In This Document
U.S. and other countries. aux États-Unis et/ou dans d’autres pays. • Bonjour ist eine Marke von Apple Inc., eingetragen in den Vereinigten Staaten und anderen Ländern. Model Number: K10363 (MX885) Référence du modèle : K10363 (MX885) Modellnummer: K10363 (MX885) Modello numero: K10363 (MX885) -
Seite 3: F E Hl Erbe He Bungshan Dbu Ch
On-screen manuals can be viewed on a computer. They are included on the Setup CD-ROM and are installed during the software installation. Some parts of the manual may be displayed in English. For details on opening the on-screen manuals, refer to page 70. Les manuels en ligne peuvent être visualisés sur un ordinateur. - Seite 4 ■ Contents ■ Sommaire ■ Inhalt ■ Sommario 1 Preparation P.5 1 Préparation P.5 1 Vorbereitung S.5 1 Preparazione P.5 2 Install the Print Head P.12 2 Installation de la tête d’impression P.12 2 Einbauen des Druckkopfs S.12 2 Installazione della testina di stampa P.12 3 Installation des réservoirs d’encre P.16 3 Einsetzen der Tintenpatronen S.16...
- Seite 5 ■ Machine Installation Network Connection Flow USB Connection Connexion réseau ■ Procédure d’installation Netzwerkverbindung Connexion USB de la machine Connessione di rete ■ Ablauf der Installation Wireless Connection Wired Connection Using from Additional USB-Verbindung des Geräts Connexion sans fil Connexion filaire Computers Drahtlose Verbindung Kabelverbindung...
- Seite 6 ■ Devices Required for Wireless/Wired Connection ■ Périphériques requis pour une connexion sans fil/filaire ■ Erforderliche Geräte für drahtlose/Kabelverbindung ■ Dispositivi necessari per la connessione wireless/cablata When using the machine over a wireless/wired connection, the following devices are required depending on the connection method. Lorsque vous utilisez la machine via une connexion sans fil/filaire, les dispositifs suivants sont requis selon la méthode de connexion.
- Seite 7 Remove all orange tape and protective materials from the inside and • Do not install the machine where an object may fall on it. In addition, outside of the machine. do not place any object on the top of the machine. It may fall into the machine when opening covers, resulting in malfunction.
- Seite 8 Do not connect the power cord yet. Ne branchez pas encore Make sure all the following items are supplied. le cordon Some accessories (1) are stored within the Paper Output Tray (A). Open the Paper Output Tray to remove them. 1.
- Seite 9 Connect one end of supplied Use FAX features? • If you cannot send faxes after installing the machine, check the following: • The basic connection telephone line cable (B) to the 1. The telephone line cable is connected to connector labeled "L" on the method is described Go to lower connector labeled "L"...
- Seite 10 Only when connecting a telephone or an answering machine Connexion d’un téléphone ou d’un répondeur uniquement Nur bei Anschluss an ein Telefon oder einen Anrufbeantworter Solo se si collega un telefono o una segreteria telefonica Remove the Cap (D) (1), then connect a telephone or an answering machine with Insert the power cord into the connector on the left side at the back of the machine the telephone line cable (2).
- Seite 11 Press the ON button (F). Use the { or } button (G) on the Operation Panel to select the language for the LCD (Liquid Crystal Display) (H), then press the OK button. • The machine may make some operating noises. This is normal operation. •...
- Seite 12 Select the country or region of use, then press the OK button. When this screen is displayed, press the OK button, then proceed to the next step. • The Country select screen may not be displayed depending on the country or region of purchase.
- Seite 13 When it is necessary to turn off the machine Lorsqu’il est nécessaire de mettre la machine hors tension Wenn das Gerät ausgeschaltet werden muss Se è necessario spegnere la stampante • Before removing the power plug, make sure that all the lamps on the Operation Panel are not lit. Removing the power plug while any of the lamps on the Operation Panel is lit or flashing may cause drying and clogging of the Print Head, resulting in poor printing.
- Seite 14 1. Make sure the Document Cover (A) is closed, then lift to open the Scanning Unit (Cover) (B). 2. Fix it with the Scanning Unit Support (C). • When you lift the Scanning Unit (Cover), do not touch the buttons on the Operation Panel (D) or the LCD (E). May result in unintended operation. 1.
- Seite 15 The Print Head Holder (F) moves to the installation position. Firmly lift the part (G) of the Print Head Lock Lever in the Print Head Holder until it stops. If the Print Head Holder does not move, make sure that the machine is turned on. The Print Head Lock Lever may feel heavy.
- Seite 16 Remove the Print Head from the silver package. Remove the orange protective cap. • Handle the Print Head carefully. Do not drop or apply excessive pressure to it. • Do not touch the inside (I) or metal parts (J) of the Print Head. The machine may not print properly if you touch them. •...
- Seite 17 Tilt the Print Head forward and set it in place as shown. Hold the Print Head Lock Lever firmly and lower it completely. • Do not knock the Print Head against the sides of the holder. • Install in a well-lit environment. •...
- Seite 18 1. Remove the orange tape completely. 1. Hold the ink tank with the orange protective cap (A) pointing up. 2. Remove the protective film completely. 2. Hold the ink tank being careful not to cover the area (B) including the L-shape air hole. •...
- Seite 19 Hold the ink tank by its sides and slowly twist the orange protective cap 90 Tilt the ink tank, then insert it under the label and against the back end of the slot. degrees horizontally to remove it off. Make sure that the color of the label matches the ink tank. Do not push the sides of the ink tank.
- Seite 20 Press the PUSH mark on the ink tank firmly until it Install all the other ink tanks in the same way according to the color order indicated on the label. clicks. When the installation is completed properly, the Ink lamp lights Make sure all the Ink lamps light red.
- Seite 21 Wait for about 4 minutes until the LCD changes as shown in the illustration, then 1. Lift the Scanning Unit (Cover) (E) slightly. proceed to the next step. 2. Fold the Scanning Unit Support (F) towards the left. Do not press the OK button yet. 3.
- Seite 22 Extend the Paper Support (A). Move the Paper Guides Load a sheet of supplied specialty paper (Matte Photo Paper MP- (B) to both edges. 101) in the Rear Tray (C). 1. Open the cover. Load paper in portrait orientation so that the cut corner (D) is at the top right. 2.
- Seite 23 Slide the left and right Make sure the Paper Press the OK button. When the pattern is printed, remove the paper. Confirm the above message, Paper Guides against Output Tray (E) is open. Print Head Alignment then proceed to the next step. both edges of the paper.
-
Seite 24: Spezialpapier Einschließlich Fotopapier
With the machine, the paper source varies depending on the media type. Avec la machine, la source du papier varie en fonction du type de support. Die Papierquelle des Geräts richtet sich nach dem verwendeten Medientyp. Con la stampante, l'alimentazione della carta varia in base al tipo di supporto. Specialty paper including photo paper Plain paper Load paper in the Rear Tray (A). -
Seite 25: Einlegen Von Spezialpapier
This section describes how to load plain paper in the Cassette. For details on how to load specialty paper in the Rear Tray, refer to in “4 Align the Print Head” on page 20. Cette section explique comment charger du papier ordinaire dans la cassette. Pour plus d’informations sur le chargement de papier spécial dans le réceptacle arrière, reportez-vous aux étapes à... - Seite 26 Move the left Paper Guide (F) to the edge. Slide the front Paper Guide (G) to align with the size Load plain paper. of the paper. Load paper with the printing side facing down. The front Paper Guide will click and stop when it aligns with the corresponding mark of paper size.
- Seite 27 Align the paper to the right side of the Insert the Cassette slowly into the Cassette (1), and slide the left Paper machine until it clicks into place. Guide completely against the left edge of the paper (2). Make sure that the height of the paper stack does not exceed the line (H).
- Seite 28 Read this section only when using Depending on your needs, select one of the following three modes for receiving faxes. You can the fax features. change the receive mode after installation is complete. For details, refer to "Setting the Receive Mode"...
- Seite 29 Intended Use Receive Mode Utilisation prévue Mode Réception Verwendungszweck Empfangsmodus Utilizzo desiderato Modalità di ricezione • Use a single telephone line for both voice and fax calls. • Prioritize voice calls over fax reception. • Connect an answering machine. TEL priority mode Mode priorité...
- Seite 30 Responses to Calls in Each Mode Réponses aux appels dans chaque mode Anrufannahme im jeweiligen Modus Risponde alle chiamate in ogni modalità When a fax call arrives When a voice call arrives Lorsqu’un appel de télécopie arrive Lorsqu’un appel vocal arrive Wenn ein Faxanruf eingeht Wenn ein Telefonanruf eingeht Quando si riceve una chiamata fax...
- Seite 31 Press the FAX button (A). Button layout on the Operation Panel changes automatically depending on use. When the display changes, check the button positions. Appuyez sur le bouton FAX (A). Use the { or } button (C) to select a receive mode, Press the center FUNCTION button (B).
- Seite 32 Intended Use Connection Method Utilisation prévue Méthode de connexion Verwendungszweck Verbindungsmethode Utilizzo desiderato Metodo di connessione • Connect to a computer with a USB cable. USB Connection Go to "8 Install the Software (USB Connection)" on page 32. • Connexion à un ordinateur avec un câble Connexion USB Passez à...
- Seite 33 What is Network? If you are not certain whether your device (access point, router, etc.) supports wireless connection or wired connection, refer to the manual supplied with the device, or contact its manufacturer. A system to exchange information between computers by connecting them to each other with cables or via wireless communication.
- Seite 34 Do not connect the USB cable yet. Ne branchez pas encore le câble USB. Schließen Sie das USB-Kabel noch nicht an. Non collegare ancora il cavo USB. To use the machine by connecting it to a computer, software Pour pouvoir utiliser la machine à partir d’un ordinateur, vous including the drivers needs to be copied (installed) to the devez copier (installer) le logiciel, de même que les pilotes, computer’s hard disk.
-
Seite 35: Für Windows 7
Easy-WebPrint EX Easy-WebPrint EX If the USB cable is connected before the software is installed Easy-WebPrint EX Si le câble USB est connecté avant que le logiciel ne soit installé Easy-WebPrint EX Wenn das USB-Kabel angeschlossen wird, bevor die Software installiert ist Se si collega il cavo USB prima dell'installazione del software For Windows 7 Easy-WebPrint EX is Web print software that... - Seite 36 Press the ON button (A) to TURN OFF THE MACHINE. 1. Make sure that the machine has For Windows turned off. • If the program does not start 2. Turn on the computer. Operating noise may continue for up to 1 minute until the machine turns off. automatically, double-click the CD-ROM icon in Computer or My Computer.
-
Seite 37: Windows 7/Windows Vista
Windows 7/Windows Vista Click Run Msetup4.exe on the AutoPlay screen, then click Yes or Continue on the User Account Control dialog box. Windows XP If the User Account Control dialog box reappears in following steps, click Yes or Continue. Cliquez sur Exécuter Msetup4.exe (Run Msetup4.exe) dans l’écran Exécution automatique (AutoPlay), puis cliquez sur Oui (Yes) ou Continuer (Continue) dans la boîte de dialogue Contrôle de compte d’utilisateur (User Account Control). - Seite 38 Select your place of residence, then click Next. Select a country or region, then click Next. Click Easy Install. The drivers, application software, and on-screen manuals are installed. • If the Select Language screen appears, select a language, then click Next. •...
- Seite 39 USB Port Port USB USB-Anschluss Porta USB When the Printer Connection screen appears, connect the machine to the computer with a USB cable. After connecting the cable, TURN ON THE MACHINE. The USB Port is located on the right side at the back of the machine. The lower port is for USB.
- Seite 40 If the serial number is not displayed on the registration screen, input the number found inside the machine. If the Extended Survey Program screen appears Si le numéro de série n’apparaît pas à l’écran d’enregistrement, saisissez le numéro de série qui se trouve à Si l’écran Extended Survey Program apparaît l’intérieur de la machine.
- Seite 41 For Macintosh For Macintosh Solution Menu EX starts when clicking OK in the Canon Solution It is necessary to restart the computer before scanning using the Menu EX dialog. Operation Panel on the machine for the first time.
- Seite 42 Congratulations! Setup is complete. To learn more about the Solution Menu EX and on-screen manual, Installing the XPS Printer Driver proceed to page 70. To start using In Windows 7 and Windows Vista SP1 or later, the XPS the machine, proceed to page 72. Printer Driver can be installed additionally.
- Seite 43 Before Configuring Wireless Settings Avant de configurer les paramètres sans fil Vor Konfiguration der Drahtloseinstellungen Prima di configurare le impostazioni wireless After confirming the connection, perform the following Make sure that the computer and access point or router are instructions to add (connect) the machine to the network. connected.
- Seite 44 ■ Notes on Wireless Connection ■ Remarques relatives à la connexion sans fil ■ Hinweise zu drahtlosen Verbindungen ■ Note sulla connessione wireless • The configuration, router functions, setup procedures and security settings of the network device vary depending on your system environment. For details, refer to your device’s instruction manual or contact its manufacturer.
- Seite 45 ■ Check the Information for Wireless Connection ■ Vérification des informations requises pour la connexion sans fil ■ Überprüfen der Informationen für die drahtlose Verbindung ■ Verifica delle informazioni per la connessione wireless In most cases, “Easy Setup” will be used to connect the machine to your access point or router. Before you continue, you must gather the following information which will be required during the installation.
- Seite 46 For details on how to check the following information, refer to the manual of your access point or router, or contact its manufacturer. Pour plus de détails sur la vérification des informations suivantes, reportez-vous manuel de votre point d’accès ou routeur, ou contactez le fabricant. Weitere Einzelheiten zum Überprüfen der folgenden Informationen finden Sie im Handbuch des Zugriffspunkts oder Routers, oder wenden Sie sich an den Hersteller.
- Seite 47 1. Press the Setup button (A). Use the { or } button (C) to select Yes, then press the OK button. 2. Use the [ or ] button (B) to select Wireless LAN setup. When wireless connection is enabled, the Wi-Fi lamp (D) lights blue. 3.
- Seite 48 Select Easy setup, then press the OK button. Select the access point name you wrote Make sure that one of the above screens is displayed, then press down on page 44, then press the OK the OK button. button. If the above screen is not displayed, go to on page 47.
- Seite 49 When the above screen appears, press the OK button. • If Failed to connect to the access point. appears, press the OK button, make sure that the network key is correct, then enter it again. If a connection still cannot be established, refer to the printed manual: Network Setup Troubleshooting.
- Seite 50 Before Configuring Wired Settings Avant de configurer les paramètres filaires Vor Konfiguration der LAN-Einstellungen Prima di configurare le impostazioni cablate After confirming the connection, perform the following Make sure that the computer and router are connected. instructions to add (connect) the machine to the network. Vérifiez que l’ordinateur et le routeur sont connectés.
- Seite 51 ■ Notes on Wired Connection ■ Remarques relatives à la connexion filaire ■ Hinweise zu Kabelverbindungen ■ Note sulla connessione cablata • The configuration, router functions, setup procedures and security settings of the network device vary depending on your system environment. For details, refer to your device's instruction manual or contact its manufacturer.
- Seite 52 Remove the Cap (A), then connect a network device (router, etc.) with an Ethernet cable (B). 1. Press the Setup button (C). 2. Use the [ or ] button (D) to select Device settings. The Wired LAN Connector is located on the right side at the back of the machine. The upper port is for an Ethernet 3.
- Seite 53 Use the { or } button (E) to select LAN settings, then press the Select Change wireless/wired, then Select Wired LAN active, press the OK button. OK button. press the OK button. Next, read "11 Install the Software (Network Connection)" on page 52! Utilisez le bouton { ou } (E) pour sélectionner Paramètres réseau Sélectionnez Changer sans fil/câblé...
- Seite 54 If the firewall function of your security software is turned on, a warning L’installation reprend après le redémarrage de votre ordinateur. message may appear that Canon software is attempting to access the network. If such a warning message appears, set the security software to •...
- Seite 55 Easy-WebPrint EX Easy-WebPrint EX Easy-WebPrint EX Easy-WebPrint EX Easy-WebPrint EX is Web print software that is installed on the computer when installing the supplied software. Internet Explorer 7 or later (Windows) or Safari 4 or later (Mac OS X v.10.5 or later) is required to use this software.
- Seite 56 Windows 7/Windows Vista Click Run Msetup4.exe on the AutoPlay screen, then click Yes or Continue on the User Account Control dialog box. Windows XP If the User Account Control dialog box reappears in following steps, click Yes or Continue. Cliquez sur Exécuter Msetup4.exe (Run Msetup4.exe) dans l’écran Exécution automatique (AutoPlay), puis cliquez sur Oui (Yes) ou Continuer (Continue) dans la boîte de dialogue Contrôle de compte d’utilisateur (User Account Control).
- Seite 57 Select your place of residence, then click Next. Select a country or region, then click Next. Click Easy Install. The drivers, application software, and on-screen manuals are • If the Select Language screen appears, select a installed. language, then click Next. •...
- Seite 58 Click Install. If you select wireless connection on page 30 Select Use the printer with wireless LAN connection, then click Next. If you select wired connection on page 30 Select Use the printer with wired LAN connection, then click Next. Follow any on-screen instructions to proceed with the software installation.
- Seite 59 When the Printer Detection screen appears, click Next. • If the Printer Connection screen appears instead of this screen, the connection method is not correctly selected in − For Windows Click Cancel and start again from , then select the connection method, which you select on page 30, in −...
- Seite 60 On the Canon IJ Network Tool screen, select MX880 series in Printers, then click Next. • If the Check Printer Settings dialog box is displayed or the machine is not displayed in the Canon IJ Network Tool screen, refer to the printed manual: Network Setup Troubleshooting.
- Seite 61 When the Setup Completion dialog box appears, click Complete. Next, read “Information” on page 64! Lorsque la boîte de dialogue Fin de l’installation (Setup Completion) apparaît, cliquez sur Terminer (Complete). Lisez ensuite la section « Informations » à la page 64. Wenn das Dialogfeld Setup abgeschlossen (Setup Completion) angezeigt wird, klicken Sie auf Abgeschlossen (Complete).
- Seite 62 Wechseln Sie zu auf Seite 61. • I caratteri alfanumerici dopo Canon MX880 series rappresentano il nome di servizio Bonjour o l'indirizzo MAC della macchina. Quando viene visualizzata la finestra di dialogo Registra • Se la macchina non viene rilevata, verificare quanto segue.
- Seite 63 Mac OS X v.10.6.x/v.10.5.x Mac OS X v.10.4.11 Mac OS X v.10.4.11 Select Canon MX880 series canonijnetwork and click Add. When the Printer List window appears, click Add. Click More Printers in the Printer Browser window. • When the You have no printers available. screen Go to on page 62.
- Seite 64 Select Canon IJ Network in the pop-up Make sure that Canon MX880 series is added to menu, select Canon MX880 series in the list of printers. the list of printers, then click Add. Go to When the Register Printer and Scanner screen appears, click Register Scanner.
- Seite 65 Select Canon MX880 series on the Canon IJ Click Next on the Register Printer and Scanner Network Scanner Selector EX screen, then click OK. screen. Next, read “Information” on page 64! Dans l’écran Canon IJ Network Scanner Selector Cliquez sur Suivant (Next) sur l’écran Enregistrer EX, sélectionnez Canon MX880 series, puis cliquez...
- Seite 66 If the serial number is not displayed on the registration screen, input the number found inside the machine. Si le numéro de série n’apparaît pas à l’écran d’enregistrement, saisissez le numéro de série qui se trouve à l’intérieur de la machine. Wenn die Seriennummer nicht im Registrierungsbildschirm angezeigt wird, geben Sie die Nummer ein, die im Geräteinneren angegeben ist.
- Seite 67 If the Extended Survey Program screen appears Si l’écran Extended Survey Program apparaît Wenn das Fenster für das Extended Survey Program angezeigt wird Se viene visualizzata la schermata Extended Survey Program Click Exit to complete the installation. For Macintosh It is necessary to restart the computer before scanning using the Operation Panel on the machine for the first time.
- Seite 68 The buttons displayed on Solution Menu EX may vary depending on the Solution Menu EX starts. country or region of purchase. For Macintosh Solution Menu EX starts when clicking OK in the Canon Solution Menu EX dialog. Remove the Setup CD-ROM and keep it in a safe place. Sous Windows •...
- Seite 69 Using the Machine from Additional Computers Congratulations! Setup is complete. Now that the machine is setup on your wireless/wired connection, you can install the software and drivers on additional computers on the same To learn more about the Solution network. Additional settings are not required. Menu EX and on-screen manual, proceed to page 70.
-
Seite 70: Nutzung Mit Zusätzlichen Computern
If the machine is already connected to a wireless/wired connection, it can be used from additional computers on the same network. Si la machine est déjà reliée à une connexion sans fil/filaire, vous pourrez l’utiliser sur d’autres ordinateurs du même réseau. Ist das Gerät bereits mit einem drahtlosen/drahtgebundenen Netzwerk verbunden, kann es von weiteren Computern im selben Netzwerk genutzt werden. - Seite 71 To change to a wireless connection from a USB connection, start over from “9 Wireless Setup” on page 41 to set up a wireless connection. Pour passer d’une connexion USB à une connexion sans fil, reportez-vous à la section « 9 Configuration sans fil » à la page 41 pour configurer une connexion sans fil.
-
Seite 72: Öffnen Des Online-Handbuchs
Solution Menu EX Various application software are installed on the computer along with the drivers. You can print creative items by correcting/enhancing Solution Menu EX is a gateway to functions and information that allow you to make full photos using the application software. use of the machine! For example, For details on how to use the application •... - Seite 73 Easy-WebPrint EX For details on Solution Menu EX and Easy-WebPrint EX, refer to the on- screen manual: Basic Guide. Use Easy-WebPrint EX to easily print web pages in Internet Explorer (Windows) or Safari (Macintosh). Some of its features include: • Printing a web page by reducing its size to fit the paper width automatically without cropping edges.
- Seite 74 Load paper in the Rear Tray (A) in portrait orientation with the printing side facing up. Make sure that the Paper Output Tray (B) is open. If printing starts while the Paper Output Tray is closed, it will automatically open. This section explains how to print images stored on the computer.
- Seite 75 For details on starting Solution Menu EX, refer to "14 Application Software" on page 70. Démarrez Solution Menu EX en cliquant sur l’icône Canon Solution Menu EX Sélectionnez un dossier contenant des Cliquez sur Sélection du papier (Select Paper), puis sur le bureau (Windows) ou dans le Dock (Macintosh), cliquez sur Impression images, puis sélectionnez celle que vous...
- Seite 76 Click Layout/Print, then select a layout for the image. Click Print. If you are using Windows, printing will start. If you are using Macintosh, click Print on the Print dialog box to start printing. For more information, refer to the on-screen manual: Advanced Guide. Cliquez sur Présentation/Impression (Layout/Print), puis Cliquez sur Imprimer (Print).
- Seite 77 Load A4 or Letter-sized plain Open the Paper Output Tray (B), then open the Place the document face-down and align it with the paper into the Cassette (A). Document Cover (C). Alignment Mark (D). If printing starts while the Paper Output Tray is closed, it will •...
- Seite 78 1. Close the Document Cover. • Close the Document Cover gently, holding it firmly, For the procedure to copy on paper 2. Press the COPY button (F). because it is heavy. other than plain paper, refer to The copy standby screen is displayed. •...
- Seite 79 Press the FAX button (A). • Make sure that the telephone line type is set correctly. For the setting procedure, refer to "Preparing for Faxing" in the on-screen manual: Basic This section explains how to send a fax in black and white from the ADF (Auto Document Guide.
- Seite 80 Open the Document Tray (C), then move the Document Guides (D) to both edges. Insert the document until a beep sounds, then slide the left and right Document Guides against both ends of the document. • For details on supported documents and settings for image quality, density (brightness), etc., refer to the on-screen manual: Basic Guide.
- Seite 81 Use the Numeric buttons (E) to enter the fax number. Press the Black button (F). The fax is sent. • If fax sending is unsuccessful, make sure that the telephone line is connected correctly and start again from on page 77. To For other procedures to send faxes, refer to connect the telephone line correctly, refer to on page 7 in "1 Preparation."...
- Seite 82 Read this section only when setting up a wireless connection by using the WPS (Wi-Fi Protected Setup). Lisez cette section uniquement si vous souhaitez configurer une connexion sans fil à l’aide de WPS (Wi-Fi Protected Setup). 1. Press the Setup button (A). Use the { or } button (C) to select Yes, then press the OK button.
- Seite 83 Select Other setup, then press the OK Select WPS, then press the OK button. Select Push button method, then Press the OK button. button. press the OK button. Appuyez sur le bouton OK. Sélectionnez Autre Configuration (Other Sélectionnez WPS, puis appuyez sur le Sélectionnez Bouton poussoir (Push button Drücken Sie die Taste OK.
- Seite 84 Press and hold the WPS button on the access point (for about When the above screen appears, press the OK button. 5 seconds), then press the OK button on the machine within Next, read “11 Install 2 minutes. the Software (Network •...
- Seite 85 The machine supports “WCN-UFD.” Properties. • Canon assumes no responsibility for any damage or loss of data stored on your USB flash 3. Select Copy this network profile to a USB flash drive. drive regardless of the cause even within the warranty period.
-
Seite 86: Windows Vista
Windows Vista 1. From the Start menu of the Windows side, select Network, then click Add a wireless device on the menu. 2. Click I want to add a wireless device or computer that is not on the list, using a USB flash drive. 3. - Seite 87 (Based on ITU-T No.1 chart for US specifications and Canon FAX Wired LAN: 100BASE-TX/10BASE-T X 14.0" (ADF) Standard chart No.1 for others, both in standard mode or Canon FAX Wireless LAN: IEEE802.11n/IEEE802.11g/IEEE802.11b *5 Standard chart No.1, standard mode.) Scanning resolution Color: Approx.
- Seite 88 Température : 0 à 40 °C (32 à 104 °F) Largeur de la bande passante : 2,4 GHz • Windows: Uninstall software bundled with the Canon inkjet printer before Humidité : 5 à 95 % d’humidité relative (sans condensation) Canal : 1-11 ou 1-13...
-
Seite 89: Configuration Minimale Requise
USB-Flash-Laufwerk Noir et blanc : environ 3 secondes/page à 33,6 kbits/s Windows XP SP2, SP3 512 Mo (selon la mire UIT-T N° 1 pour les États-Unis et la mire standard Canon Processeur de 300 MHz Mac OS X v.10.4.11 LAN-Port: FAX N°... -
Seite 90: Netzwerkspezifikationen
Windows XP SP2, SP3 512 MB A4/Letter, 216 x 297 mm / 8,5" x 11,7" (Auflagefläche)/216 x 356 mm / (Basierend auf ITU-T No.1 chart für US-Daten und Canon FAX Standard 300-MHz-Prozessor Mac OS X 10.4.11 8,5" x 14,0" (ADF) chart No.1 für andere Länder, beide im Standardmodus oder Canon FAX... - Seite 91 (Basata sul grafico ITU-T N.1 per le specifiche degli Stati Uniti e sul LAN cablata: 100BASE-TX/10BASE-T mm/8,5'' X 14,0'' (ADF) grafico N.1 Canon FAX Standard per gli altri paesi, entrambi in modalità LAN wireless: IEEE802.11n/IEEE802.11g/IEEE802.11b *5 standard o modalità standard, grafico N.1 Canon FAX Standard).
-
Seite 92: Requisiti Minimi Di Sistema
Windows 7, Windows Vista o Windows XP. • Windows: disinstallare il software fornito con la stampante a getto di inchiostro Canon prima di eseguire l'aggiornamento da Windows Vista a Windows 7, quindi installare nuovamente il software fornito. • Alcune funzioni potrebbero non essere disponibili con Windows Media Center. - Seite 93 CANON AUSTRALIA PTY LTD 1 Thomas Holt Drive, North Ryde, Sydney N.S.W. 2113, Australia The following ink tanks are compatible with this machine. canon.com.au Les cartouches d’encre suivantes sont compatibles avec cette machine. CANON NEW ZEALAND LIMITED Akoranga Business Park, Akoranga Drive, Northcote, Auckland, Die folgenden Tintenpatronen sind mit diesem Gerät kompatibel.