Herunterladen Inhalt Inhalt Diese Seite drucken
Inhaltsverzeichnis

Werbung

Verfügbare Sprachen

Verfügbare Sprachen

handleiding
meersystemen oven
mode d'emploi
four conventionnel
Bedienungsanleitung
Multifunktions Backofen
user manual
multisystem oven
OX3211C
OX3292C
ZX3211C
ZX3292C
(pyrolyse)

Werbung

Inhaltsverzeichnis
loading

Inhaltszusammenfassung für Atag OX3211C

  • Seite 1 OX3211C mode d’emploi OX3292C four conventionnel ZX3211C ZX3292C Bedienungsanleitung (pyrolyse) Multifunktions Backofen user manual multisystem oven...
  • Seite 2 NL 2...
  • Seite 3 Geachte mevrouw, Geachte heer, Wij danken u voor de aankoop van uw oven en uw vertrouwen in Atag. Om u te helpen de vele voordelen te benutten die uw nieuwe oven u biedt, raden wij u aan zeer aandachtig de informatie in deze handleiding te lezen.
  • Seite 4: Inhaltsverzeichnis

    uw meersystemen oven inhoud Bestemd voor de gebruiker Veiligheidsaanwijzingen Respect voor het milieu Presentatie van uw oven Overzicht van het bedieningspaneel Gebruik van uw oven Instellen van de tijd Onmiddellijk bakken Instellen van een persoonlijke vaste baktemperatuur Geprogrammeerd bakken Uitgesteld bakken Gebruik van de timer Kinderbeveiliging Display in standby-stand...
  • Seite 5: Bestemd Voor De Gebruiker

    bestemd voor de gebruiker Belangrijk Bewaar deze gebruiksaanwijzing in de nabijheid van het apparaat. Indien het apparaat aan een ander persoon wordt verkocht of gegeven, dient u de gebruiksaanwijzing hier- bij niet te vergeten.Wij vragen u kennis te nemen van de aanwijzingen alvorens het appa- raat te installeren en te gebruiken.
  • Seite 6: Respect Voor Het Milieu

    bestemd voor de gebruiker — Gebruik nooit stoom- of hogedrukapparaten voor het reinigen van de oven (eisen met betrek- king tot de elektrische veiligheid). — Uw oven is voorzien van een AUTOMATISCHE STOPZETTING voor uw veiligheid, als u per ongeluk vergeet uw oven af te zetten. Na 23u30 gebruik wordt de functie AS (Automatische Stop) actief en zal uw oven vanzelf uitgaan.
  • Seite 7: Presentatie Van Uw Oven

    presentatie van uw oven overzicht van het bedieningspaneel Functiekiezer Programmaschakelaar MEERSYSTEMEN MODEL model zonder pyrolyse Functiekiezer Programmaschakelaar MODEL MET PYROLYSE model met pyrolyse Samenstelling van de programmaschakelaar Symbool "einde baktijd" Pyrolyse-indicator Display : dagtijd en baktijd Temperatuurindicator Symbool "bakduur" Symbool schakelklok timer Functiekiezer AAN/UIT-toets...
  • Seite 8: Gebruik Van Uw Oven

    gebruik van uw oven instellen van de tijd Tijdens het aansluiten van de oven De display knippert. Stel de tijd met de toetsen in (hou de toets ingedrukt indien u de cij- fers sneller wil doen vorderen). Voorbeeld : 12H30 Druk op de toets START/STOP om de tijdsinstelling te bevestigen.
  • Seite 9: Onmiddellijk Bakken

    gebruik van uw oven onmiddellijk bakken Keuze van de bakwijze Kies de gewenste bakwijze met toets Voorbeeld : positie Houdt de toets ingedrukt om de verschillende bakwijzen na elkaar te bekijken. De aanbevolen baktemperatuur verschijnt op de display. Voorbeeld : 220°C. - Druk op de toets START/STOP om de bakcyclus te starten.
  • Seite 10: Instellen Van Een Persoonlijke Vaste Baktemperatuur

    gebruik van uw oven instellen van een persoonlijke vaste baktemperatuur Tijdens het kiezen van een bakstand of tijdens de bakcyclus zelf kunt u voor de gekozen bakstand als volgt een persoonlijke vaste baktemperatuur instellen : Druk ongeveer 2 sekonden op toets °C tot de temperatuurindicator begint te knipperen.
  • Seite 11: Uitgesteld Bakken

    gebruik van uw oven uitgesteld bakken Volg eerst de aanwijzingen van "Geprogrammeerd bakken" . Na het instellen van de baktijd gaat u als volgt te werk. Druk op de toets "einde baktijd" , De normale eindtijd van de ingestelde baktijd verschijnt en knippert. Ook de indicator "einde baktijd" knippert om aan te geven dat u de eindtijd kunt wijzigen.
  • Seite 12: Kinderbeveiliging

    gebruik van uw oven kinderbeveiliging Om te vermijden dat kinderen tijdens uw afwezigheid de oven aanzetten, kunt u net bedieningspaneel vergrendelen : - Druk op de toets START/STOP tot u een korte bieptoon en vervolgens een lange bieptoon hoort. Laat de toets pas los nadat de bieptoon is gestopt en de sleutel op de display verschijnt.
  • Seite 13: Bakwijzen

    bakwijzen beschrijving van de bakfuncties Ovenelement BESCHRIJVING VAN DE Aanbevolen FUNCTIES in werking BAKFUNCTIES ovenniveau De warmte wordt geleverd door een element achterr in de oven. Temperatuur De warme lucht wordt door een ventilator in het midden van de mini / preselectie / maxi oven naar boven gezogen en over de oven verspreid.
  • Seite 14: Oventoebehoren

    oventoebehoren overzicht van de oventoebehoren Veiligheidsrooster met handgreep Uitgerust met een handgreep vooraan om makkelijker vast te nemen. Het rooster kan gebruikt worden voor schalen en vormen vol voedingswaren die bereid of bruingebakken moeten worden. Kan gebruikt worden voor barbecues (rechtstreeks op het rooster Multi-functionele ovenschaal ( speciaal voor banketbakkerij)
  • Seite 15: Werking Van De Pyrolyse

    werking van de pyrolyse Enkel op model ZX3092C, ZX3011C: Werking van de pyrolyse - In de stand "pyrolyse" verwijdert uw oven bij hoge temperatuur spat- vlekken en vlekken van overgekookte ovenschotels. Rook en geuren worden door een katalysecel vernietigd. - Al naargelang de verontreiniging van de oven kunt u een keuze maken uit 3 pyrolysecycli.
  • Seite 16 werking van de pyrolyse Hoe voert u een onmiddellijke pyrolyse uit? Verwijder alle oventoebehoren uit de oven. Verwijder eventuele bakresten. Op de display wordt normaal de tijd vermeld (mag niet knipperen). Druk op de functietoets tot de functie "Pyrolyse" verschijnt. Uw oven toont het pyrolyse-symbool : pyrolysecyclus van 2 u (niet wijzigbaar).
  • Seite 17: Voor De Installateur

    Bij het niet naleven van deze voorwaarde is de installateur aansprake- lijk en vervalt de verantwoordelijkheid van Atag. 20A Monoteller 220-240V~ 50Hz Monokabel 220-240 V ~...
  • Seite 18: Inbouw

    voor de installateur inbouw De oven kan naar keuze onder een werkblad of een (open* of gesloten) kolom- meubel met de juiste afmetingen voor de inbouw van de oven worden geïnstal- leerd (zie schema). Uw oven beschikt over een optimale luchtcirculatie die vlekkeloze bakresultaten en een optimale reiniging garandeert.
  • Seite 19: Algemeen Onderhoud

    algemeen onderhoud Laat de oven afkoelen vooraleer hem met de hand te reinigen. Gebruik gaan schurende of bijtende producten of scherpe metalen voor- werpen om het glas van de ovendeur te reinigen, omdat het oppervlak ervan zo gekrast kan worden en het glas uiteindelijk kan barsten. vervanging van de ovenlamp •...
  • Seite 20 De oven is niet aangesloten. - Vervang de zekering van uw installatie (16 A). De zekering van de installatie is defect. De oven wordt niet warm. - Neem contact op met de ATAG-servi- Andere oorzaken. cedienst. De lamp is defect.
  • Seite 21 Introduction Madame, Monsieur, Vous faîtes confiance à Atag en choisissant ce Four et nous vous en remer- cions. Pour profiter pleinement, dès aujourd’hui, des nombreux avantages de votre nouveau partenaire, nous vous recommandons de lire attentivement les conseils de ce guide.
  • Seite 22 votre four conventionnel tables des matières à l’attention de l’utilisateur consignes de sécurité respect de l’environnement comment se présente votre four ? présentation du bandeau comment utiliser votre four ? mettre à l’heure faire une cuisson immédiate personnaliser la température de cuisson faire une cuisson programmée faire une cuisson différée utiliser la minuterie...
  • Seite 23: À L'attention De L'utilisateur

    à l’attention de l’utilisateur Important Conservez cette notice d'utilisation avec votre appareil. Si l'appareil devait être vendu ou cédé à une autre personne, assurez-vous que la notice d'utilisation l'accompagne. Merci de prendre connaissance de ces conseils avant d'installer et d'utiliser votre appa- reil.
  • Seite 24: Respect De L'environnement

    à l’attention de l’utilisateur — N'utilisez jamais d'appareils à vapeur ou à haute pression pour nettoyer le four (exigen- ces relatives à la sécurité électrique). — (Suivant modèle) Pour votre sécurité, votre four est équipé d’un ARRET AUTOMATIQUE, si par mégarde vous oubliez d’éteindre votre four. Après 23h30 de fonctionnement, la fonc- tion AS (Auto Stop) s’active et votre four s’arrête de chauffer.
  • Seite 25: Comment Se Présente Votre Four

    comment se présente votre four ? présentation du bandeau sélecteur de fonctions programmateur MODELE CONVENTIONNEL modèle non pyrolyse sélecteur de fonctions programmateur MODELE PYROLYSE modèle pyrolyse détail du programmateur symbole de fin de cuisson indicateur de pyrolyse afficheur de l’horloge et des temps indicateur de température symbole de durée de cuisson symbole du minuteur...
  • Seite 26: Comment Utiliser Votre Four

    comment utiliser votre four ? mettre à l’heure Lors du branchement L ’affichage clignote. Réglez l’heure avec (le maintien de la touche permet d’obtenir un dé- filement rapide). Exemple : 12H30 Appuyez sur la touche START/STOP pour valider. NOTA: S’il n’y a pas de validation par la touche START/STOP, l’enregistre- ment est automatique après quelques secondes.
  • Seite 27: Faire Une Cuisson Immédiate

    comment utiliser votre four ? faire une cuisson immédiate Choisissez le mode de cuisson Sélectionnez, avec la touche la fonction de votre choix exemple : position Un appui continu sur la touche vous permettra de faire défiler les fonctions de cuisson. La température proposée s’affiche exemple : 220°C.
  • Seite 28: Personnaliser La Température De Cuisson

    comment utiliser votre four ? personnaliser la température de cuisson Lors de la sélection des fonctions ou en cours de cuisson, vous pouvez per- sonnaliser votre températures: Appuyez sur la touche °C (environ 2 secondes) jusqu’à ce que les chiffres de puissances clignotent. Ajustez par les touches la consigne de puissance que vous désirez enregistrer.
  • Seite 29: Faire Une Cuisson Différée

    comment utiliser votre four ? faire une cuisson différée Procédez comme une cuisson programmée puis, après la durée de cuisson. Appuyez sur la touche “Fin de cuisson” , l’heure de fin de cuisson s’affiche et clignote ainsi que le symbole pour indiquer que le réglage est alors possible.
  • Seite 30: Utiliser La Sécurité Enfant

    comment utiliser votre four ? utiliser la sécurité enfant Afin de pouvoir éviter la mise en route intempestive de votre four, il vous est possible de verrouiller vos commandes, pour cela : - Appuyez sur la touche START/STOP jusqu’à ce que vous entendiez un bip sonore court puis un bip sonore long.
  • Seite 31: Modes De Cuisson Du Four

    modes de cuisson du four description des fonctions DESCRIPTION DE LA FONCTION La source de chaleur consiste en une résistance placée Température au fond du four, l'air aspiré par une turbine au centre mini / présélectionnée / maxi est rediffusé sur les côtés. 35˚/ 180˚...
  • Seite 32: Accessoires

    casserolerie accessoires Grille sécurité avec poignée Equipée à l’avant d’une poignée pour faciliter la prise en main. La grille peut être utilisée pour supporter tous les plats et moules contenant des aliments à cuire ou à gratiner. Elle sera utilisée pour les grillades (à poser directement dessus). Plat multi usages Il sert de plat à...
  • Seite 33: Comment Faire Une Pyrolyse

    comment faire une pyrolyse Pour modèles ZX3092C, ZX3011C uniquement: Qu’est-ce une pyrolyse ? - Votre four se nettoie par élimination à haute température des salissures qui proviennent des éclaboussures ou des débordements. Les fumées et odeurs dégagées sont détruites par le passage dans un catalyseur. - Afin de s’adapter à...
  • Seite 34 comment faire une pyrolyse Comment faire une pyrolyse ? Retirez la casserolerie du four et enlevez les débordements importants qui auraient pu se produire Vérifiez que le programmateur affiche l’heure du jour et que celle-ci ne cli- gnote pas. Appuyez sur la touche de sélection des fonctions jusqu’à la fonction “Pyrolyse”...
  • Seite 35: Pour L'installateur

    été effectués par vos soins, conformément aux dispositions des décrets en vigueur. Le non-respect de cette condition engagerait la responsabilité de l’installateur, à l’exclusion de celle de la société Atag. Compteur 20A Mono Ligne Mono 220-240 V ~ Disjoncteur différentiel ou...
  • Seite 36: Encastrement

    pour l’installateur encastrement Le four peut indifféremment être installé sous un plan de travail ou dans un meuble en colonne (ouvert* ou fermé) ayant les dimensions d’encastrement adaptées (voir schéma). Votre four possède une circulation d’air optimisée qui permet d’obtenir des résultats de cuisson et de nettoyage remarquables en respectant les éléments suivants : •...
  • Seite 37: Entretien Général

    entretien général Avant de procéder au nettoyage manuel de votre four, laissez refroidir l'appareil. Ne pas utiliser de produits d’entretien abrasifs ou de grattoirs métalliques durs pour nettoyer la porte en verre du four, ce qui pourrait érafler la surface et entraîner l’éclatement du verre. changer l’ampoule •...
  • Seite 38: Pannes

    pannes que faire si... LES CAUSES POSSIBLES QUE FAUT -IL FAIRE ? VOUS CONST A TEZ QUE - Brancher le four. Le four n'est pas branché. - Changer le fusible de votre installation Le fusible de votre installation est hors Le four ne chauffe pas.
  • Seite 39: Ihr Konventioneller Backofen

    Ihr konventioneller Backofen Einführung Sehr geehrte Damen und Herren, Sie haben uns durch die Wahl eines Backofens von De Dietrich Ihr Vertrauen ausges-prochen und wir danken Ihnen dafür. Damit Sie die zahlreichen Möglichkeiten Ihres neuen Küchenpartners sofort ganz aus-schöpfen können empfehlen wir Ihnen, die Ratschläge in dieser Anleitung aufmerksam durchzulesen.
  • Seite 40 Ihr konventioneller Backofen Inhalt Für den Benutzer Sicherheitshinweise Umweltschutz Wie ist Ihr Backofen aufgebaut? Aufbau der Bedienblende Betrieb des Backofens Einstellen der Uhrzeit Durchführen eines sofortigen Garvorgangs Persönliche Wahl der Gartemperatur Durchführen eines programmierten Garvorgangs Durchführen eines zeitversetzten Garvorgangs Verwendung der Schaltuhr Verwendung der Kindersicherung Einstellen des Sicherheitsmodus der Anzeige Garverfahren des Backofens...
  • Seite 41: Für Den Benutzer

    Für den Benutzer Wichtig Diese Betriebsanleitung mit dem Gerät aufbewahren. Sollte das Gerät an eine andere Person verkauft oder veräußert werden, sichergehen, dass sie auch die Betriebsanleitung bekommt. Vor der Installation und Benutzung des Geräts sollten diese Hinweise zur Kenntnis genommen werden. Sie sind für die Sicherheit des Benutzers und anderer Personen verfasst worden.
  • Seite 42: Umweltschutz

    Für den Benutzer — Niemals Dampf- oder Hochdruckgeräte zur Reinigung des Ofens benutzen (Anforderungen an die elektrische Sicherheit). — (Modellabhängig): Zur erhöhten Sicherheit ist der Ofen mit einer AUTOMATISCHEN ABSCHALTUNG aus-gestat- tet, sollten Sie aus Versehen vergessen, den Ofen auszuschalten. Nach 23 1/2 Stunden Betriebszeit wird die AS- Funktion (Automatik-stopp) aktiviert und der Ofen heizt nicht mehr.
  • Seite 43: Wie Ist Ihr Backofen Aufgebaut

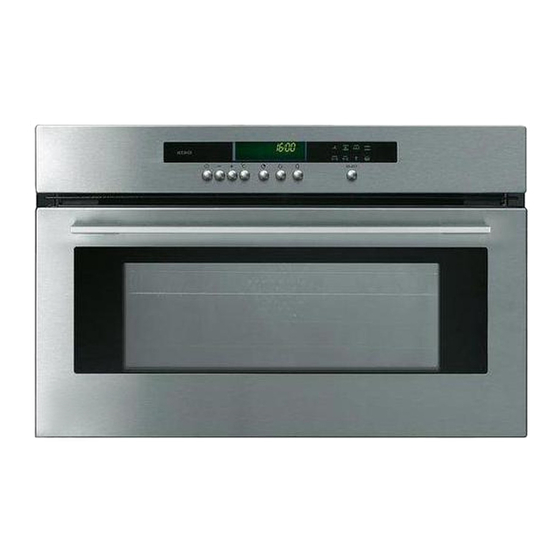
    Wie ist Ihr Backofen aufgebaut? Aufbau der Bedienblende Funktionswahlschalter Programmierbare Schaltuhr KONVENTIONELLES MODELL Modell ohne Pyrolyse Funktionswahlschalter Programmierbare Schaltuhr MODELL MIT PYROLYSE Modell mit Pyrolyse Detail der programmierbaren Schaltuhr Symbol Ende der Garzeit Pyrolyse-Anzeige Anzeige: der Uhr/ der Garzeiten Temperaturanzeige Symbol Gardauer Schaltuhr-Symbol Schaltuhr...
  • Seite 44: Betrieb Des Backofens

    Betrieb des Backofens Einstellen der Uhrzeit Bei der Inbetriebnahme Die Anzeige blinkt. Stellen Sie die Uhrzeit mit oder ein (bei gedrückter Taste erfolgt ein Schnelldurchlauf). Beispiel: 12.30 Uhr Drücken Sie zum Bestätigen auf die Taste START/STOP. ANMERKUNG: Wenn nicht mit der Taste START/STOP bestätigt wird, erfolgt nach einigen Sekunden die automatische Speicherung.
  • Seite 45: Durchführen Eines Sofortigen Garvorgangs

    Betrieb des Backofens Durchführen eines sofortigen Garvorgangs Wählen Sie das Garverfahren Wählen Sie mit der Taste die gewünschte Funktion: Beispiel: Position Durch längeres Drücken der Taste erfolgt ein Durchlauf der Garfunktionen. Die vorgeschlagene Temperatur wird angezeigt: Beispiel: 220°C. - Drücken Sie auf die Taste START/STOP, um den Garvorgang zu beginnen.
  • Seite 46: Persönliche Wahl Der Gartemperatur

    Betrieb des Backofens Persönliche Wahl der Gartemperatur Bei der Wahl des Garverfahrens oder während des Garvorgangs können Sie die Temperatur selbst einstellen: Drücken Sie auf die Taste °C (etwa 2 Sekunden lang), bis die Temperaturanzeige blinkt. Stellen Sie mit den Tasten oder die gewünschte Temperatur ein.
  • Seite 47: Durchführen Eines Zeitversetzten Garvorgangs

    Betrieb des Backofens Durchführen eines zeitversetzten Garvorgangs Gehen Sie wie bei einem programmierten Garvorgang vor. Drücken Sie dann nach der Gardauer auf die Taste „Ende der Garzeit" , woraufhin das Ende der Garzeit sowie das Symbol blinkt um anzuzeigen, dass die Einstellung nun möglich ist. Beispiel: Es ist 12.30 Uhr.
  • Seite 48: Verwendung Der Kindersicherung

    Betrieb des Backofens Verwendung der Kindersicherung Um das ungewollte Einschalten Ihres Backofens zu verhindern können Sie die Bedienelemente verriegeln. Gehen Sie dazu wie folgt vor: - Drücken Sie auf die Taste START/STOP, bis Sie einen kurzen und einen langen Piepton hören. Lassen Sie die Taste erst am Ende des Pieptons und beim Erscheinen des Schlüsselsymbols in der Anzeige los.
  • Seite 49: Garverfahren Des Backofens

    Garverfahren des Backofens Funktionsbeschreibung Empfohlene Aktive FUNKTIONEN FUNKTIONSBESCHREIBUNG Schienen Elemente Temperatur Die Wärmequelle ist ein Widerstand an der Rückwand des Backofens und die von einem Gebläse in der Mitte angesaugte mini./vorgegeben/maxi. Luft wird an den Seiten wieder eingeblasen. Es ist nicht notwendig, vorzuwärmen, außer bei Gerichten mit sehr kurzen 35˚/ 180˚...
  • Seite 50: Backofenzubehör

    Backofenzubehör Zubehör Sicherheitsrost mit Griff Zur leichteren Handhabung mit Griff an der Vorderseite. Das Rost ist für jede Art von Kochgeschirr und Kuchenform zum Kochen oder Überbacken geeignet. Es wird für Grillgerichte benutzt (sie werden direkt darauf gelegt). Mehrzweckblech Es dient als Kuchenblech und hat eine schräg abgewinkelte Kante.
  • Seite 51: Durchführung Einer Pyrolyse

    Durchführung einer Pyrolyse Nur bei Modell ZX3092C, ZX3011C: Was ist eine Pyrolyse ? - Ihr Herd wird bei hoher Temperatur von Speisespritzern und Überko- chresten gereinigt. Gerüche und Dampfentwicklungen werden beim Durchlauf durch einen Katalysator eliminiert. - Damit dieser Herd sich an jede Situation anpassen kann, verfügt er über 3 Reinigungszyklen mittels Pyrolyse.
  • Seite 52: Wie Wird Eine Pyrolyse Durchgeführt

    Durchführung einer Pyrolyse Wie wird eine Pyrolyse durchgeführt ? Entnehmen Sie die Roste und Bleche aus dem Herd und entfernen Sie den gröbsten Schmutz, der durch Überkochen entstanden ist. Prüfen Sie ob die Uhrzeit in der Programmierung angezeigt wird und das sie nicht blinkt.
  • Seite 53: Für Den Installateur

    Für den Installateur Anschluss Nur Sie als Fachmann haben das Recht, die Installation und den Anschluss der Geräte von Atag durchzuführen. Aus diesem Grund gilt unsere Garantie nur und ausschließlich für jene Geräte, deren Installation und Anschluss von Ihnen gemäß...
  • Seite 54: Einbau

    Für den Installateur Einbau Der Backofen kann beliebig unter einer Arbeitsfläche oder in einem Säulenmöbel (offen* oder geschlossen) passenden Abmessungen für den Einbau installiert werden (siehe Schema). Durch die optimierte Lüftung des Backofens werden beim Backen und Säubern unter Berücksichtigung folgender Punkte bemerkenswerte Ergebnisse erzielt: •...
  • Seite 55: Allgemeine Wartung

    Allgemeine Wartung Lassen Sie den Backofen vor der manuellen Reinigung abkühlen. Keine Scheuermittel oder harten Metallschaber zur Reinigung der Ofenglastür verwenden, da dies zu Kratzern auf der Oberfläche und u. U. zum Platzen des Glases führen kann. Auswechseln einer Lampe •...
  • Seite 56: Funktionsstörungen

    Funktionsstörungen Was tun, wenn... DIE MÖGLICHEN SIE STELLEN FEST , DAß ... WAS IST ZU TUN ? URSACHEN SIND - Den Backofen anschließen. Der Backofen ist nicht angeschlossen. - Die Sicherung Ihrer Anlage auswech- Die Sicherung Ihrer Anlage ist defekt. Der Herd heizt nicht seln und die Stärke prüfen (16A).
  • Seite 57 Thank you for choosing an Atag oven. You have made the right choice. To get the most out of your new cooking aid we suggest you read and fol- low the advice contained in this manual. Atag is continually improving its technology so that it can provide the best oven there is and the one you have chosen has the most innovative featu- res.
  • Seite 58 conventional oven contents information for the user safety instructions care for the environment your oven, how it works explanation of controls how to use your oven setting the time cooking straightaway customising the cooking temperature programming the cooking delaying the cooking using the timer using the child safety feature setting the display to stand-by mode...
  • Seite 59: Information For The User

    information for the user Warning Keep this user guide with your appliance. If the appliance is ever sold or transferred to another person, ensure that the new owner receives the user guide. Please become familiar with these recommendations before installing and using your oven.
  • Seite 60: Care For The Environment

    information for the user — Never use steam or high-pressure devices to clean the oven (requirement imposed by electri- cal safety concerns). — For your safety, your oven is equipped with an AUTOMATIC STOP , if you forget to turn off your oven by mistake.
  • Seite 61: Your Oven, How It Works

    your oven, how it works explanation of controls Program selector Programmer CONVENTIONAL OVEN Model without pyrolytic cleaning Program selector Programmer MODEL WITH PYROLYTIC CLEANING Model with pyrolytic cleaning Your programmer in detail End of cooking symbol Pyrolysis indicator Display clock/program times Temperature indicator Length of cooking symbol Timer symbol...
  • Seite 62: How To Use Your Oven

    how to use your oven setting the time When the oven is installed The time display flashes. Set the time using (holding the touch control down makes the numbers move on more quickly). Example: 12:30. Press the START/STOP touch control to confirm your setting. NOTE: If the time is not confirmed using the START/STOP control within a few seconds, it is automatically memorized.
  • Seite 63: Cooking Straightaway

    how to use your oven cooking straightaway Select the cooking mode Select the program of your choice with the touch control: Example: position You can scroll through the cooking programs by keeping your finger on the touch control . The proposed temperature is displayed: Example:220°C.
  • Seite 64: Customising The Cooking Temperature

    how to use your oven customising the cooking temperature When you select your cooking mode, or during cooking , you can modify the temperature: Press the °C touch control for about 2 seconds until the temperature figures start flashing. Adjust the temperature setting using the touch controls to indicate the temperature you wish to memorize.
  • Seite 65: Using The Timer

    how to use your oven delaying the cooking Carry out the same procedure as for programmed cooking. After setting the cooking time. Press the "end of cooking" , touch control; the time for the end of cooking is indicated and flashes, as does the symbol to indicate that it may be adjusted.
  • Seite 66: Using The Child Safety Feature

    how to use your oven using the child safety feature In order to prevent your oven being turned on unintentionally, you may lock the controls. To do this: - Press on the START/STOP touch control until it bleeps. Keep pressing on the touch control until the bleep stops and a key appears on the indicator panel.
  • Seite 67: Different Cooking Methods

    different cooking methods description of features Parts of the DESCRIPTION OF THE OVEN'S Recommended PROGRAMS oven in PROGRAMS positions operation temperature: The heat source comprises an element located at the back of min./pre-selected/max. the oven; the air is sucked up by a central fan and redistributed on the sides.There is no need to pre-heat the oven except for 35˚/ 180˚...
  • Seite 68: Oven Accessories

    oven accessories accessories Safety grid with handle Equipped with a handle at the front to make it easy to grasp. The grid can be used to hold all dishes and moulds containing foodstuffs to be cooked or browned. It can be used for barbecues (to be placed directly on the grid). ulti function pans (reserved for pastries) It serves as a cake dish and has a sloped edge.
  • Seite 69: How To Clean By Pyrolysis

    how to clean by pyrolysis Only on model ZX3092C, ZX3011C What is pyrolysis? - Pyrolysing involves cleaning the oven by heating to a high temperature (pyrolysis) in order to remove grime and dirt inside the oven caused by splashing or dripping during cooking. The smoke and smell this produces are removed by being passed through a catalyst.
  • Seite 70 how to clean by pyrolysis How to use the pyrolysis program Remove any accessories from the oven and wipe off any excess grime. Check that the programmer displays normal time and that it is not flashing. Press the program selection touch control until the "pyrolysis" pro- gram appears.
  • Seite 71: Installer's Information

    As a specialist, you alone are competent to install and connect up Atag appliances. Our guarantee therefore applies only and exclusively to appliances which have been installed and connected up by you in accordance with the provisions of current regulations.
  • Seite 72 installer's information housing The oven can be installed under a work top or in a column of cabinetry (open* or closed) having the appropriate dimensions for built-in instal- lation (see adjacent diagram). Your oven has optimised air circulation that allows it to achieve remarkable cooking and cleaning results if the following guidelines are followed: •...
  • Seite 73: General Maintenance

    general maintenance Leave the oven to cool down before cleaning it manually. Do not use harsh abrasive cleaners or sharp metal scrapers to clean the oven door glass since they can scratch the surface, which may result in shattering of the glass. changing the light bulb •...
  • Seite 74: Troubleshooting

    troubleshooting what if….. POSSIBLE CAUSES WHA T SHOULD YOU DO? IF YOU REALIZE THA T The oven isn't connected to the power - Connect to power supply. supply. - Change the fuse, checking that it is The fuse has blown. The oven isn't heating 16A.
  • Seite 76 CZ5700107 - 02/10...

Diese Anleitung auch für:

Ox3292cZx3211cZx3292c

Inhaltsverzeichnis