Herunterladen Inhalt Inhalt Diese Seite drucken
indexa DVT67 SET Bedienungsanleitung

indexa DVT67 SET Bedienungsanleitung

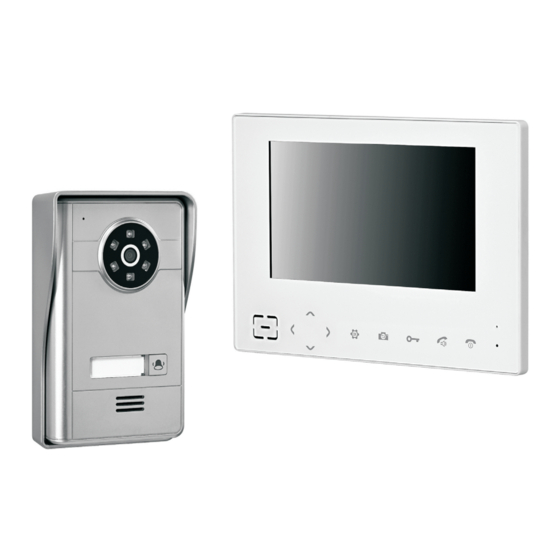
Funk-videotürsprechanlage
Vorschau ausblenden Andere Handbücher für DVT67 SET:

Werbung

Verfügbare Sprachen

Verfügbare Sprachen

DVT67 SET
DVT67/2 SET
Funk-Video-Türsprechanlage
D
Bedienungsanleitung Seite 2
Interphone vidéo sans fil
F
Mode d'emploi page 16
Wireless Video Door Intercom
GB
Operating instructions page 29

Werbung

Inhaltsverzeichnis

Fehlerbehebung

loading

Inhaltszusammenfassung für indexa DVT67 SET

  • Seite 1 DVT67 SET DVT67/2 SET Funk-Video-Türsprechanlage Bedienungsanleitung Seite 2 Interphone vidéo sans fil Mode d'emploi page 16 Wireless Video Door Intercom Operating instructions page 29...
  • Seite 2: Bestimmungsgemäße Verwendung

    Die Bild- und Tonübertragung erfolgt drahtlos im Frequenzbereich Standfuß 2,4 GHz. Bedienungsanleitung Das DVT67 SET kann durch eine zweite Türsprechstelle sowie einen DVT67/2 SET: zusätzlicher Monitor mit Netzgerät und weiteren Monitor DVT67M oder ein Mobilteil mit 2,4 Zoll Bildschirm Standfuß...
  • Seite 3 9 10 11 12 13 14 15 18 19 20 21 22 23 24 25 26 27 28 29 30 31 32 33 34 35 36 37 38 39 40 41 42 max. 15 V AC/DC max. 12 V DC 12 V DC max.
  • Seite 4: Technische Daten

    26 Klemmenanschlüsse 4. Ausstattung Taster für TÖ/GND Anschluss eines optionalen externen Monitor DVT67M (s. Abb A) Tasters zum Türöffnen 1 Monitor DC 9-12V / GND Spannungsanschluss 2 Bildschirm NO/COM Klemmen zur Steuerung eines Anzeigen auf dem Startbildschirm: optionalen Türöffners Akkuanzeige für Monitor 27 Paarungstaste 14:37 aktuelle Uhrzeit 28 Löcher für Schraube...
  • Seite 5: Sicherheitshinweise

    Türöffnerrelais: potentialfreier Wechsler, Schaltleistung 6. Sicherheitshinweise max. 1 A bei bis zu 15 V AC/DC Die folgenden Hinweise dienen Ihrer Sicherheit und Zufriedenheit (Schaltdauer einstellbar von1 - 9 s); beim Betrieb des Gerätes. Beachten Sie, dass die Nichtbeachtung bei Nutzung der Batterie max. 12 V DC, dieser Sicherheitshinweise zu erheblichen Unfallgefahren führen max.
  • Seite 6: Platzierung Der Geräte

    Schützen Sie die Geräte vor starken mechanischen Die Kamera besitzt eine Weißlichtausleuchtung [22] für den Beanspruchungen und Erschütterungen! Nahbereich. Diese wird bei Dunkelheit aktiviert. Durch eine Schützen Sie die Geräte vor starken magnetischen oder zusätzliche Beleuchtung der Umgebung bei Nacht können Sie die elektrischen Feldern! Bildqualität der Kamera verbessern.
  • Seite 7 Funkreichweite Setzen Sie 2 St. LR14 (C), 1,5 V alkalische Batterien (nicht im Die maximale Reichweite der Funkübertragung beträgt ca. 100- Lieferumfang enthalten) polrichtig in das Batteriefach ein 150 m bei Sichtkontakt zwischen Monitor und Türsprechstelle. In (Setzen Sie keine Akkus ein). Gebäuden ist die Reichweite durch Wände (insbesondere Stahlbeton- Befestigen Sie den Deckel mit der Schraube wieder auf der Wände) und Decken deutlich geringer (max.
  • Seite 8: Anschluss Des Monitors

    Türsprechstelle, dass die ggf. vorhandenen Adern nach unten über reagiert ein ggf. angeschlossener optionaler Signalgeber die Schräge aus der Türsprechstelle herausführen. dennoch auf das Klingeln Schieben Sie die Türsprechstelle in die Schutzhaube [32] und ist ca. 6 Sekunden nach dem Klingeln an der Türsprechstelle schrauben Sie sie mit der mitgelieferten Torx-Schraube [42] und ein Doppelton als Signal dafür zu hören, dass kein Monitor dem mitgelieferten Torx-Schlüssel [41] fest.
  • Seite 9 Die Gesprä chsverbindung kann durch Drücken der Ein/Aus- 11.2 Manuelles Einschalten des Kamerabildes der Taste [13] beendet werden, ansonsten wird sie Türsprechstelle automatisch nach ca. 45 Sekunden beendet, der Drücken Sie die Taste [10] am eingeschalteten Monitor [1]. Startbildschirm erscheint wieder, und nach ca. 20 Sekunden Bei nur einer gepaarten Türsprechstelle erscheint automatisch erlischt der Bildschirm.
  • Seite 10 Türsprechstelle DVT60T / DVT60T2 wählen Sie Kanal 2. DVT67 SET Der Monitor des DVT67 SET wurde bereits werkseitig mit der Hinweise zur Funktion nach Erweiterung: Türsprechstelle auf Kanal No. 1 gepaart. Beim DVT67 SET können Wird an einer von zwei gepaarten Türsprechstellen geklingelt, ist...
  • Seite 11 Zum Speichern der Einstellungen drücken Sie die Menütaste . Symbol erscheint, bestätigen Sie noch einmal durch Drücken Um aus einem Menüpunkt zurück zum Menü zu gelangen bzw. der Menütaste . zum Schließen des Menüs drücken Sie die Taste [10]. Um alle im Monitor gespeicherten Schnappschüsse zu löschen, Ca.
  • Seite 12 Türsprechstelle gehen Sie wie folgt vor: Es können maximal 1000 Videos gespeichert werden. Die DVT67 SET (eine Klingeltaste): Halten Sie die maximale Länge eines Videos ist 75 Sekunden. Paarungstaste [27] so lange gedrückt, bis ein langer Der Name der Aufnahme ist das Aufnahmedatum mit Uhrzeit.
  • Seite 13: Wartung Und Reinigung

    17. Batteriewechsel an der 14. Funktion eines optionalen Signalgebers / einer optionalen Türsprechstelle Ist n ach dem Drücken der Klingeltaste [25] kein Ton an der Türöffnertaste Türsprechstelle zu hören oder erscheint nach dem Klingeln in der Mitte 14.1 Optionaler Signalgeber des Bildschirms ein blinkendes rotes Batteriesymbol ( ) und Durch Drücken der Klingeltaste...
  • Seite 14: Rechtliche Hinweise

    Lizenz verlangt – Source Codes erhalten möchten, senden Sie Unterputz-Netzgerät ORBIT-12/2000V, 12 V DC, 2A, bitte eine E-Mail an copyrequest@indexa.de, um diese kostenlos zu IP 64, für DVT60T/T2, Art. Nr. 32163 erhalten. Einige Lizenzen verlangen jedoch die Bereitstellung von micro SDHC-Karte 32 GB Class 4;...
  • Seite 15: Fehlersuche

    Bildschirm angezeigt Türgong löst nur nach Drücken der Für untere Klingeltaste kann kein Türgong angeschlossen werden (Anschlusskabel gehört zur oberen Klingeltaste) oberen Klingeltaste aus Indexa GmbH Paul-Böhringer-Str. 3 74229 Oedheim Deutschland www.indexa.de Änderungen vorbehalten D - 15...
  • Seite 16: Utilisation Conforme Aux Instructions

    2. Utilisation conforme aux instructions *une alimentation électrique séparée est nécessaire dans chaque cas L'interphone vidéo sans fil DVT67 SET se compose d'une station La station extérieure est conçue pour un montage sous crépi et est extérieure DVT60T doté d'un capot de protection et d'un moniteur résistante aux intempéries (classe de protection IP55), et est donc...
  • Seite 17 25 Sonnette 4. Équipement 26 Terminaux de connexion: Moniteur DVT67M (voir image A) Taster für TÖ/GND Branchement d'un bouton-poussoir 1 Moniteur externe en option permettant d'ouvrir 2 Écran la porte Affichage sur l'écran de démarrage: DC 9-12V / GND Branchement électrique Témoin de batterie pour le moniteur NO/COM Pinces permettant de contrôler un...
  • Seite 18: Données Techniques

    5. Données techniques Modulation du signal GFSK Diagonale de l'écran 7" (17.6 cm) Station extérieure DVT60T / DVT60T2 Résolution moniteur 800 x 480 Pixel " Tension d'alimentation 9-12 V DC (stabilisé, min.300 mA) Mémoire d'images intégrée Mémoire circulaire, max. 75 captures d'écran 2 x LR14 (C), 1,5 V piles alcalines "...
  • Seite 19: Emplacement Des Appareils

    Ne pas brancher la tension avant d'avoir raccordé et installé la La station extérieure est en général montée sur le coté par station extérieure. Car il y aurait danger de mort par électrocution! rapport à la porte d'entrée. Veillez à ce que le visage du visiteur Veillez à...
  • Seite 20 Remarque: Pour faciliter le branchement des câbles, il peut être Veillez à ce que la sonnerie soit audible dans tout le logement. Si utile d'utiliser un boîtier encastré dans le mur directement la sonnerie n'est pas suffisammment audible, il est possible de derrière le passage de câbles.
  • Seite 21: Branchement Du Moniteur

    Si nécessaire, branchez un bouton-poussoir d'ouverture de porte à Remarque : deux fils aux bornes [26] "Taster für TÖ" et GND. Si le moniteur est hors tension : Avec les quatre vis fournies [37], vissez le couvercle de il ne réagit pas à la sonnerie à la station extérieure branchement [40] fourni sur le portier de façon à...
  • Seite 22 La fonction dialogue peut être désactivée en appuyant sur la La transmission du son est uniquement possible lorsque la touche marche/arrêt [13]. Sinon, elle s'arrête fonction dialogue est activée. automatiquement au bout de 45 secondes, l'écran de 11.2 Affichage manuel de l'image de la caméra de démarrage réapparaît, puis s'éteint quant à...
  • Seite 23 DVT60T2 DVT67SET Remarque sur le fonctionnement après ajout d'éléments Le moniteur du DVT67 SET a été associé en usine avec le canal complémentaires : No. 1de la station extérieure. Le DVT67 SET peut être complété avec Lorsque quelqu'un sonne à l'un des deux stations extérieures...
  • Seite 24 PHOTOS - consulter / supprimer les captures d'écran En appuyant sur les touches , vous pouvez modifier les En appuyant sur les touches [8], vous pouvez naviguer réglages existants. entre les différentes captures d'écran. Pour enregistrer les réglages, appuyez sur la touche menu . Pour supprimer la capture d'écran affichée à...
  • Seite 25 Le nom de l'enregistrement est la date de l'enregistrement avec Pour coupler une autre station extérieure (alimentée en électricité) l'horaire (p.ex. 01162020111028 = 16.01.2020 ; 11:10:28) DVT67 SET (1 sonnette): Maintenez la touche de couplage [27] de la station extérieure appuyée jusqu'à ce qu'un long RÉIN - Reset...
  • Seite 26: Entretien Et Nettoyage

    station extérieure DVT60T2 dispose d‘une sortie permettant de milieu de l'ècran et le témoin des piles [2] n'affiche qu'une seule commander un émetteur de signal externe. Cette sortie est attribuée à barre, il devient nécessaire de changer les piles. la touche sonnette supérieure, c‘est-à-dire la famille qui a besoin de Procédez de la manière suivante : l‘émetteur, doit choisir la touche sonnette supérieure.
  • Seite 27: Mentions Légales

    Remarque : Votre copie du produit ne contient peut-être pas de code, du type DVT67 Set / DVT67/2 SET est conforme à la directive que ce soit sous une ou plusieurs des licences listées ici, 2014/53/UE. Le texte complet de la déclaration UE de conformité est indépendamment du produit exact et de la version que vous avez...
  • Seite 28: Résolution Des Problèmes

    Aucune sonnette ne peut être connectée pour le bouton de qu'après avoir appuyé sur le bouton de sonnette inférieure (le câble de connexion appartient au sonnette supérieure bouton de sonnette supérieure) Indexa GmbH Paul-Böhringer-Str. 3 74229 Oedheim Allemagne www.indexa.de Sous réserve de modifications...
  • Seite 29: Proper Use

    2.4 GHz. The DVT67 SET can be extended to include a second outdoor station and a second monitor DVT67M or a mobile unit with a 2.4 inch screen and charging station DVT60M. The DVT67/2 SET can be operated with a maximum of two indoor stations (monitor or mobile unit) per doorbell button and a second outdoor station.
  • Seite 30: Features And Equipment

    4. Features and Equipment DC 9-12V / GND Power connection NO/COM Terminals for controlling an optional Monitor DVT67M (see Fig. A) door release 1 Monitor 27 Pairing button 2 Screen 28 Holes for screw Displays on the start screen: 29 Lugs for locking into the protective cover Battery display for monitor 30 Battery compartment cover 14:37 Current time...
  • Seite 31: Safety Instructions

    15 V AC/DC (switching duration can be 6. Safety instructions adjusted between 1 and 9 seconds); The following instructions are provided for your safety and satisfaction when battery is used: max. 12 V DC, max. during operation of the device. Note that non-observance of these 500 mA safety instructions results in significant risks of accident.
  • Seite 32 Do not connect any damaged device (e.g. damage in transit). If the outdoor station is powered by the mains adapter: Repairs to the equipment must only be performed by specialists. a door release and/or a signal generator (e.g. an external Remove the mains adapter from the mains outlet when the device bell) with a current consumption of max.
  • Seite 33 If you are using an optional door release with its own power 8. Fitting, connecting and starting up supply, connect it with two wires to terminals [26] NO/COM the door intercom (max. 1 A at up to 15 V AC/DC; max. 500 mA at up to 12 V DC if Remove the door intercom [20] from the protective cover [32].
  • Seite 34 If you wish the monitor to be portable, insert the optional AKKU- Now either the sound from the microphone [21] on the DVT67M lithium battery into the battery compartment [3], paying outdoor station can be heard over the loudspeaker [7] on the attention to the correct polarity.
  • Seite 35 DVT67 SET With only one paired outdoor station, its camera image appears The monitor of the DVT67 SET has already been paired with the automatically; with two paired outdoor stations, use the and outdoor station on channel No. 1. A maximum of...
  • Seite 36 Press the doorbell button you wish to pair. The selection is VOLUME of the ring tone / conversation / ring and camera display confirmed by a flashing of the respective doorbell button. Now you duration on the monitor have got one minute to do the pairing. Talking Volume Setting for the loudspeaker volume on the To pair a monitor with a second outdoor station, select channel No.
  • Seite 37 (e.g. 21:04), month, day and year (e. g. 06 - 22 - proceed as follows: 2020) in succession. DVT67 SET (1 doorbell button): Press and hold the pairing Pressing the and buttons changes the figure. button [27] until you hear a long beep on the outdoor...
  • Seite 38: Maintenance And Cleaning

    To delete the video that is marked in the video list, press the talk 16. Wireless range button [12]. When the symbol appears, confirm by pressing The wireless range is dependent on many factors. In an ideal location the menu button [9].
  • Seite 39: Optional Accessories

    (fitting on the left or right), art. no. 27083 as well via copyrequest@indexa.de. A nominal fee (i.e., the cost of Door opener ET100, 12 V DC, 255 mA, art. no. 37019...
  • Seite 40: Troubleshooting

    Additional doorbell only rings when the upper An additional doorbell can only be connected to the doorbell button is pressed upper doorbell button Indexa GmbH Paul-Böhringer-Str. 3 74229 Oedheim Germany www.indexa.de Subject to change 40 - GB...
  • Seite 41 If identifiable may obtain a copy of the source codes by contacting us as well via copyrequest@indexa.de. A sections of that work are not derived from the Program, and can be reasonably considered nominal fee (i.e., the cost of physically performing the source distribution) will be charged for...
  • Seite 42 whole is intended to apply in other circumstances. It is not the purpose of this section to induce you recompiling it. And you must show them these terms so they know their rights. We protect your to infringe any patents or other property right claims or to contest validity of any such claims; this rights with a two-step method: (1) we copyright the library, and (2) we offer you this license, section has the sole purpose of protecting the integrity of the free software distribution system, which gives you legal permission to copy, distribute and/or modify the library.
  • Seite 43 software library. b) You must cause the files modified to carry prominent notices stating that you complete machine-readable "work that uses the Library", as object code and/or source code, so changed the files and the date of any change. c) You must cause the whole of the work to be that the user can modify the Library and then relink to produce a modified executable containing licensed at no charge to all third parties under the terms of this License.
  • Seite 44 License may add an explicit geographical distribution limitation excluding those countries, so that incorporated within the Work. distribution is permitted only in or among countries not thus excluded. In such case, this License 2. Grant of Copyright License. Subject to the terms and conditions of this License, each incorporates the limitation as if written in the body of this License.

Diese Anleitung auch für:

Dvt67/2 set

Inhaltsverzeichnis